
Powerful forms for data collection and Wide API to merge automation using the best wokflows such as N8N, Zapier. Excellent tool for data collection. Recommended 100%. Furthermore, support is awesome.

Last updated on July 10, 2025 by Formidable Team
How To Create a Mailchimp Ajax Form in WordPress
Discover the easy way to create a Mailchimp Ajax form in WordPress. Follow this step-by-step tutorial for easy email integration and better user engagement.
Approximate read time: 5 minutes
A smoother email sign-up process can significantly boost conversion rates.
No one likes a confusing or lengthy process. Users want simple and easy so they can move on with their day. And that's where a Mailchimp Ajax form comes in. It allows users to submit a form without having to reload the entire page.
Today, I'll show how to create a Mailchimp Ajax form. Don't worry if it sounds a bit technical; I'll break it down step-by-step so anyone can learn how to do it — beginners or experts.
So, let's dive in.
Upgrade your WordPress site with powerful, flexible forms.
Ajax Mailchimp forms made easy!

The right tools can make all the difference.
And that's why we'll use the best WordPress form plugin, Formidable Forms, for this step-by-step tutorial.
With this form builder and its Mailchimp WordPress integration, we can make our Ajax forms in WordPress and instantly connect them to our Mailchimp account.
In fact, this powerful combo can do a lot when it comes to Ajax and Mailchimp forms:
- Automatically apply Mailchimp tags to new and updated subscribers.
- Create Ajax multi-step forms.
- Choose between single or double opt-in for Mailchimp subscribers.
- Add users to a Mailchimp list or audience on form submission.
- Use a form field to subscribe users to different Mailchimp groups.
- Trigger email drip campaigns set up in your Mailchimp account.
Using these features, you can create Mailchimp contact forms and a lot more — of course, Ajax-ready! It's not one-size-fits-all either. You can easily add a Mailchimp signup checkbox to a contact form, or any form you want to.
So if you want to submit a form without a page refresh (aka using Ajax), we can do this easily. Let's get to it!
From Idea to Reality in Minutes. Build Powerful Forms, Dashboards, Apps and More.
Formidable Forms makes advanced site building simple. Launch forms, directories, dashboards, and custom WordPress apps faster than ever before.
How to create a Mailchimp Ajax form
Enabling Ajax on Mailchimp forms is surprisingly simple with Formidable. Here are the steps we’ll follow:

Step 1: Install and activate Formidable Forms

Since a form builder is one of those WordPress plugins every website needs, this solution is a real no-brainer. There are a lot of options out there, like WPForms and Ninja Forms for example.
So why choose Formidable? Because it's the most user-friendly advanced form builder on the market. And it also happens to be the best Mailchimp form builder for WordPress too!
With Formidable, there's no limit to what you can create. You can easily build newsletter signup forms, Mailchimp popup forms, and any other type of form you can imagine. And all of them can be Ajax too!
To get started with Formidable and Mailchimp, click the button below 👇 to pick up a license for our premium form maker. Then just install the plugin on your WordPress website and you're ready to go!

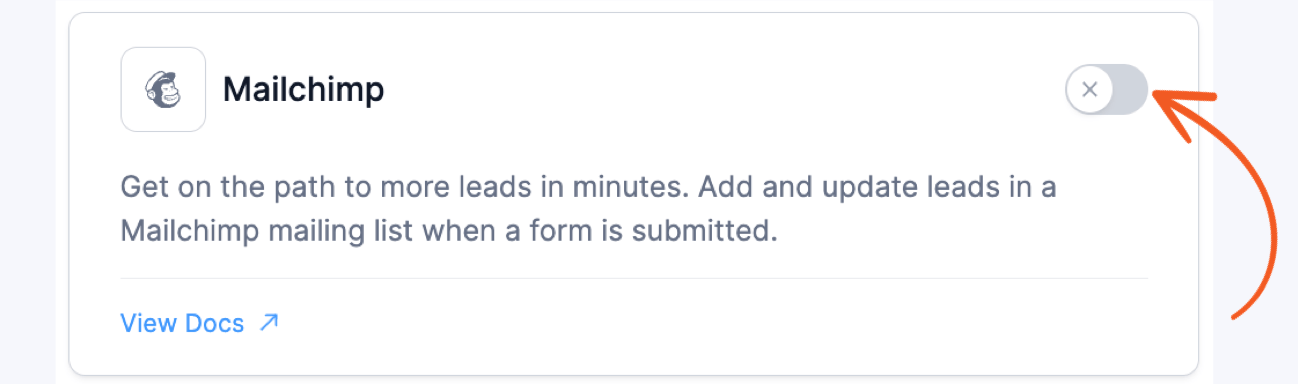
Step 2: Install, activate, and configure the Mailchimp add-on
Once you have the plugin installed, open your WordPress admin and go to Formidable → Add-Ons. Search for the one labeled Mailchimp, and click to install and activate it.
From there, you'll need to get your Mailchimp API key and plug it into the settings. To do that, go to Formidable → Global Settings → Mailchimp and insert your Mailchimp API Key there.
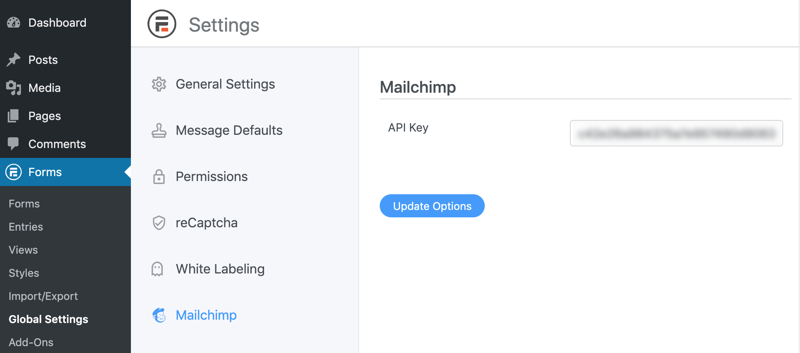
By the way, you can find more detailed setup instructions here.
Step 3: Create a form
Now that we are all set up, let's create our form. This is done using our drag and drop form builder. Just click on a field to drag and drop it into your form like so:
Since we're making a Mailchimp Ajax signup form, we'll want to add an email address field and a name field at the very least.
Feel free to play around for a while, then click Update to save your work.
Step 4: Configure Mailchimp Ajax settings and form actions
Here's where it all comes together.
First, let's make sure our form has Ajax enabled. To do that, click on the Settings tab at the top of the builder. Then tick these three boxes:

We weren't kidding when we said this would be easy! ✅ Now, let's connect the form to our Mailchimp account.
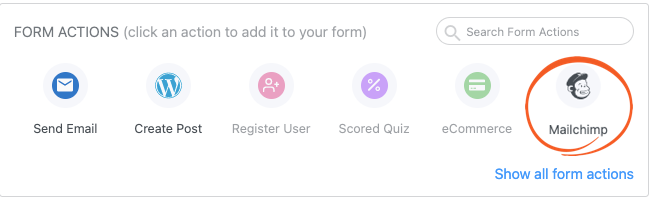
We'll do this by opening the Actions & Notifications panel and adding the Mailchimp form action.
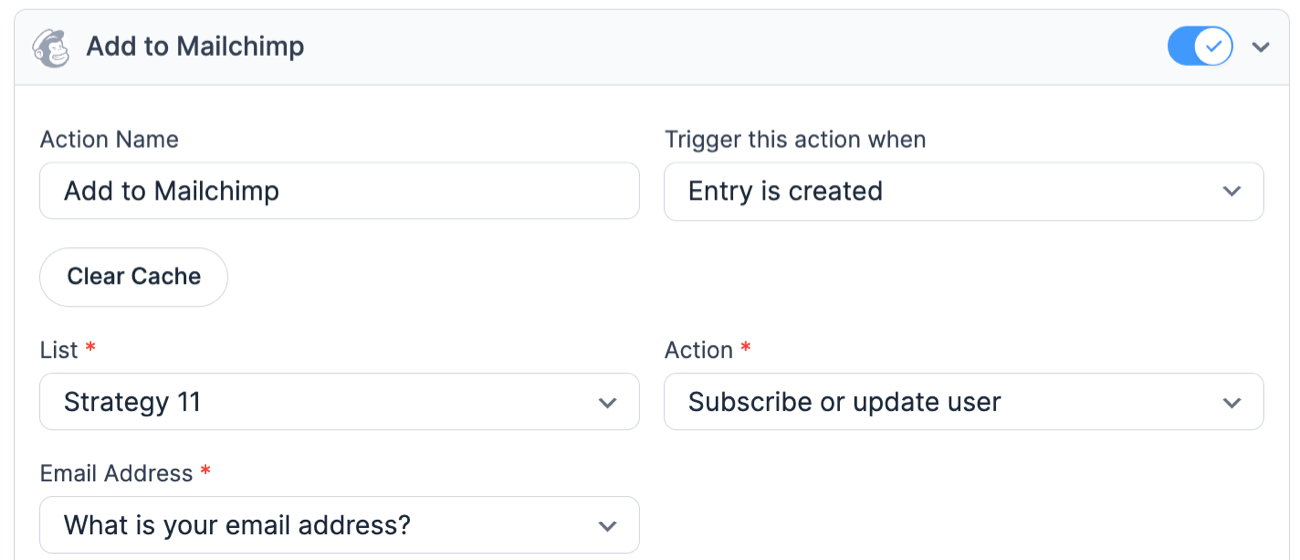
This next bit's easy too! Adjust the settings however you want to map your form fields to your Mailchimp list, and then click Update to save your form.
Want to make more kinds of cool forms that won't reload your page? You can follow these same steps to create Ajax contact forms and Ajax registration forms in WordPress too!
Ready to make your own Ajax Mailchimp forms?
That's all there is to it. I think you'll agree that this was a lot easier than learning how to code a Mailchimp Ajax form for WordPress from scratch. At any rate, we hope you've found this tutorial valuable. Be sure to check the Formidable blog often for more WordPress tips.
Bye for now!
Want to give Formidable a try? We have a 14-day money-back guarantee, so you can do so risk-free! Still not sure? Try our free form builder!
Read more of our Mailchimp posts
 How to Add a Mailchimp Signup Form to WordPress
 MailPoet vs. Mailchimp [Which is Better for You?]
 How To Make a Mailchimp Popup in WordPress (An Easy Guide)
This article may contain affiliate links. Once in a while, we earn commissions from those links. But we only recommend products we like, with or without commissions.

