
Formidable Forms has made my life so much easier as an event planner.


Last updated on July 17, 2025 by Formidable Team
How to Create Conditional Drop Down Lists in WordPress Forms
Learn how to create conditional drop down lists in WordPress. We'll show a simple, code-free method to make a car make and model WordPress forms drop down list.

Approximate read time: 5.5 minutes
Looking for a way to create conditional drop down lists in forms on a WordPress site? Don’t know what a conditional drop down list is?
Consider an auto dealer form with a car make and model drop down list.
A user chooses the year of their car, then the make and model from a list of options. These options only apply to the year/make they have already chosen.
You may have also heard these forms called chained select or dynamic drop down lists.
This functionality is super helpful when creating forms to handle price estimates, quotes, payments, etc. It's also great for end-users because they won't have to filter through many irrelevant options. You don't need a specific dynamic drop-down list WordPress plugin; you can use Formidable Forms.
With Formidable Forms, you can create a dynamic drop down list from a user-friendly interface. No need to mess with complex queries or custom code solutions.
So, in this step-by-step guide, we'll show you how to create a drop-down list on a WordPress page to make things easier for visitors.
Let's get started.
Upgrade your WordPress site with powerful, flexible forms.
How to create a drop down list in WordPress forms
Before diving into the step-by-step, let's look at Formidable Forms as a dropdown list plugin for WordPress.
- Create a "data form" to house all the data that will populate your cascading drop downs. End-users will not interact with this form directly — it's just there to hold the data.
- Add entries to populate your "data form" with the needed data. You can save time by importing a CSV. Rather than manually entering your data, let Formidable Forms do it!
- Create a second "end user form." This is the form that your human visitors will interact with.
- Add lookup fields to the "end user form" to pull data from the "data form" to populate the drop downs.
We'll use an auto industry example with three conditional drop down fields for this example, but you can use it on any form you choose — a contact form, an order form, or others.
The order will go like this:
- User selects the Year of their car
- The user chooses their vehicle's make from Makes available in Year
- Users choose their car's specific model based on the Year/Make they set

Step 1. Create the "data form"
To start, go to Formidable → Forms in your WordPress navigation menu. This form acts as your "data form."
Again, your users will not directly interact with this form. The form you create later will pull data from this form's entries.
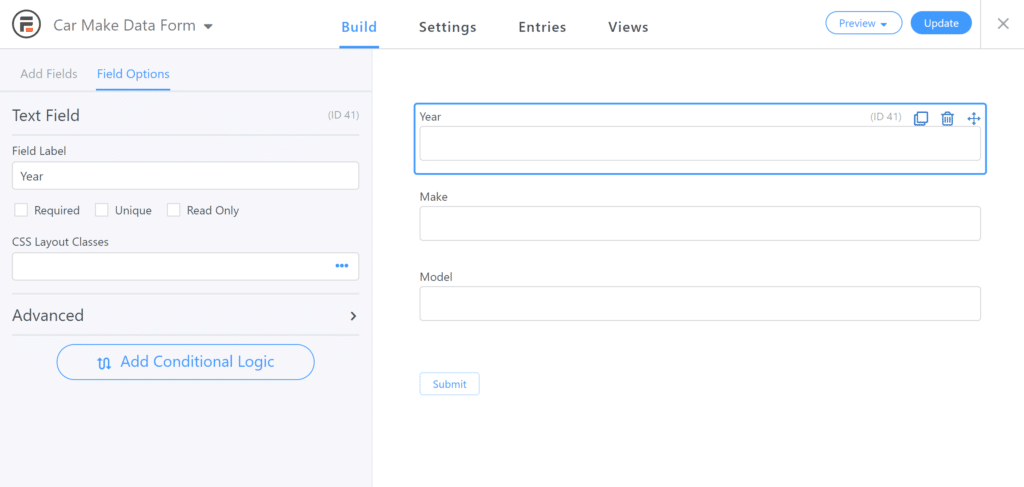
Then, drag and drop a text field for each WordPress drop down list you want to include in your end-user form.
For our example, there would be three text fields:
- Year
- Make
- Model
Remember, you can add custom input fields to suit your needs (for example, a dropdown for official forms) and customize the field label.
Then, click Update to save your form.
Step 2. Import Data as Form Entries
Next, you'll need to fill your "data form" with the menu items you want to display in your cascading drop down menu.
To do this, you'll add each piece of data as a form entry.
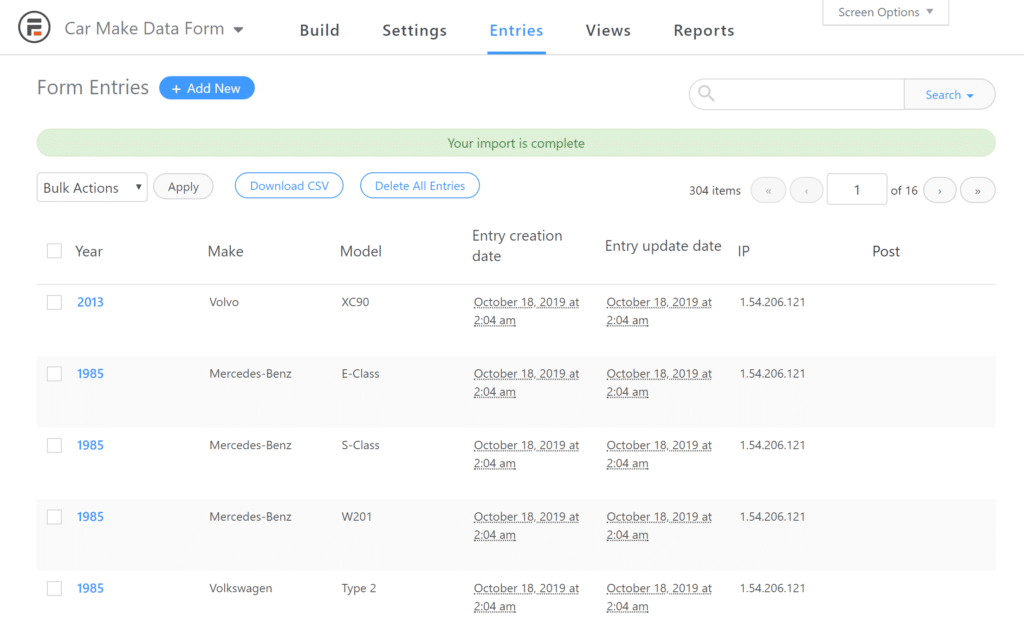
If you have a large data set, import a CSV file and auto-populate the form while creating your WordPress dropdown menu. For example, our automobile data set has over 7,000 rows — you don't want to do it manually!
If you don't have much data, you can manually add entries from the Entries tab of your data form.
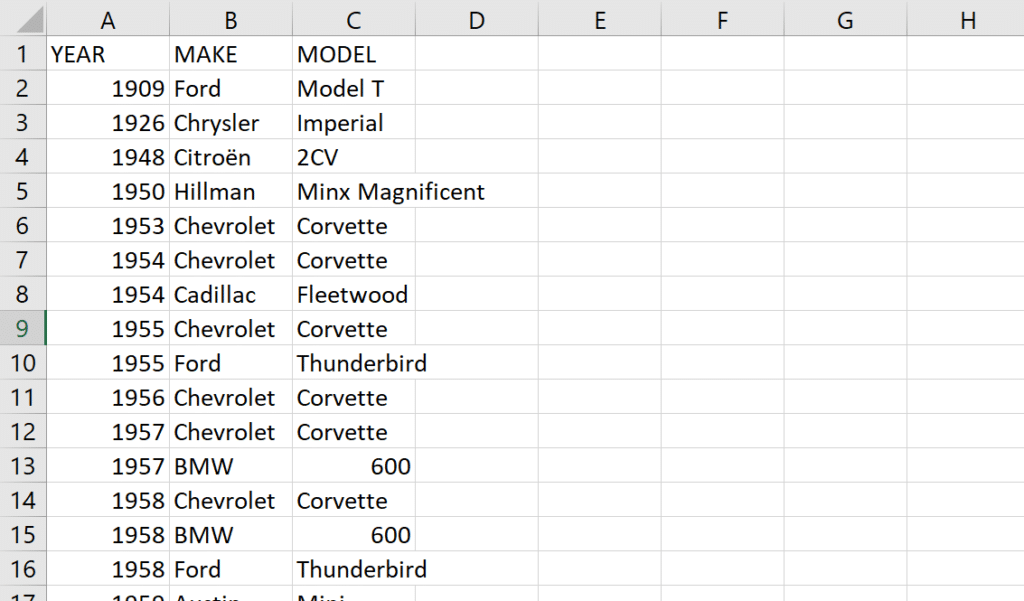
To import a CSV to Formidable Forms, ensure that the headings in your CSV match the text fields in your "data form."
In Excel, you can see how our example CSV has three columns, each of which matches the text fields that we created in the previous step:
Once you have your CSV file ready…
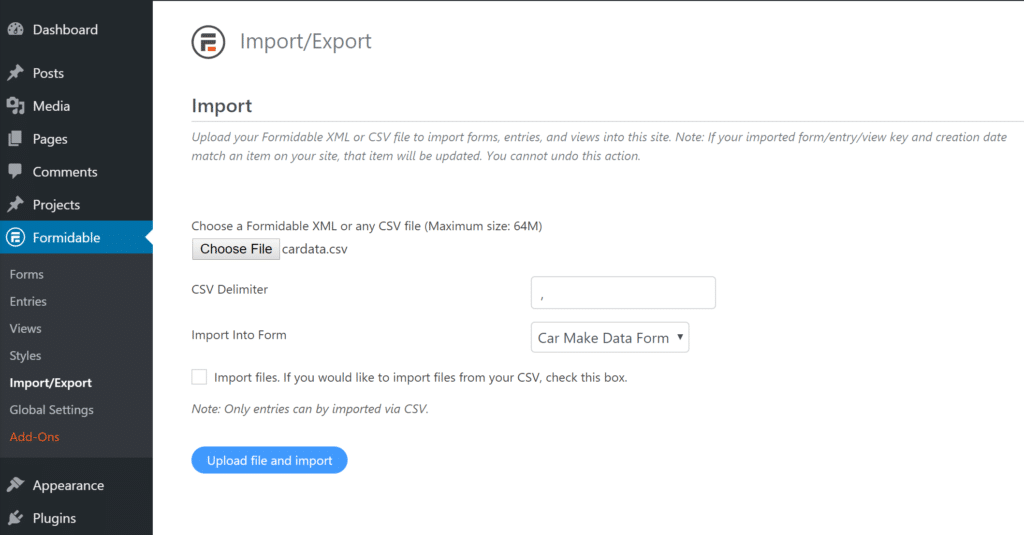
- Go to Formidable → Import/Export in the WordPress admin
- Use the Choose File button to select your CSV file
- Enter the CSV delimiter (this is almost always a comma)
- Select your "data form" from the Import Into Form drop down
- Click Upload file and import
On the next screen, make sure that the data from your CSV file is mapped correctly to the corresponding fields in your form so everything works when you create a new menu.
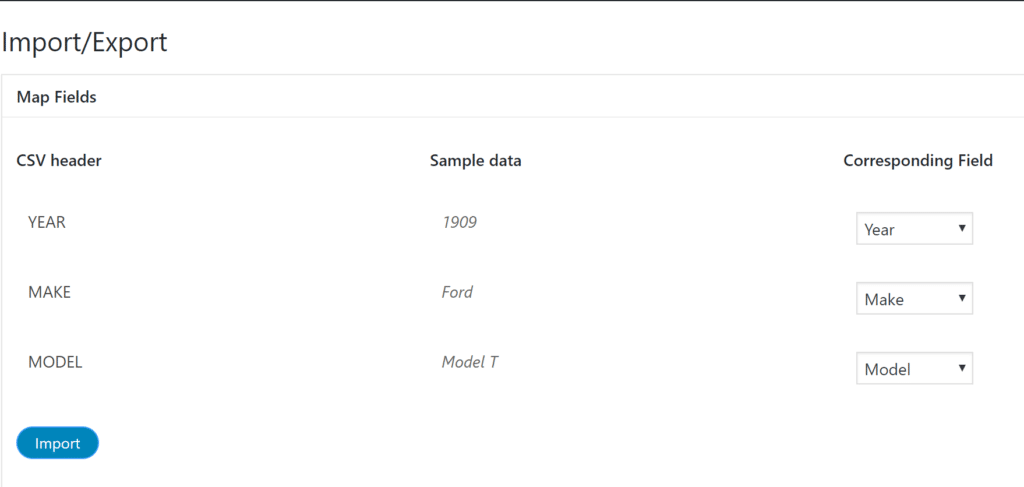
Now, you have the data you need to populate your conditional drop down lists:
Next, it's time to add a dropdown menu for your visitors to interact with.
Step 3. Create an "End User Form" and Add Lookup Fields
Next, you need to create a drop down list in a form. This will be the form that your human visitors see.
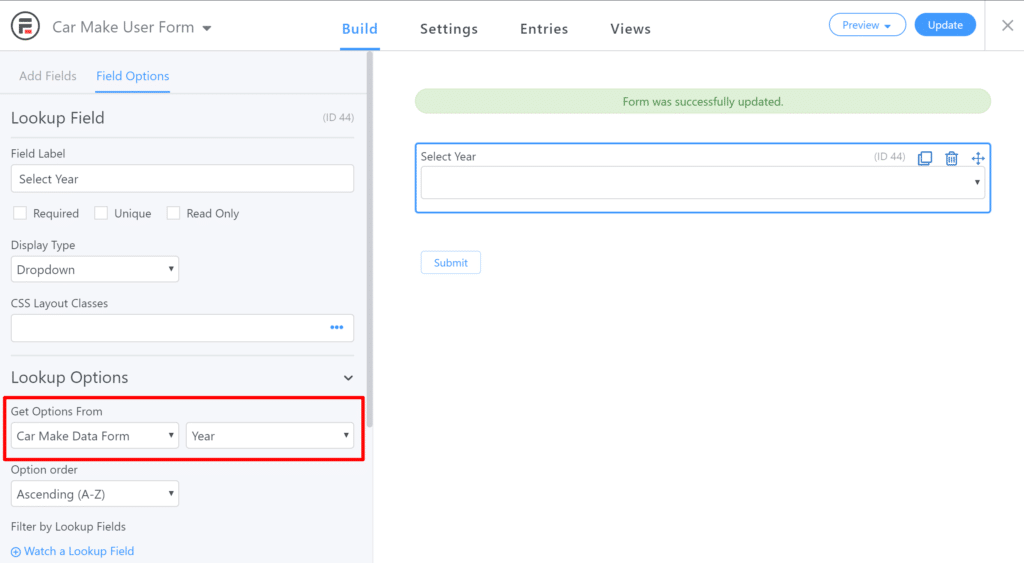
Once you have your new form, add a Lookup field and give it a name - e.g., "Select Year." This will act as your dropdown field.
Then, find the Lookup Options settings in the Field Settings and select your data form using the Select Form drop down.
Select the source field to pull data from using the Select Field drop down - e.g., "Year"
Make sure to save your changes.
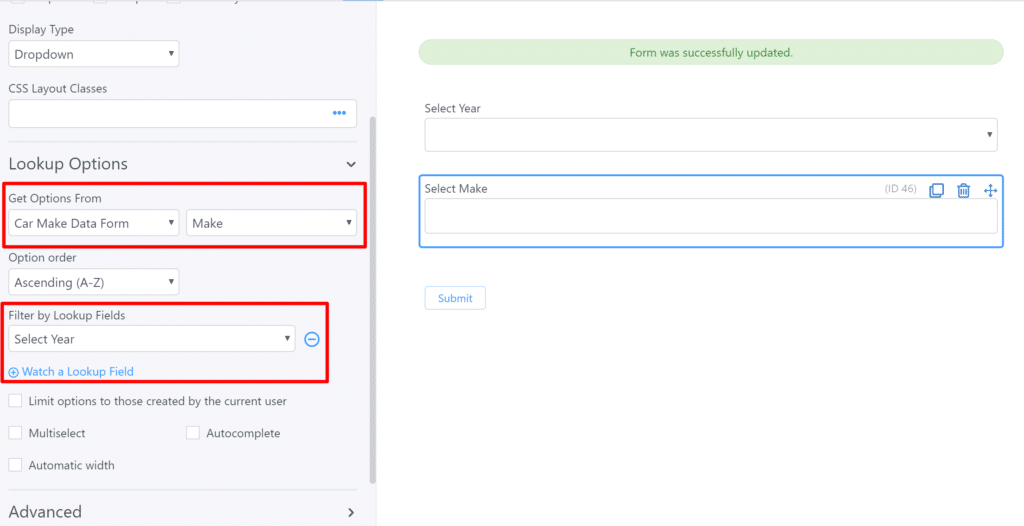
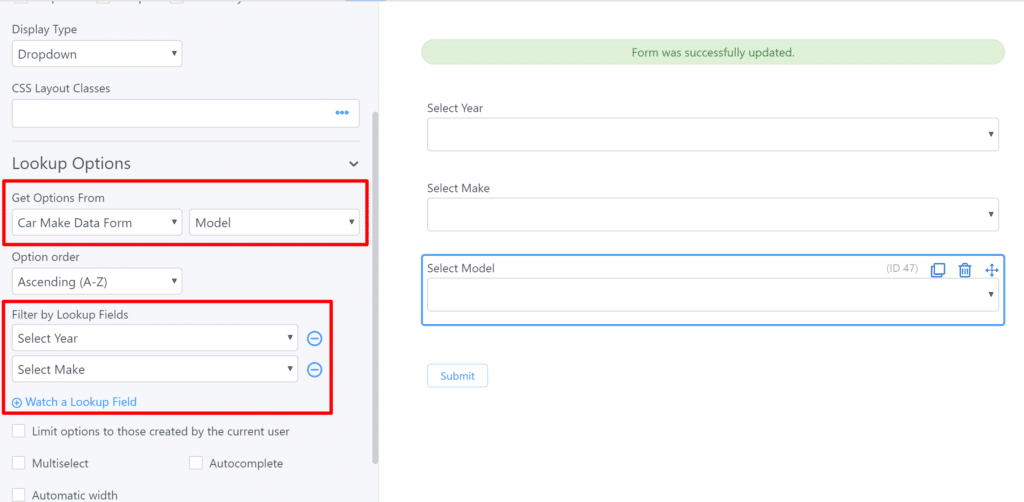
Then, configure another Lookup field for the following data set. You'll only now use the Watch a Lookup Field button to make this lookup field dependent on the previous Lookup field.
This allows you only to display options that match the last field and create that "cascading" effect:
Make sure to save your changes.
You'd add another Lookup field to add the final dropdown select (for our example). Only now, you'll use the Watch a Lookup Field option to make it dependent on the previous fields:
If you want to add more custom dropdowns to your form, you can repeat the same pattern as often as needed. Plus, you can choose Multiselect dropdowns, which (you guessed it!) adds multi-select options. So people can select the drop down and then choose multiple options!
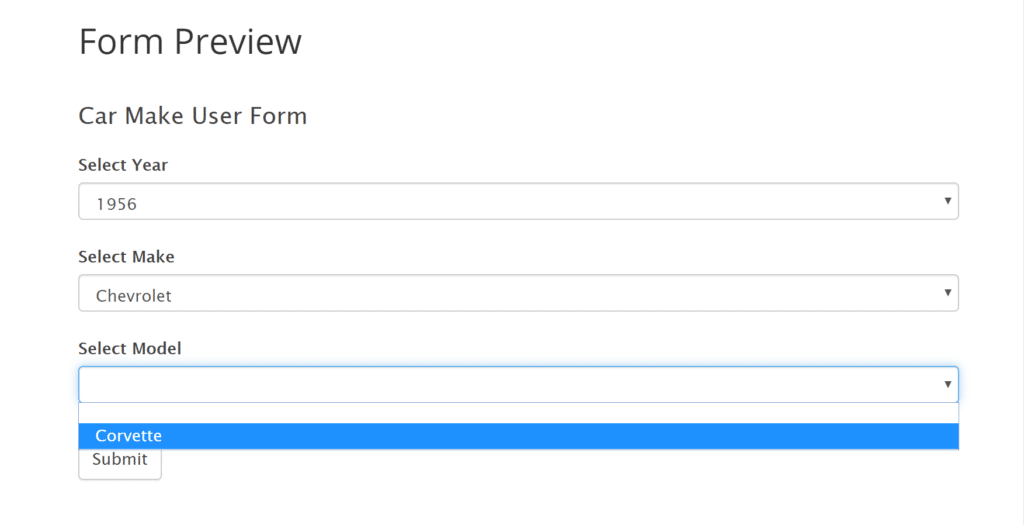
And that's it. You can view your form and manage it with the live preview, and you should see that nice cascading effect when you interact with your form:
Step 4: Add the drop down list WordPress form to your pages and posts
Last, we want your visitors to be able to see your form.
So, head to the post or page in your WordPress dashboard where you want to show the form and add a new WordPress block.
Next, search for the Formidable WordPress block, add it, and choose your form from the dropdown menu.
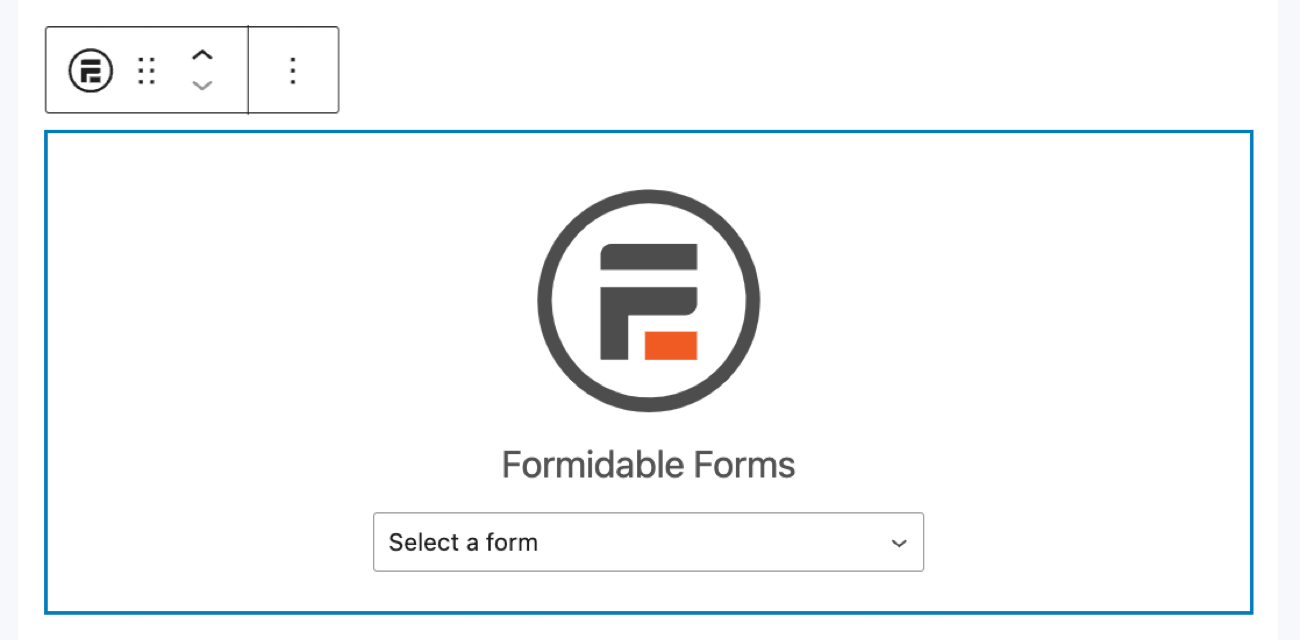
Last, update your post or page, and your form will be live on your site!
From Idea to Reality in Minutes. Build Powerful Forms, Dashboards, Apps and More.
Formidable Forms makes advanced site building simple. Launch forms, directories, dashboards, and custom WordPress apps faster than ever before.
Create your first conditional drop down list today
Cascading drop down forms are a popular approach that makes an excellent option for forms involving price estimates, quotes, payments, locations, etc.
With the Formidable Forms WordPress plugin, you can create a dynamic drop down menu in WordPress using as many conditions as needed without writing any code. It works with any WordPress theme, so you don't have to worry about compatibility.
To create dependent drop down lists with Formidable Forms, you'll need the Formidable Forms Basic plan or above.
If you're not already using Formidable Forms Pro, learn about all the helpful form builder features to understand why Formidable Forms is the best WordPress form plugin for conditional drop down lists and conditional logic, period!
Get the Formidable Forms Newsletter ⬇️
See more awesome things you can do with dependent drop down lists
 How to Create Chained Select WordPress Forms (In 3 Steps)
 The Best Relational Database Plugin for WordPress
 How To Create a Searchable Database on a WordPress Site
This article may contain affiliate links. Once in a while, we earn commissions from those links. But we only recommend products we like, with or without commissions.

