
Use Lookup fields to dynamically populate field options and values with the data from submitted entries. Lookup fields can be used for several types of dynamic field relationships. You may use them to:
- Retrieve submitted values and use them as options in a dropdown, radio, or checkbox field, or for display only.
- Set up cascading field options. This is perfect for country/state/city or year/make/model fields where the available options are filtered by the value selected in a prior field.
- Filter down to a price or final value. Allow the user to select options from Lookup fields which will ultimately display a final price or value in a text/number field.
- Dynamically populate field values. Allow users to select or enter a value in a Lookup field which will populate fields in the form with values from the same entry.

Upgrade your WordPress site with powerful, flexible forms.
Standard field options
A Lookup field has the following standard options:

- Field type
- Required
- Unique
- Read Only
- Field key
- CSS layout classes
- Label position
- Field size
- Dynamic default value
- Visibility
- Conditional logic
From Idea to Reality in Minutes. Build Powerful Forms, Dashboards, Apps and More.
Formidable Forms makes advanced site building simple. Launch forms, directories, dashboards, and custom WordPress apps faster than ever before.
Field-specific options
Multiselect
Check Multiselect to allow users to select multiple options from a dropdown. The user needs to hold down command or control to select more than one option.

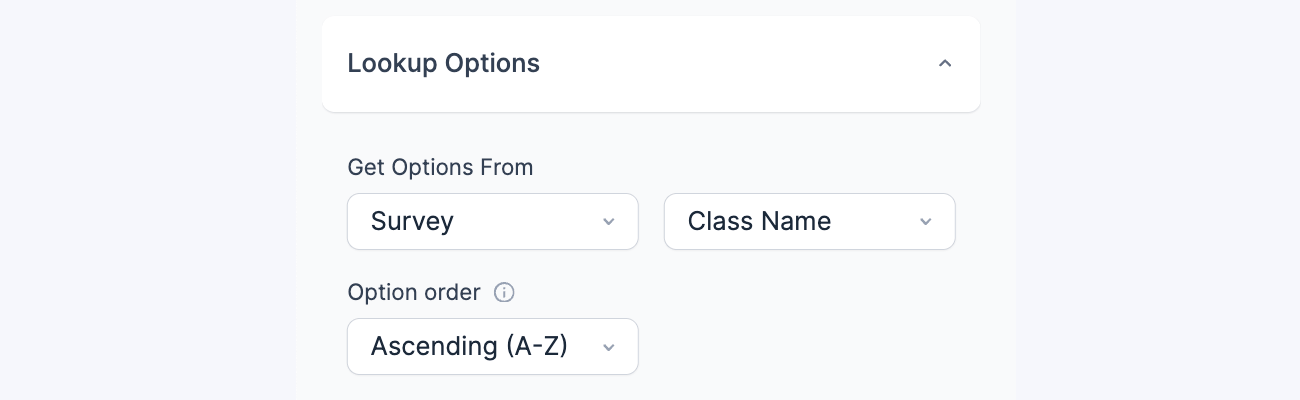
Get options from
Load options into your Lookup field from entries submitted in another Formidable form. Start by selecting the form, then the field you would like to pull the entries from.
Display type
Display the options in a dropdown menu, a set of radio buttons, a set of checkboxes, a single line text field, or a list (for display only).
The List option will display a value when it is watching another lookup field.
Placeholder text
If you are using a Lookup Dropdown field, you may enter a value in the Placeholder text setting. This text will appear on the normally blank option.
Autocomplete
Select Autocomplete if you want to provide suggestions to users as they type in a search query. This feature uses the Slim Select dropdown library, enabling autocomplete on mobile devices.
When Multiselect and Autocomplete are both selected, the user can easily choose multiple options without the need to hold down command or control keys.
Watch a Lookup Field
Limit the values displayed by watching specific fields from the same form the lookup field is pulling entries from.
Limit options
Limit options to those created by the current user, does not apply to administrators.
Option order
Select the Option order that you would like. You can display options in ascending order (A-Z), descending order (Z-A), or set no order.
Saved and Displayed Value
These settings are visible only if the source field has Separate Values enabled or is a Dynamic field. If these options are not visible immediately, clicking the Update button on the form will refresh it and display them.
Display lookup fields
Display the value submitted in a Lookup field in a form's confirmation message, email, or View. Just insert [x], where x is the ID or key of the Lookup field.
Set up a single Lookup field
If you would like to add an individual Lookup field to your form so that you can use submitted values as options, follow the directions below.
- Create a new form or go into an existing form where you would like to add a Lookup field.
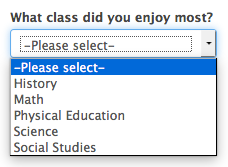
- Add a Lookup field to your form. By default, a Lookup field will display as a dropdown, but you can change Display as to Single line text, Radio button or Checkbox if you would prefer.

- Set up your Lookup field to Get options from: any form/field on your site.
- In the field options, select the Option order that you would like. You can display options in ascending order (A-Z), descending order (Z-A), or set no order.
- If you would like the user to only see values that they submitted, scroll down to Lookup options and select 'Limit options to those created by the current user'.
- If you are you using a Lookup → Dropdown field, enter a value in the Placeholder text setting if you would like placeholder text to appear on the normally blank option.
- Save the form and click Preview. Now the user can select a value from their submitted entries.


Set up cascading fields
There are many situations where setting up cascading Lookup fields is useful. One of the most common is a country/state/city scenario. Another common use for this is a vehicle year/make/model scenario. Regardless of the cascading scenario, the directions below can be adapted to apply to your use case.
- Create a new form. We'll call this the 'Data form' because it will be used to hold all of the year/make/model data, i.e., all of the data that will be retrieved and filtered in the Lookup fields. Add a text field for the Year, a text field for the Make, and a text field for the Model.
- Import a CSV with all of the year/make/model data into the Data form. If you import a CSV, the CSV headings should match up with the fields in your Data form. If you don't have a CSV to import, you can manually create entries in the Data form.
- Create a second form. We'll call this the 'End User form' because it will be the form that the end user interacts with.
- Add a Lookup field for the vehicle year. Set it up to Get options from: Data form → Year field.
- Add a Lookup field for the vehicle make. Set it up to Get options from: Data form → Make field.
Since we want the Make options to change depending on the selected year, set this field up to Watch the 'Year' Lookup field. - Add a Lookup field for the vehicle model. Set it up to Get options from: Data form → Model field.
Since we want the Model options to change depending on the selected year and make, set this field up to Watch 'Year' Lookup field and the 'Make' Lookup field. - Save the End User form and click Preview. When you select a Year, the Make options should change. When you select a Make, the Model options will update.


Filter cascading fields
Let us say you already have cascading lookup fields and want to filter its options. A common use for this is when you want to show only active employees in another form. Regardless of the cascading scenario, the directions below can be adapted to apply to your use case.
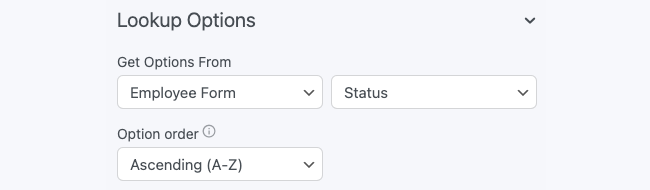
- Create a new form. We will call this the Employee Form that will hold all of the employee name/status data, i.e. all of the data that will be retrieved and filtered in the Lookup fields. Add a name field for the Name and a dropdown or radio field for the Status.
- Import a CSV with all the name/status data into the Employee form. If you import a CSV, the CSV headings should match up with the fields in your Employee form. If you don't have a CSV to import, manually create entries in the Employee form.
- Create a second form. We will call this the End User form because it will be the form which the end user will interact with.
- Add a Lookup field for the Status. Set it up to Get options from: Employee form → Status field.
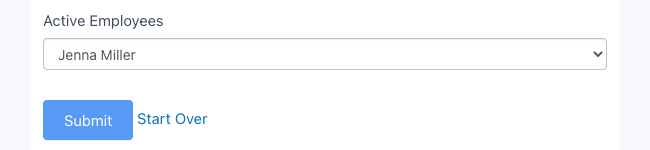
Set its default value to Active and set the field's Visibility to Administrator to prevent other users from seeing it. - Add a Lookup field for the Name. Set it up to Get options from: Employee form → Name field. Since we want the Name field options to change depending on the selected Status, set this field up to Watch the Status Lookup field.
- Save the End User form and click Preview. The first Lookup field essentially acts as a filter to only show the names with active status in the second Lookup field.


Set up multiselect cascading fields
If you want to allow multiple selections for cascading fields, using a Lookup checkbox is useful in this situation. One of the most common scenarios is a hotel/floor/room scenario. The directions below can be adapted to apply to this use case.
- Create a new form called Data form. This form will be used to hold all of the hotel/floor/room, i.e., all of the data that will be retrieved and filtered in the Lookup checkbox fields. Add a text field for the Hotel, Floor, and Room.
- Import a CSV with all of the hotel/floor/room data into the Data form and make sure that the CSV headings match up with the fields. If you don't have a CSV to import, you can manually create entries in the Data form.
- Create a second form called End User form. This will be the form that the end-user interacts with.
- Add a Lookup Checkbox field for the Hotel. Set it up to Get options from: Data form → Hotel field.
- Add a Lookup Checkbox field for the Floor Number. Set it up to Get options from: Data form → Floor Number field. Since we want the Floor Number options to change depending on the selected Hotel, set this field up to Watch the Hotel Lookup field.
- Add a Lookup checkbox field for the Room Number. Set it up to Get options from: Data form → Room Number field. In order for the Room Number options to change depending on the selected Hotel and Floor Number, set this field up to Watch Hotel and the Floor Lookup checkbox field.
- Save the End User form and click Preview. When you multiselect the Hotel, all the Floor Number options will update. When you multiselect the Floor Number, the Room Number options will update.


Drill down to a final value
There are many instances where it is useful for a user to select options in one or more fields which then spits out a final value that is retrieved by using the options selected in other fields. Lookup fields can be used for this. To help make the instructions below more clear, we will assume the end goal is to create a form where a user selects a State and their age range which then displays a policy price in a Single Line Text field.
- Create a new form. We'll call this the 'Data form' because it will be used to hold the insurance policy data. Add a field for the State, Age, and add a Single Line Text field for the Price.
- Import a CSV with all of the insurance policy data into the Data form. If you import a CSV, the CSV headings should match up with the fields in your Data form. If you don't have a CSV to import, you can manually create entries in the Data form.
- Create a second form. We'll call this the 'End user form' because it will be the form that the end user interacts with.
- Add a Lookup field for the State. Set it up to Get options from: Data form → State field.
- Add a Lookup field for the Age. Set it up to Get options from: Data form → Age field.
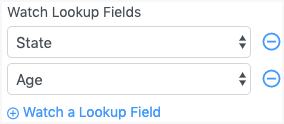
Since we want the Age options to change depending on the selected State, set this field up to Watch the State Lookup field. - Add a Single Line Text field type for the price. Select Default Value and click the search icon to get the Lookup default value settings.
Set Search in to Data form → Price field.
Since we want the price to change depending on the selected State and Age, set this field up to Watch the State and Age Lookup field.
Typically you should mark this field as 'Read-only' so users cannot change the value. If you would like to make the value appear as floating text rather than a field input, put the frm_total class in the field's CSS Layout Class box. - Save the End User form and click Preview. When you select a State and Age, a price should be displayed in the Single Line Text field.


Populate fields with values from a selected entry
If you would like to automatically populate fields based on a selected entry, follow the directions below.
- Go into edit the form that you want to autofill.
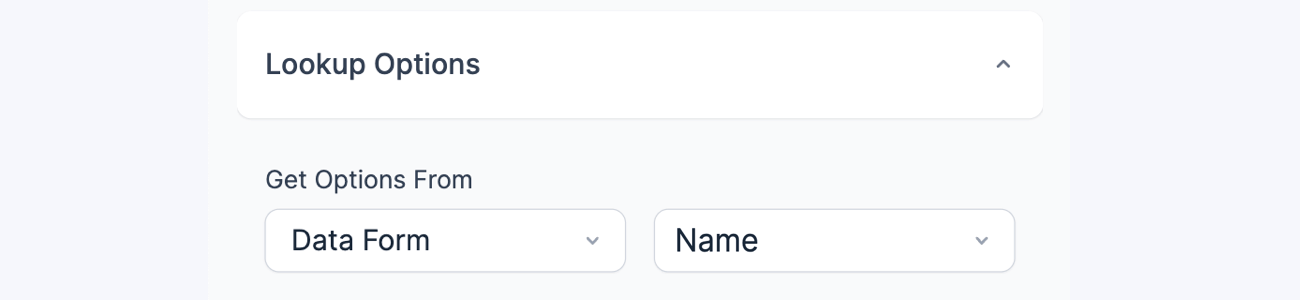
- Add a Lookup field. Set it up to Get options from: a form/field. It's acceptable to set it up to get options from the current form.
- Open the field options for a field that you want to autofill. (See the list of the types of fields you can autofill.) Open the field options → Advanced and toggle on the Lookup Toggle.
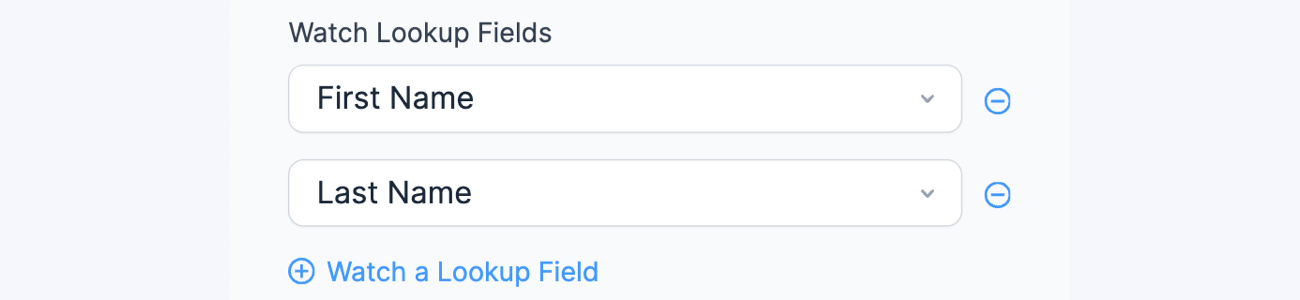
Set Search in to the same form that the Lookup field is getting its options from. In the Watch Lookup Fields option, add the Lookup field from Step 2. - Repeat the previous step for each field that you want to autofill.
- Save the form and click Preview. When you select an entry in the Lookup field, the fields that are 'watching' it should automatically populate.


Compatible field types
The following field types can be populated automatically by watching a Lookup field:
- Single Line Text
- Email Address
- Website/URL
- Image URL
- Time
- User ID
- Number
- Phone Number
- Date
- Dropdown
- Hidden
This option will be added to additional field types in future releases.
Populate fields by searching entered values
There may be situations where you would like a user to enter a first and last name, for example, and then other form fields automatically populate. Or you may want users to enter an ID number and fields automatically populate with data for that ID number. If you would like to automatically populate fields based on the values entered in one or more fields, follow the directions below.
- Go into edit the form that you want to autofill.
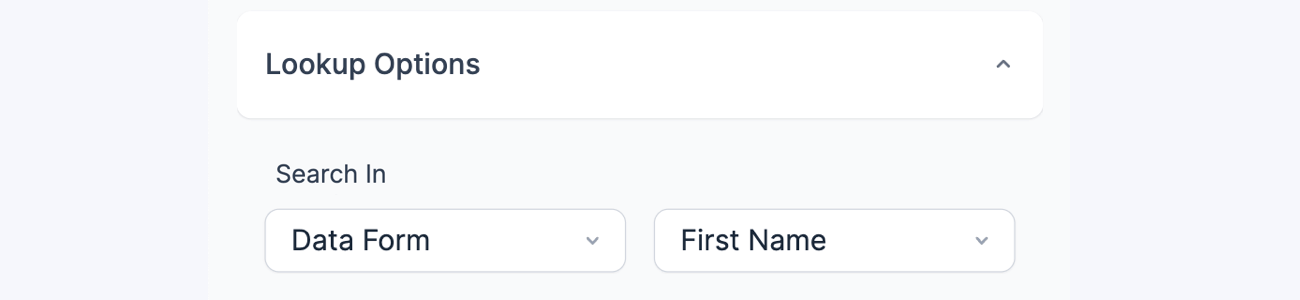
- Add a Lookup → Single Line Text field.
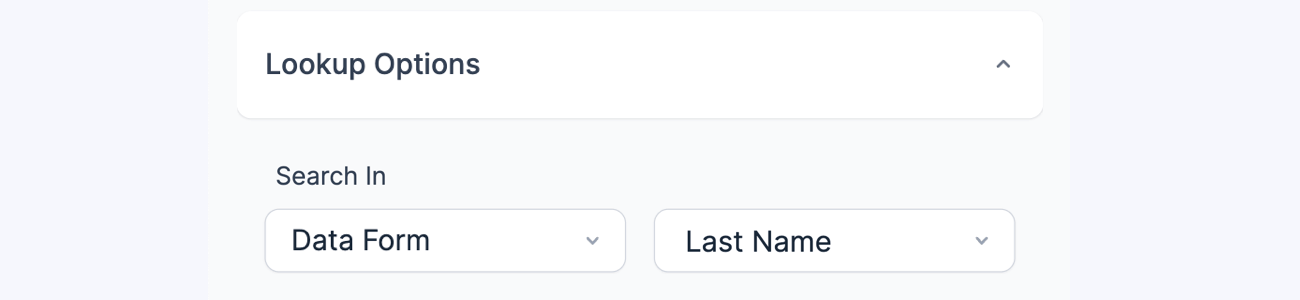
Set it up to Search in: the form/field that you would like to search for a first name. - Add a second Lookup → Single Line Text field. Set it up to Search in: the same form as step 2, but a different field. This will be the field for the user to enter a last name.
Skip this step if a second lookup field is not needed. - Add other non-Lookup fields to your form. Open the field options for a field that you want to autofill. Open the field options → Advanced and toggle on the Lookup toggle. Set Search in to the same form that the Lookup fields are searching values from.

In the Watch Lookup Fields option, add the Lookup field from Step 2 and the Lookup field from Step 3.
- Repeat the previous step for each field that you want to autofill.
- Save the form and click Preview. When you type in a first and last name in the Lookup fields, the other fields that are 'watching' it should automatically populate if a match is found for the entered first and last name.


Populate field with ID of an entry
There may be situations where you would like a user to select an entry in the Lookup field, and automatically populate another field with its entry ID. A typical scenario would be to create a form where a user selects a school which then displays the entry ID in a field. The directions below can be adapted to apply to this use case.
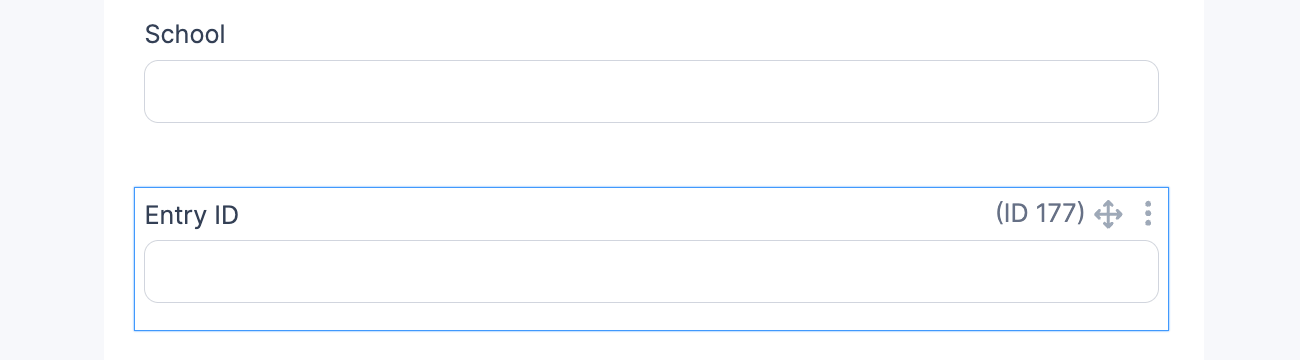
- Create a new form called Data Form. This form will be used to hold the list of school names and their entry ID. Add a text or hidden field for "Entry ID" and another field for "School."
- You could either import a CSV or manually create the options in the "School" field.
- To save the entry ID of the current entry in the "Entry ID" field, use this code example. Remove any default values and change the visibility to Administrators only if you're using a text field.
- Create a second form called End User form. It will be the form that the end-user interacts with.
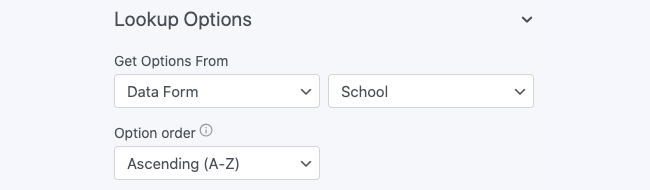
- Add a Lookup field for "School". Set it up to Get options from: Data form → School field.
- Add a text or hidden field for "Entry ID" which will autofill with the entry ID of the selected School. Open the field options → Advanced and toggle on the Lookup toggle. (See the list of the types of fields you can autofill.)
Select your Data form in the Search in option. This is the form where the "School" Lookup field options are stored. In the Watch Lookup Fields option, select the "School" Lookup field from step 5. - Save the form and click Preview. When you select an entry in the "School" Lookup field, the "Entry ID" field that is watching it should automatically populate.


Add custom coupon codes
If you want to add a custom coupon code field to your form that automatically deducts the discount amount from the total, you can use Lookup fields to accomplish this.
Copy value to a Lookup field
If you would like to copy a value from a non-Lookup field to a Lookup field, you may use the code below. This is especially useful in cases where the first field cannot be a Lookup (e.g. a field whose value is the result of a Field Calculation instead of a simple selection). The best place to add these code samples is either in your Theme's footer section or the After Fields section of your form Settings → Customize HTML tab.
<script>
jQuery(document).ready(function($){
    $('#field_nkqtr').change(function(){
        var sourceField = $('#field_nkqtr').val();
        $('#field_br4j1').val(sourceField);
        $('#field_br4j1').trigger({ type:'change', originalEvent:'custom' });
    });
});
</script>
Replace nkqtr with the field key of your source field, and br4j1 with the field key of the destination Lookup.
Validate entered value
If you would like to allow users to enter a value which is automatically validated, you could use lookup fields to accomplish this. For this use case, we will validate the value entered in a number field.
- Create a new form called Number Validation Entry Form. This form will be used to hold the numerical values that will be validated.
- Add a number field and label it Number Validation. Submit an entry for each value that you want to include in the validation.
- Go into an existing form, or create a new form, where users can enter a value and trigger the validation.
- Add a Lookup → Single Line Text field and label it as Number Validation. Set it up to Get Options From the Number Validation Entry Form → Number Validation field.
- Add a Hidden field to the form. Open the field options → Advanced and toggle on the Lookup toggle. Set it up to Search in the Number Validation Entry Form → Number Validation field.
- Since we want to validate the value depending if it matches the entry in the Number Validation Entry form, set this field up to Watch the Number Validation Lookup field.
- In the form builder, select your Submit button and add conditional logic. Show or enable the submit button if:
- Hidden field does not equal to ________(leave blank)
- Add an HTML field with a validation message. You could add some CSS styling, if you want.
- Add conditional logic to the HTML field and set it up to Show this field if ALL of the following match:
- Hidden field equals to ______(leave blank)
- Number validation does not equal to ______(leave blank)


Limitation
- The cascading lookup feature will not work if the primary field retrieves a value from a Name field.
Related developer hooks
- Change the comparison operator for Lookup fields with the frm_set_comparison_type_for_lookup hook.
- Add extra content to lookup options with the frm_filtered_lookup_options hook.
- Display User ID field with display name and ID with the frm_filtered_lookup_options hook.
- Remove the current user filter from a Lookup field for a specific user role with the frm_lookup_is_current_user_filter_needed hook.
- Modify the order of options with the frm_order_lookup_options hook.
- Order dates in a lookup with the frm_order_lookup_options hook.
- Show image in a Lookup list type with the frm_order_lookup_options hook.
