
The easiest way to place multiple fields in a row and design the layout of your form is to use the many CSS layout classes offered by Formidable. You can add these CSS layout classes to individual fields or add them to Section Headings to organize large groups of fields.
Upgrade your WordPress site with powerful, flexible forms.
Add a CSS layout class
- Go to edit your form.
- Click on any field and open the Field Options → Advanced section in the left sidebar.
- Click the menu icon in the CSS layout classes box.

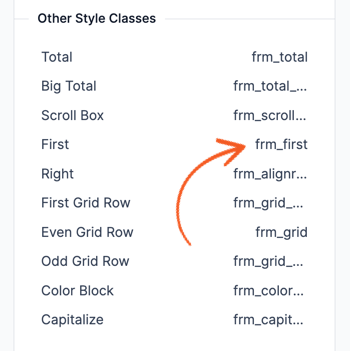
When you click the menu icon in the right side of the box, the Add Layout Classes settings will be shown below it. This gives you a complete, clickable list of all the layout classes which you may use. - Click any of the classes in the Add Layout Classes settings to insert them into the CSS layout classes box.
You can use multiple classes by inserting a space between each class. Example: 'frm_first frm_half'


Example
Here's an example of the output you can achieve with adding classes.
From Idea to Reality in Minutes. Build Powerful Forms, Dashboards, Apps and More.
Formidable Forms makes advanced site building simple. Launch forms, directories, dashboards, and custom WordPress apps faster than ever before.
Add a form layout
To align multiple fields on the same row with a form layout, follow these steps:
-
- Drag and drop the fields into the form builder and align them on the same row.
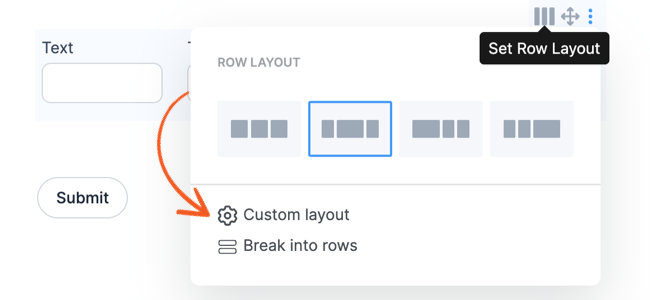
- To adjust the layout of your form fields, hover over the field group and click on the Set Row Layout icon. You will then have access to a list of different layout options to choose from.
- If you prefer a custom layout, click on the Custom Layout icon and use the 12-column grid system to enter the number of columns for each field. It's that easy!
- Drag and drop the fields into the form builder and align them on the same row.


Learn more about the different Layout field action icons.
Add columns in a form
Creating columns in a form is as easy as adding a CSS layout class to your fields.
- Add fields to your form. Alternate between adding a field for the first column and a field for the second column. Every other field will be in a different column, so order your fields with that in mind.
- Open the field options for each field that should be in the first column. Click the menu icon in the CSS layout classes box. In the Add Layout Classes settings (left sidebar), click the First style class and the 1/2 button. This will insert the frm_first frm_half classes.
- Open the field options for each field that should be in the second column. Click the menu icon in the CSS layout classes box. In the Add Layout Classes settings (left sidebar), click the 1/2 button. This will insert the frm_half class.

Section heading columns
Using Section Headings can be a much faster way of creating a two-column form because you only need to add classes to the Section Heading fields instead of every field in the column.
- Add a Section Heading field to your form. This will be for your first column. Open the field options and click the menu icon in the CSS layout classes box. In the Add Layout Classes settings (left sidebar), click the First style class and the 1/2 button. This will insert the frm_first frm_half classes.
- Add another Section Heading field to your form. This will be for your second column. Open the field options and click the menu icon in the CSS layout classes box. In the Add Layout Classes settings (left sidebar), click the 1/2 button. This will insert the frm_half class.
- Add fields that you want in the first column to the first Section field.
- Add fields that you want in the second column to the second Section field.
- If you don't want the Section Heading text to be shown in your form, set the Label Position to hidden or none on both of your Section Headings.

Align two fields in a row
- Open the first field's options and click the menu icon in the CSS layout classes box. The Add Layout Classes settings will be automatically shown below it. Click the First style class and the 1/2 button. This will insert frm_first frm_half in the CSS layout classes box.
- Open the second field's options and click the menu icon in the CSS layout classes box. The Add Layout Classes settings will be automatically shown below it. Click the 1/2 button. This will insert frm_half in the CSS layout classes box.

Align three fields in a row
- Open the first field's options and click the menu icon in the CSS layout classes box. The Add Layout Classes settings will be automatically shown below it. Click the First style class and the 1/3 button. This will insert frm_first frm_third in the CSS layout classes box.
- Open the second field's options and click the menu icon in the CSS layout classes box. The Add Layout Classes settings will be automatically shown below it. Click the 1/3 button. This will insert frm_third in the CSS layout classes box.
- Open the third field's options and click the menu icon the CSS layout classes box. The Add Layout Classes settings will be automatically shown below it. Click the 1/3 button. This will insert frm_third in the CSS layout classes box.

Align four fields in a row
- Open the first field's options and click the menu icon in the CSS layout classes box. The Add Layout Classes settings will be automatically shown below it. Click the First style class and the 1/4 button. This will insert frm_first frm_fourth in the CSS layout classes box.
- Open the second, third, and fourth field's options and click the menu icon in the CSS layout classes box. The Add Layout Classes settings will be automatically shown below it. Click the 1/4 button. This will insert frm_fourth in the CSS layout classes box.

Align submit button with fields
Note: This is now a built-in feature of Formidable Forms Pro.
If you want to put your submit button inline with the fields in your form, follow the instructions below. These instructions are specific to having two fields in your form, but they can be adapted to work with any number of fields.
- Open the first field's options and click the menu icon in the CSS layout classes box. The Add Layout Classes settings will be automatically shown below it. Click the First style class and the 1/3 button. This will insert frm_first frm_third in the CSS layout classes box.
- Open the second field's options and click the menu icon in the CSS layout classes box. The Add Layout Classes settings will be automatically shown below it. Click the 1/3 button. This will insert frm_third in the CSS layout classes box.
- Go into your form's Settings → Customize HTML. Scroll down to the Submit Button section.
Replace <div class="frm_submit"> with <div class="frm_submit frm_third frm_inline_submit">.

Create a grid
Create a grid with your radio button or checkbox fields by following the instructions below.
- Open the first radio button or checkbox field's options and click the menu icon in the CSS layout classes box. The Add Layout Classes settings will be automatically shown below it. Click the First Grid Row style class. This will insert frm_grid_first in the CSS layout classes box.
- Open the second radio button or checkbox field's options and click the menu icon in the CSS layout classes box. The Add Layout Classes settings will be automatically shown below it. Click the Even Grid Row style class. This will insert frm_grid in the CSS layout classes box. Do the same for all other even numbered radio buttons/checkboxes.
- Open the third radio button or checkbox field's options and click the menu icon in the CSS layout classes box. The Add Layout Classes settings will be automatically shown below it. Click the Odd Grid Row style class. This will insert frm_grid_odd in the CSS layout classes box. Do the same for all other odd numbered radio buttons/checkboxes.
- If you would like to add labels at the top of your grid, you will need some extra HTML and CSS. You may follow these instructions to add labels to your grid.
Available Form classes
frm_first
Use frm_first whenever you want a field to be the first in a row. This is designed to be used in conjunction with the field width classes.
frm_half, frm6
Align two fields in a row with frm_first frm_half on the first field and frm_half on the second field. If you are using a form layout, frm6 will be used instead.
frm_third, frm4
Align three fields in a row. Use frm_first frm_third for the first field and use frm_third for the second and third fields. If you are using a form layout, frm4 will be used instead.
frm_two_thirds
Use next to a field with the frm_third class on it. If you would like two fields in a row where the first takes up two-thirds width and the second takes up one-third width, put frm_first frm_two_thirds on the first field and frm_third on the second field.
frm_fourth, frm3
Align four fields in a row. Use frm_first frm_fourth for the first field. Add frm_fourth to the following fields in the row. If you are using a form layout, frm3 will be used instead.
frm_three_fourths
Use next to a field with the frm_fourth class on it. If you would like two fields in a row where the first takes up three fourths width and the second takes upon one fourth width, put frm_first frm_three_fourths on the first field and frm_fourth on the second field.
frm_sixth, frm2
Align six fields in a row. Use frm_first frm_sixth for the first field. Use frm_sixth for the following fields in the row. If you are using a form layout, frm2 will be used instead.
frm_alignright
Align a field to the right side of the page.
frm_inline
Align fields in a row without setting a specific width. Use frm_first frm_inline for the first field in the row and use frm_inline for any fields following that.
frm_full, frm12
Force the field to fill the full space with 100% width.
frm_full_upload
Make a Single File Upload field look like a Multi File Upload field.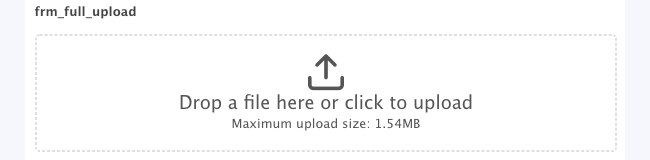
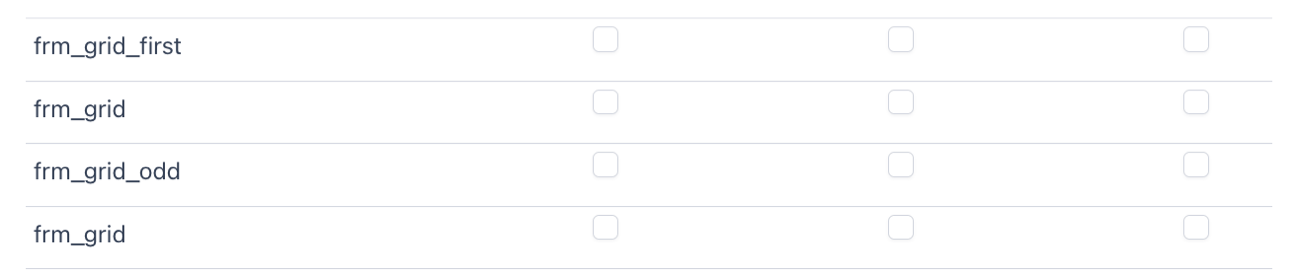
frm_grid_first, frm_grid, frm_grid_odd
Create a table of fields with alternating colors. Use frm_grid_first for the first field in the grid, frm_grid on the even numbered rows, and frm_grid_odd on the odd numbered rows.
frm_two_col, frm_three_col, frm_four_col
Put your radio button or checkbox options into two, three, or four columns.
frm_total
Add this to a read-only field to display the text in bold without a border or background.
frm_total_big
Add this to a read-only field to display the text in large, bold text without a border or background.
frm_color_block
Add a background color to the field or section.
frm_scroll_box
If you have many checkbox or radio button options, use the frm_scroll_box class to allow your user to easily scroll through the options. Add this to an HTML field to allow your user to easily scroll through text.
frm_capitalize
Add this to automatically capitalize the first letter in each word. Please note that this will not affect the saved value. It will only affect how the value is displayed in the field.
frm_hidden
Add this to hide fields that you do not want visible, but are not Hidden fields. Examples could include fields used in calculations but that you might not want visible for aesthetic reasons, or certain uses of Lookup fields.
frm_inline_submit
Use this class to make sure your inline submit button lines up with the fields in your form.
frm_inline_form
Use this class to make form content work better with inlining. It gets added automatically if you use frm_inline_submit.
frm_label_justify
Use this class to increase the space between words in a field label so that each line has equal width.
frm_pos_center
Add this class to an HTML field to horizontally center a text.
frm_slidein
Add this class to the Form Class input box on the Customize HTML page to enable a horizontal slide transition for the page turn in the page break field.
frm_slideup
Add this class to the Form Class input box on the Customize HTML page to enable a vertical slide transition for the page turn in the page break field.
Available View classes
frm_round
Use this class to create rounded images. This will create circles for square images or ovals for rectangular images.
<img class="frm_round" src="..." />
If you're using a file upload field to display images, you can style the image display by adding the frm_round class.
[x show_image=1 class="frm_round"]

frm_square
Use this class to create square images.
<img class="frm_square" src="..." />
If you're using a file upload field to display images, you can style the image display by adding the frm_square class.
[x show_image=1 class="frm_square"]

frm_small, frm_smaller, frm_bigger
Use this class to change the size of the font to small, smaller or bigger.
frm_plain_list
Add this class to remove bullets in an unordered list.
<ul class="frm_plain_list">
frm_inline_list
Add this class to set the unordered list to a row.
<ul class="frm_inline_list">
frm_full_row
Add this class to set the row to span the full page.
<ul class="frm_full_row">
frm_flex
Display the View as flex. It will set the flexible length on flexible items.
<div class="frm_flex">
<div style="flex:1">Sidebar</div>
<div style="flex:3">Content area</div>
</div>
frm_tiles
Use this class to create a tile layout.
<div class="frm_tiles">
<div>This is a tile</div>
</div>
frm_no_grid_750
Add this class to create a responsive View. It will stop showing grid items side by side at 700px screen.
frm_no_grid_600
Add this class to create a responsive View. It will stop showing grid items side by side at 600px screen.
Create natural language forms
Natural language forms go by several names including Mad Libs style forms. These types of forms include form fields inside of a sentence. They often use styling that shows only a blank line rather than a text box, similar to the available Mad Libs Lines style template.


To create a form like this, follow these steps.
- Add a Section field to your form for each sentence or block of text. Set the label position to none.
- Alternate HTML fields with other field types inside the section. The HTML fields are for the text between the other fields. Set the label position on each field to none.
- If there are any fields followed by a period or comma, add no-right-margin into the CSS layout classes box for that field.
- Go to the form Settings → Customize HTML and add frm_madlib into the Form Classes box.
- Go to the Formidable → Global Settings → Custom CSS page and add this css:
.frm_madlib .frm_section_heading { display:flex; flex-wrap: wrap; align-items: flex-end; } .frm_madlib .frm_section_heading div { margin: 5px; } .frm_madlib .frm_section_heading div.no-right-margin { margin-right: 0px; } - Create a new style or import the Mad libs line style template. See how to only show the bottom border in a field.
- You're all done. Your form should look like the form in the screenshot above.
Create custom mobile-friendly form
All forms created with Formidable Forms are mobile-friendly and responsive. By default, the fields will be displayed in a single column on mobile. If you want to customize how many fields will be shown per row, you can follow the steps below.
- Install and activate the Bootstrap styling add-on. This add-on is included in the Formidable Plus plan and higher.
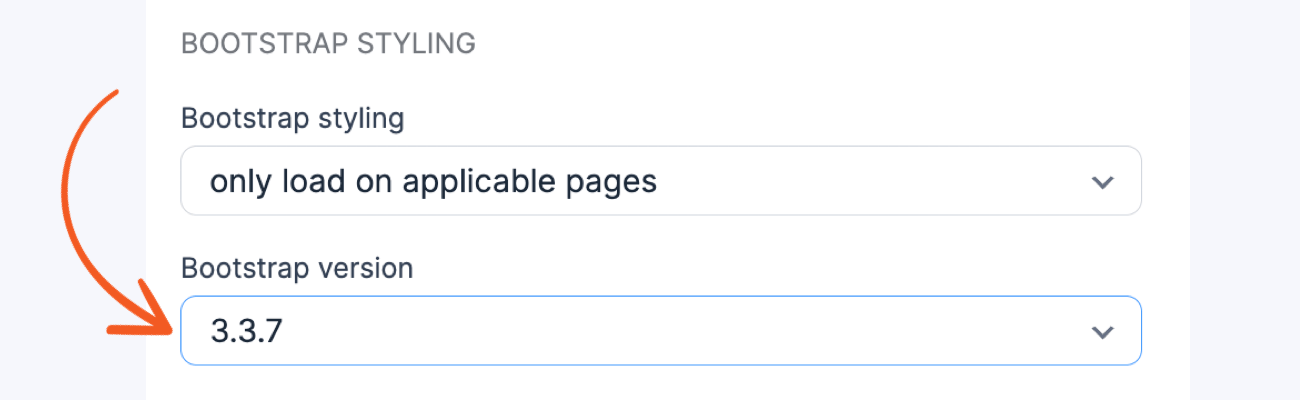
- Go to Formidable → Global Settings → General Settings, and choose 3.3.7 as the Bootstrap version.
- Go to your Formidable → Global Settings → Custom CSS page and add this:
.frm_fields_container { display: block !important; } .with_frm_style .frm_form_field { clear: none; } - Add three fields to your form. Insert col-xs-4 as the CSS layout class for each field.
- If you view your form on a mobile device, you should see three columns even on small screens.
- Learn more about the other Bootstrap layout options available.
- col-xs-6: Display two fields side by side.
- col-xs-6 col-md-4: Display three fields side by side on bigger screens, and two fields side by side on smaller screens.

Migrating from Bootstrap 3 to Bootstrap 5
If you are migrating to Bootstrap 5, it is important to note that the col-xs-6 class is no longer supported and has been replaced with col-6. This change applies to other xs columns, as the -xs has been removed. Follow the steps below to get started.
- Replace instances of col-xs-6 with col-6 or col-xs-4 with col-4 in your field options CSS Layout Classes box.
- If you haven't already, remove the old custom CSS added using the Bootstrap 3 guide.
- Add the filter and custom CSS from the Bootstrap 5 guide.
Make mobile-friendly forms with Bootstrap 5
With Bootstrap 5, you can create mobile-friendly forms using flexbox. Learn how to build layouts with the flexbox grid.
- Install and activate the Bootstrap styling add-on. This add-on is included in the Formidable Plus plan and higher.
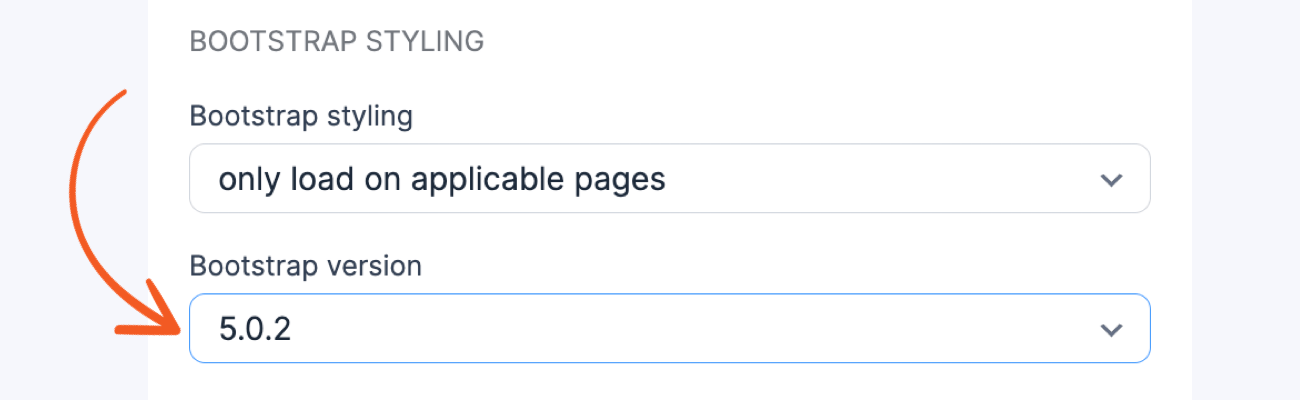
- Go to Formidable → Global Settings → General Settings, and choose 5.0.2 as the Bootstrap version.
- Add this code snippet to your site. To learn more about how to use code examples like this, see the Formidable Hooks guide.
add_filter( 'frm_fields_container_class', function() { return 'class="frm_fields_container row"'; } ); - In the Formidable → Global Settings → Custom CSS page, add a custom CSS like this:
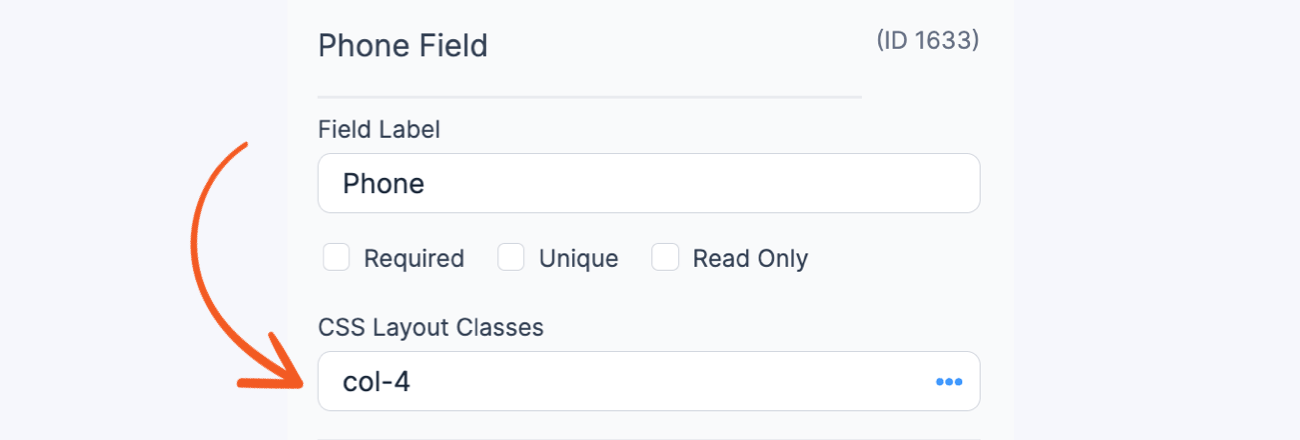
.frm_fields_container { display: flex !important; grid-gap: 0 !important; } - To optimize the layout of your form on mobile devices, you can add three fields with a CSS layout class of col-4 for each field.
It will ensure that your form will display three columns, even on small screens. - Learn more about the other Bootstrap layout options available.
- col-6: Display two fields side by side.
- col-6 col-md-4: Display three fields side by side on bigger screens and two fields side by side on smaller screens.

Create an inline form

If you want to customize your form layout and create an inline form where all the fields are aligned in a row, follow the steps below.
-
- Create a new form or edit an existing one.
- Add the fields where you want to apply the inline formatting. In this example, we will add a Name field and Email field. By default, these fields are stacked.
- Use our drag-and-drop layout builder to move the fields in a row.
- To make room for the submit button in the 12-column grid, hover over the row and click the Layout icon right above the row.
- Click Custom Layout and change the value to 6 and 3. Alternatively, you can use the CSS Layout Classes box to add frm_first frm6 for the Name field and frm3 for the Email field.
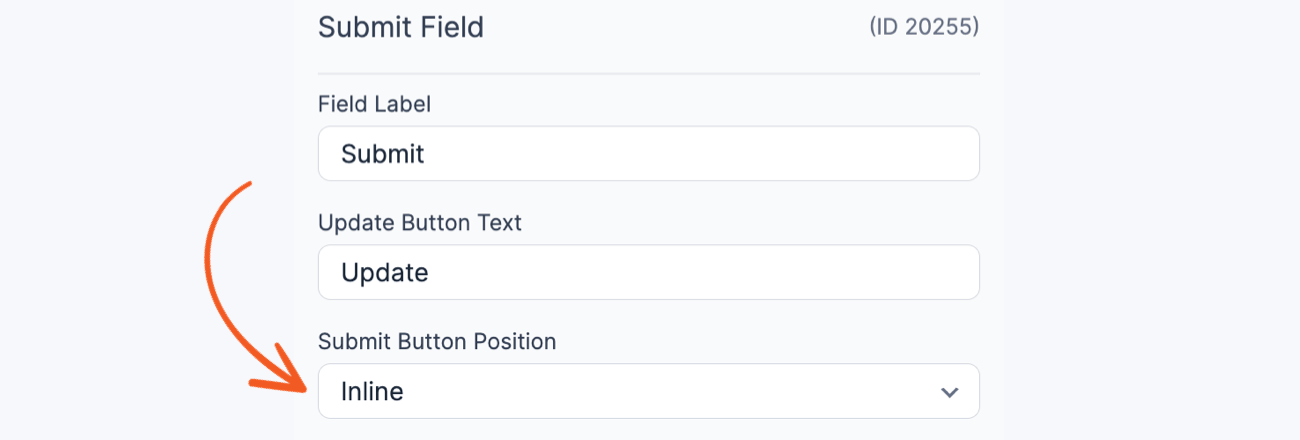
- In your form builder, click the Submit button to open the field options. In the Submit Button Position dropdown, select Inline.
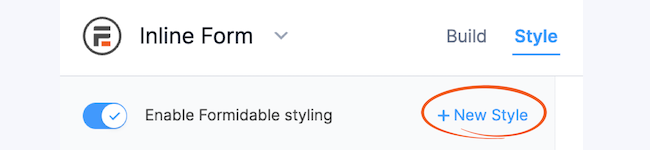
- To line up the submit button to the form fields, go to form Style page. Click the New Style button and create a new style called Inline Style.
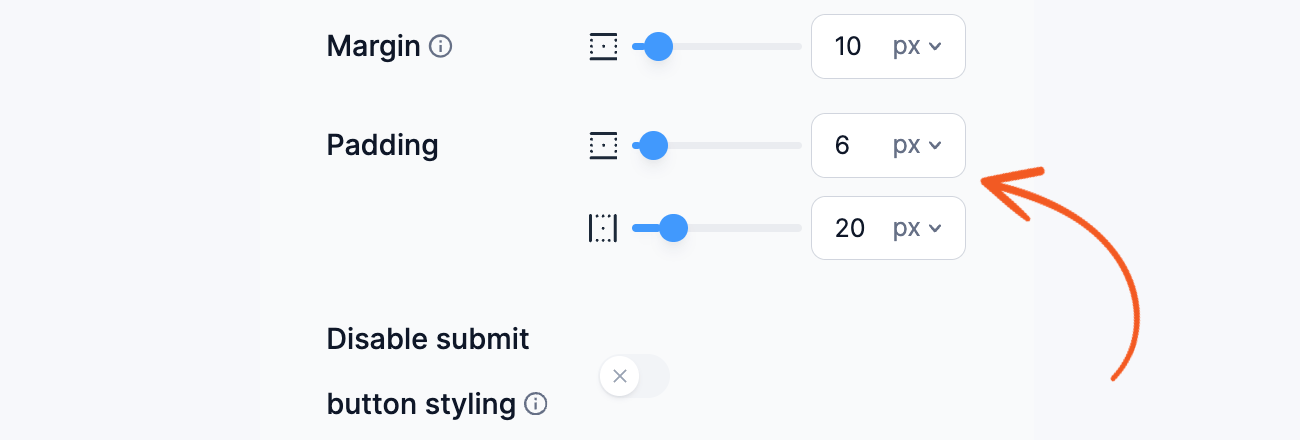
- Look for the Button section and change the padding to 6px 20px. Click the Update button to save.
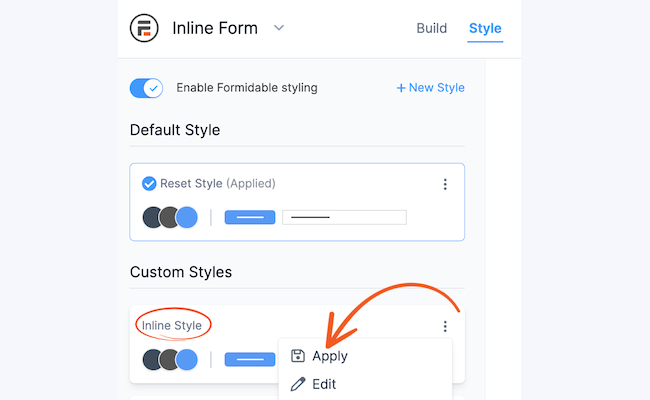
- Go back to the form Style page. Select lnline Style and click the Apply link.


- You're all done! Your inline form should look like this.

More layout customization
Users familiar with HTML can further customize the form layout by using the Customize HTML tab on the form settings page.
