
The Form Settings may be used to customize the action after submission, permissions, styling, and messages for an individual form.
Upgrade your WordPress site with powerful, flexible forms.
Basic settings
When you first create a form, you will be asked to add a form name and description in the form builder. If you would like to make changes, you can edit it in the Settings → General Form Settings page.
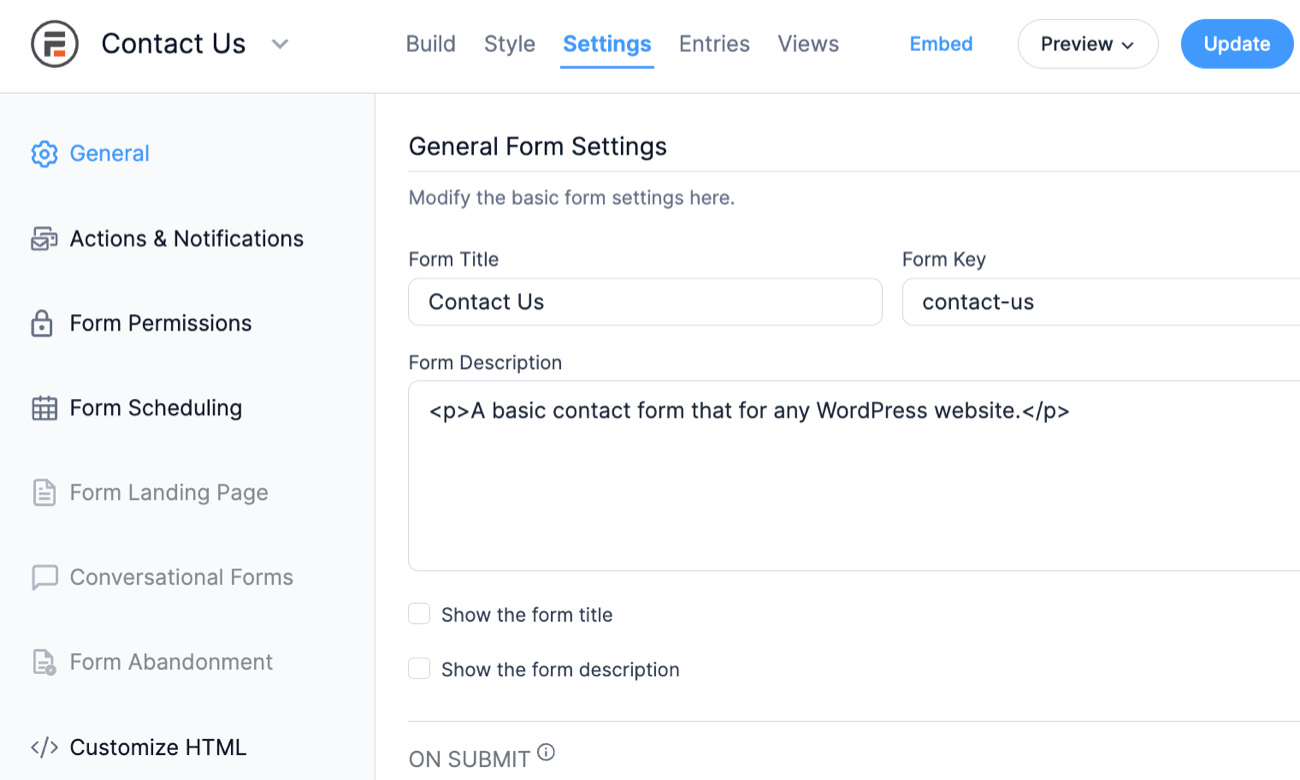
- Form Title: Add a name to allow your users to get an overview of the form.
- Form Key: While this is automatically generated based on the form name that you first added, you can still change this if you want.
- Form Description: Add a description to provide information about the form such as instructions, notes, updates, and more.
- Show the form title: Select this checkbox if you would like the form title to be displayed with the form when published.
- Show the form description: Select this checkbox if you would like the form description to be displayed with the form when published.
- Embed button: Easily publish the form on a page/post.
From Idea to Reality in Minutes. Build Powerful Forms, Dashboards, Apps and More.
Formidable Forms makes advanced site building simple. Launch forms, directories, dashboards, and custom WordPress apps faster than ever before.
On submit
Choose what happens after an entry is submitted.
Storing entries
You can choose if you would like to save entries from this form or not. All the entries will be saved automatically unless the Do not store entries submitted from this form is checked. Note: There is no way of retrieving entries that are not saved.

AJAX

Load and save form builder page with AJAX
This is recommended for long forms. Instead of a complete page refresh when you load or update a form, the form will be loaded and saved with Ajax. This will make the load time considerably faster for long forms.
Submit this form with Ajax
 Allows the user to submit the form without a page refresh. Ajax refreshes only the form when the user hits Submit by exchanging data with the server and updating parts of a web page without reloading the whole page.
- If your form contains a signature or rich text field, it will not be submitted via AJAX. This is a current limitation of the AJAX Submit feature.
- If your form is shown with the confirmation message and Ajax submission is enabled, the form won't have access to the params in the URL. You can either turn off Ajax submission or use this code example to show a message and then redirect.
Validate this form with javascript
Required fields, phone format, email format, and number format can be checked instantly in your browser. After typing into a field the format will be checked, and any error messages for the field will be immediately added or removed without clicking the submit button.
Some types of validation are still run after submit, when communication is needed with the server. This includes unique fields, spam checks, and other PHP validation. Depending on your form, especially if you have any customizations to remove validation messages on certain fields, it may be better to keep javascript validation turned off.
Form permissions
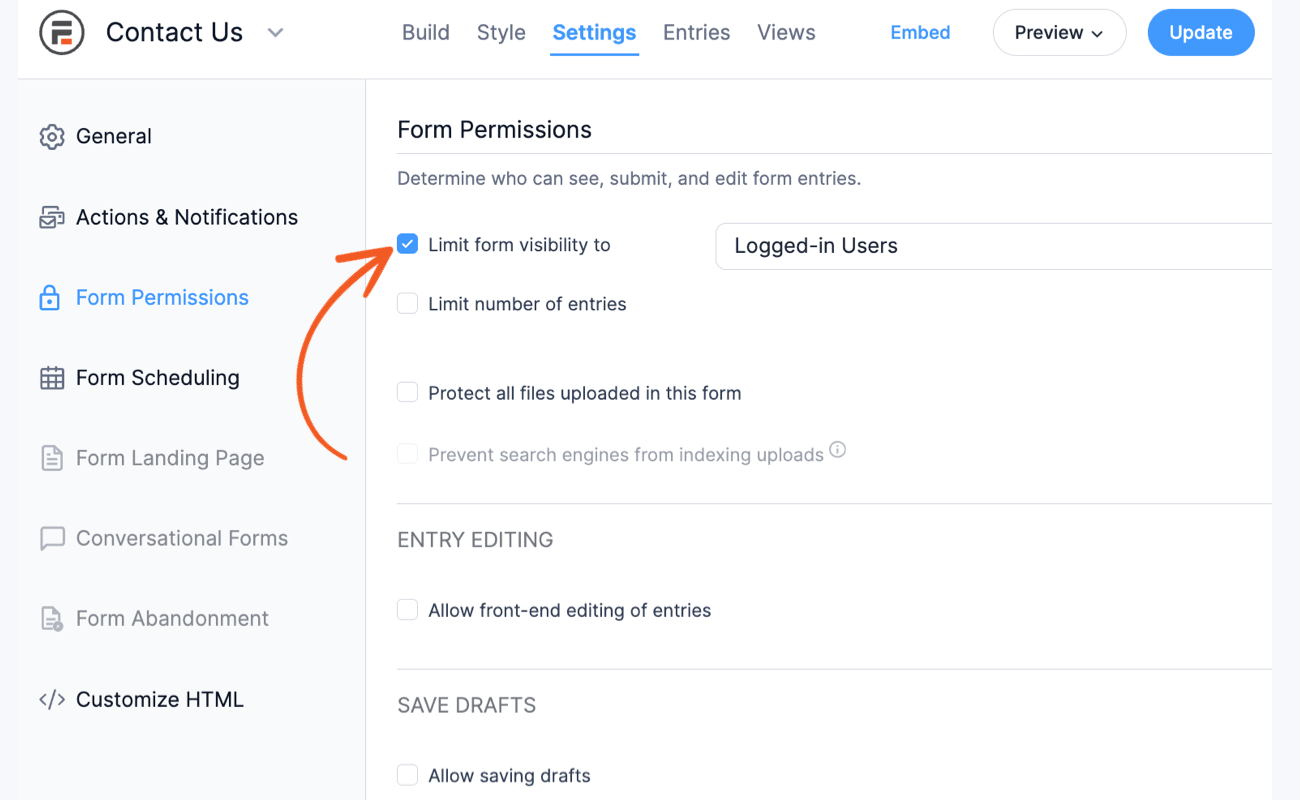
Limit form visibility
Allows you to choose which user roles can see and submit the form. A logged-in user is someone who is logged in with a WordPress user account on your site before filling out the form. Note: Even if you don't publish your form, it may be accessible via the preview URL. If you do not want unauthorized users submitting your form, we recommend that you set the form visibility to prevent this.
Limit number of entries

Limit the number of entries and avoid duplicates by selecting one or all options.
-
- Logged-in user. Limit one entry per logged-in user. If this option is not selected, users can submit multiple entries.
- IP address. Restrict form submission to one entry per IP address.
- Saved cookie. Limit the number of times a response can be used in a field within a specific time. By default, it prevents duplicate entries within 60 seconds. You can set the hours in the Cookie expiration box.
- Email address. Prevent duplicate entries by requiring a unique email address when submitting the form. This option is automatically enabled for forms with unique email.

Allow front-end editing of entries
This will allow certain users to edit form submissions. You may allow a particular user role to edit their own submissions or all form submissions. To learn more about editing responses, click here.

Protect all files uploaded in this form
This file permissions option will appear when the form includes a file upload field. When enabled, uploaded files cannot be accessed directly using the file URL. It prevents files from being indexed and searchable by Google and other search engines.
You may also restrict any files uploaded in a form to be restricted to a specific user role. Anyone without this role will see an error message when trying to access files they don't have permission to view.
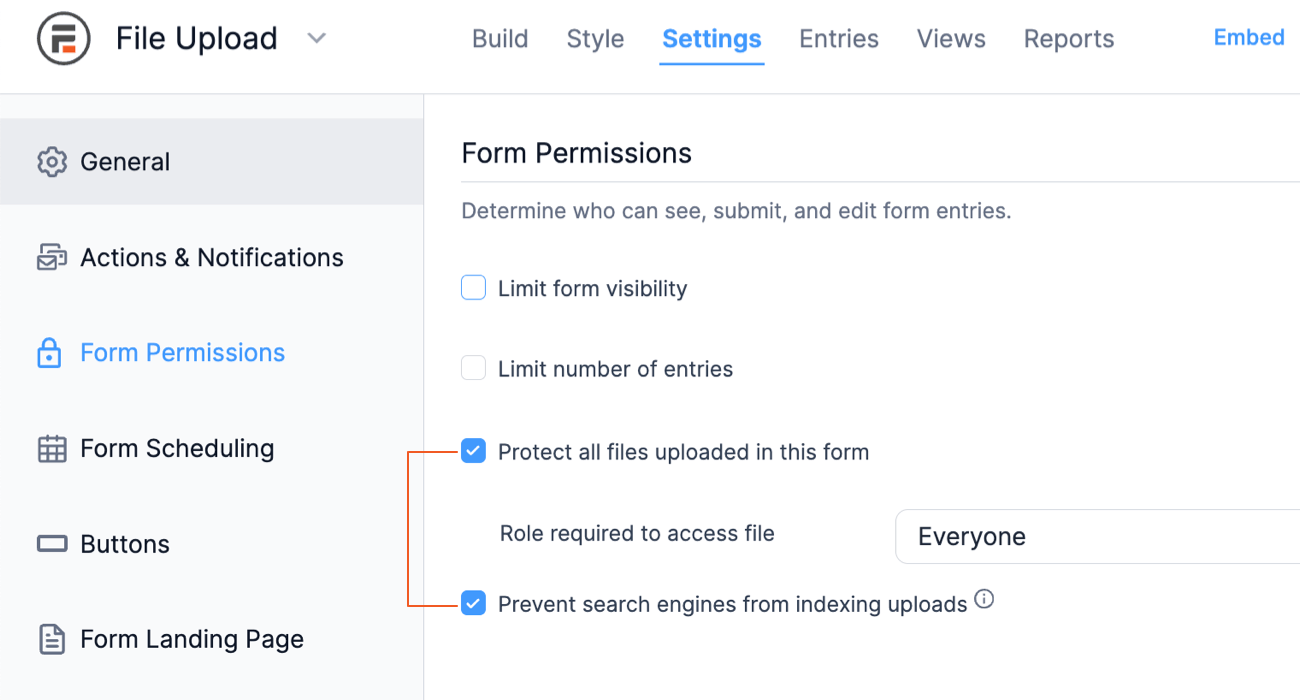
Prevent search engines from indexing uploads
This option requires File protection to be enabled and is applied for new files before the entry has been submitted.
If you are using Apache and want to prevent indexing uploads without file protection, you can configure your htaccess file to prevent bots from indexing specific paths.
Copy this form to other blogs
Allows you to copy the current form network-wide when Formidable Forms is activated. This setting only shows up when it's a multisite network.
- In the form Settings → Form Permissions, select the checkbox Copy this form to other blogs when Formidable Forms is activated.
- Install and activate Formidable Forms on the new subsite.
- It will automatically copy the form but not the entries. This option works for both the master site and subsites. It will not copy the form to sites where Formidable Forms is already activated.

Save and continue forms

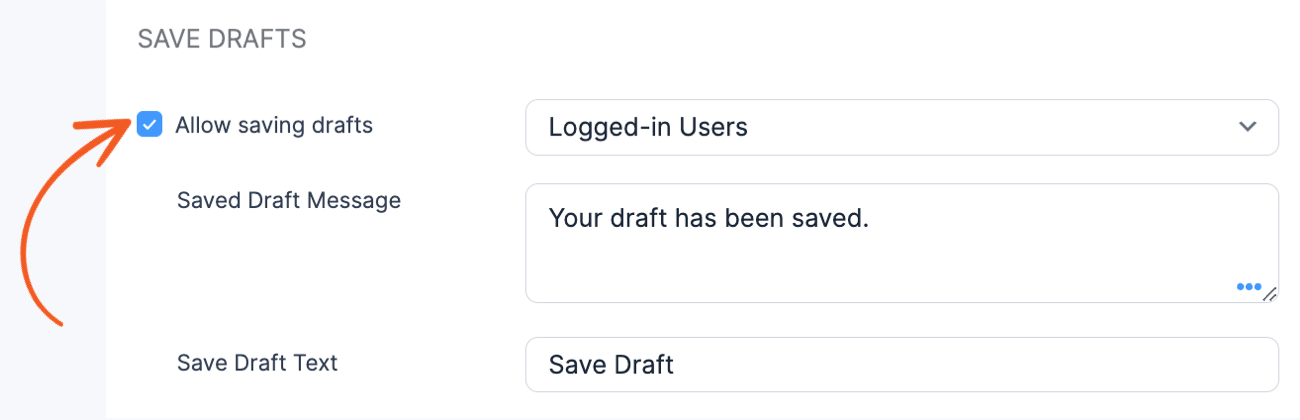
Allow logged-in users to save drafts
Allows the logged-in user to save a partially completed form as a draft. A logged-in user is someone who is logged in with a WordPress user account on your site before filling out the form. When the user returns to the form, they can continue where they left off. Users can save their draft as many times as they would like, but once it is submitted, it cannot be reverted to a draft. Each user can only have one draft at a time. To enable this setting, follow the steps below.
-
- Go to your form Settings → Form Permissions page.

- Select the Allow saving drafts checkbox.
- In the dropdown field next to it, select Logged-in Users.
- Go to your form Settings → Form Permissions page.
-
-
- If you want to enable saving drafts for logged-out users, get the Form abandonment add-on available in the premium plugin.
- If you have set your emails to trigger when a Draft is saved, only the first draft is saved.
- When this option is turned on for multipage forms, a draft is saved automatically every time a user navigates between pages, whether from Page 1 to Page 2 or Page 1 to Page 4.
-
Save draft text
Go to your form Settings → Form Permissions page and select the Allow saving drafts checkbox to customize the text that will be shown after a form is saved as a draft.

Saved draft message
Go to your form Settings → Form Permissions page and check the Allow saving drafts checkbox customize the message that will be shown after a form is saved as a draft.

Change Save draft link to a button
Go to your form Settings → Customize HTML → Submit button section and replace the existing '[if save_draft]' with this:
[if save_draft]<a href="#" tabindex="0" class="frm_save_draft frm_form_submit_style" [draft_hook]>[draft_label]</a>[/if save_draft]
Allow multiple drafts
Since each user can only have one draft at at time, you could still allow your users to create multiple drafts by creating an entry status field.
- Go to the form builder page.
- Add a dropdown field and label it as Entry Status.
- Add Draft and Final as the dropdown options.
A user can indicate if they're submitting a draft or the final entry by choosing the status from the Entry Status dropdown. If the entries are being used in a View, add a filter in the Advanced View settings to only show entries where the Entry Status is equal to Final.
Form scheduling

Set your form to open at a later date or close automatically to stop accepting entries. While open, the form will appear wherever the form shortcode is used. When closed, the 'Form Closed Message' will appear in place of the form.
To set a specific time, use HH:MM format. For example, to open the form at 8:30 AM, use 08:30 for the time. To open at 1:30 PM, use 13:30. This time will use the timezone set in your WordPress settings.
- Open. By default, the form is always open and will accept submissions indefinitely.
- Closed. Set Closed as the form status to manually close the form at any time.
- Schedule. Schedule the form to open and/or close on specific dates.
- Limit Entries - Close the form after a specified number of entries have been collected in the form. This is based on the total count of entries in the form.
- Schedule and Limit Entries. Schedule the form by date and limit by the number of entries in the form. When both a close date and limit are set, the form will be closed based on which is reached first.
Messages
As of version 6.0, messages can be edited using the Success Confirmation form action. You can add any values from the submitted entry to your confirmation message. Use the links and buttons in the right sidebar to add fields from your form. You can add text and HTML in this box.
To customize the message seen when you submit an entry, learn more about how to show a message with Confirmation form action.
To customize the message seen after an entry is updated, learn more about how to show a message after editing. This box will only appear if the Allow front-end editing of entries checkbox is checked.
To customize the message seen after an entry is saved as a draft, learn more about how to edit the saved draft message.
Related developer hooks
- Enable saving drafts by default for newly created forms with the frm_new_form_values hook.
- Enable file protection by default for newly created forms with the frm_new_form_values hook.
