
With front-end editing, you can allow logged-in users to edit their submissions, allow administrators to edit all entries, or set other form-specific editing permissions based on user role. You may set up editing with a View, create a clickable list of entries with a shortcode, or pull up a user's only entry automatically for editing. Creating a View is recommended for greater flexibility.
Upgrade your WordPress site with powerful, flexible forms.
How to allow editing
If you would like to set up front-end editing or allow users to delete entries from the front-end, you'll need to allow front-end editing first.
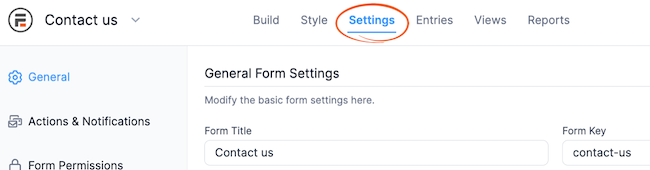
- Go into edit your form and click the Settings tab.

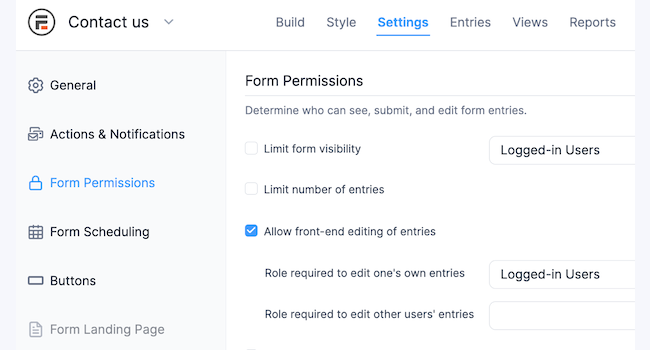
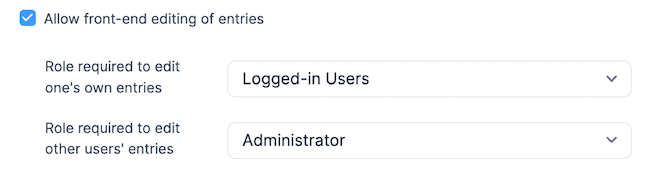
- Scroll down to Form Permissions. Check the Allow front-end editing of entries box. Determine which user role can edit their own submissions and which user role can edit responses submitted by other users.
That's it! Now when you add an edit link or delete link to a View, the user will see the link if they have permission to edit.
From Idea to Reality in Minutes. Build Powerful Forms, Dashboards, Apps and More.
Formidable Forms makes advanced site building simple. Launch forms, directories, dashboards, and custom WordPress apps faster than ever before.
Set up editing with a View
If you would like to set up front-end editing, we recommend that you create a View where users can see their submitted entries and edit them via an edit link. There are two main types of edit links: a standard edit link and an in-place edit link. The standard edit link will take the user to the form to edit their entry. The in-place edit link will pull up the form "in-place" for editing so the user doesn't have to leave the page.
Standard editing
If you would like users to see edit links alongside their entries, which links take the user to the published form for entry editing, follow the instructions below.
- Go into edit your form and click the Settings tab.
- Scroll down to Form Permissions. Check the Allow front-end editing of entries box. Determine which user role can edit their own submissions and which user role can edit responses submitted by other users.
- Publish your form on a page. Make note of the Page ID where the form is published.
- Create a table View, numbered list View, basic listing View, or any other type of View. If you have already created a View that you would like to use, skip this step.
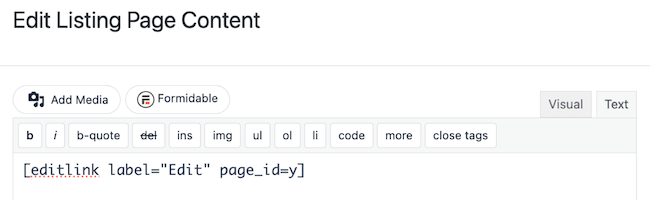
- In the Listing Page Content box, select the Text tab and insert the editlink shortcode. Replace y with the Page ID where your form is published (from step 3).
[editlink label="Edit" page_id=y]
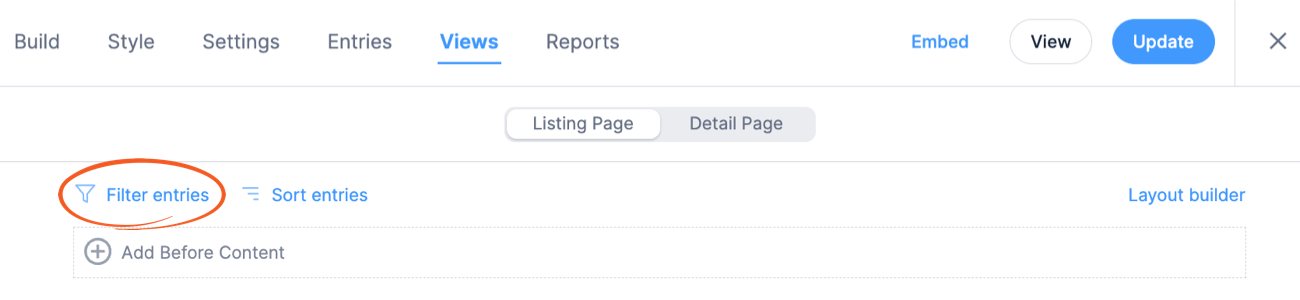
- In the View Builder, click the Filter entries link.
Set up the filter so it says User ID is equal to current_user. You must have the User ID (hidden) field in your form for this to work. - Click Update to save your View.
- Publish your View on a page if you have not done so already.

When the page is visited, a logged-in user will only see entries that they submitted. If they have permission to edit the entry, an edit link will appear by that entry.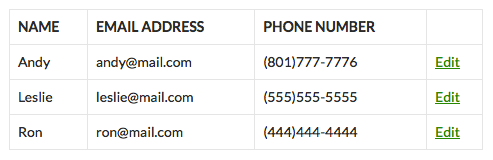
Edit in-place
If you would like to allow users to edit an entry in-place without leaving the view, follow the instructions below.
- Follow steps 1-4 here.
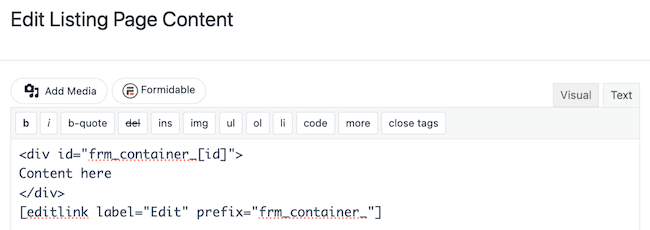
- In the Listing Page Content box, select the Text tab and insert the following shortcode. Replace Content here with any content you would like.
<div id="frm_container_[id]">
Content here
</div>
[editlink label="Edit" prefix="frm_container_"]
- In the View Builder, click the Filter entries link.
Set up the filter so it says User ID is equal to current_user. You must have the User ID (hidden) field in your form for this to work. - Click Update to save your View.
- Publish your View on a page if you have not done so already.
When the page is visited, a logged-in user will only see entries that they submitted. If they have permission to edit the entry, an edit link will appear by that entry. When the edit link is clicked, the user will be able to edit the entry with out leaving the view.
Edit only certain fields in place
If you would like to limit your editing in place to only certain fields, you can add the fields="100,101,102" parameter to the editlink. Change 100,101,102 to the fields you want to include in editing in place.
To begin the form on a specific page, you can add the start_page="2" parameter to the editlink. Change 2 with the page number.
<div id="frm_container_[id]">
Content here
</div>
[editlink label="Edit" prefix="frm_container_" fields="100,101,102" start_page="2"]
Edit and delete in-place
If you would like to be able to edit and/or delete an entry in-place on the front-end of your site, follow the directions below. Editing and deleting in place uses Ajax so the entry can be edited/deleted without a page refresh.
- Follow steps 1-4 here.
- In the Listing Page Content box, select the Text tab and insert the following shortcode.
<div id="frm_del_container_[id]"><div id="frm_edit_container_[id]">
Majority of your content will go here. This is where the form will appear when you hit the Edit link.
</div>
[editlink label="Edit" prefix="frm_edit_container_"]
[deletelink label="Delete" prefix="frm_del_container_"]
Some additional content may go here.
</div>
The outer frm_del_container_[id] div holds all of the content that will be removed when you click the Delete link. The inner frm_edit_container_[id] div holds all of the content that will be replaced with a form when you click the Edit link. - In the View Builder, click the Filter entries link.
Set up the filter so it says User ID is equal to current_user. You must have the User ID (hidden) field in your form for this to work. - Click Update to save your View.
- Publish your View on a page if you have not done so already.

When the page is visited, the user has the option of editing or deleting the entry in-place. The user will only see the edit/delete links if they have permission to edit the entry.
Create clickable list of entries
In order to make front-end editing easy for your users, you'll need to create a page where the user can see their submitted entries and edit them via an edit link. Follow the instructions below to create a clickable list of the current user's entries. When an entry is clicked, the user will be taken to edit the entry.
- Go into edit your form and click the Settings tab.
- Scroll down to Form Permissions. Check the Allow front-end editing of entries box. Determine which user role can edit their own submissions and which user role can edit responses submitted by other users.
- Publish your form on a page. Make note of the Page ID where the form is published.
- Create a new page or go to the page where your form is published. Insert the following shortcode:
[frm-entry-links id=x page_id=y]
Replace x with the form ID/Key and replace y with the Page ID where the form is published.
This shortcode will display a list of entries that the current user submitted. The entry's creation date will be shown in the list by default.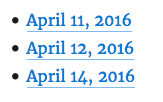
When the user clicks on one of these dates, they will be able to edit that entry. For customization of the entry list, see how to display a List of Entries.
Create table with an edit link
If you would like to display all entries in a table format with an edit link, follow the steps below.
- Go into edit your form and click the Settings tab.
- Scroll down to Form Permissions. Check the Allow front-end editing of entries box. Determine which user role can edit their own submissions and which user role can edit responses submitted by other users.
- Publish your form on a page. Make note of the Page ID where the form is published.
- Create a new page. Insert this shortcode on the page:
[formresults id=x edit_link="Edit" page_id=y]
Replace x with the form ID/key and replace y with the Page ID where the form is published (in step 3). You can insert the shortcode on the same page where the form is published on or create a new page.
Now when the page is visited, all entries will display in a table format with an edit link.
For more information on this shortcode, see the Display All Entries in a Table page.
Set up edit in-place with a table view
Start with these instructions to create a table View. Then follow the instructions below to enable front-editing.
-
- In the View builder, add a column by clicking the plus icon on the right side of the table. Set the column name to Edit.
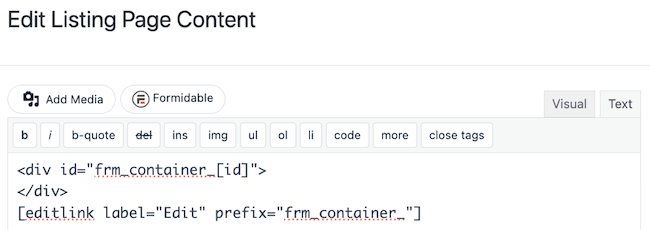
- In your new column Listing Page Content box, select the Text tab and insert the following shortcode.
<div id="frm_container_[id]">
</div>
[editlink label="Edit" prefix="frm_container_"]
- In the View Builder, click the Filter entries link.
Set up the filter so it says User ID is equal to current_user. You must have the User ID (hidden) field in your form for this to work. - Click Update to save your View.
- Publish your View on a page if you have not done so already.
- In the View builder, add a column by clicking the plus icon on the right side of the table. Set the column name to Edit.

When the page is visited, the user can click the Edit link to open the front-editing for that specific entry. Note that the user can only see the edit link if they have permission to edit the entry.
Pull up single entry for editing
If you would like to limit each user to one entry and you would like to automatically pull up their entry for editing when they visit the form, follow the steps below:
- Go into edit your form and click the Settings tab.
- Scroll down to Form Permissions. Check the Limit number of form entries to one per box, and the Allow front-end editing of entries box. Determine which user role can edit their own submissions and which user role can edit responses submitted by other users.
- Publish your form on a page.

Now when the user visits the form, their entry will automatically appear ready to be edited.
Add edit link for specific entry
If you would like to add an edit link for a specific entry follow the directions below.
- Go into edit your form and click the Settings tab.
- Scroll down to Form Permissions. Check the Allow front-end editing of entries box. Determine which user role can edit their own submissions and which user role can edit responses submitted by other users.
- Publish your form on a page. Make note of the Page ID where the form is published.
- Add this shortcode to a page, post, or widget:
[frm-entry-edit-link id=x label="Edit" page_id=y]
Replace x with the entry ID, and replace y with the Page ID the form is published on.
- The entry ID can be found by going into your form and clicking on 'Entries'. The furthest left column typically contains the entry IDs. If you are inserting this link directly on a post page that was created by Formidable, you can use id="current" to dynamically get the ID of the entry from the post being viewed.
- You can include form_id=x in this shortcode. This is the ID of the form which holds the entry to edit. Including this parameter will slightly decrease processing time.
Now when the page, post, or widget is visited, an edit link will appear if the user has permission to edit the entry. When the edit link is clicked, it will take the user to the form to edit the specified entry.
Trigger action after editing
You can trigger a Confirmation action after editing an entry where you can find the Entry is updated option in the Trigger this action when dropdown. With this action, you can show a message, redirect to a URL, or show the page content after editing.
Show Message after editing
If you want to show a message after updating an entry, indicate the confirmation message you would like to be displayed in the form settings.
- Go to your form Settings → Form Permissions. Select the Allow front-end editing of entries checkbox and configure which role is required to edit one's own entries or other users' entries.
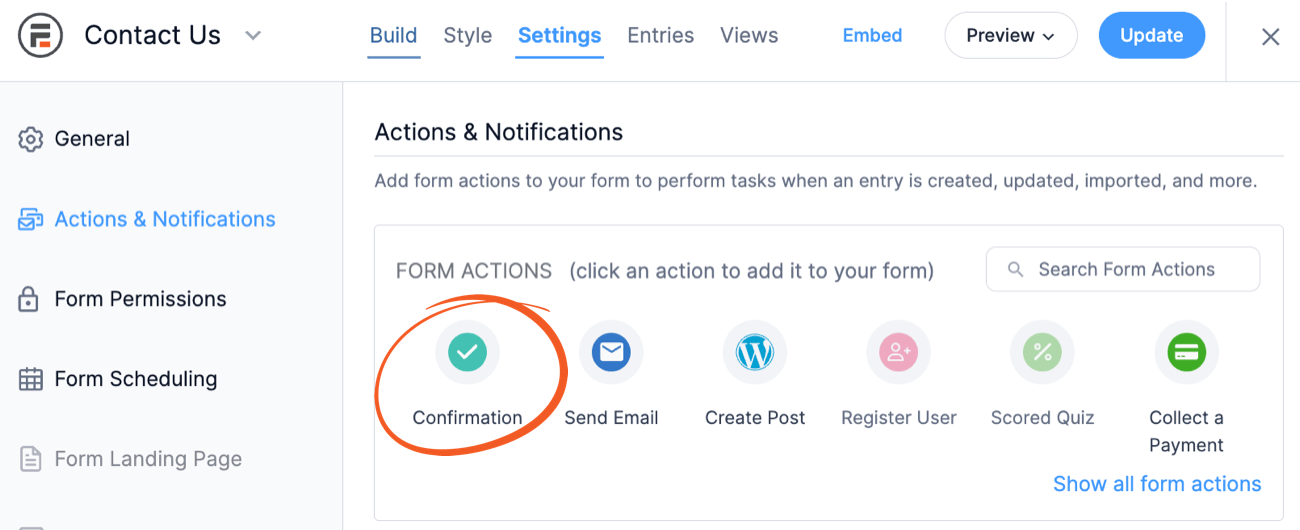
- Go to your form Settings → Actions & Notifications page.
- Click the Confirmation action to add a notification.
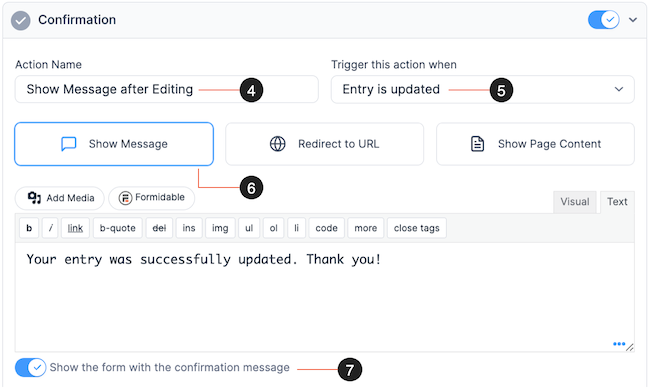
- In the Action Name box, add a label for easy reference.
- Trigger this action when the Entry is updated.
- Select the Show Message button. Use the Rich text editor to customize the success message.
- Toggle the Show the form with the confirmation message option if you want to include the form below the confirmation message.
- Once done, click the Update button to save your changes.
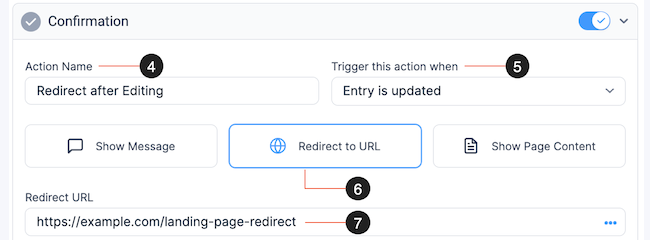
Redirect after editing
If you want to set a redirect after updating an entry, indicate the redirect URL in the form settings.
- Go to your form Settings → Form Permissions. Select the Allow front-end editing of entries checkbox and configure which role is required to edit one's own entries or other users' entries.
- Go to your form Settings → Actions & Notifications page.
- Click the Confirmation action to add a notification.
- In the Action Name box, add a label for easy reference.
- Trigger this action when the Entry is updated.
- Select the Redirect to URL button.
- In the Redirect URL box, enter the URL where you want users to be redirected after editing.
- Once done, click the Update button to save your changes.
If you want to redirect the user to its referring URL after editing, use the frm_setup_edit_fields_vars code example.
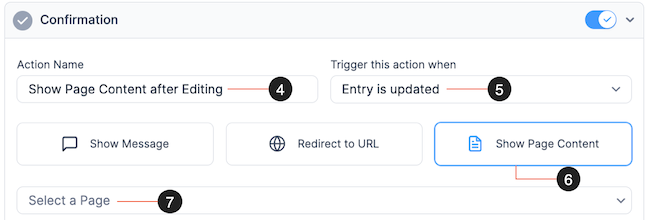
Show Page content after editing
If you want to show the content of a published page after updating an entry, indicate the selected page in the form settings.
- Go to your form Settings → Form Permissions. Select the Allow front-end editing of entries checkbox and configure which role is required to edit one's own entries or other users' entries.
- Go to your form Settings → Actions & Notifications page.
- Click the Confirmation action to add a notification.
- In the Action Name box, add a label for easy reference.
- Trigger this action when the Entry is updated.
- Select the Show Page Content button.
- In the Select a Page dropdown, choose the page on which you would like users to view the content.
- Once done, click the Update button to save your changes.
Editlink shortcode
You may insert an edit link in a View in order to allow users to easily update entries from the front-end of your site. Before an edit link will work correctly, you must set up your form to allow editing. Editing permissions can be modified on your form's Settings page.
Usage
Insert the following shortcode in a View:
[editlink label="Edit" page_id="y"]
Replace y with the ID of the page where your form is published.
Please note: The edit link will only appear for those authorized to edit the entry.
Parameters
The following parameters can be used with the editlink shortcode.
Required
- page_id – The ID of the page where the form is published. You can find the ID of a page by going into edit the page and looking in the address bar as shown below.
Please note: While the page_id parameter in the deletelink shortcode can be used to redirect after deletion of the entry, this is not the intended function for the editlink.

Optional
- label – Change the text of the edit link which is 'Edit' by default. Use label=0 to show only the edit link URL without any added HTML.
[editlink label="Edit" page_id=y]
- class – If you are using the label parameter, you can add an HTML class to the edit link to add styling.
[editlink label="Edit" class="my_edit_class" page_id=y]
- title – Set a value on the link title that shows on hover. If this is not specified, the label value will be used.
[editlink label="Edit" title="Edit now" page_id=y]
- fields – When using in-place-edit, include a comma-separated list of the field ids to only show a few fields (or a single field). See more detail on using this option above. Please note: This parameter will only apply when using edit in-place.
[editlink label="Edit" fields="25,26" prefix="frm_container_"]
- exclude_fields – To exclude a few fields (or a single field), include a comma-separated list of the field ids to exclude. Do not combine with the 'fields' parameter above. Please note: This parameter will only apply when using edit in-place.
[editlink label="Edit" exclude_fields="25,26" page_id=y]
- prefix – If you would like to edit the entry in-place (as seen in the help desk), use the prefix parameter. In order to use the prefix parameter, you must add a div or other HTML element around your content which has an id like frm_container_[id]. When the edit link is clicked, everything inside of this container element will be replaced with the form and entry for editing. The edit link must go outside of this container element in order for the 'Cancel' link to show when editing. This may be how it would look in a View:
[editlink label="Edit" cancel="Cancel" prefix="frm_container_"]
<div id="frm_container_[id]">
Content here
</div>
The text in red must match in order for prefix to work properly.
- cancel – If using the prefix parameter, you can change the label on the cancel link. By default, the link will say Cancel.
[editlink label="Edit" cancel="Cancel" prefix="frm_container_"]
- cancel – If using the prefix parameter, you can change the label on the cancel link. By default, the link will say Cancel.
Add parameter to editlink
To get the URL, use something like:
[editlink label=0 page_id=25]&my_param=28
You could then add your own link HTML around it.
<a href="[editlink label=0 page_id=25]&my_param=28">Edit</a>
frm-entry-edit-link shortcode
While the editlink shortcode is only for Views, the frm-entry-edit-link shortcode can be used anywhere WordPress allows shortcodes.
frm-entry-edit-link Parameters
This shortcode accepts all of the parameters listed above for the editlink shortcode. However, the entry id is required since it cannot be set automatically.
Required
- id – The ID of the entry to edit. Options include the numeric ID or current when the shortcode is included on a post that was created by a Formidable Form.
[frm-entry-edit-link id=current page_id=200]
PHP Alternative
echo FrmProEntriesController::entry_edit_link( array( 'id' => x, 'label' => 'Edit', 'page_id' => y ) );
Replace x with entry ID to be edited, and replace y with the Page ID where the form is published.
Limitation
If you have a rich text field in your form with front-editing enabled, the links in the field will be stripped. This security measure was implemented to sanitize input from unprivileged users. By default, only site administrators can save HTML tags in your rich text fields.
If you want to allow non-administrators to save additional tags, you can use the frm_allowed_form_input_html filter. However, it's important to be aware that allowing anchor tags from untrusted sources can create security risks. While it's generally not recommended, it may become necessary in exceptional cases, such as ensuring backward compatibility.
Troubleshooting
Edit links are not visible
When the edit links are not showing, there are a few things you can check for.
- Have you configured your form settings to allow front-end editing?
- Are you logged in with a user who has access to edit that entry?
- If it is only allowed for users to edit their own entries, are you logged in with the correct account?
- If a role is selected to allow others to edit, do you have the allowed role? If this is a custom role, you will need to be logged in with the exact role selected.
If you continue to have trouble with the edit links not showing, please create a new ticket in the help desk.
Related developer hooks
- Allow logged-out users to edit entries with the frm_user_can_edit hook.
- Prevent editing after a certain date with the frm_user_can_edit hook.
- Prevent editing after 24 hours with the frm_user_can_edit hook.
- Only allow one edit with the frm_user_can_edit hook.
- Prevent editing based on field value with the frm_user_can_edit hook.
- Allow non-administrators to save additional tags with the frm_allowed_form_input_html hook.
