
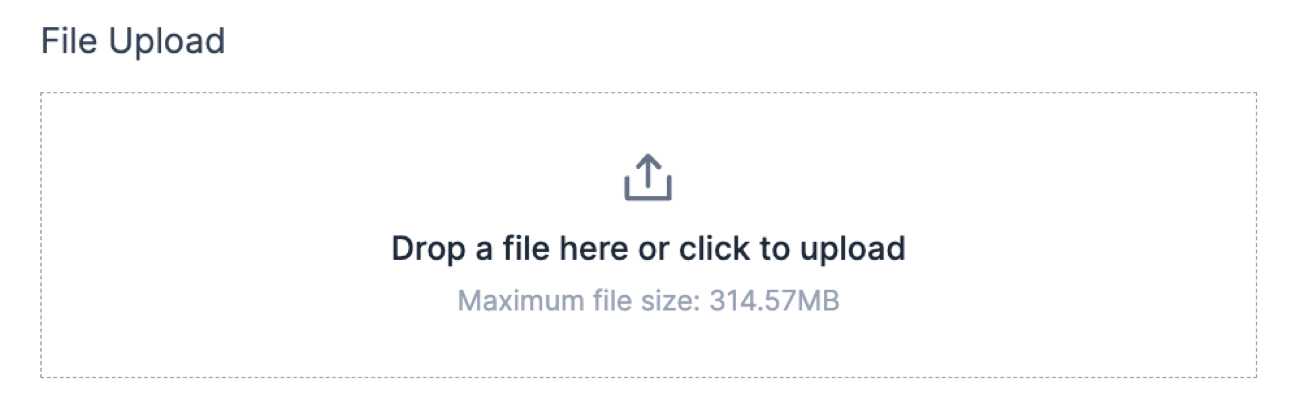
A WordPress File Upload field allows users to easily upload files in a form. You can click to add files or drag and drop files into the field. The uploaded files are stored in your WordPress Media Library in the location specified in your WordPress settings.
Upgrade your WordPress site with powerful, flexible forms.
Standard field options
A File Upload field has the following standard options:
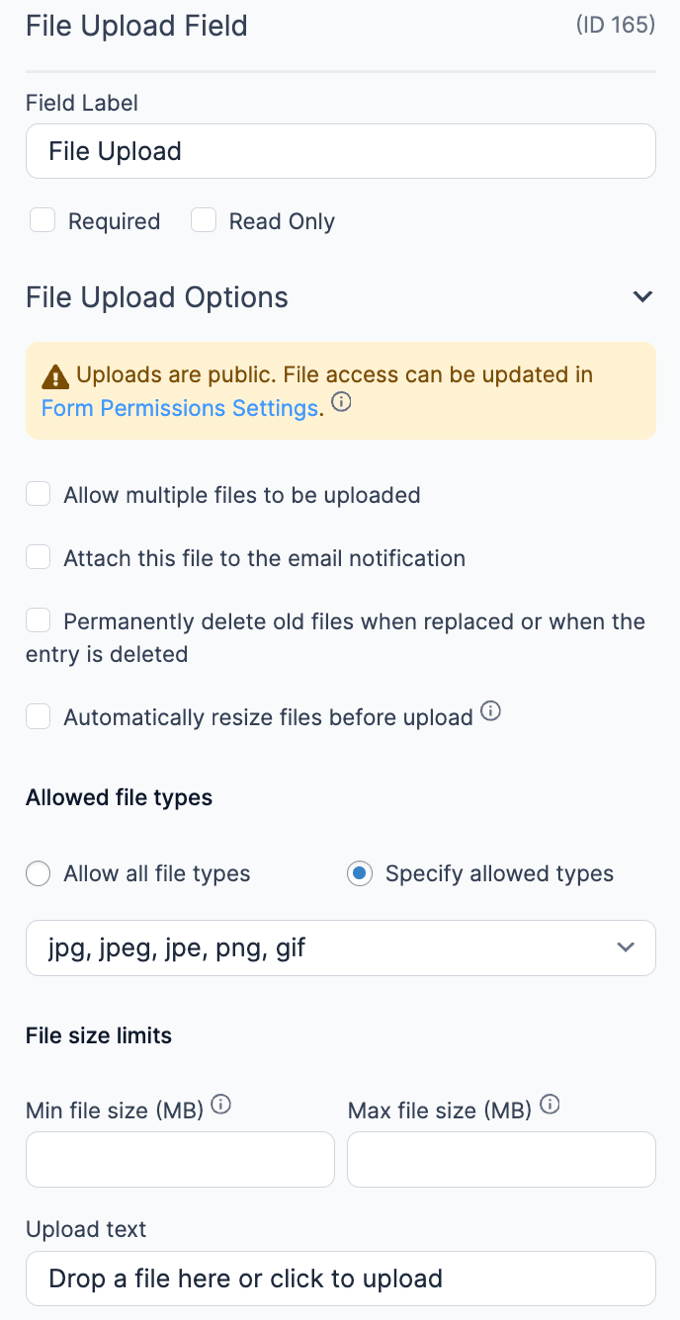

- Required
- Read Only
- CSS layout classes
- Dynamic default value
- Visibility
- Label position
- Conditional logic
- Field key
From Idea to Reality in Minutes. Build Powerful Forms, Dashboards, Apps and More.
Formidable Forms makes advanced site building simple. Launch forms, directories, dashboards, and custom WordPress apps faster than ever before.
Field specific options
Multiple files
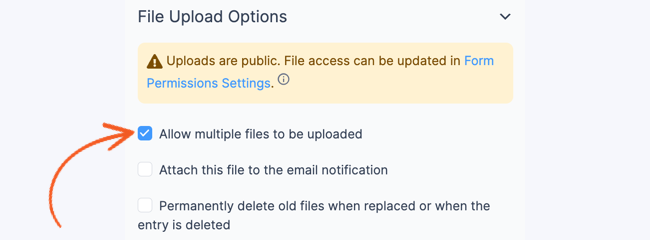
Normally, only one file can be uploaded in a File Upload field, but you can allow multiple files to be uploaded. Open the field options, scroll down to File Upload Options and check Allow multiple files to be uploaded. Learn more how to display files from a multi-file upload field.
When this option is selected, you will also have the option to limit how many files can be uploaded. See the File limits section for more information.
Delete files
By default, files uploaded in a File Upload field will remain on your site indefinitely. If you would like to automatically delete files when they are removed/replaced (in the File Upload field) or when their entry is deleted, you may open the field options, scroll down to File Upload Options, and select Permanently delete old files when replaced or when the entry is deleted.

If you would like to delete files immediately after the entry is created (and after the email notification is sent), see the automatically delete files code snippet. You may use this code snippet if you do not want uploaded files stored on your site.
Email Attachment
Attach the uploaded file(s) to the email notification. Open the field options, scroll down to File Upload Options and select Attach this file to the email notification.

If you have multiple notifications and would like to remove the attachment from some of the notifications then follow the link here.
Allowed file types
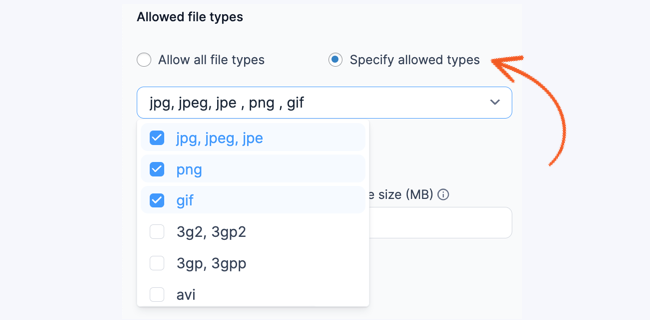
Any file types supported by your WordPress installation can be uploaded in a File Upload field. Since 5.0.12, all new File Upload fields will only allow images (jpg, jpeg, jpe, png, gif) by default. If your form allows public uploads (from untrusted users), allowing PDFs can be a security risk.
To limit the allowed file types, scroll down to Allowed file types in the field options, select Specify allowed types, and check the boxes for the file types you would like to use. In these options, only file types accepted by WordPress will be included.
If you would like to allow additional file types, take a look at the allow extra file types customization.
File size limits
Specify the size limit for each file upload in (MB). Navigate to the field options settings and proceed to the File Upload options. To define the allowable file size range, input the minimum limit in the Min file size (MB) field and the maximum limit in the Max file size (MB) field as numbers.
Note: You must input only numbers as the file size value. For example, you can enter 3 as the maximum file size value instead of 3MB.
When the Multiple file upload option is selected, the Max files per entry box will appear in the File Limits row. To limit the number of uploaded files, insert the maximum number of files per entry that you would like to allow.

Auto resize
When a large image is uploaded, it can be resized before it is saved to your site. To turn on automatic image resizing, check the Automatically resize files before upload box. You can then set either the maximum image height or the width. Resized images will keep their original size ratio.

Upload text
Change the message on a file upload field from Drop a file here or click to upload to something else. If the upload field is using the frm_compact class, the default text can be changed from Choose File.

Field icons
Field action icons allows you to duplicate, delete, and/or move a field on the form builder page. See the field action icons article for more information.
Display images
Display uploaded files in a form's confirmation message, email, or View.
Shortcode options
- File URL: Display the URL of the uploaded file(s):
[x]
Replace x with the ID of the file upload field.
- Show image: Display the image if the WordPress file is an image file type. Display an icon if the file is not an image.
[x show_image=1]
Replace x with the ID of the file upload field.
- Add link: Link to the full-sized image. This may be used in conjunction with show_image=1, show_filename=1, or any other File Upload shortcode parameters.
[x add_link=1]
Replace x with the ID of the file upload field.
- Open link in new tab: Open the link to the image in a new browser tab. The new_tab=1 parameter must be used in conjunction with the add_link=1 parameter.
[x add_link=1 new_tab=1]
Replace x with the ID of the file upload field.
- Image size: Set the image display size using either size=thumbnail, size=medium, or size=full. The default size displayed is the thumbnail. In WordPress, the default thumbnail size is a 150x150 image. Specify a different size to show a bigger image.
[x size=full show_image=1]
Replace x with the ID of the file upload field.
- Add a class: Add a class on the file HTML.
[x class="something"]
Replace x with the ID of the file upload field.
- Show filename: Display the filename of an uploaded WordPress file.
[x show_filename=1]
Replace x with the ID of the file upload field.
- Show attachment ID: Display the attachment ID of an uploaded file.
[x show=id]
Replace x with the ID of the file upload field.
- Show default image: Check for an image and add a default if there isn't one.
[if x][x show_image="1"][/if x]
[if x equals=""]<img src="default.png" alt="" />[/if x]
Replace x with the ID of your file upload field. Replace default.png with the path to your default image.
WordPress gallery
Display uploaded images in a Wordpress gallery using this shortcode:
[gallery ids="[x show=id sep=',']" link="file"]
Replace x with the ID of your File Upload field . Read more about the gallery shortcode and its parameters in the WordPress Codex.
Display uploaded files in a list
Use the example below to display the uploaded files in a bulleted list.
<ul>
    <li>[100 sep="</li><li>"]</li>
</ul>
To display the uploaded files in a numbered list, use this instead.
<ol>
    <li>[100 sep="</li><li>"]</li>
</ol>
Replace 100 with the ID or key of the File Upload field.
Link a custom URL to an image
This guide explains how to create a clickable image in a View that redirects to a custom URL. By using a specific shortcode format, you can set this up by inserting the following code into your View:
<a href="[10]">[20 show_image=1]</a>- Replace 10 with the field ID where the target URL is stored. This ID will specify where the link should redirect.
- Replace 20 with the file upload field ID where the image is stored.
Set a default value
Autopopulate the File Upload field with a file of your choosing.
Use file from media library
If you would like to set a default value in your File Upload field with a file from your WordPress media library, please follow the steps below.
- Go to your WordPress Media → Library.
- Select the WordPress file you want to use as your default value.
- Copy the media ID that can be seen in the address bar.

- Go to your form and open the field options for the File Upload field.
- Scroll down to the Advanced section. In the Default value box insert the media ID of the file from step 3.
- Save the form and click Preview. Now when the page is visited the default file will appear in the File Upload field.


For more information on default values, visit the Default values page.
Use multiple files as default value
If you want to set a default value in your File Upload field with multiple files from your WordPress media library, follow the steps below.
- Go to your WordPress Media → Library.
- Select the WordPress file you want to use as your default value.
- Copy the media ID that can be seen in the address bar.
- Go to your form and open the field options for the File Upload field. Allow multiple files to be uploaded by selecting the checkbox.
- Scroll down to the Advanced section. In the Default value box, insert the media ID of the files formatted as a serialized PHP array.
a:2:{i:0;i:1744;i:1;i:1745;}Replace 1744 and 1745 with the media ID of the files.
- Save the form and click Preview. When the page is visited, the default files appear in the File Upload field.


Use file from previous entry
If you would like to automatically populate a File Upload field with the most recent value submitted by the current user, follow the steps below.
- Go into edit your form.
- Open the field options for the File Upload field.
- Scroll down to the Advanced section. In the 'Default value' box insert the following shortcode:
[frm-field-value field_id="x" user_id="current" show="id"]
Replace x with the ID of the File Upload field that you want to retrieve a value from.
- Save the form and click preview. Now when the page is visited, the uploaded file from the user's previous entry will be shown. If the user is not logged-in, this shortcode will have no effect.
File upload classes
frm_compact
Use this CSS layout class if you want the file upload field to take up less space in your form.
- Open the field options.
- Scroll down to CSS layout classes. Insert frm_compact in the box.
- Save the form and click the Preview button. When the page is visited, the file upload field will be more compact.


frm_full_upload
Use this CSS layout class to make a single file upload field look like a multi-file upload field.
- Open the field options.
- Scroll down to CSS layout classes. Insert frm_full_upload in the box.
- Save the form and click the Preview button. When the page is visited, the file upload field will be a full 100% width.

Manage uploaded files
All files that are downloaded in a Formidable form are saved to your WordPress media library. To access the uploaded files, follow the instructions below.
- Go to your WordPress Media → Library.
- Click the list view icon.
- In the filtering menu, change 'Hide form uploads' to 'Show form uploads' if you would like to see files uploaded in your forms. Click 'Filter'.
- Now all the files that have been downloaded in a Formidable form should appear here in the list view.


If you would always like to view your form uploads in the media library, see the prevent filtering of form uploads section.
File protection
Files uploaded through the file upload field can be viewed by anyone with access to a link and could be indexed by search engines. If you want to protect your uploaded files, you can enable the Protect all files uploaded in this form and Prevent search engines from indexing uploads file permission options in the General form settings.
With file protection enabled:
- Uploaded files cannot be accessed directly using the file URL.
- Prevent files from being indexed and searchable by Google and other search engines.
- Reduce the risks of file spamming.
- Files can only be reached when clicking a link directly to the file from within the site.
- Links clicked from an email will be blocked.
- Logged-in status doesn't affect this.
File protection adds restrictions to prevent files from being accessed from another entry. It is a security measure to prevent visitors from changing the file ID in the form to access other files.
- New uploaded files will use file protection even when file protection is turned off before the form has been submitted.
- File access for most file types is limited to users with the frm_edit_entries capability only.
- All new files will include X-Robots-Tag: noindex to ensure that search engines never crawl new temporary files.
Temporary Files
To avoid spam and for better file protection, files are immediately uploaded to the server but are automatically deleted if they are not attached to any entry.
If you need to adjust the default -3 hours period before temporary files are deleted, use the frm_delete_temp_files_period hook.
Related hooks
- To improve file upload security for unprotected forms, use the frm_stop_file_switching filter and return false.
- If you would like the same files to be reused on multiple entries, use the frm_stop_file_switching filter and return true.
- To remove protection for temporary files, use the frm_protect_temporary_file hook.
- To control whether or not a protected file will check the referer on download, use the frm_check_file_referer hook.
Import files
If you would like to import files from entries on one site into entries on another site, see Import files for more information.
Show content based on file URL
If you would like to compare the File upload values in a form's confirmation message, email, or View, use conditional statements.
Troubleshooting
Upload limits
File upload size and quantity limits are set in your server's php.ini. If you have a problem uploading a file to your form, first try uploading the same file to the WordPress → Media Library. If you see the same error here, you face upload limits. You (or your host) may need to increase the max_file_uploads, max_input_time, post_max_size, and upload_max_filesize settings in your php.ini.
In a WordPress Multisite setup, you can customize the upload limits by navigating to Network Admin → Settings → Upload Settings.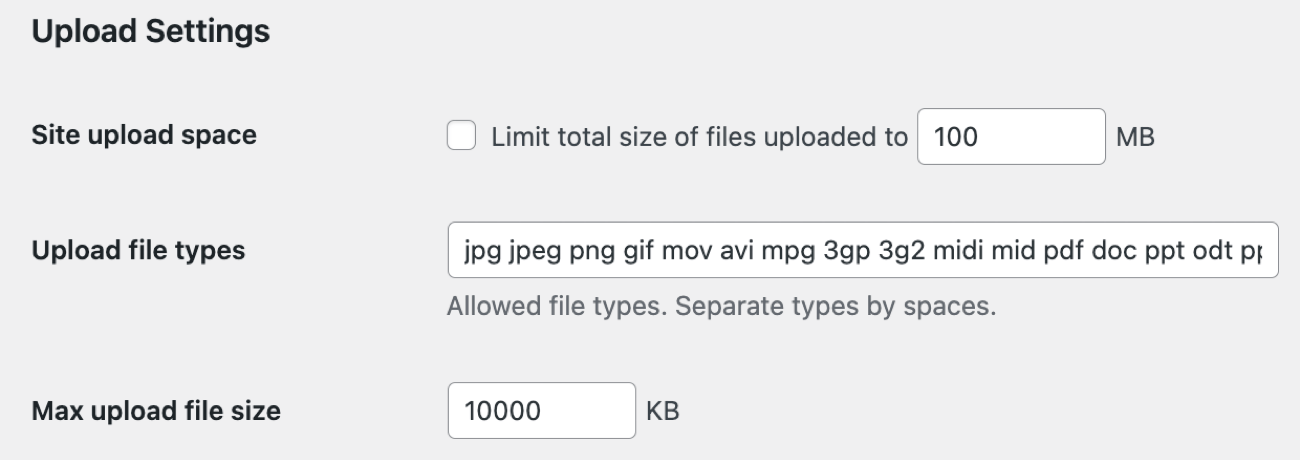
Server responded with 0 code
When AJAX requests are fired in WordPress, 0 is returned when the request isn't processed. We have seen cases where 0 is returned by the file uploader, even though the code is there to process it.
The most likely cause is a plugin or theme conflict. Start by checking for a conflict.
If the problem continues with all other plugins disabled, there may be an issue with your server settings. In some cases, this happens when there a page is loaded with a different URL than the one set as the site URL in the WordPress Settings. To solve the problem, you will need to add a redirect rule in your .htaccess that will redirect to the correct url. This is also better for SEO.
File upload "-1" error
If you're seeing a "-1" error when trying to upload a file on your form, this problem is most often related to a plugin or theme conflict. Generally, we have seen cases where a security plugin is causing this trouble. To troubleshoot this, start by finding the source of the conflict.
Uploaded file could not be moved
If you're seeing the "Uploaded file could not be moved to" error message, this problem usually means that there is something wrong with the permissions on your site at a server level.
To troubleshoot this, start by following the steps below.
- Try to upload the file in the WordPress → Media Library. Do you see the same error? If so, please contact your web host.
- If the upload is successful, change the folder permissions of the uploads/formidable folder, and each of the numbered folders inside it to 755.
- If the upload still fails and regular WordPress uploads are successful, open a ticket so our team can help investigate.
File upload "0 b" value
If you see a 0 b message when uploading a file to your form, you may have added an incorrect default value.
When setting a default value, you can either use a file from the media library or use a file from a previous entry.
Disable scaling in images
In WordPress 5.3, users are allowed to upload big image files. It will be automatically scaled down once the image height or width is above the threshold value of 2560px.
To disable the scaling, you could use the snippet below.
add_filter( 'big_image_size_threshold', '__return_false' );File type is not permitted for security reasons
If you have already set up your site to allow extra file types like XML, it may return a "Sorry, this file type is not permitted for security reasons" error message. To fix this, go to the wp-config.php file and add the following code snippet above the line:
/* That’s all, stop editing! Happy blogging. */
define('ALLOW_UNFILTERED_UPLOADS', true);Unsupported file type
If you're already using the code snippet to allow extra file types, but your server still doesn't recognize your file type, you may use the expected plain/text mime type.
For example, instead of using the expected mime type for a STEP file type:
$mimes['step'] = 'application/STEP';Use the expected mime type to plain/text for application/STEP files instead.
$mimes['step'] = 'text/plain';This isn't unique to STEP files but could apply to other file types like MP3 file uploads.
503 error
If you encounter a 503 error while uploading a file, the PHP ImageMagick module could be the issue. Disable ImageMagick and try GD on your server.
Allow all user types to upload files in multisite
By default, multisite guest users can only upload "jpg jpeg png gif" file types. If you are already using the code snippet to allow extra file types, you can use this filter to allow all multisite user types to upload other file types.
This code example adds wma to the end of that list, but you could update the actual upload_filetypes site_option value in the database.
add_filter('site_option_upload_filetypes', 'allow_multisite_users');
function allow_multisite_users( $upload_filetypes ) {
	$upload_filetypes .= ' wma'; // Replace wma with your file type
	return $upload_filetypes;
}
If you are dealing with uncommon file types that aren't supported in WordPress by default, this works in combination with the mime_types filter.
Related customizations
Allow extra file types
If you would like to allow file types than are not allowed in WordPress by default, you'll need some custom code.
add_filter('upload_mimes','restrict_mime');
function restrict_mime($mimes) {
    $mimes['mp4'] = 'video/mp4';
    $mimes['csv'] = 'text/csv'; //allow csv files
    $mimes['avi'] = 'video/x-msvideo'; //add avi
    $mimes['mov'] = 'video/quicktime'; //add mov
    $mimes['epub'] = 'application/epub+zip'; //add epub
    $mimes['ai'] = 'application/postscript'; //add ai
    $mimes['eps'] = 'application/postscript'; //add eps
    $mimes['xml'] = 'application/xml'; //add xml

    return $mimes;
}
This is a WordPress filter (not Formidable). You can find more information on this filter in the WordPress codex.
Prevent filtering of form uploads
If you would like to prevent the filtering of files that have been uploaded through formidable forms in your WordPress media library, insert the following code in the 'Code Snippets' plugin or a child theme’s functions.php file.
add_action( 'pre_get_posts', 'frm_remove_media_filtering', 1 );
function frm_remove_media_filtering () {
    remove_action( 'pre_get_posts', 'FrmProFileField::filter_media_library', 99 );
}
Disable dropzone
Disable the AJAX uploader and revert to a standard uploader with the code below.
add_filter( 'frm_load_dropzone', '__return_false' );If you want to turn off dropzone on one page, use the frm_load_dropzone hook.
Block dropzone action
To disallow uploads that happen before the entry is created, use the code snippet below to block the dropzone action.
add_action('wp_ajax_nopriv_frm_submit_dropzone', 'block_dropzone_uploads', 1 );
add_action('wp_ajax_frm_submit_dropzone', 'block_dropzone_uploads', 1 );
function block_dropzone_uploads() {
    $target_field_id = 996; // change 996 to the file upload field ID
    $field_id = FrmAppHelper::get_param('field_id', '', 'post', 'absint' );
    if ( $target_field_id === $field_id ) {
        wp_die( 0 );
    }
}
Change the upload field label
The default Drop a file here or click to upload message can be changed with a bit of javascript. Click here to see an example.
Translate the upload text
Translation options for the default Drop a file here or click to upload text are included in the PO file inside the plugin. See how to translate Formidable for more information.
Add front-end file download
If you would like to add front-end file download for uploaded files, see how to offer a protected file and download file on submit for more information.
Handle file download errors
You could handle a redirect with a snippet like this. Note that this may be overwriting over die handler behaviour from another plugin.
function custom_die_handler( $message, $title = '', $args = array() ) {
     if ( 403 === $args['response'] ) {
          wp_redirect( 'http://example.com/403/' ); // change this URL.
          die();
     }
     _default_wp_die_handler( $message, $title, $args );
}
add_filter(
     'wp_die_handler',
     function() {
          return 'custom_die_handler';
     }
);
Modify kses rules
By default, WordPress kses function prevents base64 images from being displayed. To modify the kses rules in a form submission, use the code snippet below.
add_filter('kses_allowed_protocols', 'modify_kses_rules');
function modify_kses_rules($protocols) {
    $protocols[] = 'data';

    return $protocols;
}
Randomizing file names
If you would like your uploaded files to have harder-to-guess paths, use the code snippet below.
add_action( 'wp_ajax_nopriv_frm_submit_dropzone', 'add_upload_prefilter', 1 );
add_action( 'wp_ajax_frm_submit_dropzone', 'add_upload_prefilter', 1 );

function add_upload_prefilter() {
	add_filter(
		'wp_handle_upload_prefilter',
		function( $file ) {
			$file['name'] = randomize_filename( $file['name'] );
			return $file;
		}
	);
}

function randomize_filename( $name ) {
	$split = explode( '.', $name, 2 );
	$split[0] = uniqid();
	return implode( '.', $split );
}
Related developer hooks
- Customize the location of your uploaded files using the frm_upload_folder hook.
- Automatically delete WordPress files after the entry is created (and after the email notification is sent) with the frm_after_create_entry hook.
- Remove attachments from notifications with the frm_notification_attachment hook.
- Format multiple files differently than the default HTML with the frmpro_fields_replace_shortcodes hook.
- Use Base64 file info with the frmpro_fields_replace_shortcodes hook.
- Create a custom field that stores the file URL with the frm_new_post hook.
- Add image meta with the frm_after_create_entry hook.
- Only show first file from a multiple-image upload with the frmpro_fields_replace_shortcodes hook.
- Link thumbnail to full size images from a multiple-image upload with the frmpro_fields_replace_shortcodes hook.
- Move and rename file uploads with the frm_after_create_entry hook.
- Disable file URLs for an uploaded file even when file protection is turned off with the frm_field_input_html hook.
