
Powerful forms for data collection and Wide API to merge automation using the best wokflows such as N8N, Zapier. Excellent tool for data collection. Recommended 100%. Furthermore, support is awesome.

Last updated on June 23, 2025 by Formidable Team
How To Create a WordPress Contact Form with File Uploads
Need to create a WordPress contact form with file uploads? Whether for businesses or blogs, learn how to make one today for your WordPress website!

Approximate read time: 6 minutes
Creating a WordPress contact form with file uploads shouldn't be hard.
But if you don't have any coding experience, then it may seem more difficult than you can handle. That is until you use a WordPress plugin to simplify your job.
This post is for that purpose. This tutorial will show you how to create a form to accept file uploads in a few simple steps.
So, let's dive in.
Upgrade your WordPress site with powerful, flexible forms.
Why accept file uploads through WordPress contact forms?
There are several reasons to accept file uploads through a contact form.
But the main reason is that it makes your life easier. You won't have to email attachments back and forth or upload them to the cloud. Just fill out the form and attach the file, and that's it.

And this helps many people in different situations, like:
- Business documents: Submit resumes, application forms, portfolios, applications, or signed forms to create a smoother process.
- Customer support: People can upload screenshots, logs, or other files to help your customer service team fix their problem faster.
- Content: Websites can accept User Generated Content (UGC), such as blog posts, artwork, or photos, much faster.
- eCommerce: If you offer customized products, this is an easy way to get customers' exact designs!
If you fall into one of these categories, creating a contact form with file uploads is perfect.
From Idea to Reality in Minutes. Build Powerful Forms, Dashboards, Apps and More.
Formidable Forms makes advanced site building simple. Launch forms, directories, dashboards, and custom WordPress apps faster than ever before.
How to create a WordPress contact form with file uploads
To get started, you need a WordPress form plugin to help create your form.
For that, we recommend our WordPress form plugin, Formidable Forms. With its drag and drop form builder, you can create a form in minutes. And its file upload field turns your simple contact form into a file upload form quickly.
So, head over and grab the Basic plan of our form maker and get it installed and activated.
Then, it's just a few easy steps:

Step 1 - Create a WordPress contact form for file uploads
First, you need to add a contact form to your site.
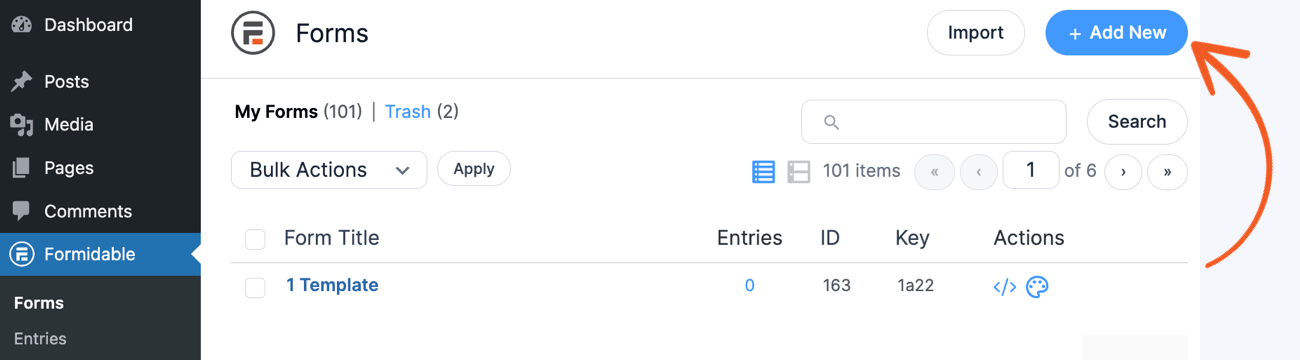
So, open your WordPress dashboard, go to Formidable → Forms, and click Add New at the top of the page.
Next, you can choose to start from scratch using a Blank Form or use one of our form templates to get started faster! For this example, we'll use the Contact Us form template.
The plugin takes you to our form builder, where you can add or remove form fields.
Some fields will already be added if you use one of our templates. But feel free to add any other useful fields.
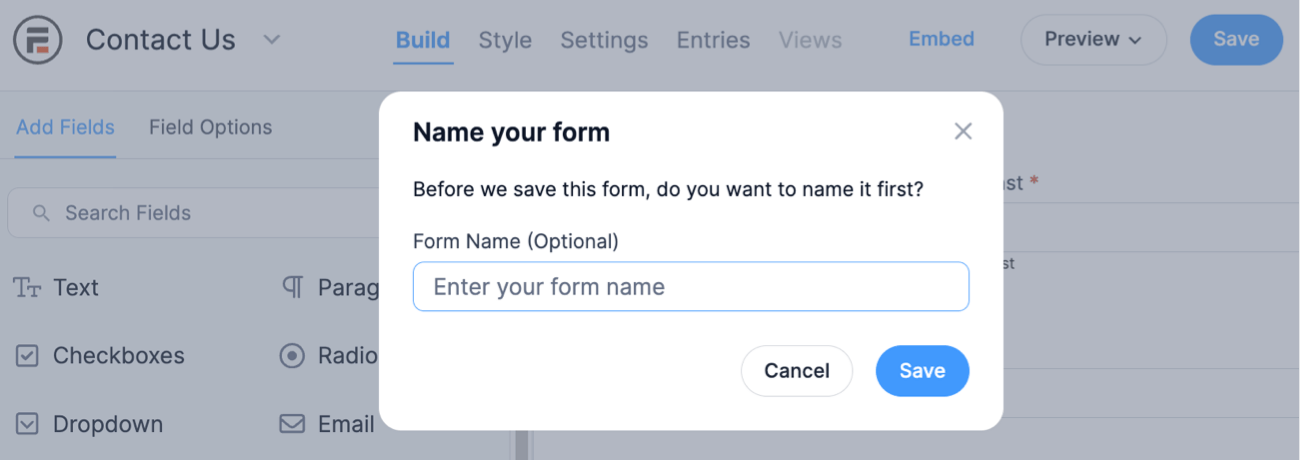
Last, click the Save button and give your form a name so you don't lose any progress.
Step 2 - Add a file upload field to your WordPress contact form
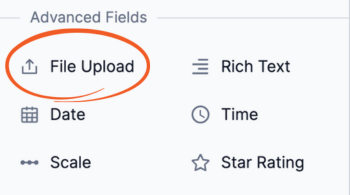
The next step is to add the File Upload field to your form.
Our drag and drop design means you can add or remove any field you want from your form. In this case, you'll need to add a field called File Upload. You can find this in the sidebar list in the Add Fields box under Advanced Fields.
Add the file upload field by clicking it or dragging and dropping it into the contact form, wherever you want it.

You can even drag and drop multiple file upload fields to your form if you need more than one.
Step 3 - Change the file upload form settings
Now it's time to change the settings so the file uploader works exactly how you want.
To change all the settings for the file upload field, click on it in your contact form. You should now see your Field Options on the left.

This will pull up plenty of different options ready for you to customize.
Don't skip this part! Controlling exactly how the file uploader works can save you a lot of time.
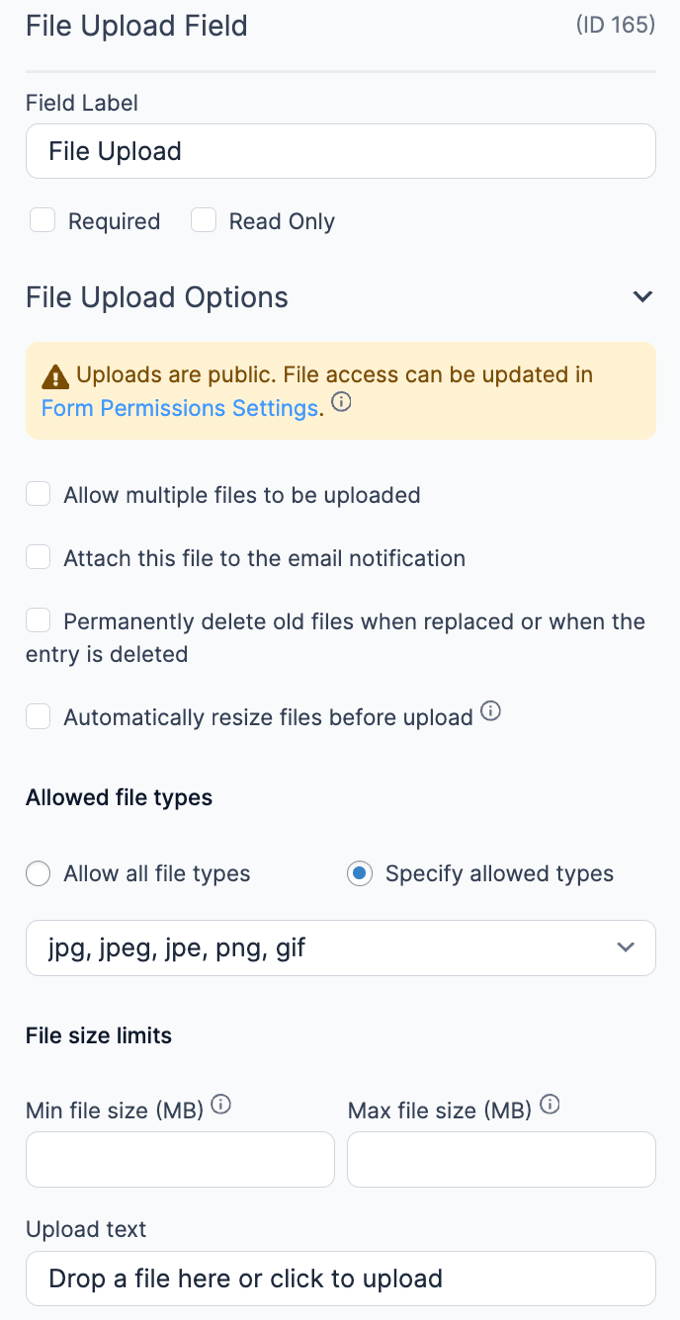
Here are some important settings to check:
- Required: Don't let anyone submit the form without uploading their file.
- Allow multiple files to be uploaded: Make it so people can add multiple file uploads instead of just one.
- File size limits: Huge files in your WordPress media library can slow things down quickly. Limit the file upload size based on what files you accept, with a minimum or maximum file size.
- Upload text: Change the text to clarify what you're looking for to your users.
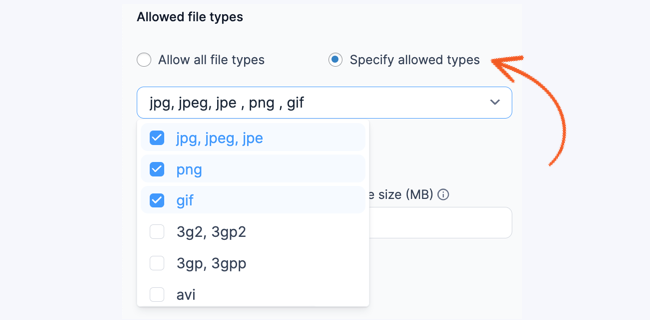
Last, it'd help specify what file extension types you accept. If you're looking for PDFs only, you don't want people to upload images.
Changing the file attachment options is entirely up to you and your needs. So take a look through them and choose the best ones for you. By getting your settings correct, you can potentially save yourself a lot of time.
So, once you're finished, click Save to update your form.
Read More: 6 Options to Look for in a WordPress File Upload Form
Step 5 - Save and publish your WordPress file upload form
The last step is to put your contact form with file uploads on your site!
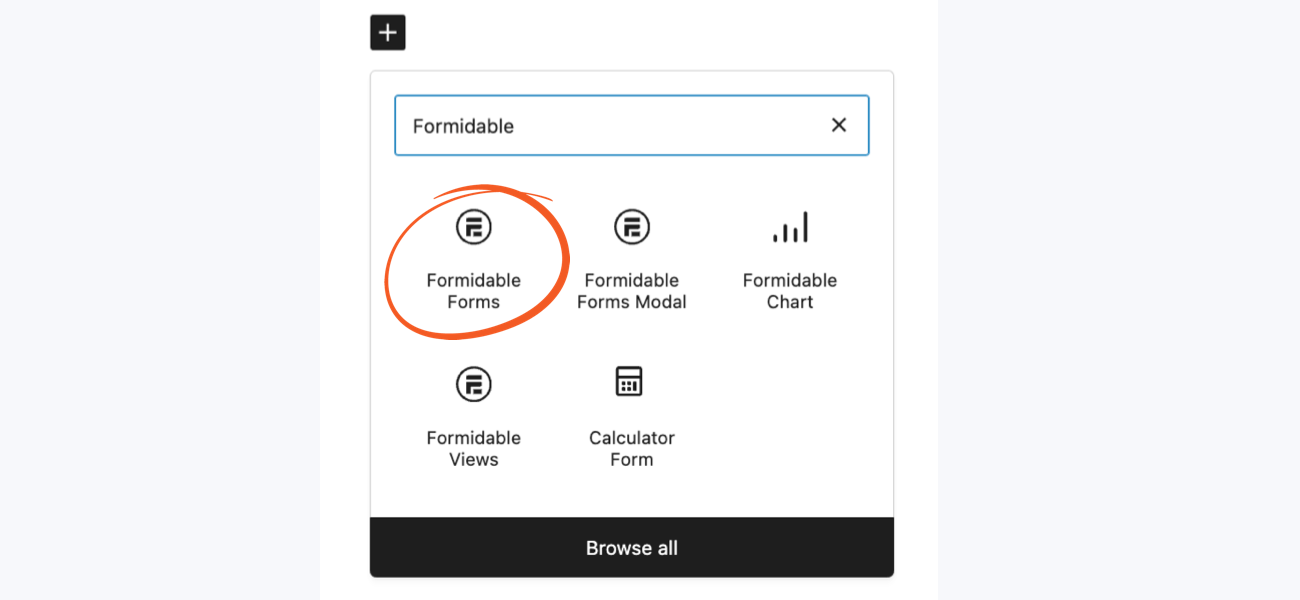
First, go to the post or page where you'll display your form. Then, add a new WordPress block, search for Formidable Forms, and choose it.
Next, choose your form from the dropdown menu. You can easily find it using the name you gave it in Step 1.
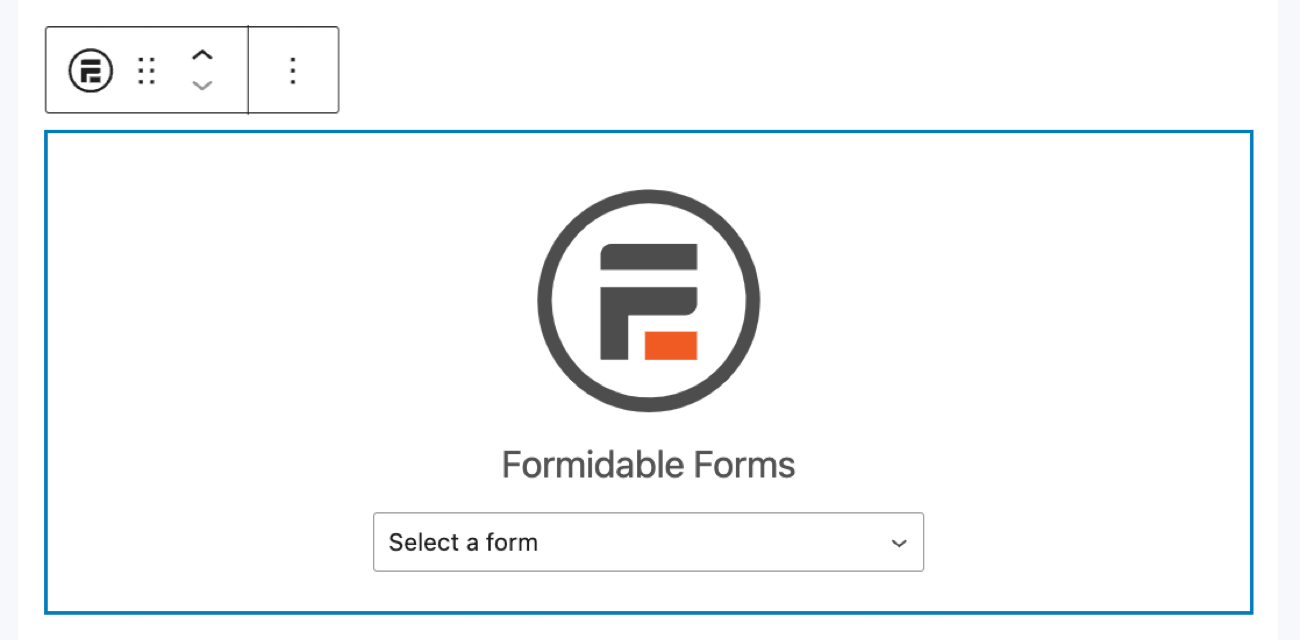
Once you choose it, your form will show in your post, ready to go! The last thing to do is to update your post or page so it shows to your visitors
And that's it! Your WordPress contact form with file uploads is ready to accept form submissions. It's that easy!
Need to change the contact form email in WordPress?
It's important to ensure emails are reaching the correct email or team.
The best way to do that is by changing the contact form and email address in WordPress. This prevents it from being sent to a default email no one uses or a notification being sent to spam.
And if you haven't yet, grab a Formidable Forms license to get started!
Read more about file uploads!
 How to Use WordPress to Upload Files to Google Drive
 How to Display Form Submissions in an Image Carousel
 How to Create a WordPress Image Upload Form (3 Step Guide)
This article may contain affiliate links. Once in a while, we earn commissions from those links. But we only recommend products we like, with or without commissions.

