
Use Page Break fields to create multi-page forms. Users may easily navigate back and forth between the pages.
Upgrade your WordPress site with powerful, flexible forms.
Standard field options
A Page Break field has the following options: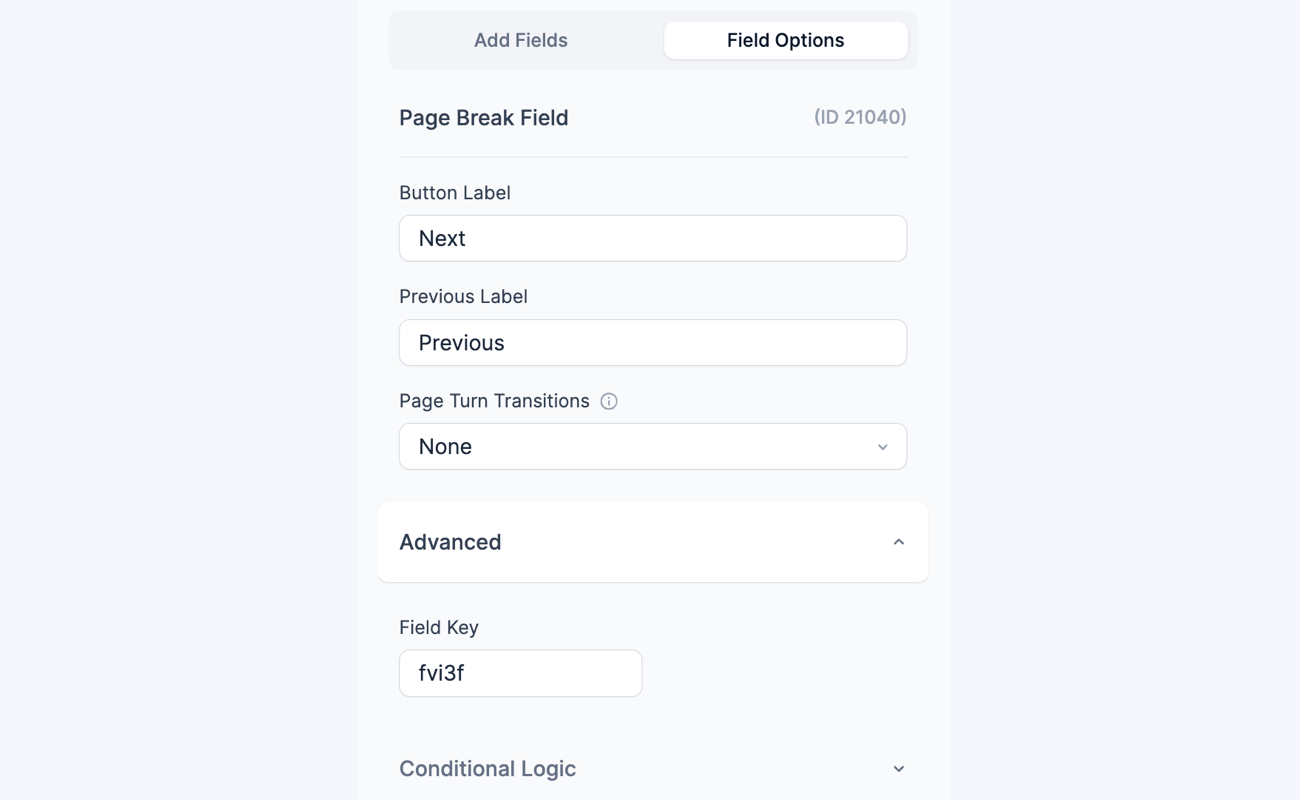
Field icons
Field action icons allows you to duplicate, delete, and/or move a field on the form builder page. See the field action icons article for more information.
From Idea to Reality in Minutes. Build Powerful Forms, Dashboards, Apps and More.
Formidable Forms makes advanced site building simple. Launch forms, directories, dashboards, and custom WordPress apps faster than ever before.
Field-specific options
Position
When displaying pagination with your multipage form, you can use the position setting to determine where the rootline and progress bar will be placed. Note: This field option appears only when either the rootline or the progress bar is enabled. You have four options to choose from:
- Below form title (default)
- Above form title
- Above submit button
- Below submit button
Page turn transitions
Choose transition effects that can be used on form load. This setting will be applied to all page break fields in the current form. Select from these options: Slide horizontally and Slide vertically. By default, this is set to None.
If you have set up a multi-page form, select AJAX submit in your form settings for a smoother page turn transition effect.
Show page titles
When you show either a Progress bar or a Rootline in your form, you have the option of showing page titles for each page. If you would like to enable this feature, simply check the box labeled Show page titles with steps and then enter a page title for each page in your form.
Please note: If you leave any of these fields blank, your progress bar or rootline will have no title for the respective page.
Hide page numbers
By default, the Progress bar or Rootline will show page numbers. To disable this feature, simply check the box labeled Hide the page numbers and then update your form.
Below are examples of what the progress bar and rootline would like to when this option is selected.
Hide progress bar numbers
Hide rootline number
Hide pagination lines
By default, the Progress bar will show a vertical line separating each page in the progress bar. Similarly, the Rootline will show a horizontal line connecting each page in the form. If you would like to hide these lines, simply check the box labeled Hide lines in the rootline or progress bar and then update your form.
Hide progress bar lines
Hide rootline lines
Display pagination
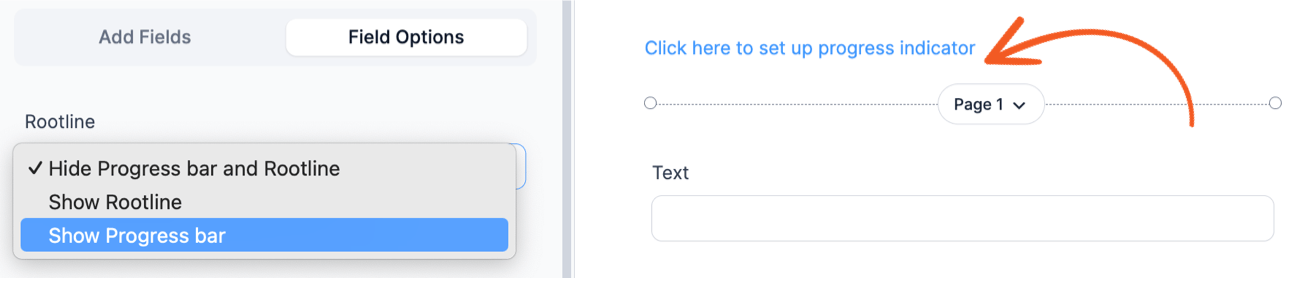
By default, a multipage form will hide both the progress bar and rootline from appearing. You have three options to choose from.
- Hide Progress bar and Rootline
- Show Progress bar
- Show Rootline
Default Progress Bar
Default Rootline
Button label
Customize the text that appears on the Next button. You can change it to any text or character.
Previous label
Customize the text that appears on the Previous button. You can change it to any text or character.
Create a multi-step form
If you would like to create a multi-step form, the page break field is all you need to break a long form into pages. A Page Break marks the division between pages. Follow the instructions below to get started.
- Add a Page Break field anywhere that you want a new page of your form to begin.

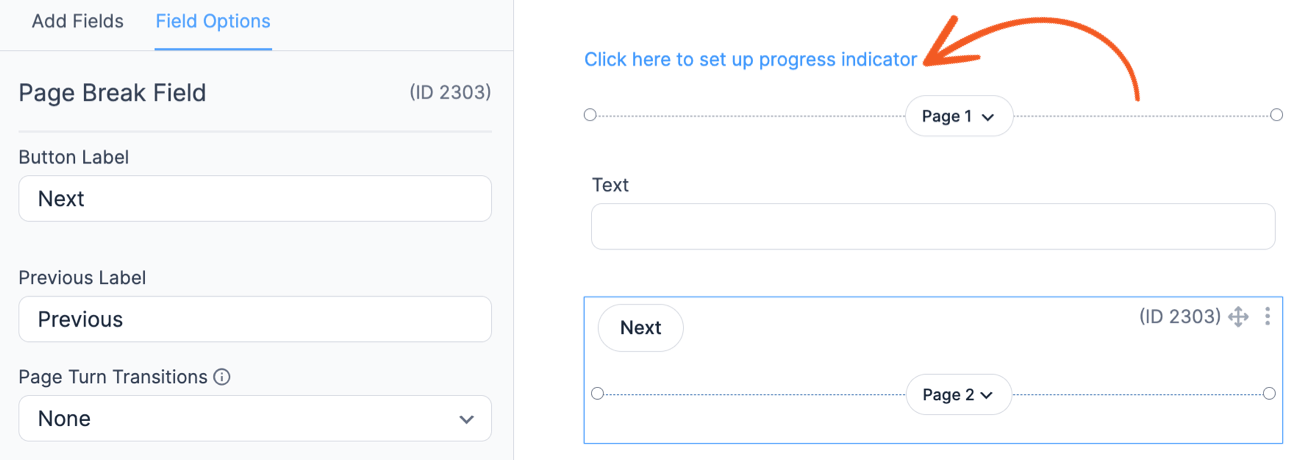
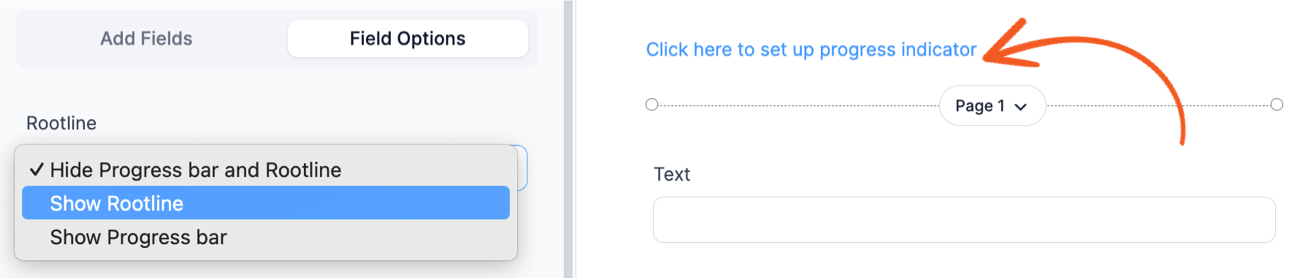
- When you first add a Page Break field, you'll see a link at the top of the builder. Clicking this link will allow you to set up a progress indicator wherein you can choose between a a progress bar or rootline to set up a multi-step form.
- Select where you want to position the pagination. By default, it will be shown below the form title.
- You can optionally change the position of the pagination, show the page title with steps, hide the page numbers or hide the lines in the rootline or progress bar. We recommend checking the box titled Show page titles with steps and label your pages. This helps users know which page they are on when looking at the progress bar.

- Hitting the Enter key will trigger the Previous page button instead of the Next page button. If you want to progress to the next page, follow these instructions.
- When progressing to a subsequent page using page breaks, validation is automatically triggered for the current page. Any fields entered incorrectly will show errors before the user can progress to the next page.
How to set up a progress bar
Progress bars help users see where they are in the form. Additionally, your users can jump to different pages by interacting with the progress bar. Follow the steps below to add a progress bar to your form.
- Create a multi-step form or open an existing multi-page form.
- Look for the Click here to set up progress indicator link at the top of the form builder. Click the link and select Show Progress bar as the pagination.
- The progress bar pagination is responsive and will automatically shrink on mobile.

How to set up a rootline
A rootline can help users see where they are in the form. Additionally, your users can jump to different pages by interacting with the rootline. Follow the steps below to add a rootline to your form.
- Create a multi-step form or open an existing multi-page form.
- Look for the Click here to set up progress indicator link at the top of the form builder. Click the link and select Show Rootline as the pagination.
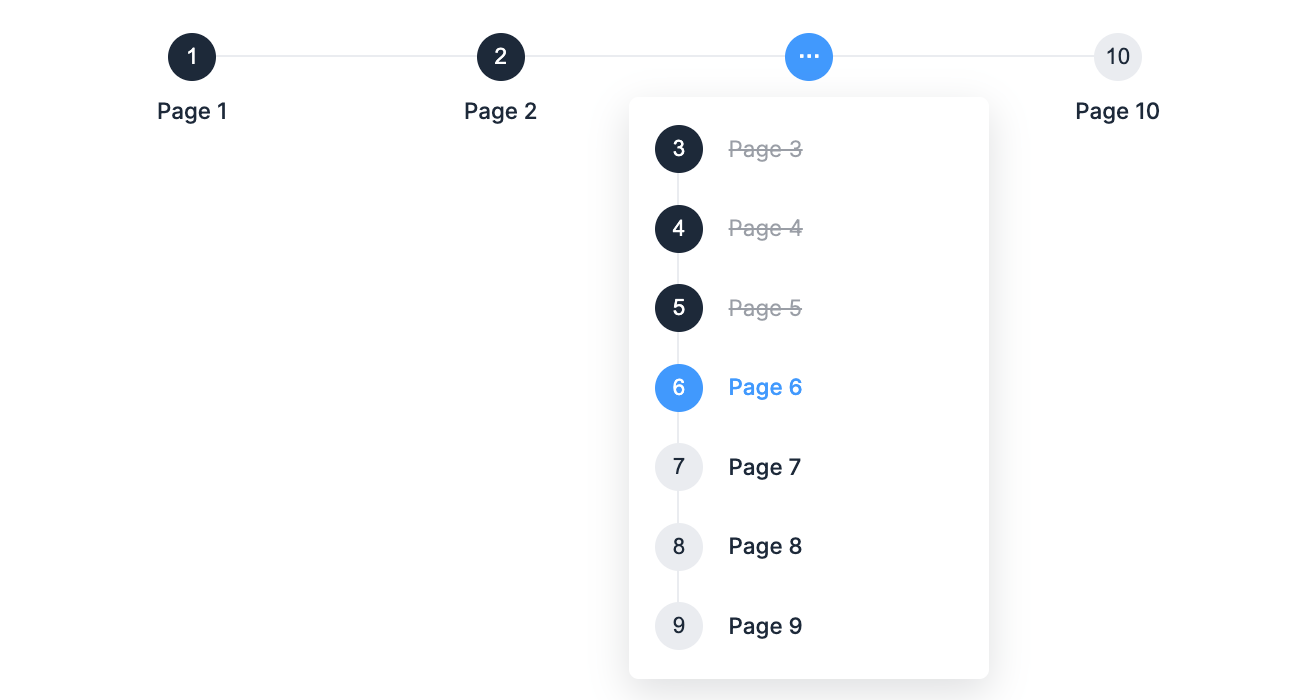
- The rootline pagination is responsive and will automatically shrink on mobile with a dropdown toggled by a new rootline item with an ellipsis.
Field styling
If you are using a Progress bar or Rootline in a multipage form, you can customize the styling in Formidable → Styles → Progress Bars & Rootline.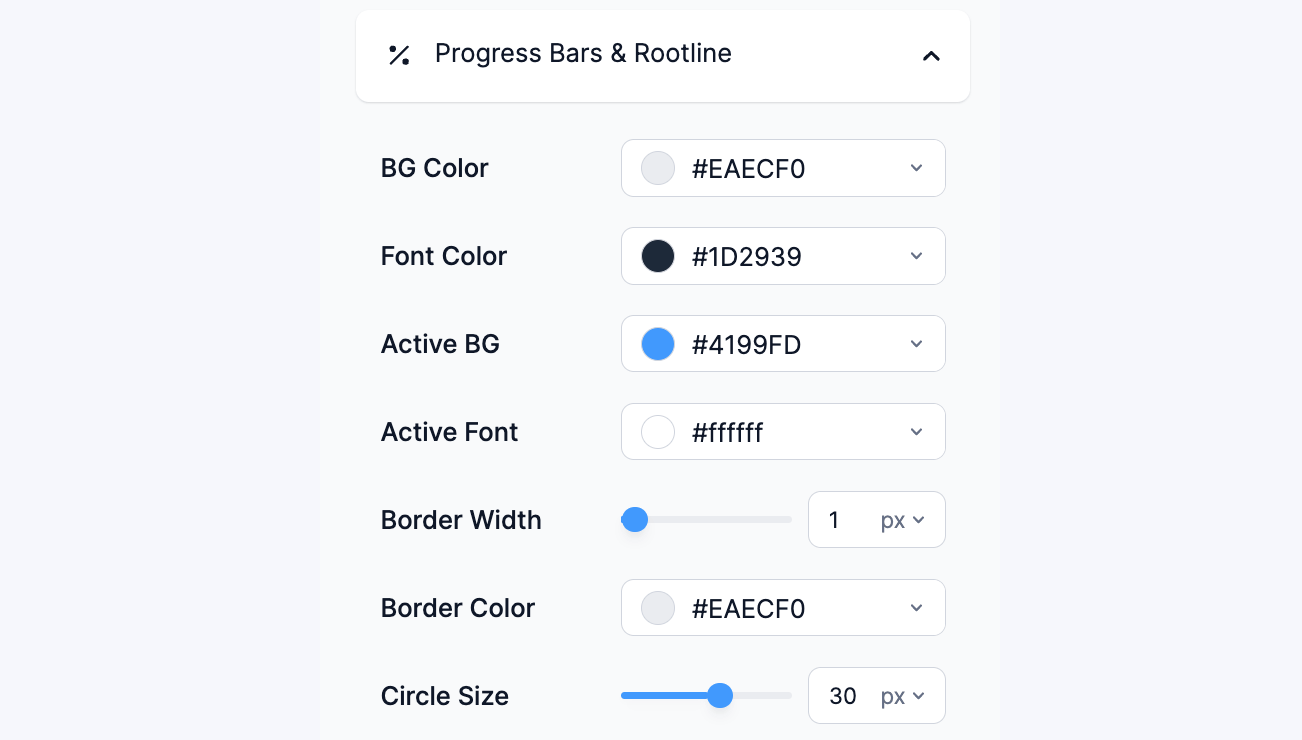
- BG Color: This will adjust the background of the Progress bar, or the background of the circles in the Rootline
- Active: This will adjust the background color of whichever active page in the Progress bar or Rootline
- Color: This will adjust the color of the lines in the Progress bar, or the color of the page numbers in the Rootline
Conditional page breaks
Add conditional logic to a Page Break in order to show or hide the following page depending on a selection in the form. You may set up your form so a single page or multiple pages can be skipped conditionally to create branching forms.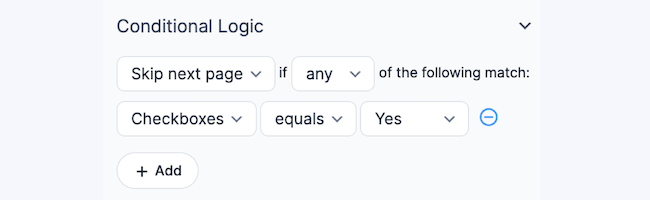
Autosave on page turn
A multipage form can save automatically when switching between pages when saving drafts is enabled. Read more about allowing logged in users to save drafts.
Customizations
How to progress to next page when hitting enter
If you have both the previous and next button on the same page in a multi-page form, hitting the enter key after making an entry will trigger the previous page function instead of the next page.
To retain the enter key functionality such that the form will progress to the next page, you can go to your form General Settings → Customize HTML → Submit button and replace the existing HTML with this:
<div class="frm_submit">
<button class="frm_button_submit" type="submit" [button_action]>[button_label]</button>
[if back_button]<button type="submit" name="frm_prev_page" formnovalidate="formnovalidate" class="frm_prev_page" [back_hook]>[back_label]</button>[/if back_button]
[if save_draft]<a href="#" tabindex="0" class="frm_save_draft" [draft_hook]>[draft_label]</a>[/if save_draft]
</div>
Note: This customization will move the previous button after the Next/Submit button in the DOM tree.
Submit button on every page
If you'd like your users to be able to submit their forms and exit before they reach the last page, you can add a submit button to any pages of your form you'd like. In an HTML field, put:
<button type="submit" class="frm_page_skip" data-page="">Save</button>You can change "Save" to whatever word(s) you want to show in the button.
If you'd like the styling to match the Next/Previous/Submit buttons, you can use this HTML:
<div class="frm_submit"><button type="submit" class="frm_page_skip" data-page="">Save</button></div>Related developer hooks
- Show all fields on the final page of a multi-paged form with the frm_get_paged_fields hook.
- Remove page breaks from the admin with the frm_get_paged_fields hook.
