
Powerful forms for data collection and Wide API to merge automation using the best wokflows such as N8N, Zapier. Excellent tool for data collection. Recommended 100%. Furthermore, support is awesome.

Last updated on June 24, 2026 by Formidable Team
How to Add a Mailchimp Signup Form to WordPress
Wondering how to add a Mailchimp signup form to WordPress? Follow these four simple steps to get a Mailchimp form on your website today!

Approximate read time: 6 minutes
You're not alone if you struggle to add a Mailchimp signup form in WordPress! Mailchimp’s documentation isn't very clear.
We looked at it ourselves and were left scratching our heads. You shouldn't need HTML and CSS skills to get a Mailchimp form onto your website.
In this article, you'll learn how to embed a Mailchimp signup form on a WordPress site. And we'll also show you a way to create a Mailchimp signup form in WordPress that makes things even easier.
Ready to grow your mailing list? Let's get started!
Upgrade your WordPress site with powerful, flexible forms.
Add a Mailchimp subscribe form to WordPress
There are two different ways to add a WordPress Mailchimp signup form to your site:
- Copy and paste Mailchimp’s embed code
- Use a WordPress form plugin
Copy and paste the Mailchimp embed code
Each time you create a form in Mailchimp, it generates HTML code that you can insert into your website to display the form.
Uh oh, code. Don’t worry; you only need to know how to copy and paste!
This method is quick and easy but doesn’t make the prettiest forms.
First, log into your Mailchimp account, and then under the Mailchimp Audiences tab, select Signup Forms.
Next, choose Embedded Forms.
Once you’ve customized your form, click Continue in the upper right corner.
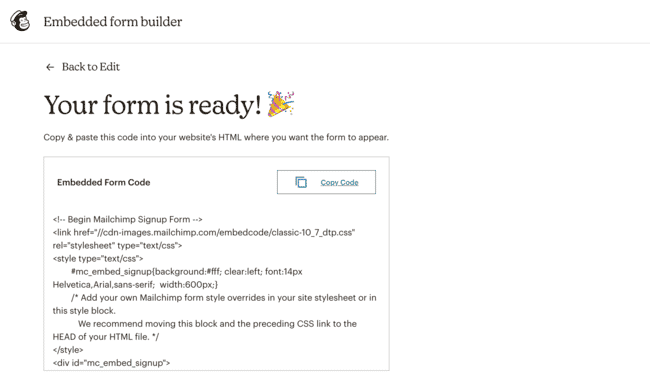
Now, you can paste this into any post or page on your website to display your Mailchimp embed signup form on WordPress.
People who subscribe via this form will automatically be added to the Mailchimp list you chose.
Not loving the look of your form?
You may want to use a WordPress form builder to integrate a Mailchimp signup in WordPress instead. It’ll give you a lot more control over your form’s design.
So, if more customization sounds cool, you will want to keep reading.
Use a WordPress form plugin
There is an official Mailchimp plugin for WordPress, but it hasn't been tested with the last few versions of WordPress and hasn't been updated in over a year. Yikes!
That means you'd be taking a big risk by installing it on your site.
So, we have a better solution… and it’s the method Mailchimp recommends over using their clunky code.
Use a WordPress form plugin to make your Mailchimp signup form!
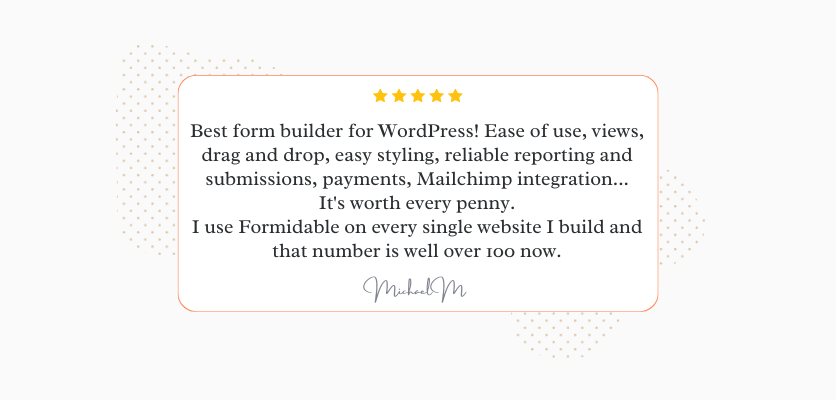
And the #1 form plugin? Well, that would be Formidable Forms! But you don’t have to take our word for it. More than 950 happy users have left 5-star reviews of the Formidable Forms WordPress plugin.
Enough about us, though! Let’s connect your Mailchimp forms to WordPress. And why don’t we make them look amazing while we're at it?!

So, here are the steps to add a Mailchimp form:
Step 1: Install and activate Formidable Forms
If you don’t already have the Formidable Forms plugin, first pick up our WordPress form maker.
Once you have your license, it's time to install Formidable’s WordPress Mailchimp integration.
From the WordPress dashboard, go to Formidable → Add-ons. Use the search bar or scroll down until you find the Mailchimp Add-On.
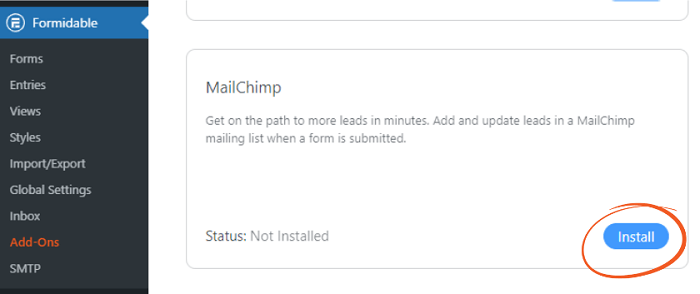
All that’s left is to click the blue button to Activate and then Install.
Step 2: Get your Mailchimp API key
To find your Mailchimp API key, log in to your Mailchimp account.
Once you're there, go to Account → Extras → API Keys. Click Create A Key if there isn’t one already. Copy your key, and then pop back over into WordPress.
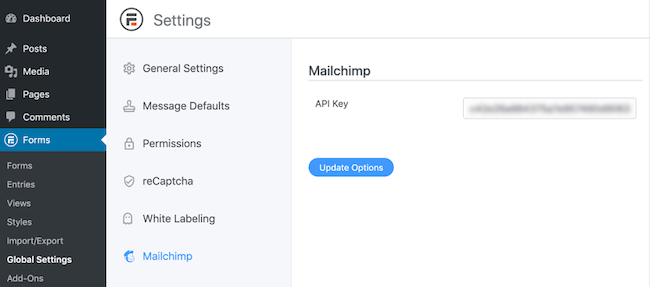
In the Formidable Forms plugin, go to Global Settings → Mailchimp and paste your API key in this field.
Step 3: Create your WordPress signup form
Already made your signup form in Formidable? Go ahead and skip to the next step!
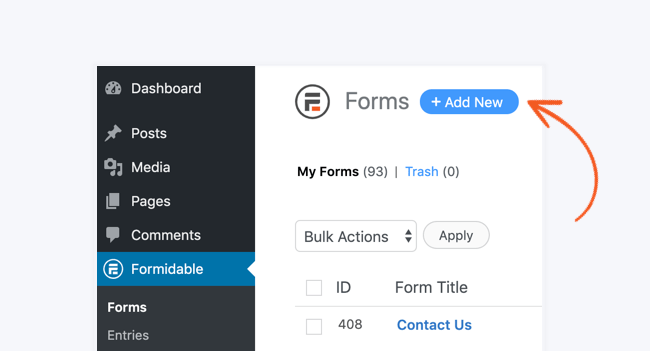
For everyone else, let’s start by heading to Formidable → Forms your WordPress dashboard.
Here, click on the Add New button. Now, you can choose whether to use one of our handy WordPress form templates or build your own from the ground up by choosing Create a blank form.
And that's it! You're ready to start building your Mailchimp signup form right in WordPress. Simply drag your fields to the form and customize them.
The same drag and drop steps work for any form, so if you add a message field you've built a WordPress contact form that subscribes people to Mailchimp on submit. You're not limited to signups.
Need a little help? Check out this step-by-step guide on how to create a form.
When you're done, don’t forget to hit Update to save your changes.
Still with us? Awesome! We’re only two short steps away from getting your subscription form online.
Step 4: Configure your form settings
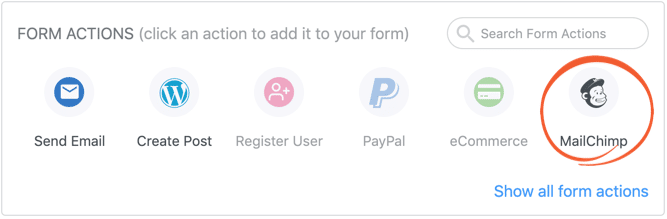
Next, click Settings → Actions & Notifications → Mailchimp.
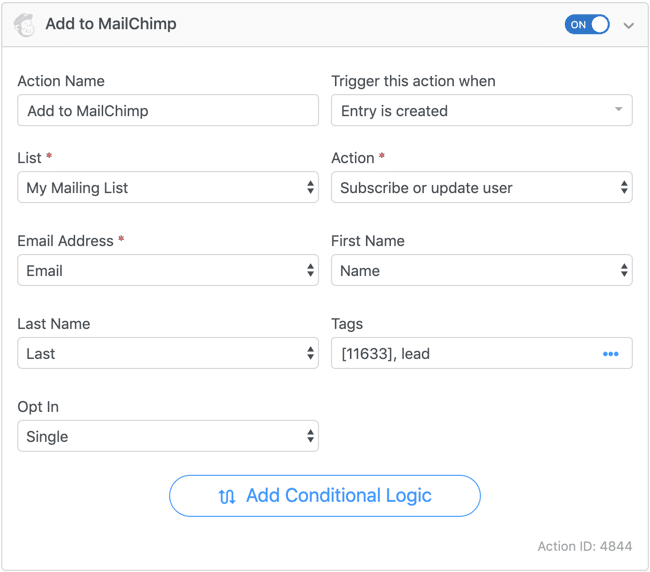
Now pick the email list to add subscribers to and then match the fields of your form to the fields in your Mailchimp mailing list (i.e., email address, first name, and any other contact information you need).
From this menu, you can also adjust the form options for your Mailchimp opt-in form in WordPress and automatically add Mailchimp tags to keep your contacts organized.
And that’s it! Your form is ready to go!
You can add it to any page or post by inserting the Formidable block and selecting the Mailchimp email signup form for WordPress you created.

Want to add your Mailchimp signup form to the WordPress footer or sidebar instead? Not a problem! You can use the Formidable block in widget areas too.
Step 5: Style your form to match your site
This is where a form plugin beats Mailchimp's embed code. Your form already inherits your theme, but you can make it match your brand exactly, with no CSS required.
Open the Style tab at the top of the form builder and adjust the colors, fonts, spacing, and button styles.
You'll see a live preview as you go, so you can match your signup form to your site in a couple of minutes. When it looks right, save, and the change updates everywhere the form appears.
From Idea to Reality in Minutes. Build Powerful Forms, Dashboards, Apps and More.
Formidable Forms makes advanced site building simple. Launch forms, directories, dashboards, and custom WordPress apps faster than ever before.
All set to add your Mailchimp subscribe form to WordPress?
If you've been struggling to get Mailchimp signup forms into WordPress, we hope this quick tutorial helped! We have a ton more Mailchimp tips too, from adding GDPR checkboxes to how to create a Mailchimp subscriber popup form.
But Formidable does so much more than make Mailchimp forms.
This plugin does it all: Buzzfeed-style quizzes, online calculators, creating custom PDFs from form entries, and even charts and graphs.
So check out all the features of Formidable Forms for more inspiration. Then pick up your plan and get started!
Learn more about Mailchimp signup forms for WordPress
 How To Add a Mailchimp Checkbox Field in a Signup Form
This article may contain affiliate links. Once in a while, we earn commissions from those links. But we only recommend products we like, with or without commissions.

