
Powerful forms for data collection and Wide API to merge automation using the best wokflows such as N8N, Zapier. Excellent tool for data collection. Recommended 100%. Furthermore, support is awesome.

Last updated on May 26, 2026 by Formidable Team
How To Add a Mailchimp Checkbox Field in a Signup Form
Want to add a Mailchimp checkbox field in a signup form? This simple guide lets you add email signup checkboxes to all your Mailchimp forms!
Approximate read time: 3 minutes
Want a simple way to add a checkbox in your Mailchimp signup form?
A simple checkbox can skyrocket your Mailchimp lists by allowing visitors to sign up while they fill out your form! And with this article, you'll learn how to add one to your forms to see your Mailchimp audience grow today.
Let’s get started.
Upgrade your WordPress site with powerful, flexible forms.
Why add a checkbox to your Mailchimp signup form?
People hate receiving emails they didn’t sign up for.
It instantly creates a bad experience, which is the last thing you want when building trust and confidence with website visitors.
So, adding a checkbox is an easy way to get clear consent from your subscribers to receive your emails. And that helps you avoid negative interactions, comply with laws (like Mailchimp GDPR requirements), and respect your subscriber's privacy.
Plus, it helps you zero in on your most engaged subscribers. After all, if a user checks your checkbox for your emails, they send you a clear message:
“I want to hear what you have to say!”
That means higher open rates, conversions, and an active email list overall.
And that’s HUGE for your website or business.
From Idea to Reality in Minutes. Build Powerful Forms, Dashboards, Apps and More.
Formidable Forms makes advanced site building simple. Launch forms, directories, dashboards, and custom WordPress apps faster than ever before.
How to add a checkbox in a Mailchimp signup form
To get started, we recommend using Formidable Forms, the most advanced form builder for WordPress.
Formidable has a Mailchimp integration included in the Plus plan. So, with a simple add-on, you can create any Mailchimp form you want — registration forms, signup forms, or newsletter subscriptions.
You can't add custom fields to Mailchimp's forms, but you can with Formidable!
So, get Formidable Forms installed and activated, then we’ll start with a few simple steps:

1. Create your Mailchimp form and add a checkbox
First, head to Formidable → Forms and click Add New to create a new form.
Next, you can choose from one of Formidable’s pre-made templates to save time or Blank Form to start from scratch. For our example, we'll create a simple contact form.
Then, give your form a name and click Create, and the plugin will take you to its drag and drop form builder. You can begin adding any form fields you need for your forms, like Text, Email, or Radio Buttons.
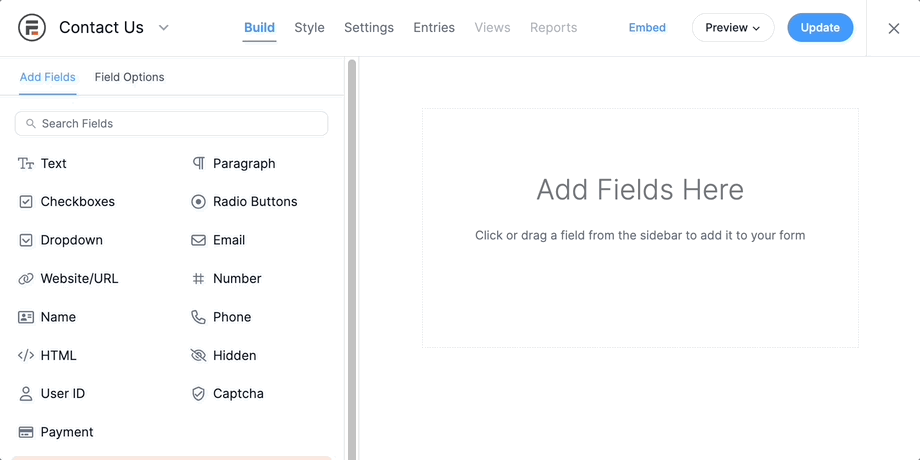
You can customize the fields as you need to use the field options in the left sidebar.
The input type Checkboxes field is what we want to focus on, though.

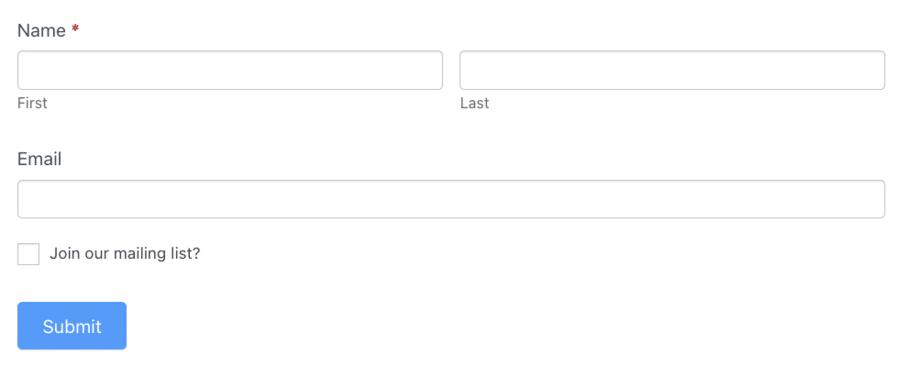
Add a checkbox field to your form, and two checkboxes appear. You can keep this to have a Mailchimp signup with multiple checkboxes. But we’ll use one subscribe checkbox for this example.
So, in the Field Options sidebar, delete the Option 2 checkbox and rename the Option 1 field. Check the Required field if you want to make the checkbox required for your Mailchimp signup form.
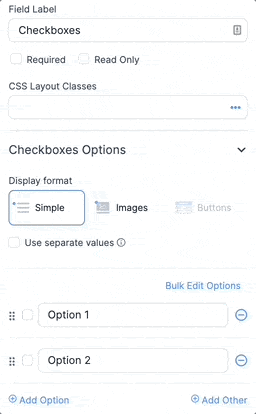
You can also set the minimum and maximum option limits. With this option, you can ensure that users choose more than one option or no more than a certain amount.

Next, scroll down to the Advanced section in the Field Options to the Label Position drop-down and choose None.
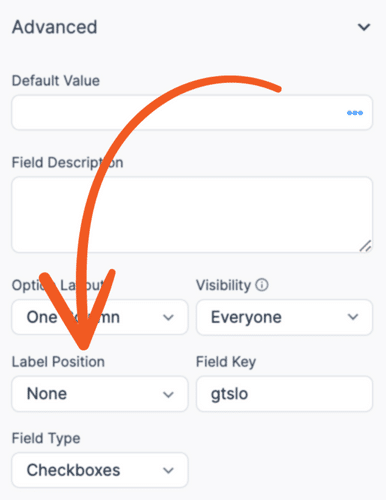
This will ensure only your message next to the checkbox shows.
So, your form should look like this now:
Now that your form is ready, let’s connect Mailchimp.
2. Connect Mailchimp to your form
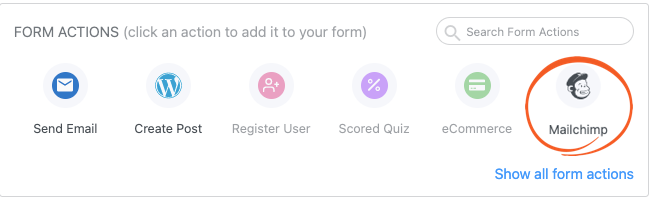
In your WordPress dashboard, go to Formidable → Add-Ons and search for the Mailchimp add-on.
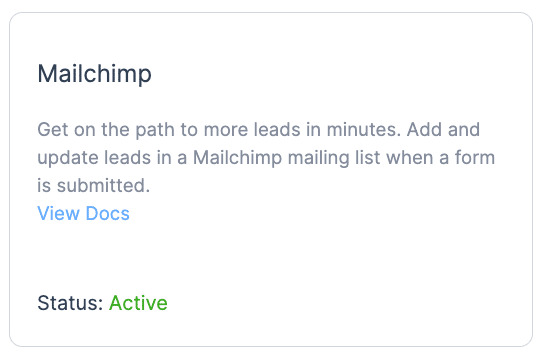
Click Activate to get the add-on installed and ready to go.
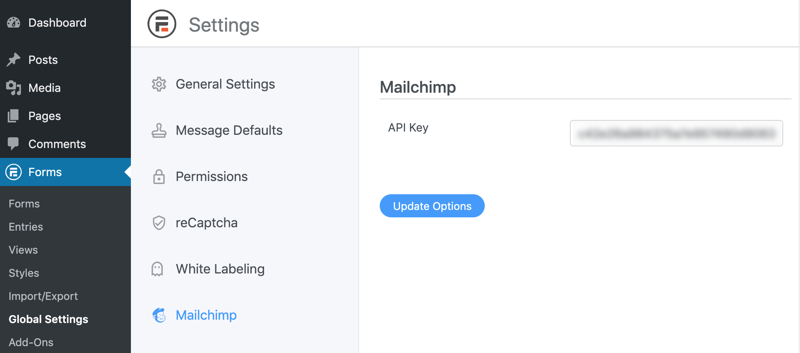
Next, go to Formidable → Global Settings → Mailchimp, enter your API Key from Mailchimp, and click Update Options to connect your Mailchimp account.
The last thing we need to do is connect Mailchimp to your form. So, head to your form, go to Settings → Actions & Notifications, and click Mailchimp.
A Mailchimp action will appear below, and you can customize it to fit your needs, like which mailing list to manage your audience, single or double opt-in, and more.
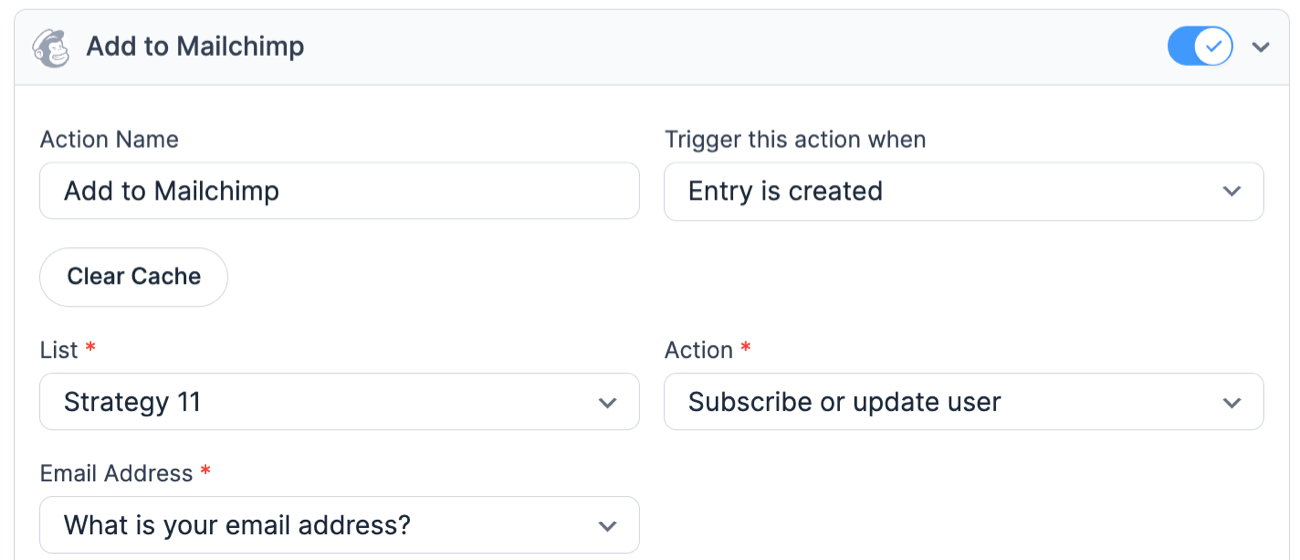
Once you set them up, click Update to save your changes, and Mailchimp is ready.
3. Set up your form’s conditional logic
Not everyone wants to sign up for your email list.
So, you need a way to filter out those who don’t consent. And it’s as simple as adding conditional logic to your Mailchimp action.
So, scroll down to the bottom of the action and click Add Conditional Logic.
Next, set your conditional logic like this:

The form will only add visitors if they check the box.
Now, let’s look at changing your form’s design.
4. Customize your form (optional)
If you truly want your form to stand out, it must be unique.
And the best way to do that is with Formidable’s Visual Form Styler. With just a few clicks and settings changes, your form looks beautiful.
So, head to the Style tab in your form, which will take you to the form styler.

You can choose from one of the pre-made design templates or click New Style to create one.
Next, name your style and click Create new style. The plugin will redirect you to the Form Styler, where you can customize your template.
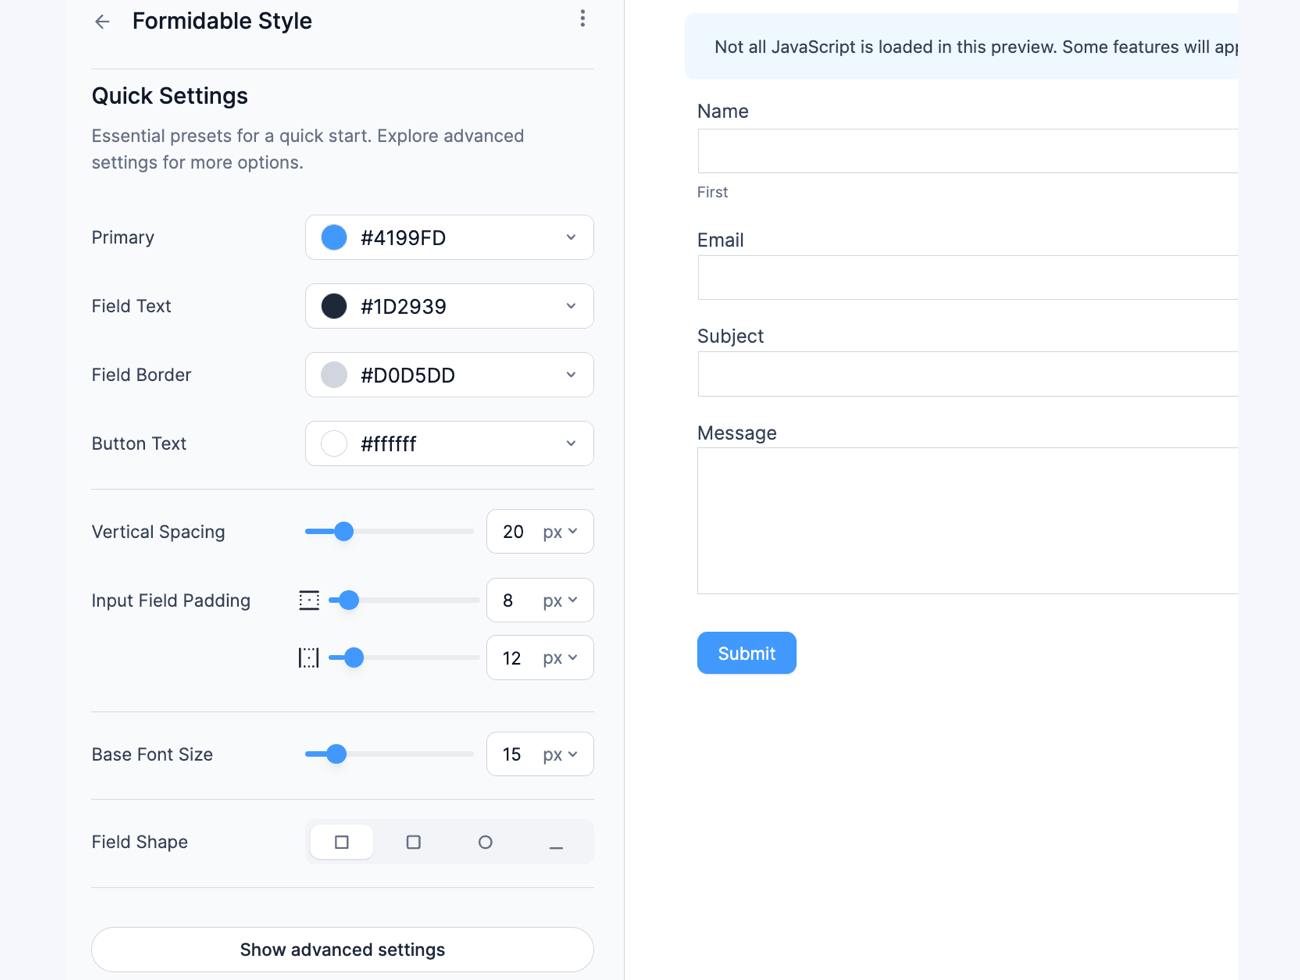
Change the colors, border radius, and more from one simple menu. Feel free to play around with the options until you design a form that fits your site.
Once you’re finished, click Update to save your changes.
The only thing left to do is publish your form on your website!
5. Display your form
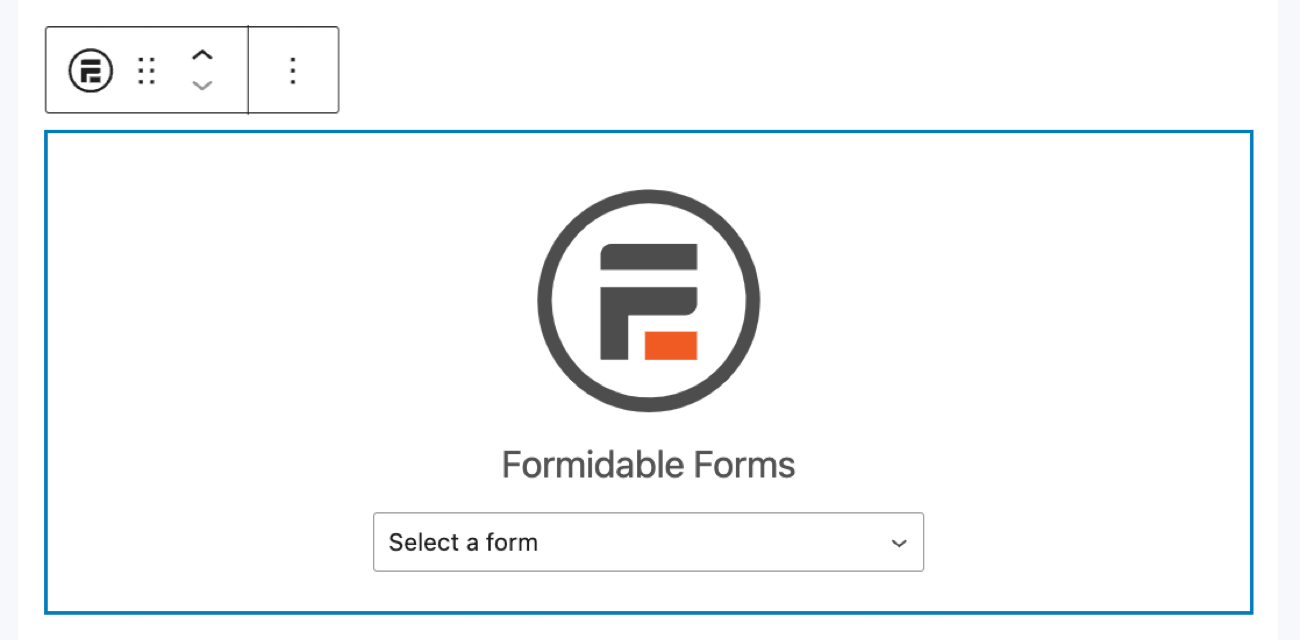
Head to the post or page where you want to show your form and add a new WordPress block.
Next, search for Formidable, add the Formidable WordPress block, and choose your form from the dropdown menu. The plugin will display your form on your site now!
Last, update your page; your form is ready to take submissions!
Ready to add a checkbox in your Mailchimp signup form?
Who knew a simple checkbox could do so much?
But simply by adding one to your form, you can boost your email list quickly. And this guide taught you exactly how to insert a checkbox in Mailchimp.
Now, if you want more information on how to customize your Mailchimp signup form in WordPress, you’ll like this post on styling your Mailchimp form! And if you have any problems, be sure to contact our technical support for help!
Last, follow us on Facebook, Twitter, and YouTube for more great Mailchimp tips!
Read more about Mailchimp and Formidable!
 How to Add a Mailchimp Signup Form to WordPress
 MailPoet vs. Mailchimp [Which is Better for You?]
 How To Make a Mailchimp Popup in WordPress (An Easy Guide)
This article may contain affiliate links. Once in a while, we earn commissions from those links. But we only recommend products we like, with or without commissions.

