
Powerful forms for data collection and Wide API to merge automation using the best wokflows such as N8N, Zapier. Excellent tool for data collection. Recommended 100%. Furthermore, support is awesome.

Last updated on July 10, 2025 by Formidable Team
How to Create a Form in WordPress (Fast and Easy!)
Easily create a form in WordPress with these simple steps. Whether it's a contact form or an order form, this guide will help you do it. Get started today!
Approximate read time: 5 minutes
New to WordPress? There's a lot to learn, right? Luckily, form building is one of the easiest parts of building a WordPress website.
Phew! One less thing to worry about, eh?
In this step-by-step guide, we'll show you how to use the form editor to create a super fast contact form in WordPress. After that, you'll be on your way to crafting an amazing WordPress site in super speed!
All you need is a solid WordPress form plugin.
Upgrade your WordPress site with powerful, flexible forms.
How to create a form in WordPress

Formidable can create any form, like:
- User registration forms
- Multi-step forms
- Order forms
- Surveys/polls
- And more
But most will follow the same basic steps to get started. So, to create a WordPress form, follow these steps:
Step 1: Install a WordPress form plugin
The first step is to install and activate a great WordPress form builder plugin. There are many choices, but we will use the most powerful option, trusted by more than 400,000 businesses.
Formidable is a drag and drop form builder that makes creating a form easy and fast. The best part is it's completely free!
Of course, there are plenty of advanced features in the pro version. But in this tutorial, all you'll need is the basic plugin (which you can do a lot of things with free Formidable Forms).

Here's how to install the free version of Formidable Forms:
- Go to your WordPress Dashboard and the Plugins → Add New page.
- Search for 'Formidable' and click the Install button. After installing, click the Activate button that appears.

Step 2: Create a form
Now that you've installed your new contact form plugin, it's time to create a new form. To do so, stay in your WordPress admin and look at the sidebar on the left side of your screen.
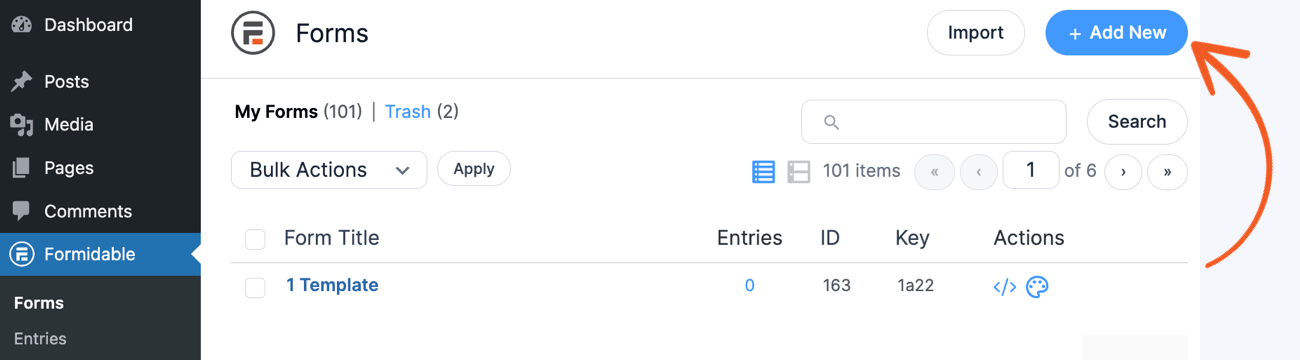
First, go to Formidable → Forms. We'll create a contact form for this tutorial to show you how. Click Add New at the top of the page.
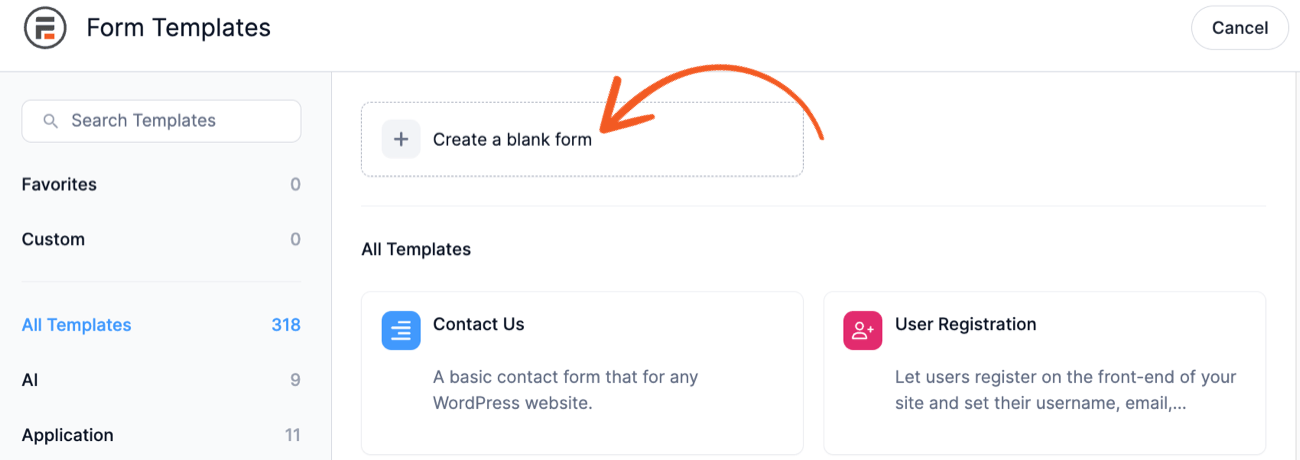
Next, click the Create a blank form button or choose one of Formidable's pre-built WordPress form templates to get started faster.
Need more details? Read our 'create a form' help documentation.
Step 3: Add form fields
Once you've created a new form, you only need to add a few form fields. We told you this would be quick and easy!
Now, you should see the drag-and-drop form builder page. From this interface, form design is simple.
Just hover over each field and click or drag the ones you need for the new form. You can also drag the fields around to adjust their order.
As you can see, there are quite a few fields to choose from. For a simple contact form, you'll add fields like a Single-Line Text, Email Address, Paragraph Text, and spam protection (like ReCAPTCHA).
A Single Line Text field can be used in a variety of ways. You'll want users to leave their names for a contact form. To do this, click on the field name for your single-line text field. Then, change the Field Label in the Field Options section in the sidebar.
Using the above method, you could add another text field so users could add a subject to their message. You can come back and edit your form anytime if you want more fields. Depending on the form you're creating, you have other options, like adding conditional logic or payments.
The form button is added for you, but the text can be changed on the Settings page for this form.
For more info on fields, check out our field types help doc.
Step 4: Publish the created form
Now that you've created a form, you need to publish it. You want people to contact you, right?
First, you must create a new page or post where the form will be published.
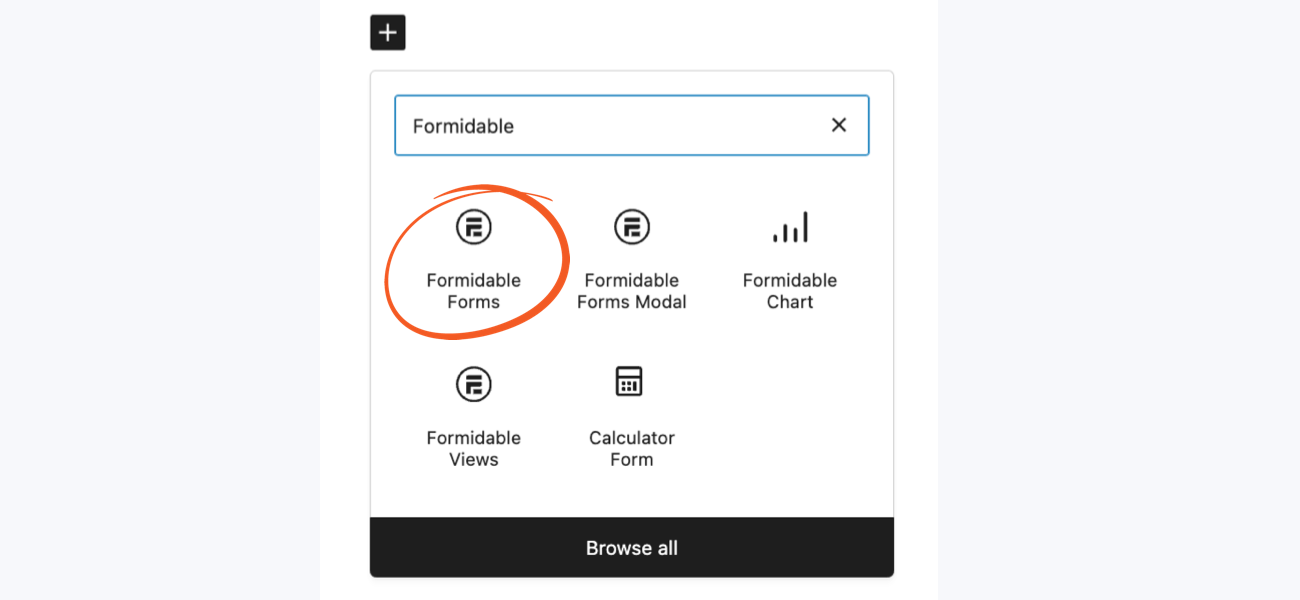
Once that's done, you can add the newly created form to the page in a few ways. The fastest option is to insert the form using the contact form block. Just select the form for the block settings, and you're set.
Using the Classic editor, the shortcode is the next best option. If you've never used a WordPress shortcode before, don't worry. They are very easy to use. You can easily spot shortcodes because they are always wrapped in square brackets [like this].
Your newly created form will have a shortcode that can be found in the Settings tab just above the form builder.
Once that's added, you'll be notified when a WordPress user submits your form.
From Idea to Reality in Minutes. Build Powerful Forms, Dashboards, Apps and More.
Formidable Forms makes advanced site building simple. Launch forms, directories, dashboards, and custom WordPress apps faster than ever before.
What's next?
Congratulations! You've created and published a form! Fast, wasn't it?
As you might have guessed, this form is just the tip of the iceberg. After publishing the form, you can expect people to start submitting the form. Those form submissions will show up in the Formidable → Form Entries tab.
Learn More: How to Add Email Subscription Forms in WordPress
Here are a few more ideas to keep the momentum going. We cover topics for beginners and developers.
- Learn about the different ways to use forms in WordPress
- Learn more about sending confirmation emails with WordPress Forms
- See our list of the best WordPress plugins or the best Free WordPress Form Plugins
Get tips straight to your inbox ⬇️
This article may contain affiliate links. Once in a while, we earn commissions from those links. But we only recommend products we like, with or without commissions.

