
Formidable Forms has made my life so much easier as an event planner.


Last updated on February 14, 2022 by Formidable Team
How To Create a Mailgun Subscribe Form in WordPress
Do your WordPress emails have a nasty habit of getting lost in transit? Send WordPress emails from a Mailgun subscribe form and create the best email delivery system possible for your business.

Being able to send an automated email from a WordPress site helps you respond to form submissions in a timely manner. However, it’s not uncommon for WordPress to suddenly stop sending you these important notifications.
In fact, with more recent updates, default WordPress protections prevent a lot of emails from reaching individual email accounts at all. This includes if you're the administrator of the WordPress website!
Fortunately, it is possible to switch to a more reliable email workflow. By configuring WordPress for the Simple Mail Transfer Protocol (SMTP), you can ensure that you never miss another key alert.
And Mailgun is one of the best third-party plugins you can use. That's email deliverability you can rely on!
In this post, we’ll discuss why you may be encountering email delivery issues. We’ll then show you how to send form submission notifications using the popular Mailgun service and SMTP.
Let’s get started!
Upgrade your WordPress site with powerful, flexible forms.
An introduction to WordPress form notification emails (and delivery issues)
A professional email campaign involves sleek forms, quick replies, and automation. That said, there are usually a ton of forms on a professional website. This makes it easy for an email account to get overloaded with inquiries. Especially if you're responding to each individually.
In addition, if you’re too slow to respond to an inquiry, you can create a poor first impression. You may even miss out on potential leads and conversions, particularly if your competitors communicate more promptly.
This is why mass email autoresponders are such a big benefit to businesses. But only if they work!
This is where an effective SMTP server comes in.
An SMTP server is like your local paper mailservice. The server "picks up" the mail, makes sure the destination and return path are legitimate, then delivers it to its destination. The only difference is the server breaks your message down into a string of code and reassembles it before delivery.
SMTP servers like Mailgun are equipped to process the heavy load of mass emails and verify all information sent. This helps WordPress see them as a trusted source for preventing spam.
But before we go on, what types of WordPress emails can Mailgun help with?
- Booking confirmation emails
- Contact us forms
- Callback requests
- Subscription signup
- Transactional emails
These are all important emails that require attention to keep your customers and users happy.
However, regardless of which email services you use, sometimes WordPress may not send emails due to an email provider incorrectly flagging them as spam.
You may also encounter this problem if your WordPress hosting server isn’t configured to use the PHP mail() function.
The good news is that you can address both of these problems using SMTP and Mailgun. This protocol uses proper authentication, which can help your emails avoid the spam folder.
SMTP also doesn’t require PHP mail(), which makes it a good option if your server isn’t configured to use the mail() function.
From Idea to Reality in Minutes. Build Powerful Forms, Dashboards, Apps and More.
Formidable Forms makes advanced site building simple. Launch forms, directories, dashboards, and custom WordPress apps faster than ever before.
How to create a WordPress Mailgun subscribe form
Mailgun is a popular service provider that enables website owners to send emails via SMTP. Using Mailgun for all your WordPress website messages ensures that form notification emails arrive in your inbox safely.
Here’s how to get started.
Step 1: Sign up for a Mailgun account
Mailgun offers a number of paid plans. However, you can send 5,000 emails for free in the first three months. That means you can have a free trial before you buy, although Mailgun does request your payment information.
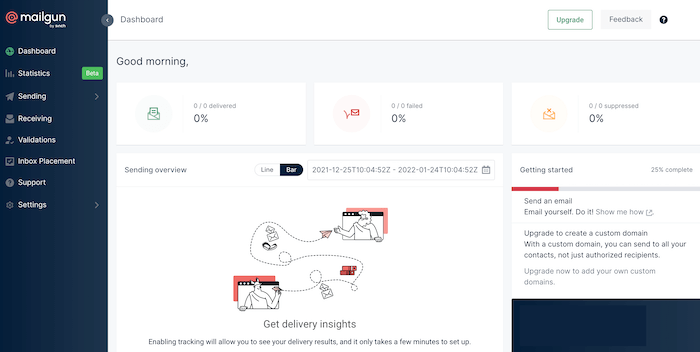
As part of the Mailgun subscribe form, you will need to verify your email address and your telephone number. Once you complete these tasks, you’ll gain access to the Mailgun dashboard:
In the left-hand menu, select Sending & Domains. Now click on Add New Domain. Next, Mailgun will ask you to create a subdomain, which it will use to send emails.
You can enter whatever address you want, as you’ll be creating this subdomain in the following step. However, you may want to choose a name that clearly identifies the subdomain’s purpose, such as mail.yourwebsite.com.
Next, Mailgun will ask you to verify whether your site is located in the European Union (EU) or the US. After making this selection, there are a few additional options you may want to configure.
To give your messages the best possible chance of avoiding spam filters, we recommend leaving the Create DKIM Authority box selected. It’s also smart to select 2048, as this creates a longer DKIM key. This will make it more difficult for spammers to impersonate your domain.
Step 2: Verify your domain
To help protect your website and your visitors, Mailgun needs to verify your domain. This means adding some records to your site’s Domain Name System (DNS).
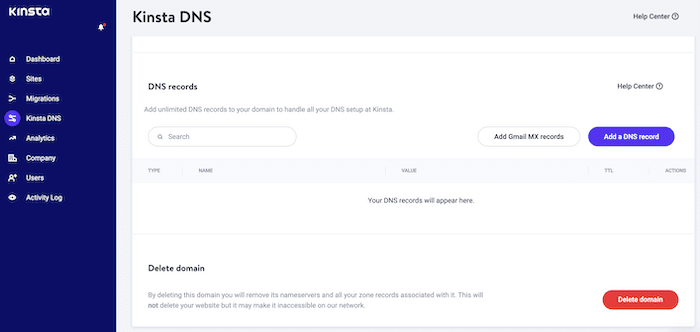
This process will vary depending on your hosting provider. However, you’ll typically log into your web hosting panel and select the domain name you want to work with. Then look for any options that are labeled DNS or Nameservers:
Typically, to verify your domain, you’ll need to add two TXT records to your site’s DNS.
Note: You're adding these records to your subdomain, not your main domain!
This means you’ll need to copy the provided records from your Mailgun account. Once you've done that, paste them as a new entry for your subdomain in your web host panel:

You may also need to create an MX record. You can also copy this information from Mailgun and then paste it into your web host panel.
Still confused based on your web host's prompts? Consult your host's documentation on how to add each of these files.
When you're done, Mailgun will attempt to verify that your subdomain has the correct DNS records. This may take 24-48 hours, so you might need to be patient.
To check the status of your domain verification, log into your Mailgun dashboard. Then select Sending & Domains:

Once Mailgun has successfully verified your DNS records, it will display a checkmark alongside your domain name.
Step 3: Configure WP Mail SMTP
Next, you’ll need to configure WordPress to use Mailgun as your SMTP provider. You can achieve this using WP Mail SMTP and your WordPress dashboard:

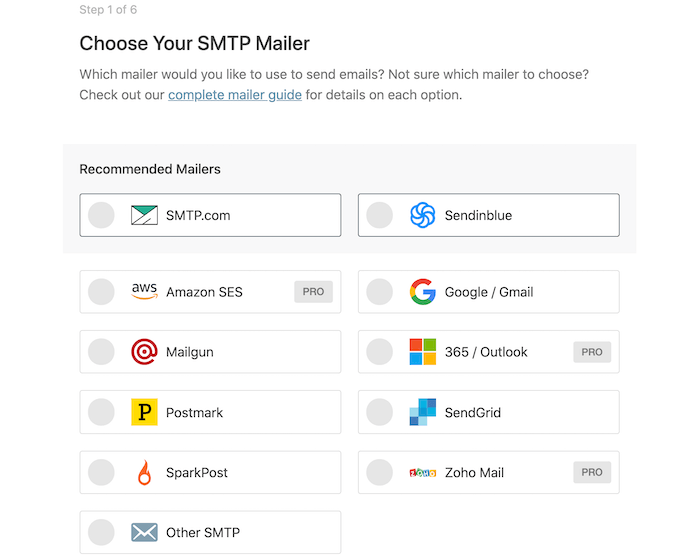
After you install and activate this plugin, it will launch into a configuration wizard. When prompted, click on Get Started and choose Mailgun as your SMTP mailer:
The plugin will now request your Mailgun API key. To find this information, switch over to your Mailgun dashboard and navigate to Settings & API Key:

You’ll also need to enter your Mailgun domain name. This is the subdomain you created in the previous step. Next, define your endpoint, which can be either US or EU:
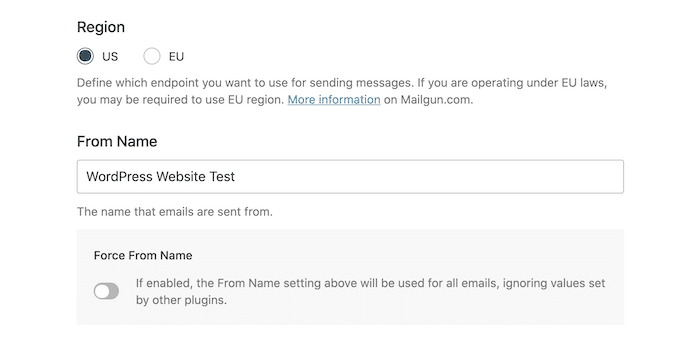
Then specify the From Email, which can be any valid email address. We recommend that you enable Force From Email. This ensures that all of your emails are sent from this address, regardless of the values set by other plugins.
You can also specify a From Name, which will be displayed in recipients' inboxes. Similarly, you may want to enable Force From Name. This will apply your chosen name to all of your emails, including those created by plugins such as Formidable Forms.
On the next page, you can choose whether to activate some additional WP Mail SMTP features. This includes email error tracking and a weekly summary displaying statistics for all of your messages:

After entering this information, WP Mail SMTP will verify your configuration by sending a test email.
Assuming that the plugin is set up correctly, after a few moments, WP Mail SMTP will display a success message. Your WordPress website is now ready to send emails via SMTP and Mailgun!
Wrapping up
Formidable Form’s email notifications help you respond to potential leads as soon as they come in. However, sometimes these vital notifications may get caught in your spam folder or lost due to an incorrect server configuration.
Let’s quickly recap how setup a Mailgun subscribe form:
- Sign up for a Mailgun account.
- Verify your domain.
- Configure the WP Mail SMTP plugin.
Now you’re ready to start sending (and receiving) dependable form notification emails through Mailgun. Instead of creating these messages manually, why not let Formidable Forms do all the hard work for you?
Check out Formidable Forms’ complete system of auto-responders and email notifications today! You'll see why we're one of the best-rated WordPress plugins out there!
More on WordPress email!
 How To Use WP Mail SMTP with the WP Mail SMTP Plugin [Guide]
 How to Schedule Email Autoresponders in WordPress [No Code!]
 Make Your WordPress Form Notification Emails Look Professional
This article may contain affiliate links. Once in a while, we earn commissions from those links. But we only recommend products we like, with or without commissions.

