
Formidable Forms has made my life so much easier as an event planner.


Last updated on February 24, 2023 by Formidable Team
How To Get WordPress Conditional Redirect on Form Submit
Want to show website visitors different content based on their form submissions? This guide shows you how to set up WordPress conditional redirect on form submit.

Approximate read time: 4.5 minutes
Did you know customers feel frustrated when content isn’t personalized?
You get better results and more customers by customizing what they based on their interests. Using conditional form redirects to personalize what a customer sees is an excellent way. This guide will show you how to set up WordPress conditional form redirects on your WordPress website.
And all it takes is one plugin.
Let's get started.
Upgrade your WordPress site with powerful, flexible forms.
What is conditional redirect on form submission in WordPress?
A conditional form redirect allows you to redirect visitors to specific pages based on their form answers.
Whether it’s products, contact forms, or login redirects, it’s a great way to improve the user experience.
Imagine you own a bakery.
One customer chooses cakes, and another chooses donuts. You don’t want a giant page where they scroll forever. That doesn’t keep site visitors on your site. It drives them away.
Instead, you redirect based on their needs.
Cake lovers bask in all your cake glory. And donut fanatics stare in awe at your amazing glazed donuts. Everyone only sees what they want. And that’s important for personalization and a better user experience.
So, now you know the what and the why. It’s time to get to the how.
From Idea to Reality in Minutes. Build Powerful Forms, Dashboards, Apps and More.
Formidable Forms makes advanced site building simple. Launch forms, directories, dashboards, and custom WordPress apps faster than ever before.
How to set up automatic redirect in WordPress
With Formidable Forms, you can easily create any form you want using its simple drag and drop form builder.
You may think you need a redirection plugin for this, but a WordPress form plugin handles this easily. And you can use its conditional form redirect feature to set up your form to redirect users where you want.
So, there are four steps to follow:
For our example, we’ll use an online clothing store scenario.

Step 1: Create your form
So, go to your WordPress dashboard and click Formidable → Forms to get started.
Click Add New at the top, then Create a blank form to start a new form. Give it a name, then click Create. Using Formidable’s drag and drop builder, you can easily add any field you want to the form.
So, we’ll add a dropdown with six options:
- Baby clothing
- Boy’s clothing
- Girl’s clothing
- Men’s clothing
- Women’s clothing
- Shoes & Accessories
The different values in this field allow a simpler form redirect option.
- Baby
- Boys
- Girls
- Mens
- Womens
- Accessories

You can even take this further and add a checkbox for existing customers.
Next, add conditional logic. If customers check the box, an email and password field will appear.
You can offer your loyal customers free shipping or exclusive discounts! We’ll leave this off for now and have customers sign in later to keep things simple.
So, feel free to customize your form to fit your business needs, then click Update to save your changes.
Step 2: Create your landing pages
Now that you’ve set up your form, you’ll need landing pages for each category.
You can design your page however you want. If it makes sense, you can make them more fun with a confetti animation.
Consider the URL slugs carefully. This avoids confusion when creating your redirects. So, for our example, we’ll set up six pages for non-customers with “new-” in the URL. Returning customers will use “returning-”.
So, to make things easy with our form, our new customer URL slugs look like this:
- mysite.com/new-baby/
- mysite.com/new-boys/
- mysite.com/new-girls/
- mysite.com/new-mens/
- mysite.com/new-womens/
- mysite.com/new-accessories/
And our returning customer URLs will look like this:
- mysite.com/returning-baby/
- mysite.com/returning-boys/
- mysite.com/returning-girls/
- mysite.com/returning-mens/
- mysite.com/returning-womens/
- mysite.com/returning-accessories/
You can customize your URLs however you like, but following a similar pattern will make it much easier.
Want a simple redirect after form submit? How to Redirect After Form Submit in WordPress
Step 3: Set up your form redirect settings
Next, we'll set up our redirect easily. First, go to your form and click the Settings tab.
Under Actions & Notifications, find the Confirmation button.
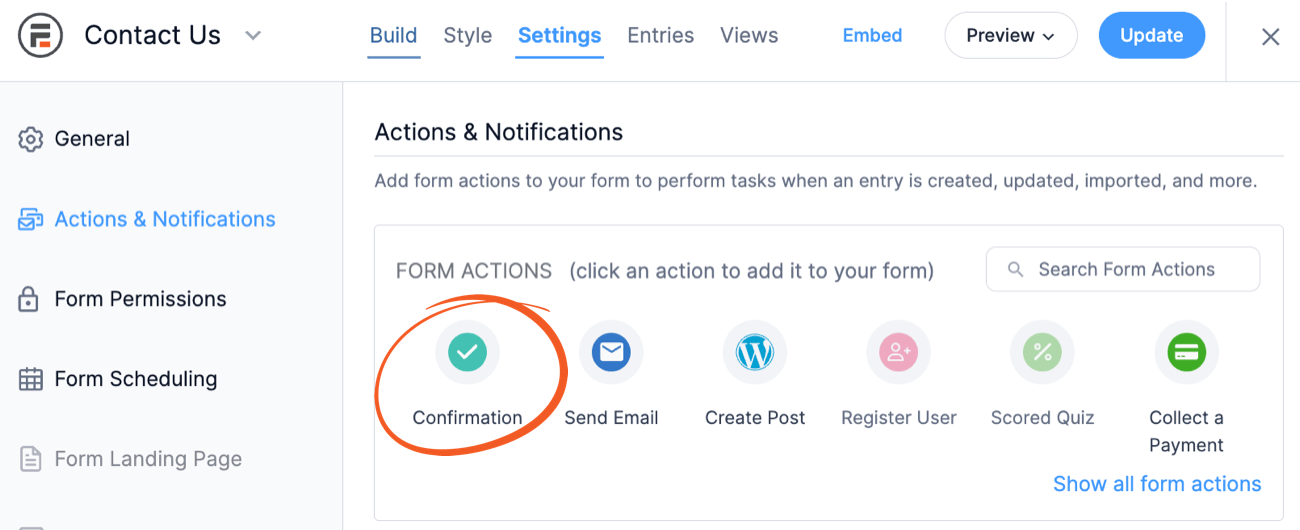
Next, scroll down to the Confirmation section and pick Redirect to URL.
Here, we'll enter our first URL: https://mysite.com/new-baby.
Next, we'll add another Confirmation section for our second URL: https://mysite.com/returning-baby.
Then, choose the Add Conditional Logic button for each and add the following statements:
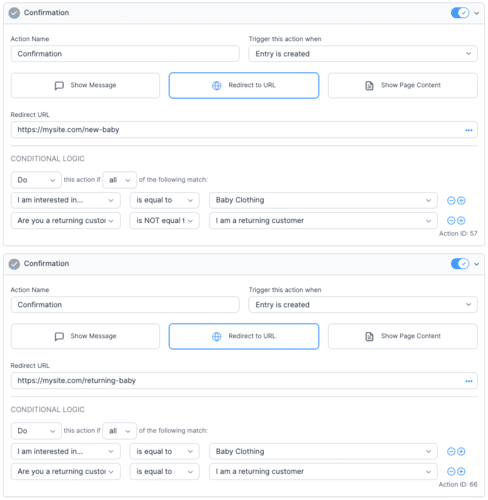
This tells the form to examine the user's answers. If they chose baby clothing and didn't choose returning customers, it'll send them to the URL with new-baby.
If they did choose a returning customer, it will send them to the URL with returning-baby
Next, you can repeat this for each URL. So, whatever the user picks, they'll be redirected to the correct URL.
Don’t worry if this is confusing at first. With our tutorials and videos, you can master conditional statements.
Now, let's get your form displayed.
Step 4: Display your form
Now that everything is created, we need to display it on your website so people can fill it out!
So, head to the post/page where you want to show your form. Then, add a new WordPress block and search for Formidable. Next, select the block and choose your form from the dropdown menu.
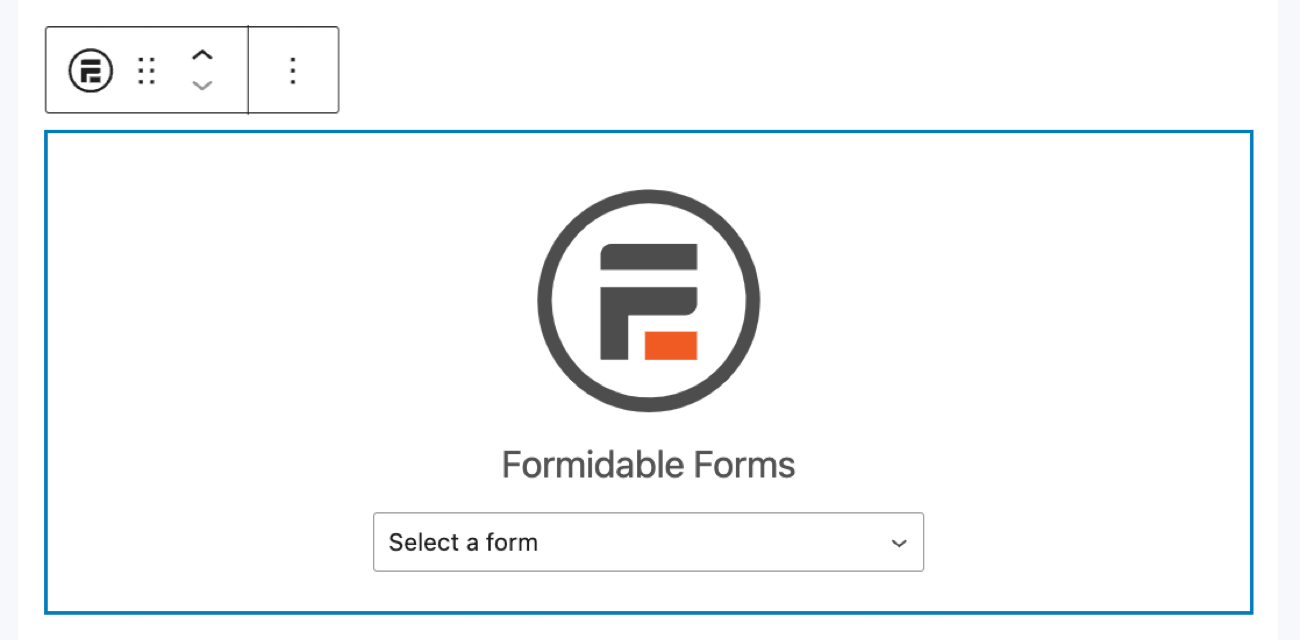
Last, update your post/page, and your form is live!
Ready to set up redirects on your site?
Whether it’s a contact form submission or for products, this helps.
This post taught you how to create and customize your WordPress redirect after form submission with Formidable Forms. As you saw, doing amazing things with Formidable is incredibly easy.
Formidable has tons of features and integrations, including the option to use WooCommerce redirect after checkout.
To learn more about WordPress forms, check out the best plugins for tracking visitors to improve customer flow!
Read more about what you can do with conditional logic!
 How to Build a Calculator That Recommends Actions (Not Just Numbers)
 Why Most Pricing Calculators Don't Qualify Leads
 Unlock Advanced WordPress Form Date Logic & Lookup with Formidable
This article may contain affiliate links. Once in a while, we earn commissions from those links. But we only recommend products we like, with or without commissions.

