
Formidable Forms has made my life so much easier as an event planner.


Last updated on June 19, 2025 by Formidable Team
How To Make a WordPress Contact Form with Multiple Recipients
Discover how to set up a WordPress contact form with multiple recipients for free! Step-by-step guide to easily enhance your site's communication capabilities.
Approximate read time: 5 minutes
Some things should be simple in the email world.
Emailing recipients with a WordPress contact form to send to multiple email addresses? Surely, one of them.
And with this guide, it will be.
So, whether you want to send it to different employees or attach a carbon copy for your records and visitors, we'll show you how to create a WordPress contact form with multiple email addresses in just a few simple steps.
Let's get started.
Upgrade your WordPress site with powerful, flexible forms.
How to create a WordPress contact form with multiple recipients
There are two ways you can do this:
- Code it yourself
- Use a WordPress plugin
Coding it yourself involves knowing advanced code. And we're guessing you aren't a developer if you're reading this article.
And that's why we think the second option is the best (whether you know how to code or not!).
Download a simple plugin, create your form, and set up your notifications. It just sounds easy. And the best plugin to use? That'd be the best form plugin for WordPress: Formidable Forms.
Why Formidable Forms? Besides making your contact form in a few easy steps...it's also FREE! And who doesn't love that? We'll add a bonus step that we think you may like at the end. It requires Formidable Forms Pro, but it's worth checking out.
So, to start, install and activate our free contact form plugin.
Then it's three easy steps:
Step 1: Create a contact form
The first step in creating a contact form with multiple recipients? Create a form!
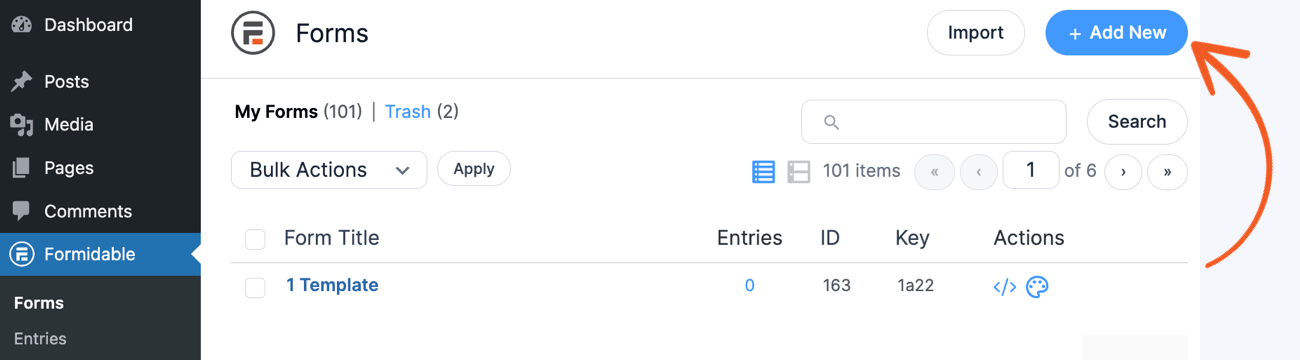
So, in your WordPress dashboard, go to Formidable → Forms and click the Add New button.
If you want to speed things up, there’s no faster way to do this than with our free contact form template! If you want to create your form from scratch, choose the Blank Form option.
Since it's a contact form, include an Email address field, a Name field, and a Paragraph field for the message.
Feel free to add more form fields based on your needs, but these basic options will do for now. Be sure to click the Update button to save your settings.
Step 2: Set up your email notification
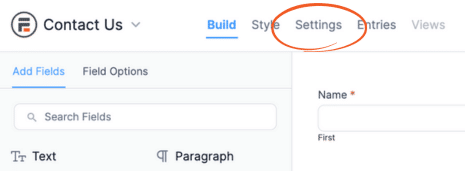
Now, let’s get to the fun part of the Settings page. Here, we'll customize the notification email settings and change the email address in the WordPress contact form.
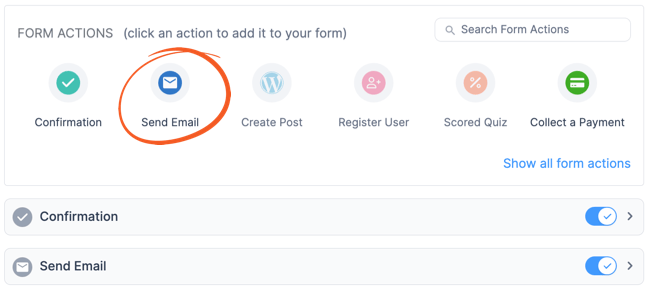
Click on Settings and Actions & Notifications to see all your form notifications.
Next, you may have an Email Notification already created for you for your auto-replies. If so, you can edit it by expanding the Send Email action or clicking it and creating a new one.
First, we have the admin email, which is yours or that of whoever owns the domain. So, add that email address to the send to email address field. Add another email to send the form notifications to multiple emails.
Next, we'll add the recipient's email address who filled out the form. To find that, check the Fields for the shortcode labeled Email Address to choose the answer in the email field.

You can also add multiple emails to the BCC field, the CC field, or any combination of these three fields. The BCC option will send emails to multiple recipients without their knowledge.
To turn these on, click the CC or BCC buttons.
Of course, you may want to create different mail templates to send to internal and external recipients. If so, you can create separate email notification fields for every email you’d like to send.
As you can see, there are many possible ways to send notifications to as many people as you want!
Okay, so that's the basics. But what if you want something a little more advanced?
Step 3: Choose who the email gets sent to
Here’s the bonus step we mentioned earlier. Remember, this one will require one of our premium plans.
For example, let’s say you have multiple departments and want to allow the user to choose where the contact form will be sent.
All it takes is enabling conditional logic.
To make this work in your form, you’ll need to add at least one more field. In this case, you can use a Radio Button, a Checkbox, or a Dropdown field.
No matter which one you choose, you’ll want to add options like “Sales”, “Marketing”, “Human Resources”, and so on. Also, change the field label to something like “Department.”

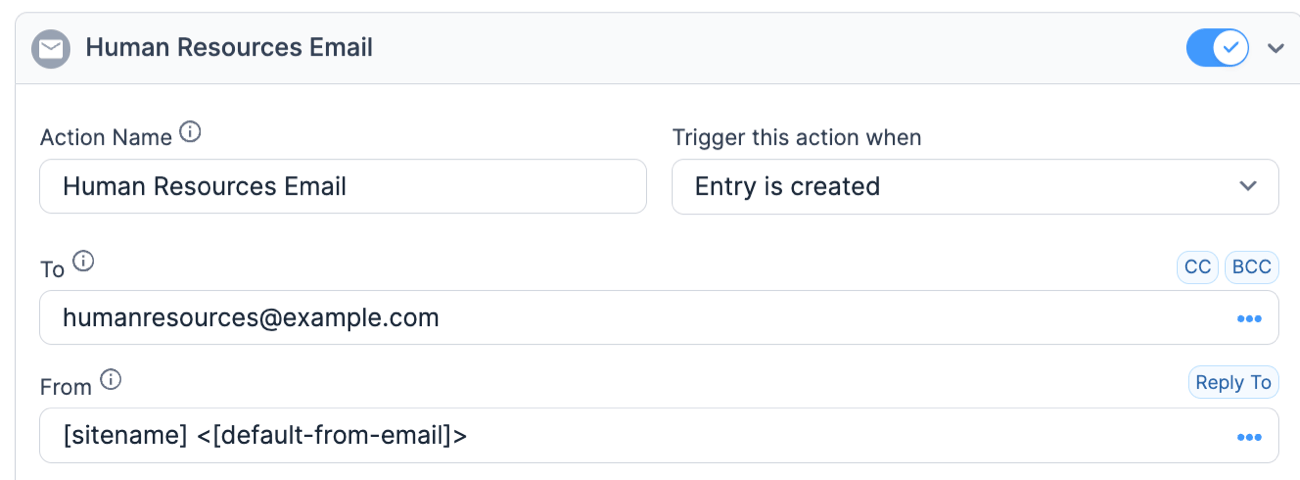
Now, back in the Form Settings tab, add a new notification. Then, enter the "send to" email address in the To box and the message in the Message box, as in the example below:
Now, select Add Conditional Logic.
In this example, set Department is equal to Human Resources:

Now, the email notification will only be sent to the Human Resources department. And you can repeat this for all the other departments to ensure the right people get the right emails!
From Idea to Reality in Minutes. Build Powerful Forms, Dashboards, Apps and More.
Formidable Forms makes advanced site building simple. Launch forms, directories, dashboards, and custom WordPress apps faster than ever before.
So, what's holding you back from creating your form?
Did you know you can even schedule emails for later? Reminder emails, birthday wishes, and more can all be automated. And they all follow a similar process!
So grab Formidable Forms and get started today. And be sure to join our community on Facebook, Twitter, and YouTube for more WordPress tips and tricks!
Read more of our WordPress forms posts
 Sell Products on Your WordPress Site for Free (No WooCommerce Needed)
 Forms vs Apps in WordPress: Where Simpler Tools Collapse
 How a WordPress Payment Approval Workflow Works
 Gravity Forms vs Formidable Forms at Real World Scale
 Introducing Virtual Fields: Keep Sensitive Data Off the Page
 Why Recurring Payments Fail in WordPress After Month 3
This article may contain affiliate links. Once in a while, we earn commissions from those links. But we only recommend products we like, with or without commissions.

