
Powerful forms for data collection and Wide API to merge automation using the best wokflows such as N8N, Zapier. Excellent tool for data collection. Recommended 100%. Furthermore, support is awesome.

Last updated on September 8, 2023 by Formidable Team
How To Create a MailPoet Form in WordPress [5 Steps!]
Want to make a MailPoet form in WordPress? This quick tutorial shows you the best way to create a custom MailPoet form for your site so you can get more subscribers.

Approximate read time: 3.5 minutes
MailPoet comes with standard signup forms, but they're a bit basic, if I may say so.
MailPoet's newsletter and email marketing automation features are great, but its limited form options leave a bit to be desired.
In this post, I'll show you how to use MailPoet in WordPress with form builder to get complete control over Mailpoet form design. Ready to grow that mailing list? Let's do it!
Upgrade your WordPress site with powerful, flexible forms.
What is MailPoet used for in WordPress?
MailPoet is an excellent email service that lets you handle everything from right inside WordPress.

That means no switching between tabs to manage email lists, edit subscription forms, or send newsletters. This little plugin adds an entire email marketing service to your WordPress dashboard.
The main MailPoet features include:
- Basic form builder (contact forms, subscription forms, etc.)
- Email newsletter automation (like post notifications)
- Different form types (fixed bar forms, slide-in forms, and pop up forms)
- Email address/subscriber management
But while it's great at many things, its form editor is pretty limited. Here's a peek:
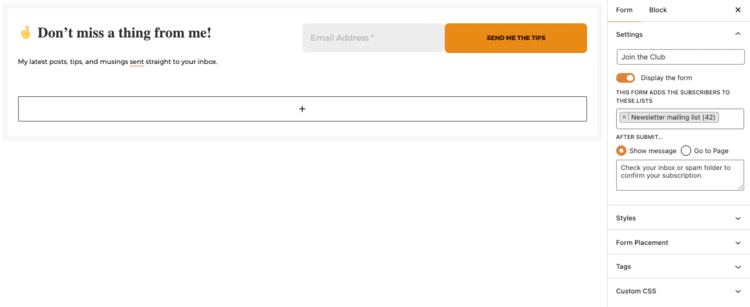
You can enter a form title, display a message, change the form placement, add some styling,... and that's about it. After all, it’s focused on email solutions, not form-building!
So why not pair MailPoet with a WordPress form builder and get the best of both worlds?
You get excellent email features (like MailPoet's sending service) plus a dynamic form tool. That's a win-win!
But which form plugin should you pick? Formidable Forms, of course!

From Idea to Reality in Minutes. Build Powerful Forms, Dashboards, Apps and More.
Formidable Forms makes advanced site building simple. Launch forms, directories, dashboards, and custom WordPress apps faster than ever before.
How to create a MailPoet form in WordPress
Formidable Forms is the best WordPress form builder for MailPoet. Not only does it have a MailPoet integration, but it also has a ton of great features, like:
- A simple drag and drop form builder
- Easy-to-use visual form styler
- Custom success messages
- Custom fields
- Conditional logic
- Calculations
- Landing page forms
It's powerful, flexible, and user-friendly. That's why I recommend it.
That, and the fact that it's our plugin. Try it for yourself risk-free with our 14-day money-back guarantee. I'm sure you'll love it too!
You'll need Formidable’s Plus Plan or above for MailPoet integration. So grab your plan, install and activate the plugin, and then follow along with these five simple steps:
I'm assuming you already have MailPoet installed. If you don’t, install it from WordPress.org first.

Step 1: Connect your WordPress MailPoet account with Formidable
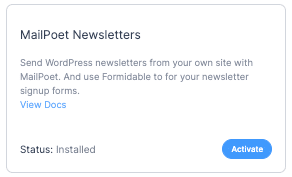
First, go to Formidable → Add-Ons in your WordPress dashboard, and click the Install button for the MailPoet Newsletters add-on.
Once that’s done, you can head to Formidable → Forms for the next step.
Step 2: Create your MailPoet signup form
Now, let's create a form for MailPoet!
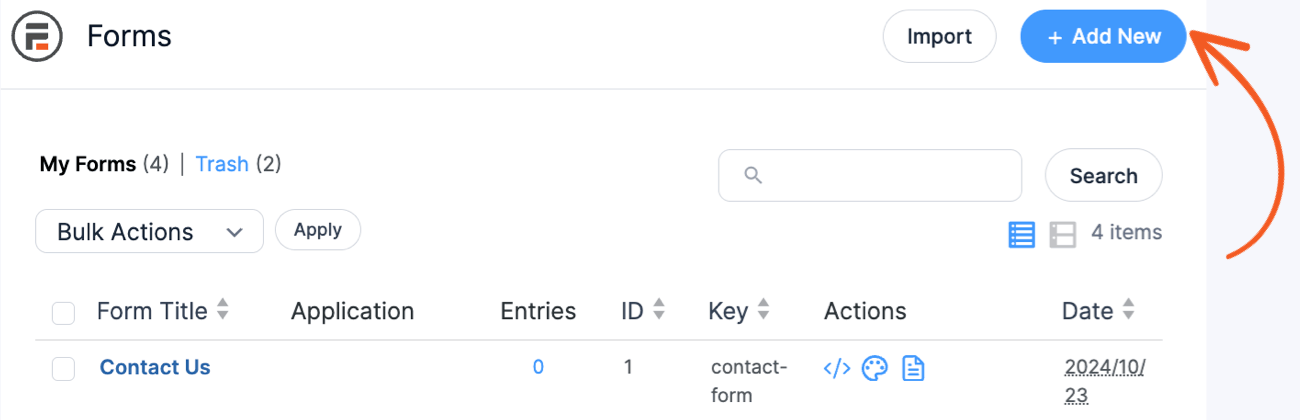
In the Forms menu, click Add New to get started.
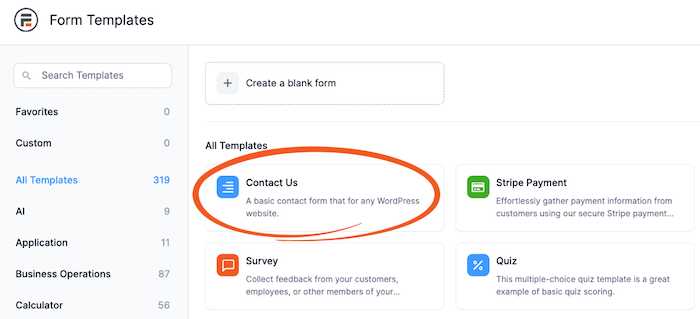
Next, you can choose one of Formidable’s pre-made form templates to speed things up or select Create a blank form to start from scratch.
For example, you can easily create a MailPoet contact form using Formidable’s Contact Us form template.
The plugin will take you to its drag and drop form builder, where you can add fields.
Drag them to the canvas from the Add Fields section on the left. You can customize the field in the Field Options tab.
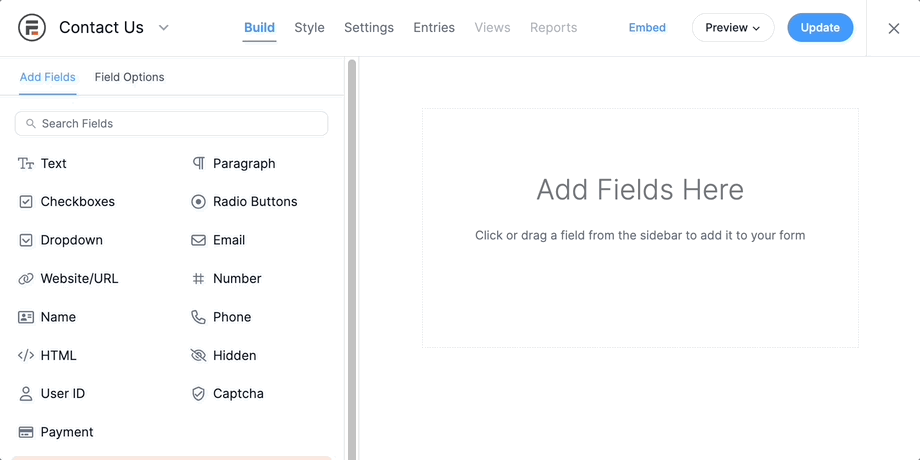
You can add any fields you need. For example, you can add a checkbox field for opt-ins to a certain newsletter or program.
Feel free to continue customizing your form as you need. Once you’re finished, click Update to save your changes.
Next, head to the Style tab to customize the design of your form.

Step 3: Customize your Mailpoet form
With Formidable’s Visual Styler, you have complete control over the design of your MailPoet form.
Adjust font sizes, borders, padding, and more from one menu.
Click the three dots in the Style tab, then Edit your Default Style to begin.
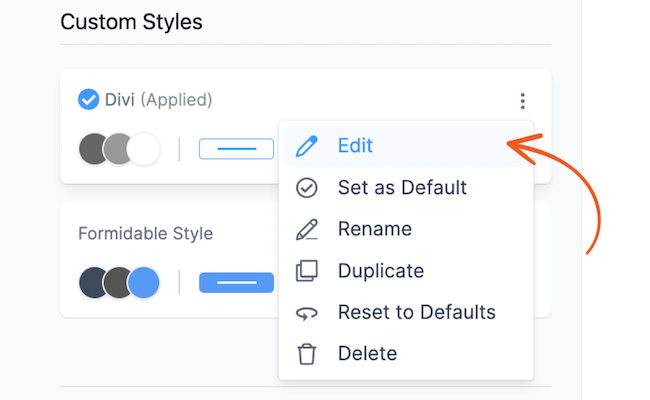
Next, you can customize your form by choosing the category on the left and adjusting its settings.

Make any edits you want until you're happy with your form. Upload a background image, add borders, switch up fonts — whatever you want!
Once you’ve added your artistic touch, click Update to save your changes.
Next, head to the Settings tab to customize our MailPoet settings.
Step 4: Set up MailPoet in the form settings
In your Settings tab, click the Actions & Notifications tab.
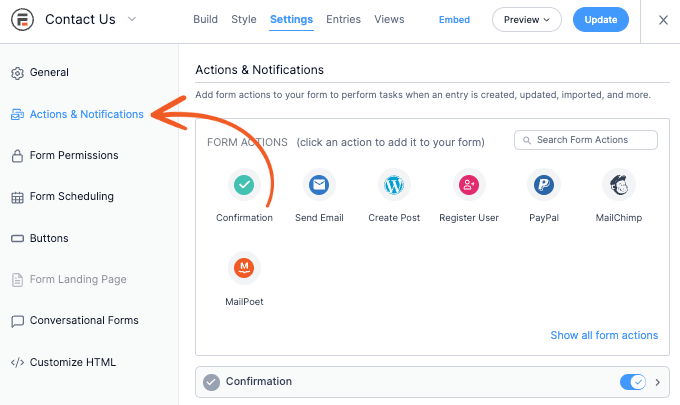
Next, find the MailPoet form action to create a new one.
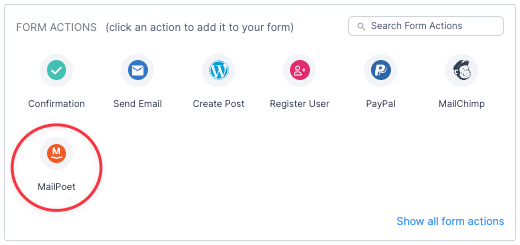
Then a form action tab will open below, and you can use it to customize your settings.
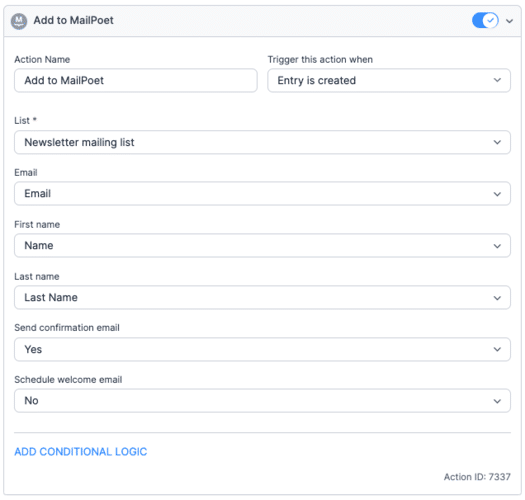
Match the fields to your form’s fields so they fill correctly, and choose the List they’ll be subscribed to.
Once you finish customizing your settings, click Update to save your changes.
Now it’s time to share your form with the world!
Step 5: Display your form
Head to the WordPress page or post where you want to show your form.
Next, add a new WordPress block and search for the Formidable block.
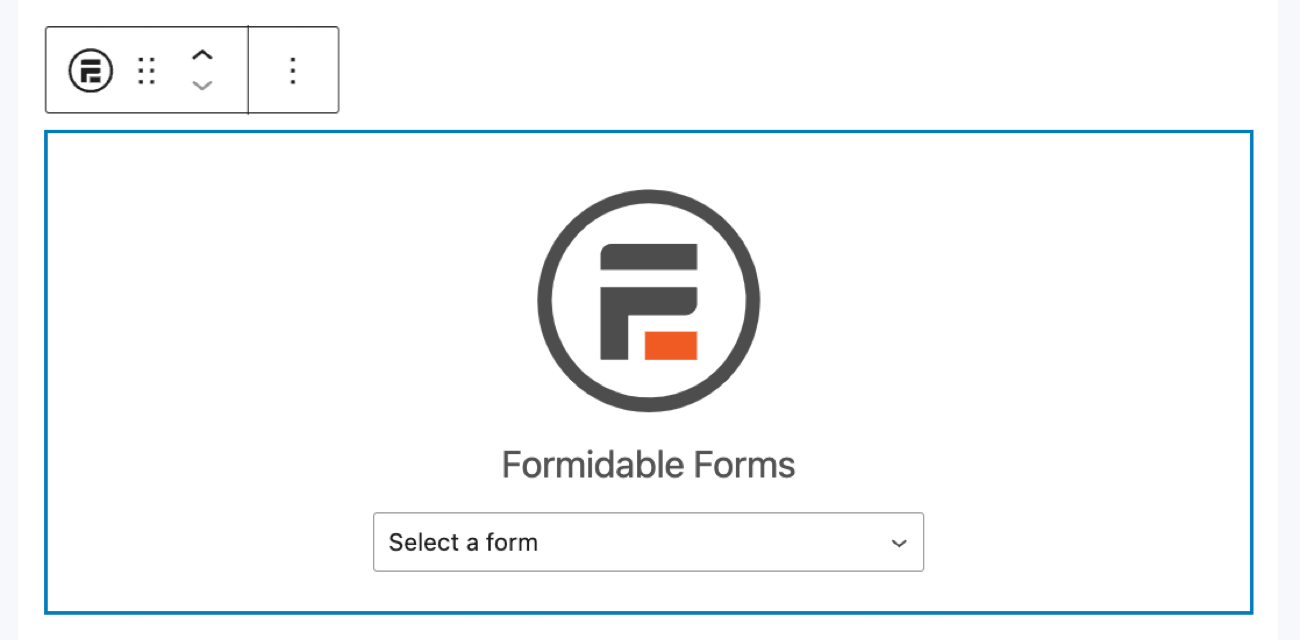
Choose your form from the dropdown menu, and then update the page.
Your form is live and ready to add entries to your MailPoet list!
Ready to create a MailPoet form?
And that’s how you set up MailPoet in WordPress!
With two simple plugins — the MailPoet plugin for WordPress and Formidable Forms — you get everything you need to jumpstart your mailing list to 1,000 subscribers and more! This post showed you how to create, customize, and add a form to MailPoet for your WordPress site.
Whether you want MailPoet subscription forms, popup forms, or a call to action, you now have the plugins.
If you enjoyed this post, you’ll love all the tips and tricks on our Facebook, Twitter, and YouTube accounts!
Read more about WordPress forms!
 Sell Products on Your WordPress Site for Free (No WooCommerce Needed)
 Forms vs Apps in WordPress: Where Simpler Tools Collapse
 How a WordPress Payment Approval Workflow Works
This article may contain affiliate links. Once in a while, we earn commissions from those links. But we only recommend products we like, with or without commissions.

