
Create custom WordPress search forms with the Formidable WordPress form builder plugin. This allows you to search (or filter) form submissions within a View.

Upgrade your WordPress site with powerful, flexible forms.
Create a custom search form
Learn to create a custom search form by following the directions in the tutorial below.
- If you have not done so already, create a form that stores all the form entries that will be searched. This will be your Data Form.
- If you have not done so already, create a View that shows entries from the Data Form created in step 1. Select Grid or Classic for the View type. This is will be your Results View.
- Publish the Results View on a page using the following shortcode:
[display-frm-data id="x" filter="1"]
Replace x with the ID of the Results View. Copy the URL of the page.
- Create a new form, this will be your Search Form. Add as many fields as you would like to the form. Your Search Form will end up looking something like this:

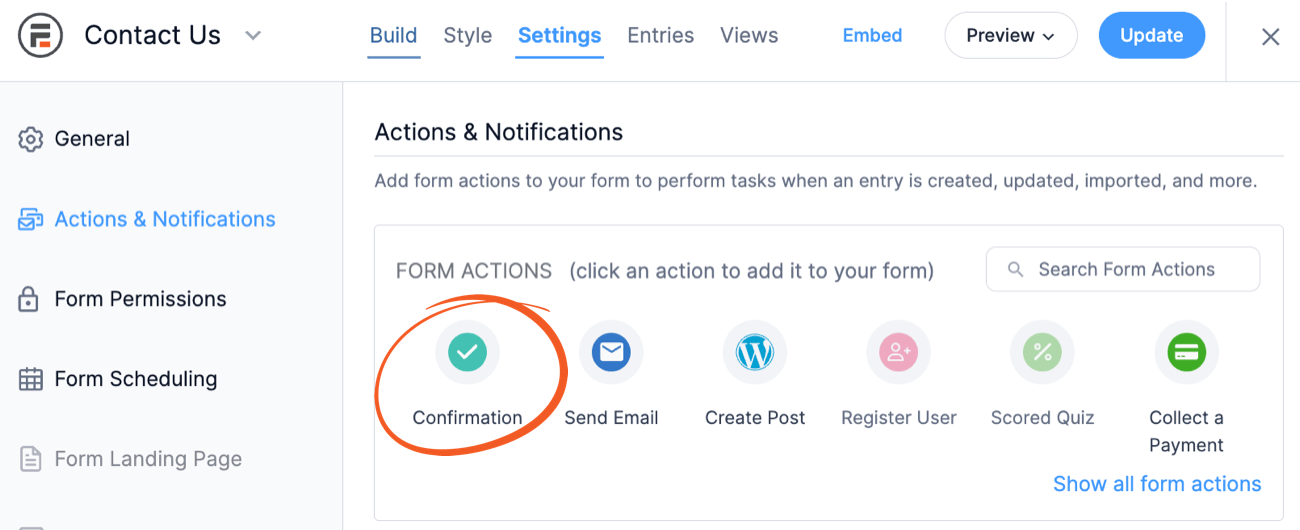
If there are any Dynamic fields in your Data Form that you would like to search, add a Dynamic field to your Search Form with identical settings.If you would like to search values in a Repeater, it is recommended that you create a view from the repeater first. - Go to the Search Form Settings → Actions & Notifications page. Click the Confirmation icon to create the form action.
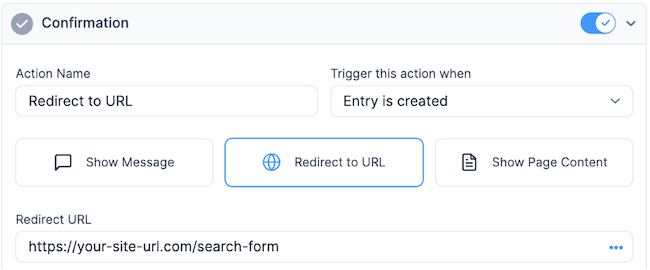
- Select the Redirect to URL button. In the Redirect URL box, paste the URL of the page where the Results View is published.
- Add a parameter to the end of the redirect URL for each field in the Search Form. These parameters will be used to pass the values entered in the search form to the Results View filters.
- Add the first parameter to the end of your redirect URL, it should look something like this:
?fname=[x]
- Replace fname with any text. Stay away from names like 'post', 'p', 'date', 'year', 'month', and 'name' as they are commonly used by WordPress.
- Replace x with the ID of the First Name field in the Search Form.
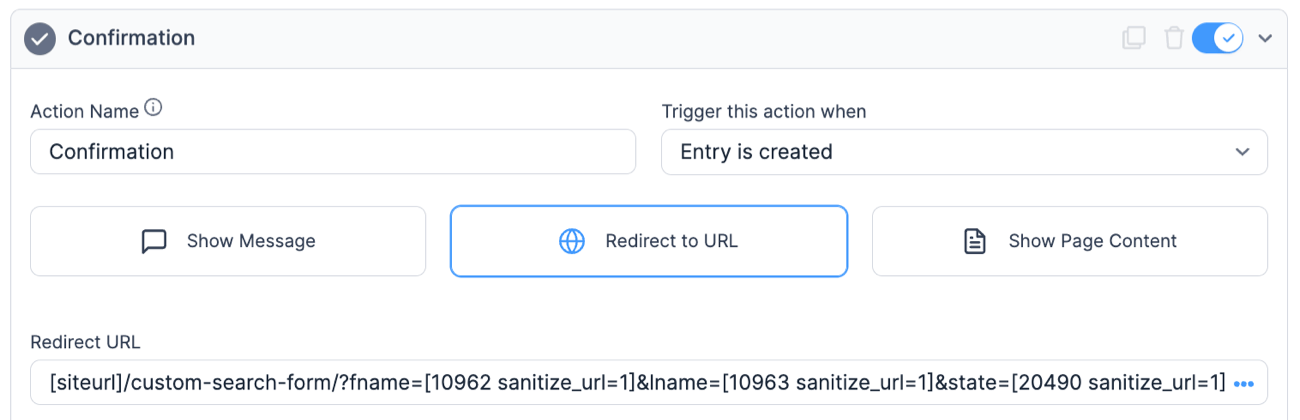
- For any additional parameters, replace '?' with '&'. The first parameter will need to begin with a ?, each additional parameter will have to begin with an &.
The redirect URL should look something like this when you are done adding parameters:
Replace 25, 26, and 27 with the field IDs from the Search Form. - Add the first parameter to the end of your redirect URL, it should look something like this:
- Go to your Search Form Settings → Actions & Notifications and delete the Email Notification action.
It is also recommended to select Do not store entries submitted from this form in your Search Form Settings → General → On Submit section. - Go to edit the Results View. Click the Filter Entries link in the View builder and add a filter for each field in your Search Form. If the search form contains a first name, last name, and a dropdown field, you will add three filters that look something like this:
Make sure fname, lname, and state match the parameter names you added to the end of the redirect URL in Step 6.


From Idea to Reality in Minutes. Build Powerful Forms, Dashboards, Apps and More.
Formidable Forms makes advanced site building simple. Launch forms, directories, dashboards, and custom WordPress apps faster than ever before.
Publish search form and results View
There are a few different ways to publish a search form and results View. You may want the search form and results View on the same page or on different pages. If they're on the same page, you may want to hide the results until a search is performed.
Publish search form and results on same page
If you would like the Search Form and the Results View to be published on the same page, follow the steps here:
- Create a custom search form, if you have not done so already. Make sure your Results View is published on a page.
- Go into the Results View Before Content and insert the Search Form shortcode.
[formidable id="x" minimize="1"]
Replace x with the ID of the Search Form.
- While in the Results View, insert the Search Form shortcode in the No Entries Message box that can be found in the right sidebar of the View builder.
[formidable id="x" minimize="1"]
Replace x with the ID of the Search Form.
- Click Update. Now when the user visits the page where the Results View is published, the Search Form and the Results View will be displayed together.


Publish search form and results on separate pages
If you would like to take the user to a separate search results page after they submit a search form, follow the instructions below.
- Create a custom search form, if you have not done so already. Make sure your Results View is published on a page.
- Publish your Search Form on a page using the following shortcode:
[formidable id="x"]
Replace x with the ID of the Search Form.
- Click Update. Now when the user submits a search on the Search Form they will be redirected to a page where their search results are displayed.
Hide results view until search is performed
If you would like to prevent results from showing up before a search is performed, follow the steps below.
- Create a custom search form if you have not done so already. If you already have a custom search form created, please ensure it is not in the Before Content or After Content section of your View.
- Go into your Search Form Settings → Actions & Notifications page, and add this to the end of the redirect URL in your Confirmation action.
&show_view=yes
Your redirect URL should look something like this:
- (Optional) If your Results View has any [detaillink] shortcodes, add '?show_view=yes' to the end of it. It should look something like this:
<a href="[detaillink]?show_view=yes">Link Name</a>
- Lastly, publish the Search Form and the Results View on a page. Replace x with the Form ID, and y with the View ID.
[formidable id="x"]
[frm-condition source=param param="show_view" equals="yes"][display-frm-data id="y" filter="1"][/frm-condition]
Make sure to save the page when you're done.
- Now when the page is visited, no entries will be visible until a search has been submitted.


Show the search terms after a search
After a search is performed, the Search Form will be blank by default. If the Search Form and Results View are on the same page, you can populate the Search Form with the search terms, if you like. Set a default value for each field by retrieving the corresponding search term from the URL like so:
[get param=search-term-param]
Use exactly the same param name as the one you used for the field in the redirect URL. If a search term has been set for the field, it will appear in the field. Otherwise, the field will be blank. When a user first views the Search Form, its fields will be blank.
Additional Options
Use a Checkbox field in search form
If you would like to use a Checkbox field in the Search Form, please add this code to the WPCode plugin or a child theme's functions.php file.
Search dates
If you include a date field in the search form, you may have inaccurate search results. Therefore, you will need to change the redirect URL a bit in your search form. If the date part of your form looks like this: mydate=[30], then you will change it to: mydate=[30 format='Y-m-d']. This will change the format of the date used for searching.
Search date range
If you would like to search using a date range, follow the instructions below:
- In your Search form, add two date fields: Start Date and End Date.
- In your Data form View, click the Filter Entries link in the View builder and add two filters for your date field.
- Date field is greater than or equal to [get param="startdate"]
- Date field is less than or equal to [get param="enddate"]
- In your Search form, add the startdate and enddate parameters to the end of the redirect URL for each field.
[siteurl]/search-form/?startdate=[100 format='Y-m-d']&enddate=[101 format='Y-m-d']
Replace 100 and 101 with their respective field IDs.


Search by User ID
If you would like to search by User ID, follow the instructions below:
- Add a Dynamic field to the Search form to load Form Entries options from your Data Form. Select the User ID field.
- Since there will be duplicate values, add this code snippet to remove those duplicate values from a Dynamic field. You can put the code in the WPCode plugin, your plugin, or your theme’s functions.php file.
- In the Redirect URL for this search form, your URL could look something like:
[siteurl]/results-view/?frm_user_id=[65 show="ID" sanitize_url=1]
- Where /results-view/ is the page where you have published your Results View.
- Replace 65 with your Dynamic field ID.
- Insert the show=ID parameter to display the User’s ID.
- In the Results View, add a View filter like:
User ID is equal to [get param=frm_user_id].


Remove blank fields from search URL
If you would like to remove search fields from the URL when they are not filled in, you may add if statements around each parameter, like this:
https://your-site-url.com/search-form?[if 25]fname=[25][/if 25][if 26]&lname=[26][/if 26][if 27]&date=[27 format='Y-m-d'][/if 27]
These field IDs are the IDs from the search form. The [if xx] [/if xx] are used to remove that part of the URL if the field is left blank in the search form.
Search all fields
If you would like to have a field in your Search Form that searches all the fields in your Results View, including fields that are not visible in the view, add a text field to your Search Form and put '?frm_search=[25]' at the end of your search form's redirect URL.
https://your-site-url.com/search-form?frm_search=[25]
Replace 25 with the ID of the text field.
Remove duplicates from Dynamic fields
If you would like to use a Dynamic field in a search form which searches data from a non-Dynamic field, you may have duplicate values appear in the Dynamic field. You may use the frm_remove_duplicates function to remove duplicate values from the Dynamic field in your search form.
Troubleshooting
Please follow these steps to troubleshoot your search form if you are having trouble:
- Duplicate the search results View and replace the [get param] values in the filters with hard-coded values that you think should work. For example, replace [get param=color] with red, then preview the View to make sure the filters give the expected results.
- Check that the param values match the entry values completely—spacing, punctuation, spelling, capitalization, etc. If the view filters correctly now, then the issue is likely with the search form itself, and you can skip to step 6. If the View is still not filtered correctly, there may be other issues with the entries, the data form, or the View itself.
- View the page where you are redirected after submitting the search form. Look at the URL of the page and make sure that the parameters appear correctly, i.e.
?fname=Rob&lname=Smith&uState=Arizona
- If the parameters are blank or do not look right, try manually changing one of the parameters to a value of one of the fields being searched that you know exists in an entry, for example, change &color= to &color=Red.
- Do not use any parameters that may be reserved by WordPress. For example, change ?m=[x]&p=[y] to ?model=[x]&price=[y] and update the [get param] shortcodes in the view filter settings.
To make sure your parameter names are not used by WordPress, please compare against the query parameter list in the docs. - Check to make sure that there aren't filters set on the view that would prevent entries from being shown, such as User ID filters or limits on number of entries.
- Check to make sure that the field ID shortcodes in the "Redirect to URL" setting in your search form are the correct field IDs from the fields within the search form, not the data form.
- Verify that you are searching entries for the correct form, and that entries exist for that form.
If you still have issues after going through all these steps, please open a Help Desk ticket and let us know your results from the above steps.
