
The Date field allows users to select a date from a pop-up calendar. A Date field stores values in the Y-m-d format but the field displays dates in the format selected in your Formidable Global Settings.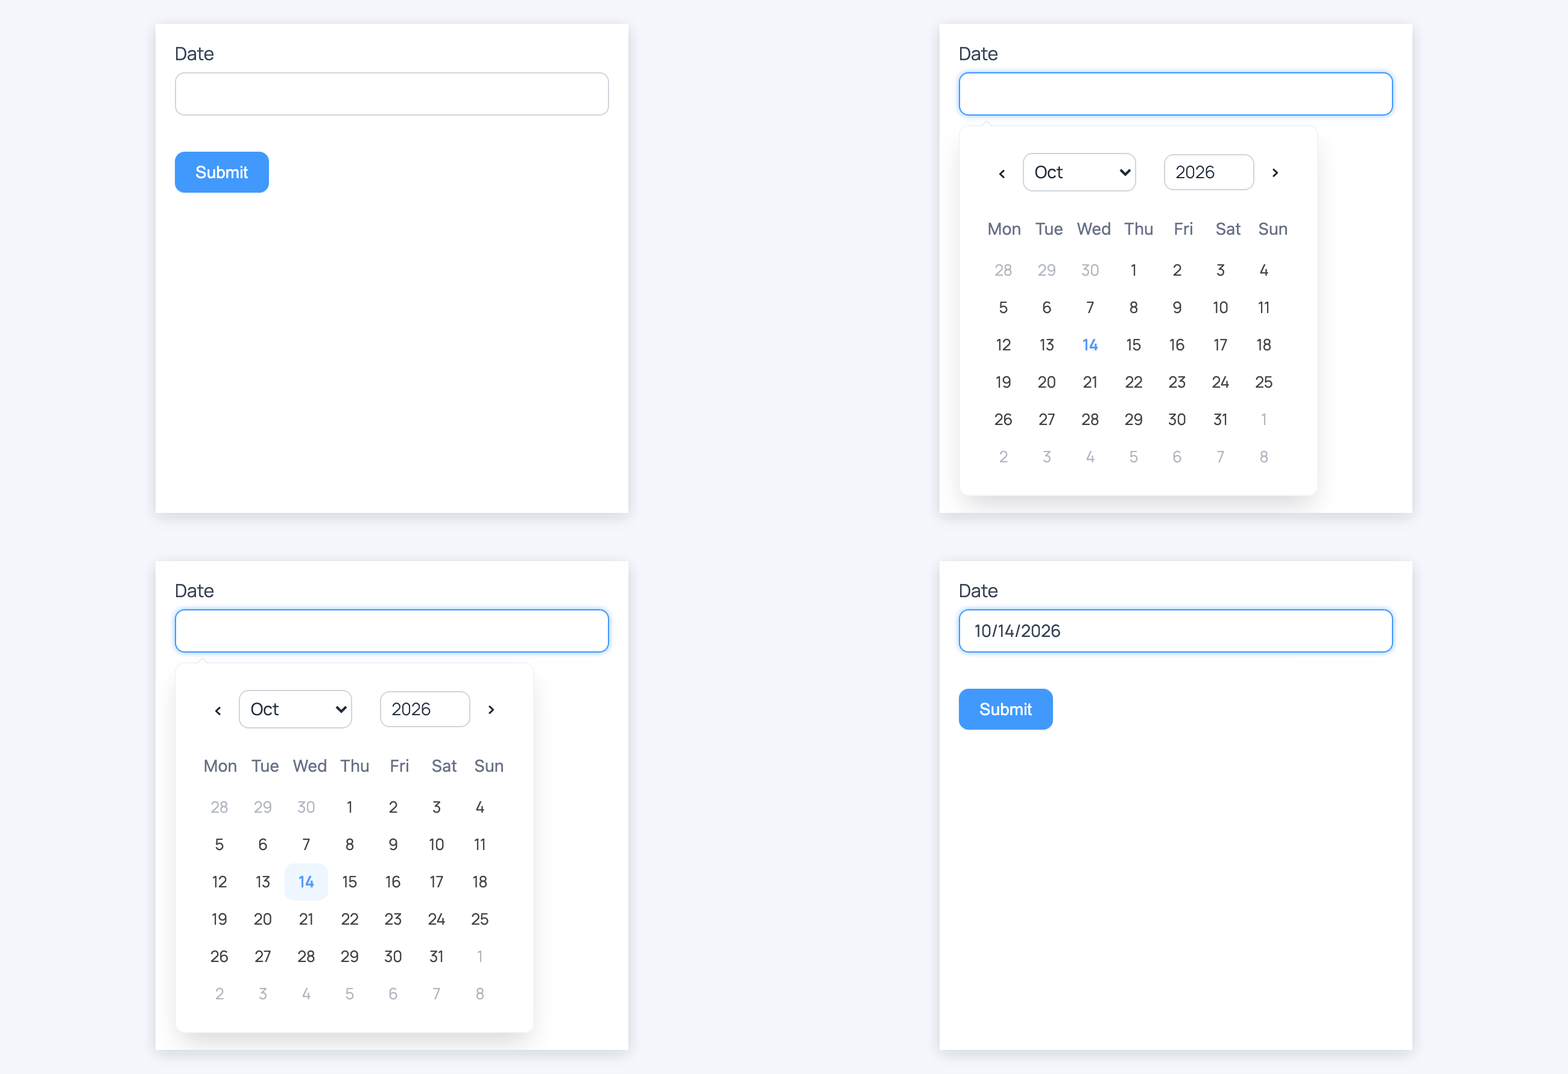
With the Flatpickr date picker library, the default since Formidable Forms 7.0, users choose the date from the calendar and can't type it in. If your site uses the jQuery date picker library, users can also type a date. You can switch libraries in Formidable → Global Settings → General Settings under Date Picker Library.
For more advanced options, see the Datepicker Options add-on.
Upgrade your WordPress site with powerful, flexible forms.
Standard field options
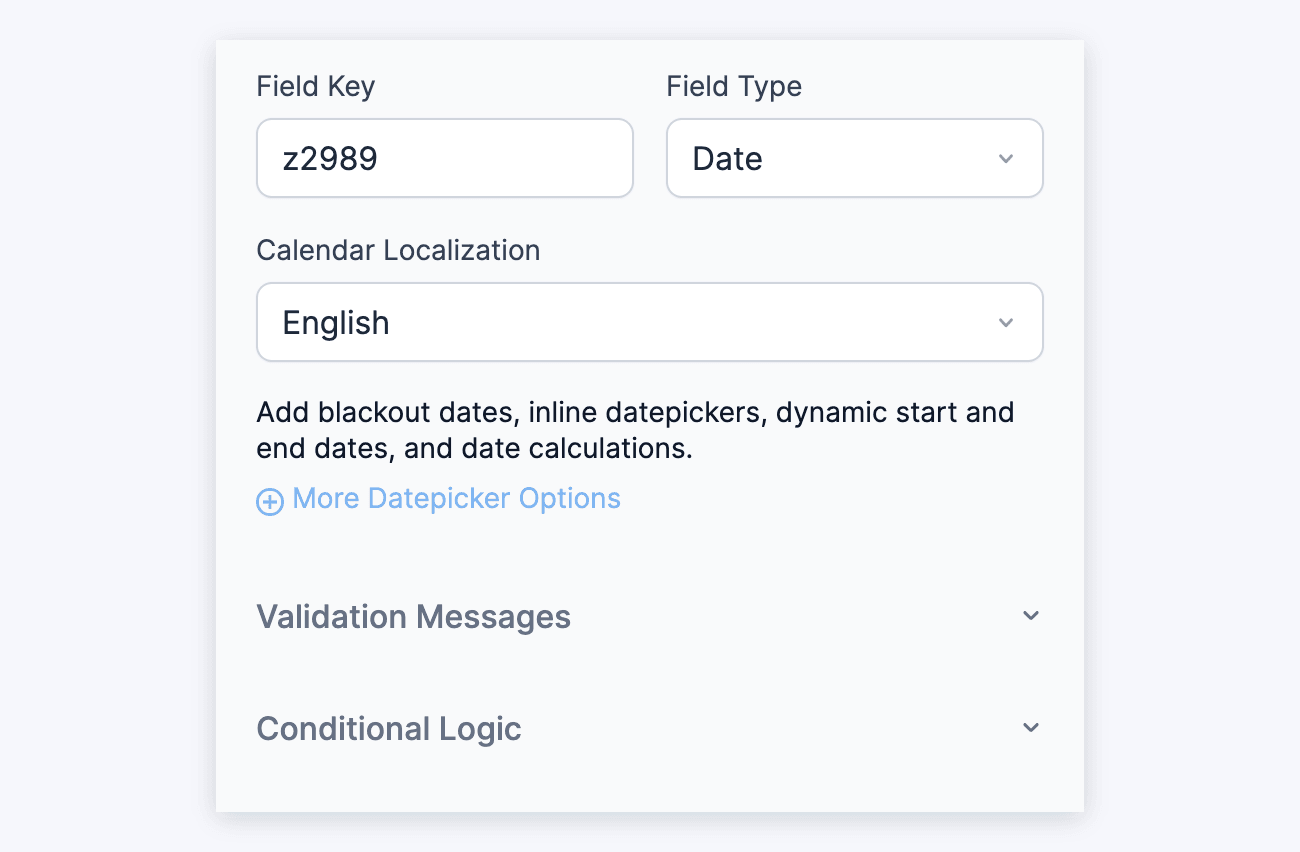
A Date field has the following standard options: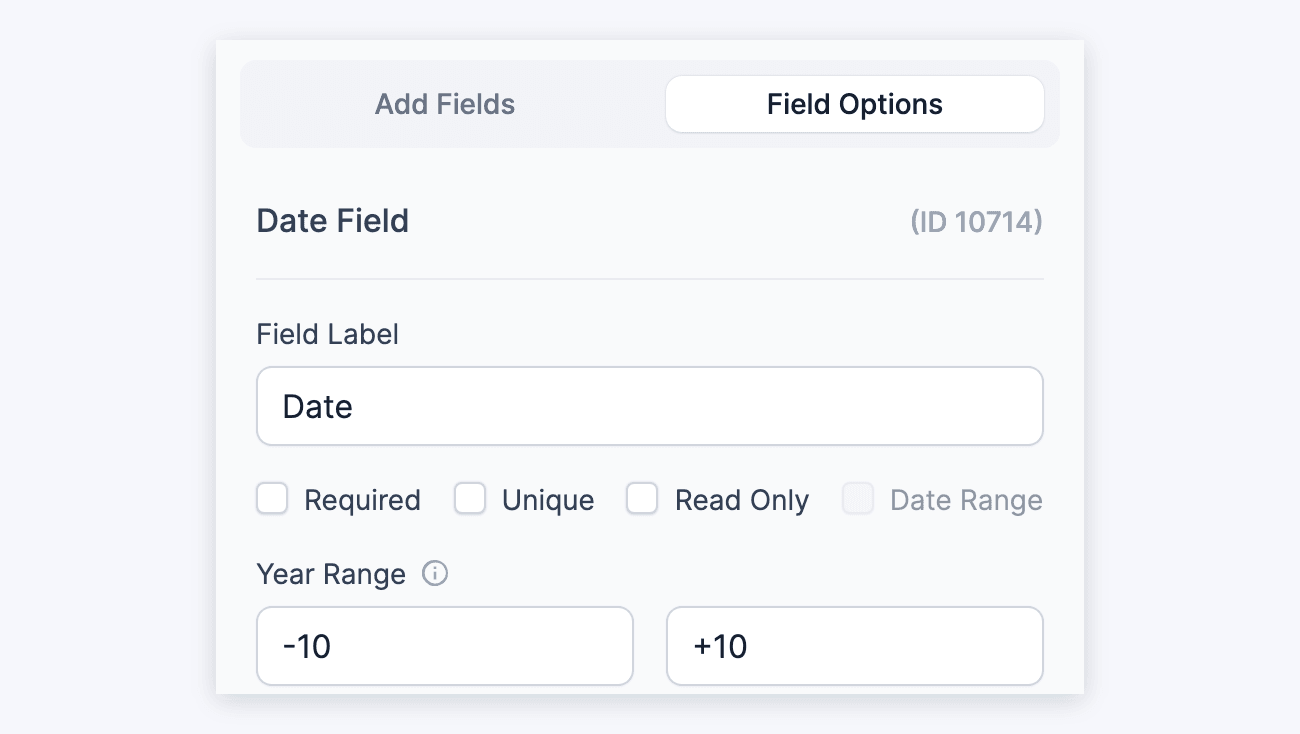
- Field type
- Required
- Unique
- Read Only
- Field key
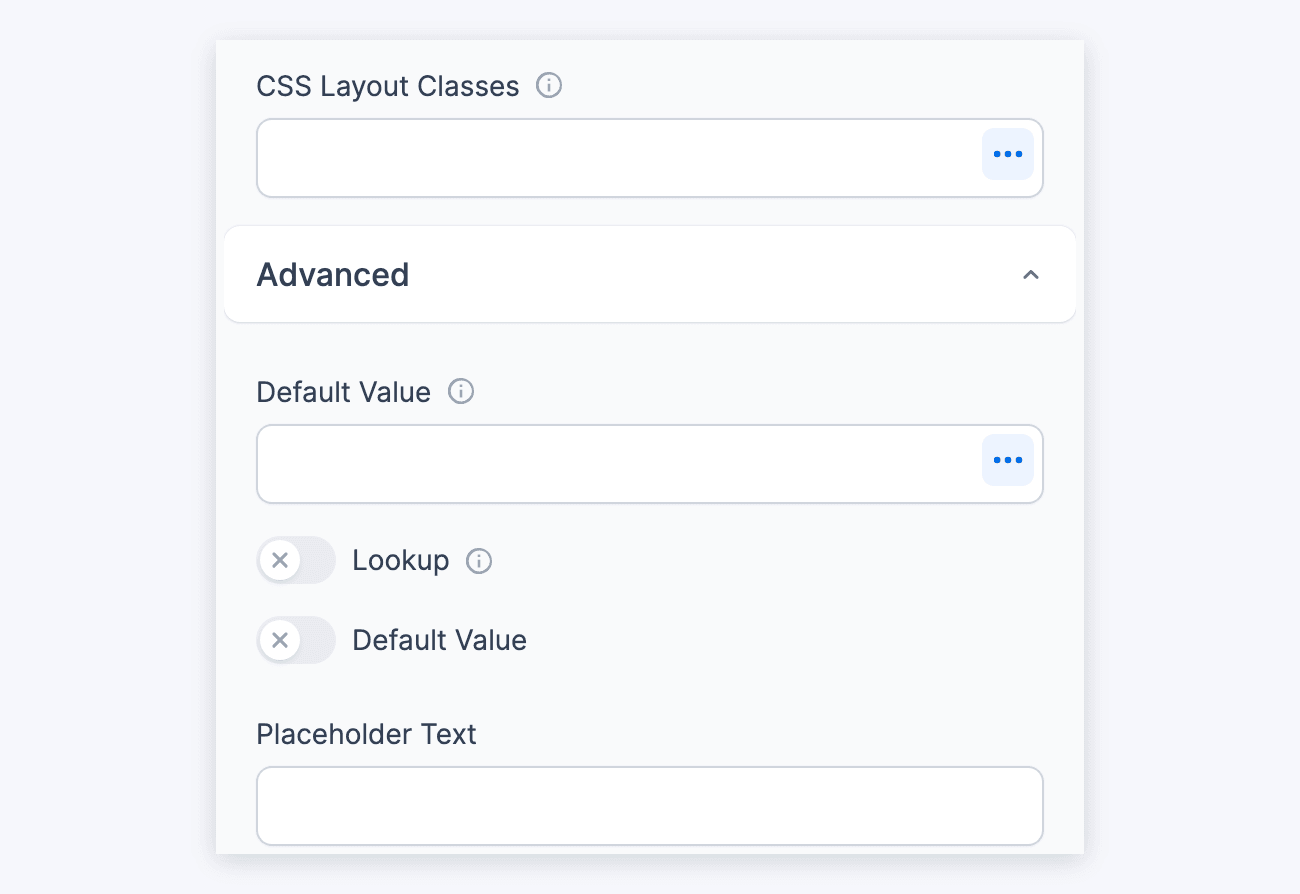
- CSS layout classes
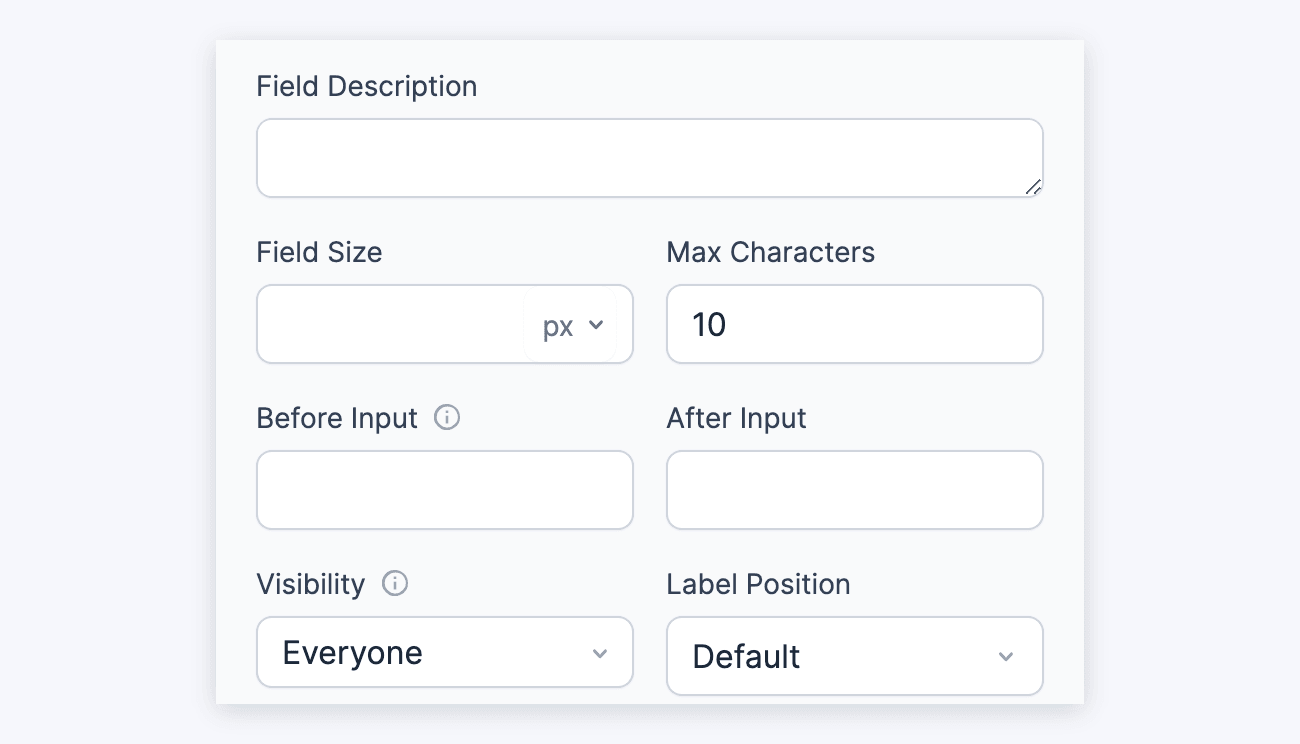
- Label position
- Field size
- Visibility
- Before & After Input
- Conditional logic
- Lookup value
From Idea to Reality in Minutes. Build Powerful Forms, Dashboards, Apps and More.
Formidable Forms makes advanced site building simple. Launch forms, directories, dashboards, and custom WordPress apps faster than ever before.
Field specific options
In addition to the standard field options, a Date field has a few field specific options. Plus, there are more powerful options available in the Datepicker Options add-on, such as date ranges.
Calendar localization
In the Calendar Localization dropdown, choose the language your calendar displays in. To find it, look in the field's Advanced section. English is the default.
Year range
The Year Range boxes set which years the calendar offers. They're set to -10 and +10 by default, so the calendar shows 10 years before and after the current year.
To set a dynamic year range for a date field calendar, enter -50 for the start year and +0 for the end year. This sets the start date to 50 years ago and the end date to the current year. Change 50 and 0 to any integer.
In a date range, set the Year Range on the start date field. The end date field takes the same Year Range from it when you click Update, even if you type other years in its own boxes. Because Calendar Localization isn't shared, set the language on both fields.
Date field styling
To change how the datepicker looks, open your form and click the Style tab (1). Click Edit style at the bottom of the form preview (2).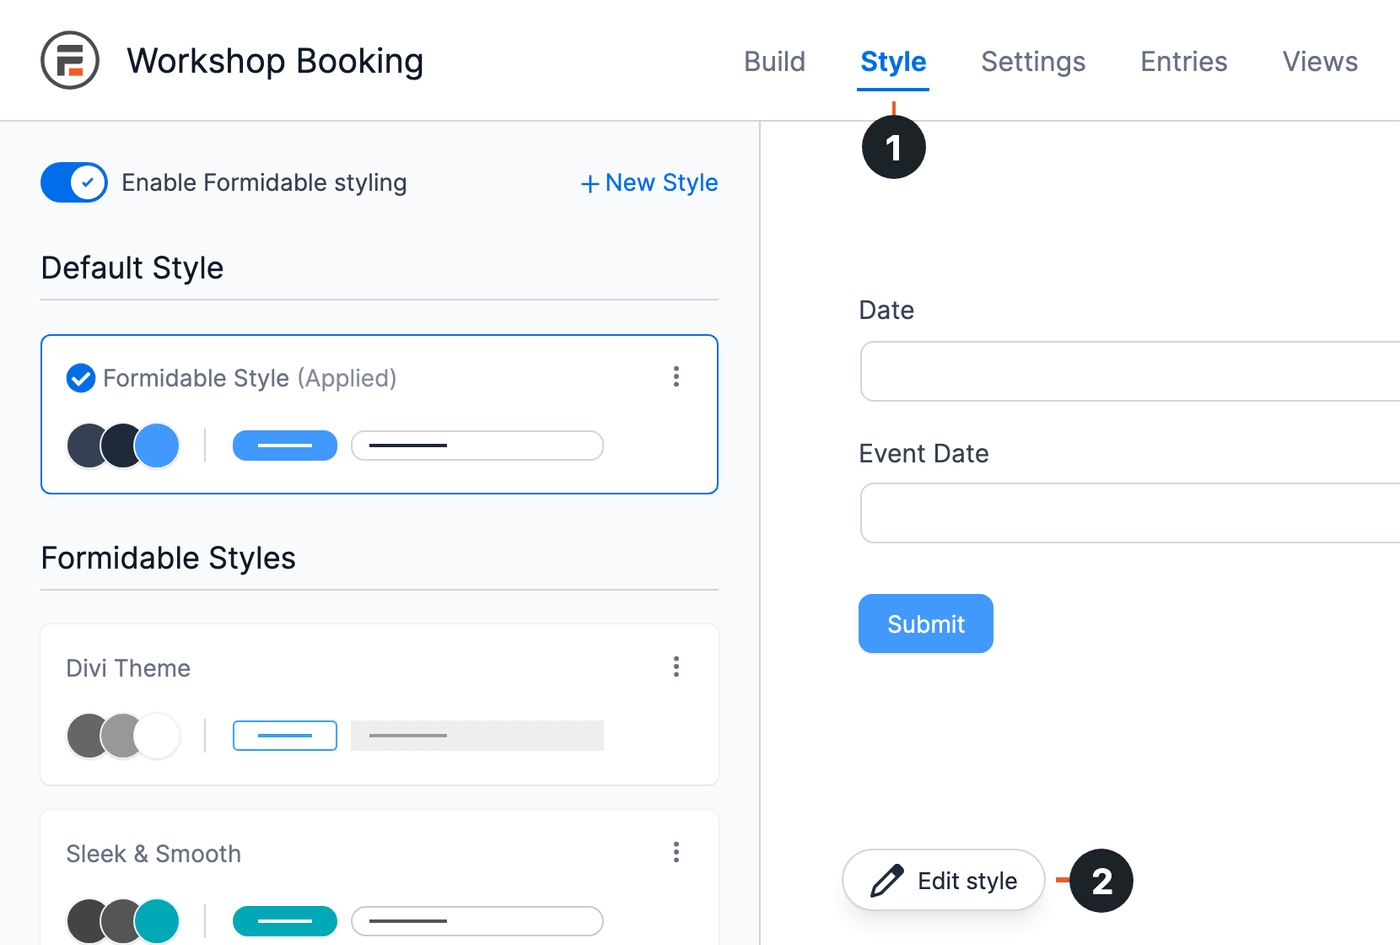
Then click Show advanced settings at the bottom of Quick Settings.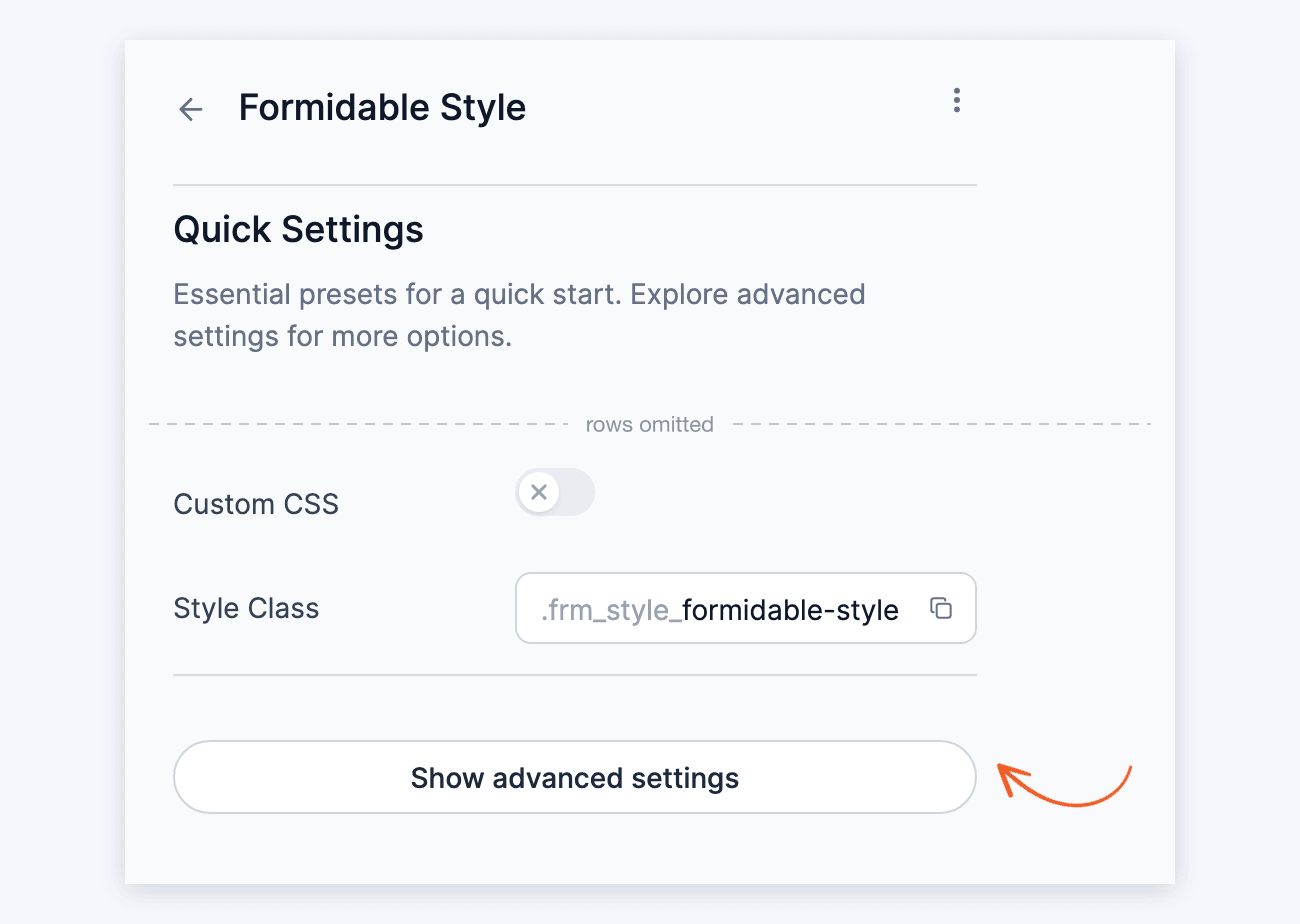
Open the Date Fields section. Here, you can change the head, font, and band colors. You can style a datepicker for each style.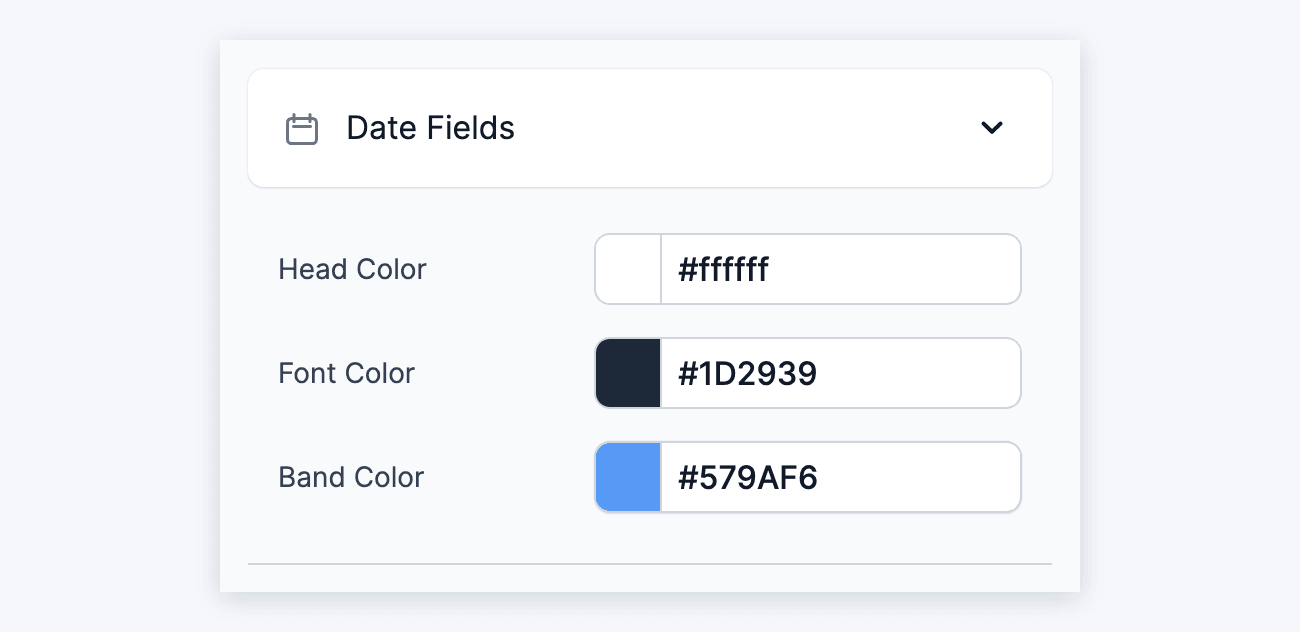
The calendar your users see on the front end uses these colors from the form's style.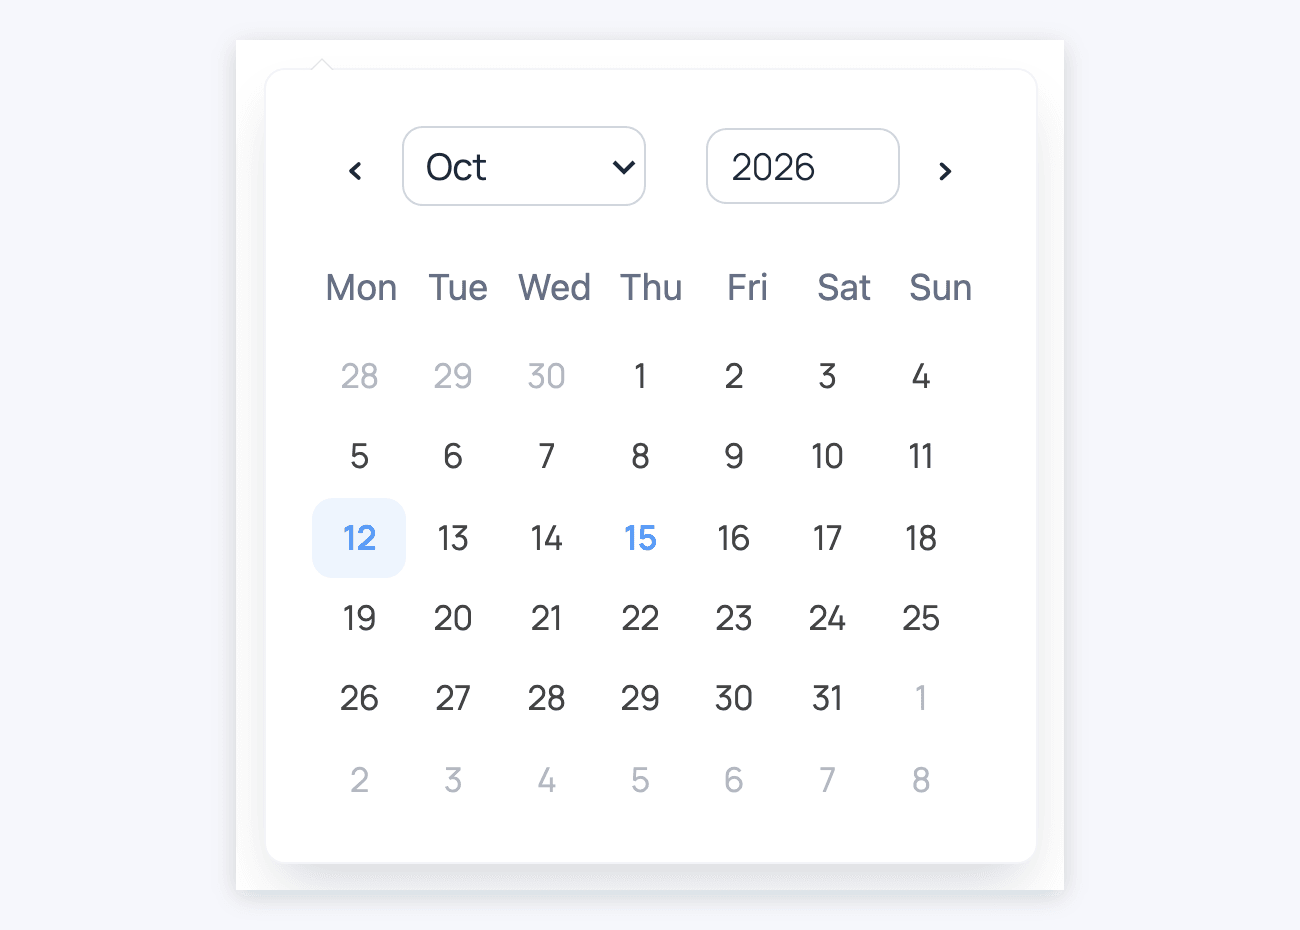
To learn more about styling your form, see the visual form styler page.
Default values and field icons
To prefill a Date field, open its field options and expand Advanced. Then enter a value in the Default Value box. To show hint text instead, use the Placeholder Text box. Learn how to set a default value and how to set a placeholder in a Date field.
Field action icons allow you to duplicate, delete, or move a field on the form builder page. See the field action icons article for more information.
Set default to the current date
Autopopulate a Date field with the current date by inserting the [date] shortcode in a field. By default, this will display the current date in the format selected in your Formidable Global Settings. To display a specific format, use the following shortcode:
[date format="m/d/Y"]
You may replace m/d/Y with any of the accepted PHP date() format characters.
Using current date in form action
If you want to set the conditional logic of a form action based on the current date, you can use the [date] shortcode in the form action conditions. For example, if you want to conditionally send an email when a date field has passed or hasn't passed today's date, it will compare the current date every time the entry is created or updated. In your form action, toggle on Add Conditional Logic (1). Then set the rule (2) to your Date field, is greater than, and [date format="Y-m-d"].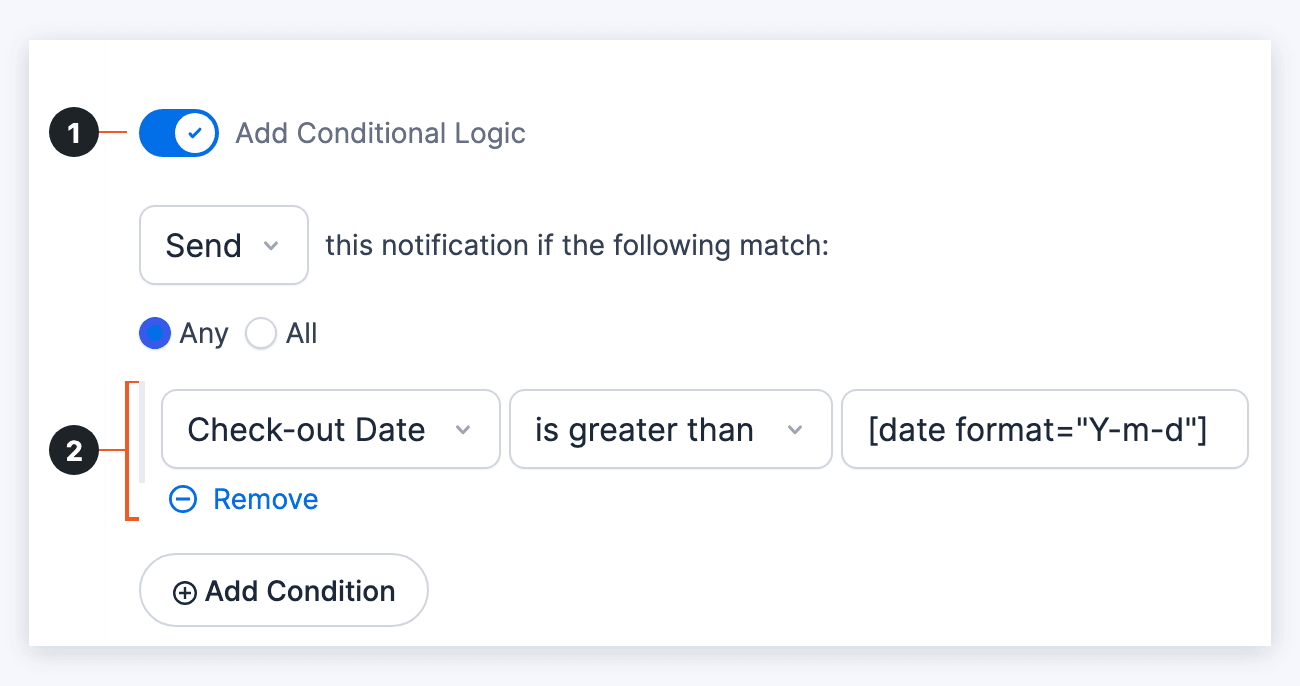
Display date fields
Display the value submitted in a Date field in a form's confirmation message, email, or View.
Display date
Display the value submitted in a Date field. By default, the date will be displayed in the format entered in your WordPress → Settings → General page in the 'Date Format' setting.
[x]
Replace x with the ID or key of the Date field.
Display a specific date format
Display the value submitted in a Date field with the format of your choosing. You may use any of the PHP date() allowed format characters.
[x format="m/d/Y"]
Replace x with the field ID or key of the Date field.
Time ago
Display the number of days, weeks, months, or years ago the entered date is from today's date. This also calculates dates in the future for countdowns.
[x time_ago=1]
Replace x with the field ID or key of the Date field.
See more time_ago options.
Offset
Calculate a date by adding or removing a set amount of time. For example, calculate a pregnancy due date by adding a set number of days to the selected date.
[x offset="+280 days"]
Replace x with the field ID or key of the Date field.
For more flexibility, you can combine time_ago and offset. Our pregnancy due date example shows the number of weeks until the calculated due date with:
[x offset="+280 days" time_ago=week]
Compare date fields
Use the [date_calc] shortcode to compare date fields. Place the shortcode in a field's calculation. In the field options, expand Advanced and turn on Calculate Value (1). Then select Math (2) and enter the shortcode in the Field Formula box (3).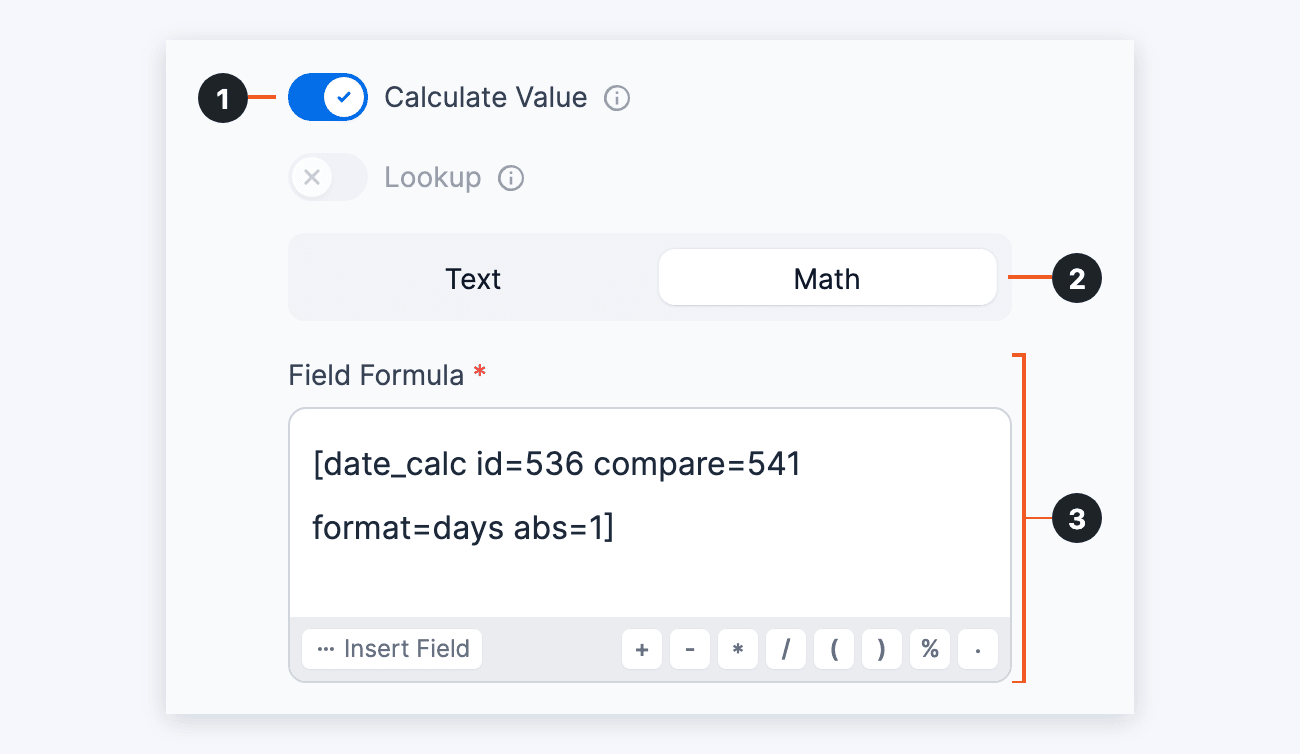
For example, if the first date selected is the current date and the second date being compared is five days ago, various options will return different results. Here are a few examples:
| Shortcode | Result |
|---|---|
[date_calc id=536 compare=541 format=days] | -5 |
[date_calc id=536 compare=541 format=days abs=1] | 5 |
Replace 536 and 541 with the ID or key of the date fields to compare.
Parameters
compare
Use this option to compare a date field with a specific date.
[date_calc id=536 compare="2020-01-01" format=days abs=1]
Replace 536 with the ID or key of the Date field and replace 2020-01-01 with your preferred date.
count_blackout_dates
By default, the [date_calc] shortcode will automatically exclude blackout dates when using the format="days" option. Use this option to include the blackout dates in the date calculation. Blackout dates come from the Datepicker Options add-on. This option only changes the result when that add-on is active and the Date field has blackout dates.
[date_calc id=536 compare=541 format=days abs=1 count_blackout_dates="1"]
Replace 536 and 541 with the ID or key of the date fields to compare.
Create a booking form
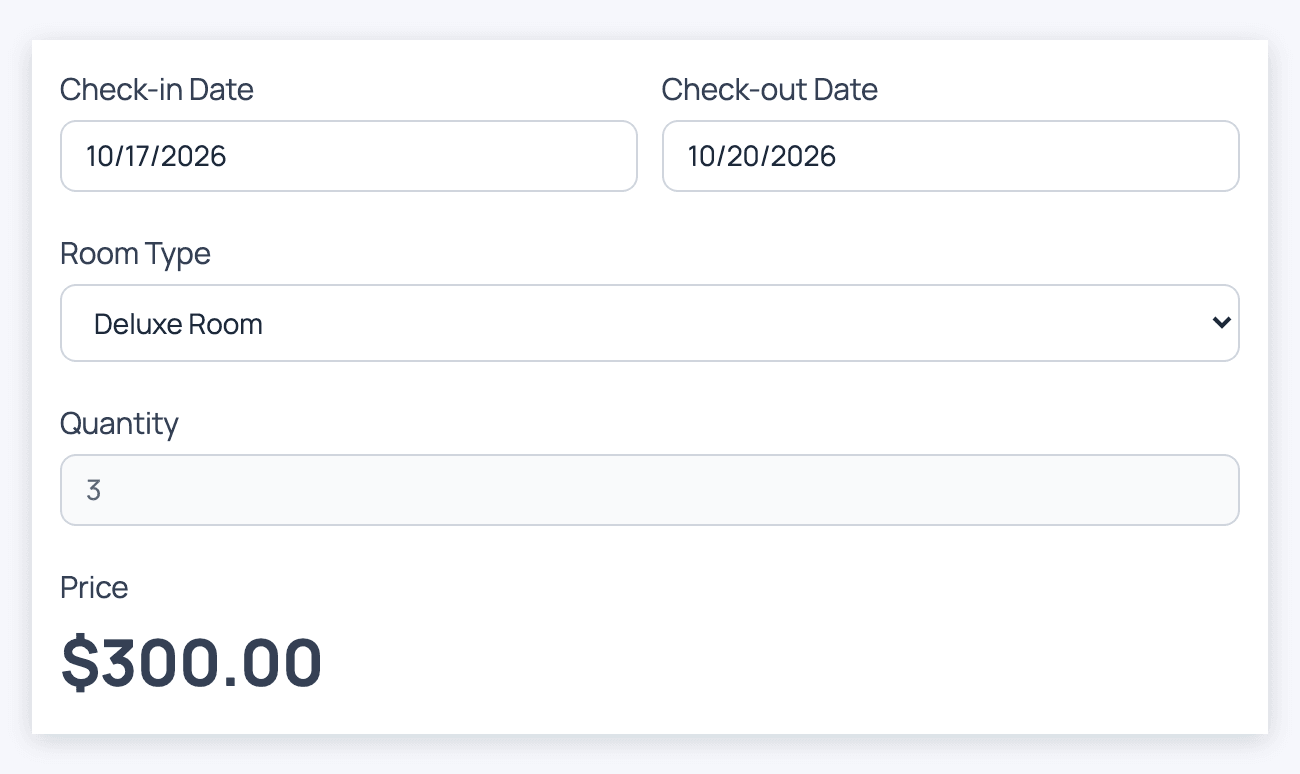
To create a booking form where users select a check-in and check-out date and see the total amount to be paid:
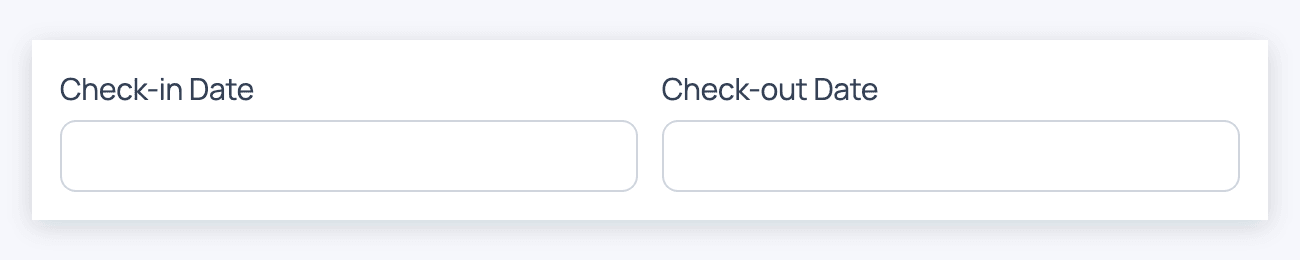
- Add two date fields to your form: Check-in Date and Check-out Date. To place them side by side, enter
frm_halfin each field's CSS Layout Classes box in the field options.
- For the Check-in Date, set [date] as the default value to get the current date.
- Add a product field and name it Room Type. It is the field where the users can choose which room they want to book.
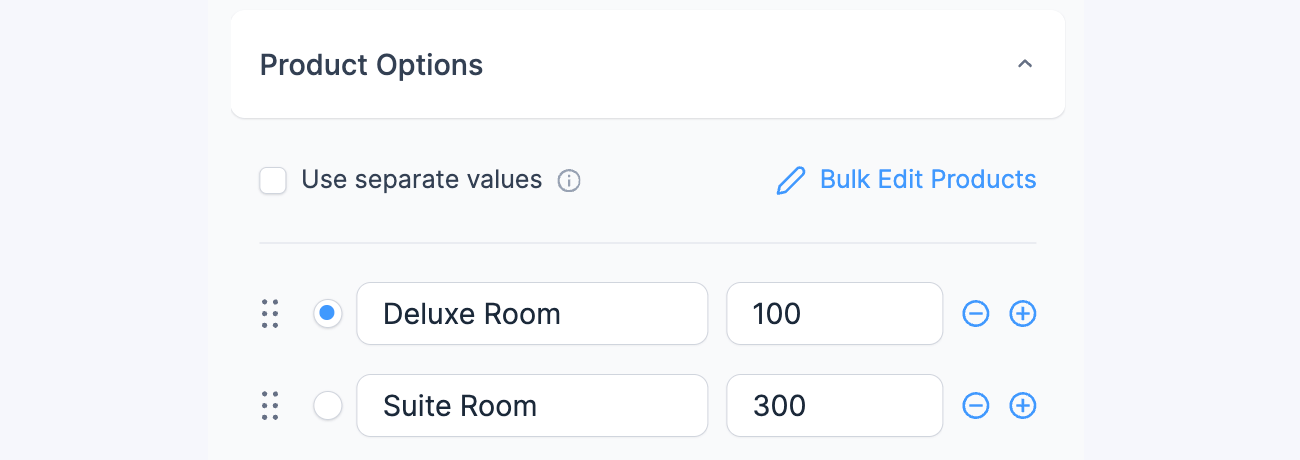
- Add your products and their corresponding price. For example:
- Deluxe Room = 100
- Suite Room = 300
- Add a quantity field and name it Quantity. It is the field where the number of nights per stay will be compared. Check Read Only in the field options, below the Field Label box. Then expand Advanced and turn on Calculate Value (1). Select Math (2) and enter this calculation in the Field Formula box (3):
[date_calc id=536 compare=541 format=days abs=1]
Replace 536 and 541 with the ID or key of the date fields to compare. - Add a total field and name it Price. It is the field where the total price will be calculated.
- If you have the Datepicker add-on installed, you can set the minimum date to the current date to prevent previous dates from being selected.
- You can use the built-in frm_total_big CSS layout class to highlight the price.
Calculate an age
See the Field Calculation page for step by step instructions on how to calculate a users age.
Calculate difference in days in a form
To show the difference between two Date fields, you can use a simple numerical Calculation. Add a Number field. In the calculations box, put [end-date] - [start-date], where end-date is the id or key of the end Date field and start-date is the id or key of the start Date field.
A Number field's Number Range starts at 0. A negative result, such as an end date before the start date, stops the form from being submitted. If your users can pick an end date before the start date, clear the minimum in Number Range.
Show difference in days in a View
Use this shortcode in a View to show the difference in days between two date fields or a date field and the current date. Use the start and finish parameters to indicate the start and finish dates. If you don't include a start or finish parameter, the current date will be used for that parameter. To use [created-at], add a format that only has day, month, and year.
Usage:
- [frm-days-diff start="[100]"]: Days since the date in field 100
- [frm-days-diff start="[100]" finish="[101]"]: Days between the dates in fields 100 and 101
- [frm-days-diff start="[created-at format='d-m-Y']"]: Days since the entry was created
add_shortcode( 'frm-days-diff', 'frm_days_diff' );
function frm_days_diff( $atts ){
	extract( $atts );
	$startdate = isset( $start ) ? new DateTime( $start ) : new DateTime();
	$finishdate = isset( $finish ) ? new DateTime( $finish ) : new DateTime();
        $interval = $startdate->diff( $finishdate );
	//Uncomment statement below to show + or - before number of days
	//return $interval->format( '%R%a days' );
	return $interval->format( '%a days' );
}
Prevent typing into date fields
With the Flatpickr date picker library, the default since Formidable Forms 7.0, users can't type into a Date field, so there's nothing to set up. If your site uses the jQuery date picker library, follow these instructions to force your users to select dates using the datepicker and not by manually typing in the date.
Vary schedule for each day
Using a date field and time fields is useful to have separate schedules for different days of the week. One of the most common scenarios is when availability is reduced on Fridays and Saturdays. The directions below can be adapted to apply to this use case.
- Add a Date field in your form.
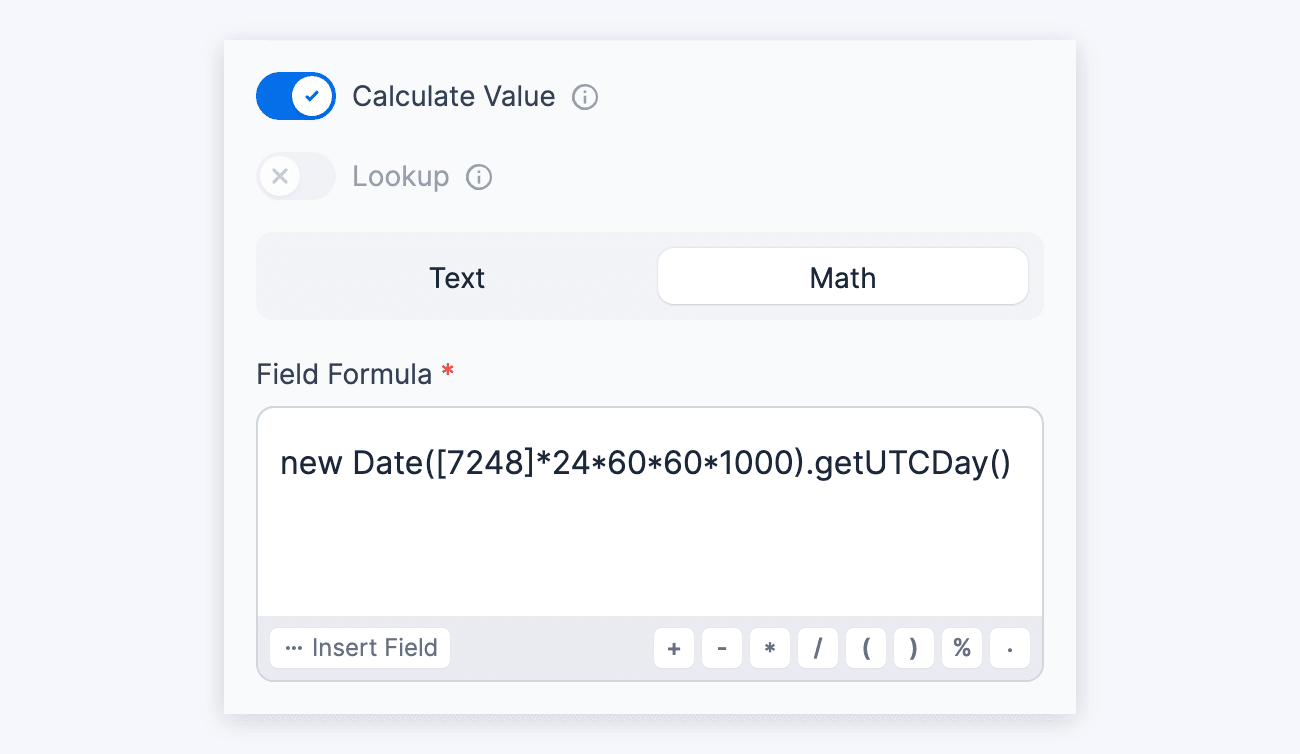
- Add a Hidden field. Give it a math calculation that gets the day of the week of the selected date. With Sunday as 0 and Saturday as 6.
In the field options, expand Advanced and turn on Calculate Value. Then select Math and enter this calculation in the Field Formula box:new Date([320]*24*60*60*1000).getUTCDay()
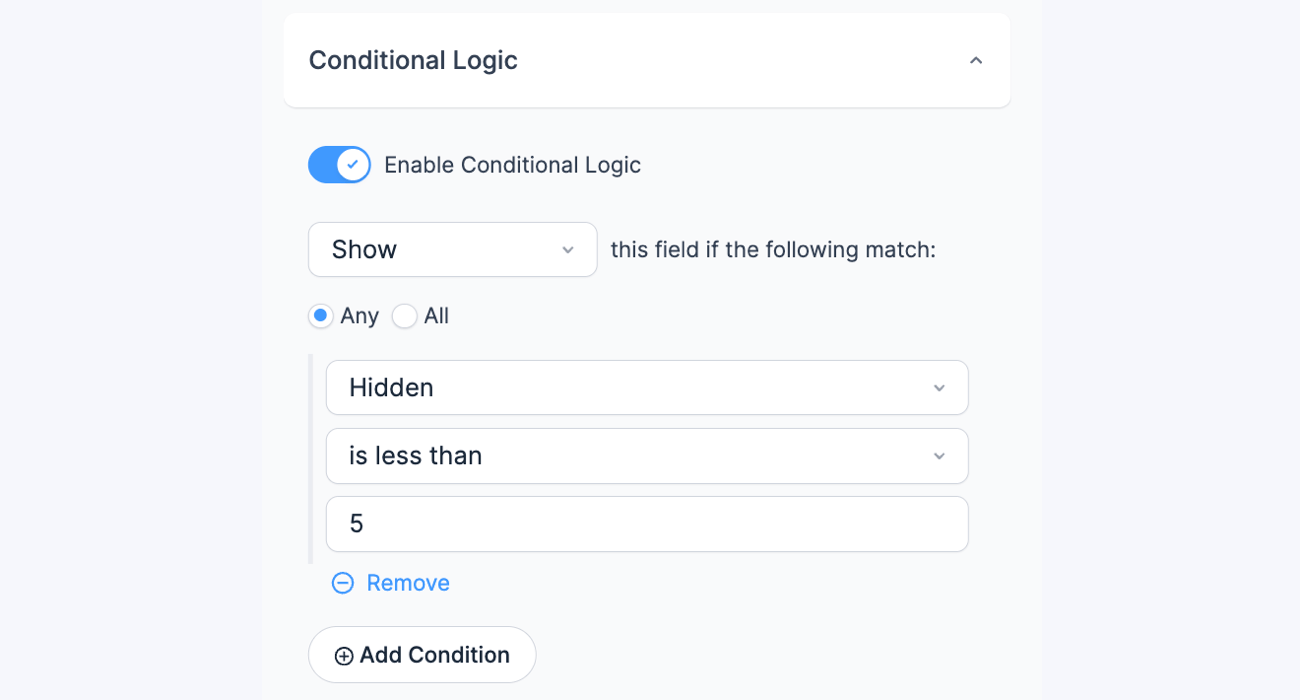
Replace 320 with the id or key of your Date field. - Add a Time field for your regular (Sunday - Thursday) time selections. In its field options, expand Conditional Logic and toggle on Enable Conditional Logic. Then set the rule to show the regular time field when the Hidden field is less than 5.
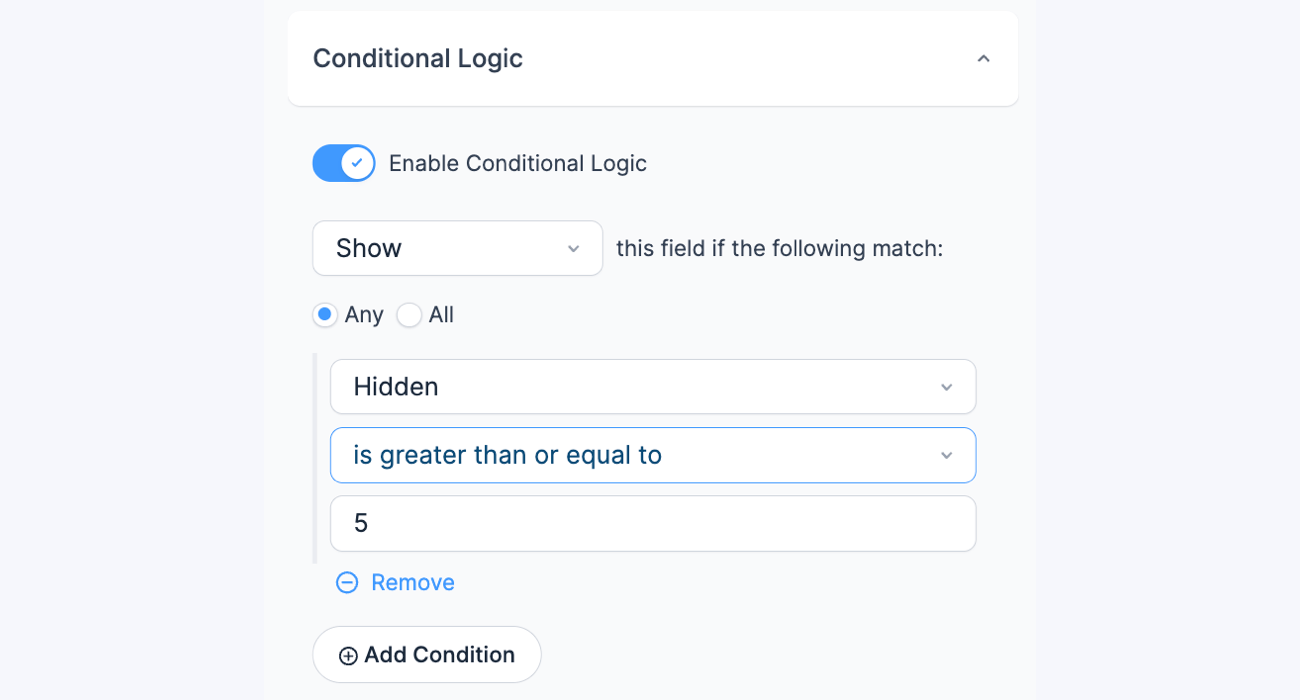
- Add another time field for your Special (Friday and Saturday) time selections. Toggle on Enable Conditional Logic in its field options. Then set the rule to show this time field when the Hidden field is greater than or equal to 5.
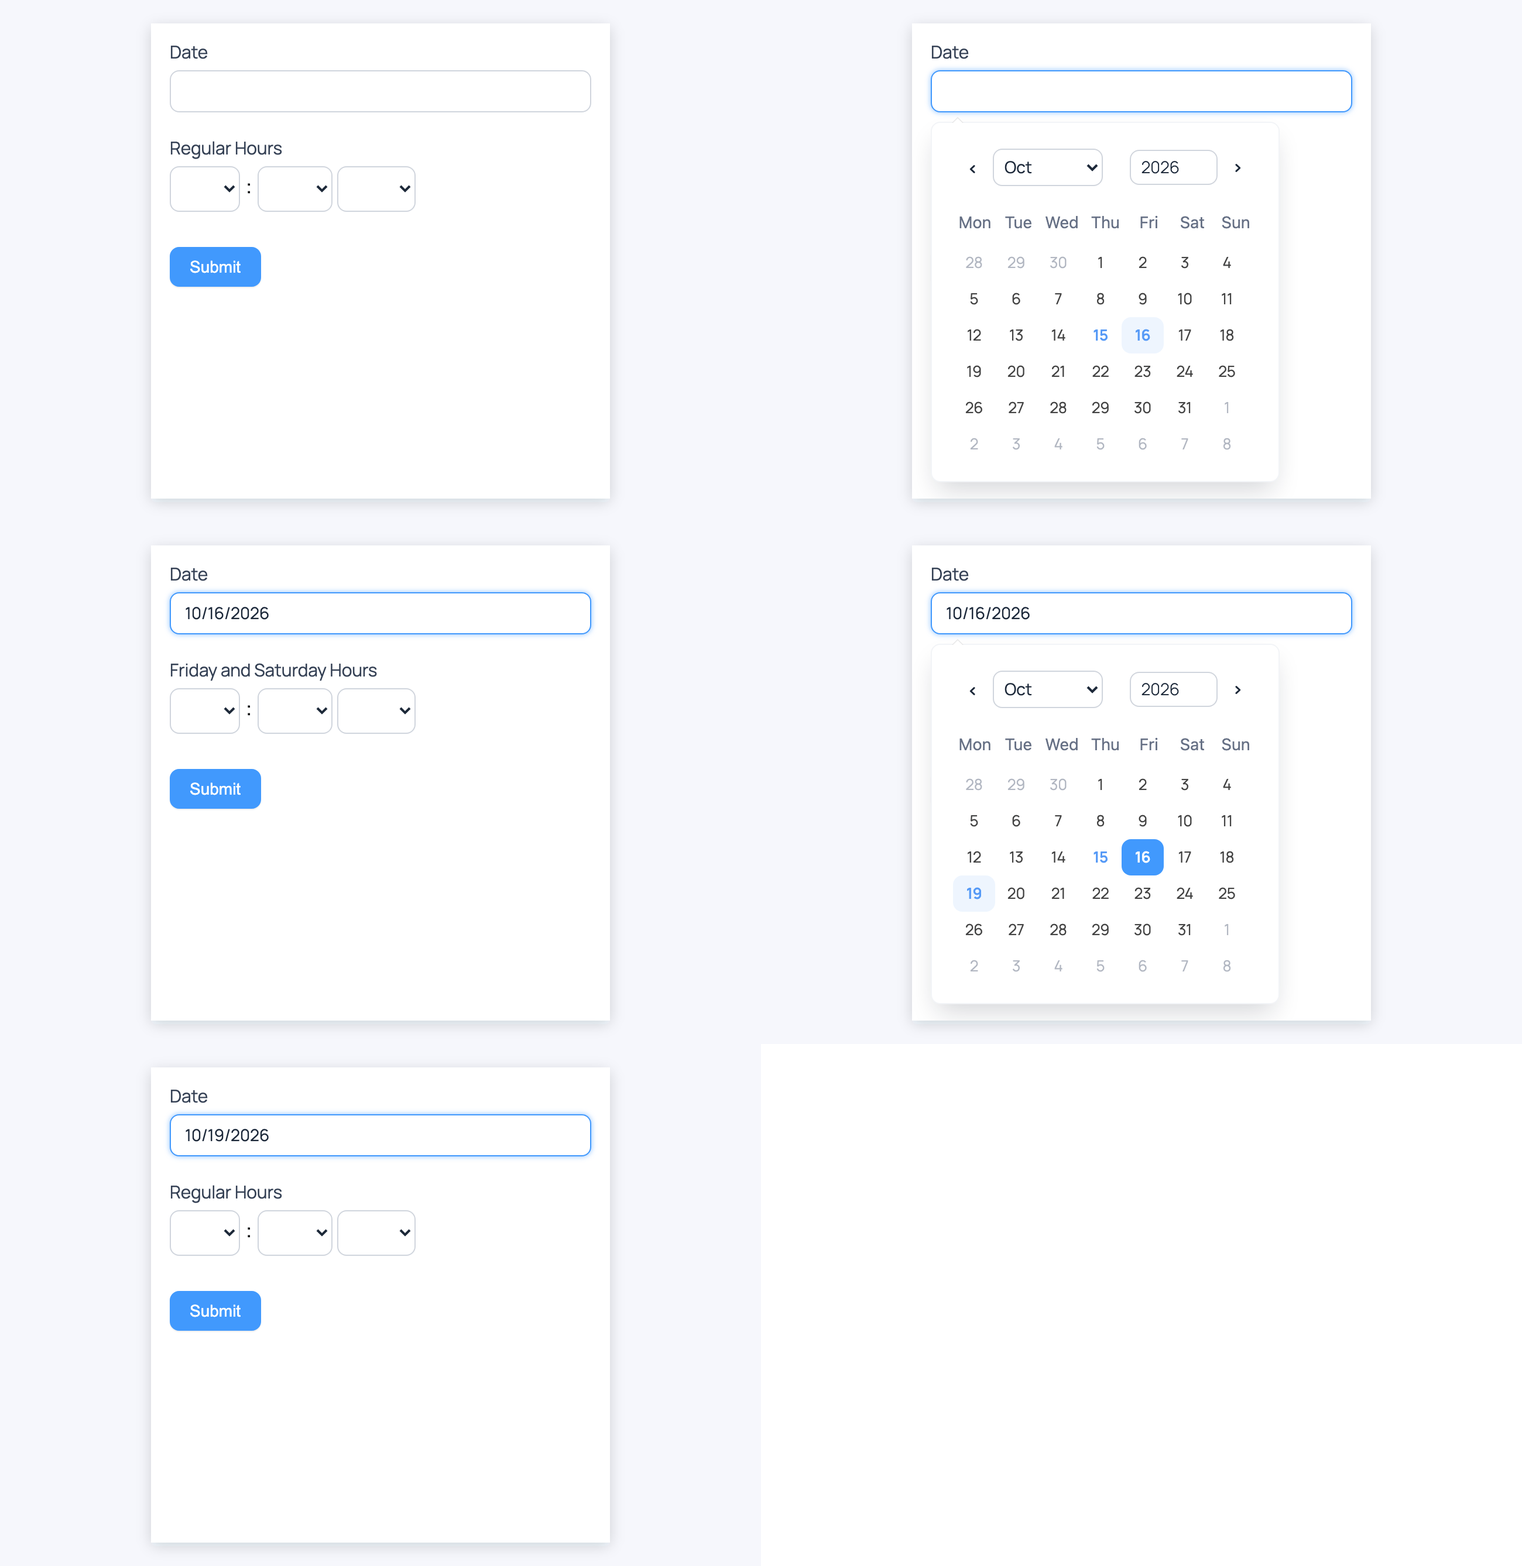
- When the user selects a date in the Date field, it will show the corresponding time field depending on the day of the week selected.
Troubleshooting
Datepicker not working
If your calendar does not pop up, then you may be missing the wp_footer hook in your theme. It is also possible that you have a JavaScript error on your page. Please review this FAQ to find and fix the problem. If you are unable to find the problem, please create a ticket in our help desk.
Often, if the datepicker calendar is not appearing, the problem can be solved simply by clearing any caches on your site and in your browser.
Missing month and year field text
If you're not seeing any text on the datepicker month and year fields, your theme might be introducing this conflict. To override this, use the custom CSS below to change it to a darker color, which will make it more visible. Add it to your Formidable → Global Settings → Custom CSS page.
With the Flatpickr date picker library (the default):
.flatpickr-calendar .flatpickr-monthDropdown-months,
.flatpickr-calendar .numInputWrapper input.cur-year {
   color: #333 !important;
}
With the jQuery date picker library:
.ui-datepicker .ui-datepicker-title select {
   color: #333 !important;
}
Related customizations
Set datepicker width
This example will allow you to adjust the width of the datepicker field in a form when your site uses the jQuery date picker library. You can add this to your Formidable → Global Settings → Custom CSS page.
.ui-datepicker{
max-width:20em !important;
}
Related developer hooks
- Add blackout days, custom date ranges, calendar icons, and more with the frm_date_field_js hook (jQuery date picker library only).
- Change the date picker settings for either date picker library with the frm_date_field_options hook.
- Require a minimum age for form submission with the frm_validate_field_entry hook.
- Save the date in a different format with the frm_validate_field_entry hook.
- Calculate a final date with the frm_validate_field_entry hook.
- Change the date format for entries exported as a CSV file with the frm_csv_date_format hook.
- Black out days of the week so that the user cannot select the day with the frm_selectable_dates hook.
