
The Advanced tab is part of the customization panel which is available for your convenience. It is located in the right sidebar when you are in a View or as modal when you are in your form Settings. Please note that some of these features are not included in the lite version.
Upgrade your WordPress site with powerful, flexible forms.
Inside the tab
The Advanced tab contains a variety of clickable tags that insert helpful shortcodes.

From Idea to Reality in Minutes. Build Powerful Forms, Dashboards, Apps and More.
Formidable Forms makes advanced site building simple. Launch forms, directories, dashboards, and custom WordPress apps faster than ever before.
Advanced shortcodes
A Customization panel is located in the right sidebar when you are in your form Settings or a View. The Advanced section contains the following shortcodes which can be used to show a saved value, show a field label, remove automatically added paragraph tags, truncate text, format dates or numbers, etc.
Separator
Specify the separator for checkbox field values. By default, this will be a comma.
[x sep=", "]
Date Format
Change the format of a displayed date. This can be used with date field, created_at, and updated_at shortcodes.
[x format="d-m-Y"]
For more information and options on date format, visit the Date format options section.
Field Label
Show the label of a field.
[x show="field_label"]
Field Description
Shows the description of a field or the content of an HTML field.
[x show="description"]
No Auto P
Remove any automatically added paragraph tags from a paragraph or rich text field.
[x wpautop=0]
Clickable Links
Make a link clickable.
[x clickable=1]
Remove Links
Remove a link from text.
[x links=0]
Sanitize
Replace spaces with dashes and change all characters to lowercase. This is recommended when using a field value as an HTML class or ID.
[x sanitize=1]
Remove accents
Remove the accent marks from all characters.
[x remove_accents=1]
Use the sanitize=1 option to remove the accent marks, replace spaces with dashes, and convert all characters to lowercase.
[x remove_accents=1 sanitize=1]
Sanitize URL
Replace all HTML entities with a URL-safe string. Use this when passing the field value in a URL. The sanitize_url=1 shortcode is automatically added when inserting most field shortcodes into a Redirect URL. It is to avoid issues with redirects stripping characters like ' and @ that may cause a redirect to fail in some cases.
[x sanitize_url=1]
To avoid the automatic URL encoding, you can replace it with sanitize_url=0.
[x sanitize_url=0]
To avoid & from appearing incorrectly as & you can use the keepjs=1 option.
[x sanitize_url=0 keepjs=1]
Truncate
Truncate text to the specified number of characters. By default, a link is appended to the end of the text. You can use the following parameters to modify or remove this link.
[x truncate=40]
- More Text: By default, this link will be "..." but can be changed with the parameter below. If using a Dynamic View, the link goes to the detail page. Otherwise, it will show in-place.
[x truncate=100 more_text="Read More"]
- No Link: By default, when truncating text, there will be a link to show the remaining text. To remove this link, use the following shortcode. Please note, the no_link parameter requires the truncate parameter to also be used.
[x truncate=100 no_link=1]
Time Ago
Display the amount of time between a saved date and today's date. You can use this with a date field, created_at, or updated_at shortcode. If using time_ago with created_at or updated_at, you may determine how many time measurements should appear.
For example, if there is a date selected that was almost 16 days away, various options will return different results. Here are a few examples:
| Shortcode | Result |
|---|---|
[created_at time_ago=3] |
2 weeks 1 day 23 hours |
[created_at time_ago=1] |
2 weeks |
[created_at time_ago=week] |
2 weeks |
[created_at time_ago=day] |
15 days |
[created_at time_ago=hour] |
383 hours |
The time_ago option accepts the following values:
- y or year: "# years"
- m or month: "# months"
- w or week: "# weeks"
- d or day: "# days"
- h or hour: "# hours"
- m or minute: "# minutes"
- s or seconds: "# seconds"
- 1, 2, 3, 4, 5, 6, or 7: Set the maximum number of units the result should return
Usage: [125 time_ago=1] or [created_at time_ago=1]
[x time_ago=1]
or
[created-at time_ago=1]
Note: time_ago can only be used in Views, emails, and form success messages. If you want to calculate dates in a form, use the age shortcode.
Number Format
Change the format of a displayed number. You can change the number of decimals places, the decimal type, and the separator for thousands.
[x decimal=2 dec_point="." thousands_sep=","]
For more information on this, see the Number format option section.
Saved Value
Show the saved value of a field. This is most helpful when you are using separate values.
[x show="value"]
Remove HTML
Remove any HTML from a field.
[x striphtml=1]
Keep JS
Javascript and iframes will be stripped from a field automatically when the field value is displayed in an email, confirmation message, View, etc. If you would like to keep the javascript in a field, use:
[x keepjs=1]
If you would like to show an iframe, this would require extra code since it works differently in WordPress from other HTML.
Show image
Display an uploaded image file.
[x show_image=1]
Image ID
Display the attachment ID of an uploaded file.
[x show=id]
Image Name
Display the filename of an uploaded file.
[x show_filename=1]
Note: In all usage examples, you must replace x with the ID of a field in your form.
Insert user information
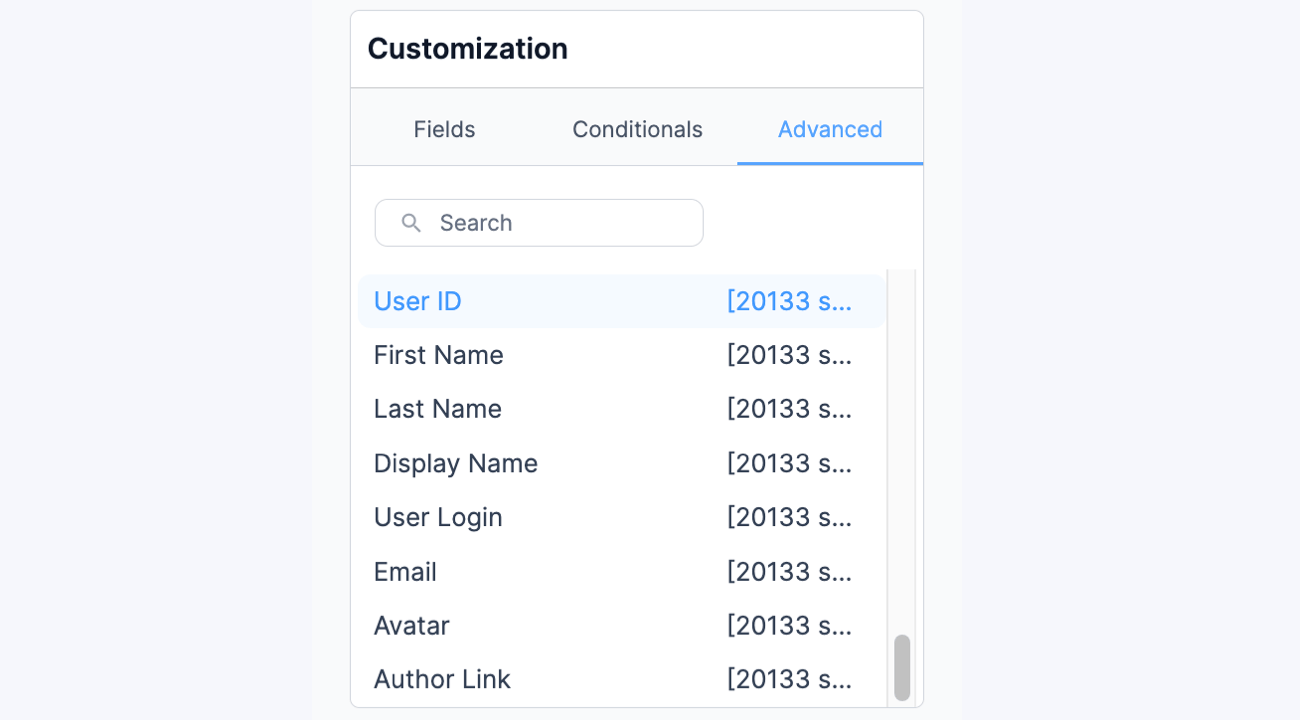 All of the UserID shortcodes can be found in the bottom section of the Advanced tab in the right sidebar. You must have a UserID field in your form in order to use any of the following shortcodes.
- User ID: Display the user's ID number.
[x show="ID"]
- First Name: Display the user's first name.
[x show="first_name"]
- Last Name: Display the user's last name.
[x show="last_name"]
- Display Name: Show the user's display name.
[x show="display_name"]
- User Login: Display the user's username/login.
[x show="user_login"]
- Email: Show the user's email address.
[x show="user_email"]
- Avatar: Display the user's avatar, if he/she has one. Before the avatar will show, you'll need to go to the WordPress Settings -> Discussion page and make sure the "Show Avatars" box is checked.
[x show="avatar"]
- User Meta: Display any user meta you have added with the User Registration addon.
[x show="address"]
You must replace "address" with the name of your user meta.
Note: In all usage examples, you must replace x with the ID of the UserID field in your form.
Dynamic field options
You can use the following shortcodes to display information from a dynamic field.
-
- Creation Date: Display the creation date for the linked entry.
[x show="created-at"]
- Field from Entry: Display a field from the linked entry.
[x show="311"]
Replace 311 with the ID of any field in the linked form.
- Entry ID: Display the ID of the linked entry.
[x show=id]
- User ID Information: Show information from the profile of the user who submitted the linked entry, this include user meta.
[x show="y" show="user_email"]
Replace y with the ID of a userID field in the linked form. All of the different user info shortcode options are listed in the Insert User Information section.
- Three Level Entry Information: If you have a Dynamic field that pulls from another Dynamic field, you can display information from the form that the second Dynamic field pulls from. The following shortcode may be used to display information from a field in the third level form:
[x show="y" show_info=95]
The following shortcode may be used to display an entry ID from the third level form:
[x show="y" show_info=id]
Replace y with the ID of the Dynamic field in the linked form.
- Creation Date: Display the creation date for the linked entry.
Note: In all usage examples, you must replace x with the ID of the Dynamic field in your form.
Examples
Display checkbox options in a list
To display your submitted checkbox options in an ordered list, insert this shortcode in a View, email, form success message, or an Email notification:
<ol><li>[x sep="</li><li>"]</li></ol>
Replace x with the field ID/Key of a checkbox field in your form.
Prevent special character removal
If you are passing a field value in your form's redirect URL and you need to prevent special characters (like accents) from being removed, follow the directions below.
- Go into edit the form that will be passing the field value in the redirect URL.
- Go into the form's Settings.
- In the redirect URL box, add sanitize_url to all the fields that could contain special characters. Your redirect URL may look something like this:
your-site-url.com/?pass_field=[x sanitize_url=1]
Replace x with a field ID/Key.
Show a user's age
If you would like to display a user's age in a View, email notification, or confirmation message, follow the steps below.
- Add a Date field to your form. Title it 'Date of Birth'.
- Go into your View and/or form Settings.
- Insert the following shortcode:
[x time_ago=1]
Replace x with the field ID/Key of the Date field from your form.
Remove extra space around paragraph fields
When a paragraph field is displayed in a View, post, or email notification, <p> tags will be added around the text automatically. The paragraph tags create extra space around the text. To remove the extra space insert the shortcode like this:
[x wpautop=0]
Replace x with a Paragraph field ID/Key from your form.
Date format options
Display a date in any format you would like with the format parameter. Here are some examples of different formats that can be used:
-
- [x format="d-m-Y"] displays the following format: 21-09-2016
- [x format="D, F j, Y"] displays the following format: Mon, September 21, 2016
- [x format="l, M d, y"] displays the following format: Monday, Sep 21, 16
Replace x with the Date field ID/Key from your form.
Find a full list of date format characters at php.net under the 'Parameters' section. For a list of helpful format options, scroll down to the Examples section.
Number format option
Change the format of a displayed number in a View, post, email notification, or confirmation message.
[x decimal=2 dec_point="." thousands_sep=","]
Replace x with the Number field ID/Key from your form.
- decimal: Determine how many decimal places to show. Usage: [x decimal="2"].
- dec_point: Determine the decimal point character. Usage: [x dec_point="."]
- thousands_sep: Determines the character separator for thousands. Usage: [x thousands_sep=","]
If you would like to place a dollar sign in front of the number, insert the shortcode like this:
$[x decimal=2 dec_point="." thousands_sep=","]
European number format
If you need to display your number in a European format, you may use the following shortcode:
[x decimal=2 dec_point="," thousands_sep="."]
Replace x with the Number field ID/key from your form.
Related customizations
If you would like to show an iframe, this would require extra code since it works differently in WordPress from other HTML.
add_filter( 'wp_kses_allowed_html', 'esw_author_cap_filter',1,1 );
function esw_author_cap_filter( $allowedposttags ) {

    //Here put your conditions, depending on your context
    if ( !current_user_can( 'publish_posts' ) )
    return $allowedposttags;

    // Here add tags and attributes you want to allow
    $allowedposttags['iframe']=array(
        'align' => true,
        'width' => true,
        'height' => true,
        'frameborder' => true,
        'name' => true,
        'src' => true,
        'id' => true,
        'class' => true,
        'style' => true,
        'scrolling' => true,
        'marginwidth' => true,
        'marginheight' => true,
    );
    return $allowedposttags;
}
