
The Datepicker Options plugin enhances the overall user experience by providing customizable options to date fields in WordPress forms.

Upgrade your WordPress site with powerful, flexible forms.
Download and install
- If you haven't already, install and activate the current version of Formidable Forms Premium on your WordPress site.
- After confirming your Formidable Forms license, proceed to the Formidable → Add-Ons page and toggle on the Datepicker Options WordPress plugin.


From Idea to Reality in Minutes. Build Powerful Forms, Dashboards, Apps and More.
Formidable Forms makes advanced site building simple. Launch forms, directories, dashboards, and custom WordPress apps faster than ever before.
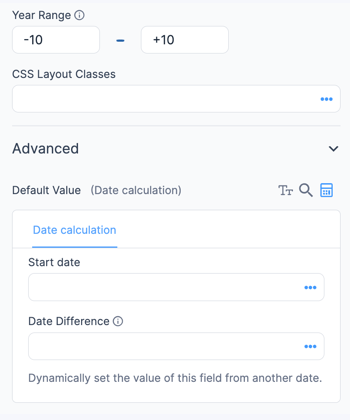
Date calculations

With date calculation, users can instantly see the calculated results without submitting the form. To calculate the results date after specifying the number of days, weeks, months, or years, follow the steps below.
-
- Open the field options for the date field in your form.
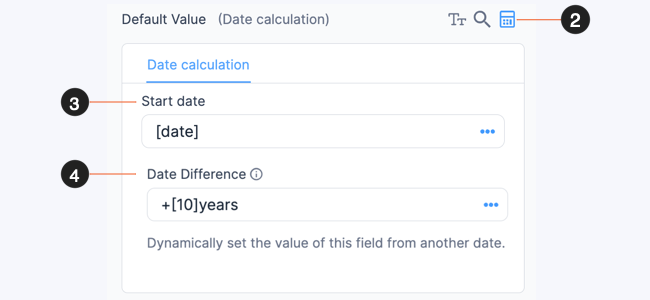
- In the Advanced section, select the calculator icon in the Default Value box to enable the date calculation.
- Set the Start date by adding values that can be filled with these options:
- With a specific date in the yyyy-mm-dd format: 2023-07-21
- Using shortcodes: [date], [get param="param_name"]
- With a field value: [10] (Replace 10 with the field ID). Supported field types are date, text, hidden, radio, and dropdown.
- Set the Date Difference by adding values in this format: {operator} {number} {unit}, e.g., +[10]years, -3days
- Using shortcodes: [get param="param_name"]
- Field values: [10] (Replace 10 with the field ID). Supported field types are number, text, hidden, radio, and dropdown.
- There can be no space, one, or multiple spaces between those parts. e.g., +3day or + 3 day are ok.
- {operator}: Not a required value. If you don't add any operator value, it will default as +. It accepts + and -.
- {number}: A required value.
- {unit}: A required value. It accepts d, day, days, w, week, weeks, m, month, months, y, year, years.
Calculate future date
If you need to calculate a future date based on an entered date and a specific number of days, follow the steps below.
- Add a date field where you can select a date. If you want to set it to the current date, use the [date] as the default value.
- Add a number field to determine the duration.
- Add a dropdown or radio button field to specify the unit. You can set the options as day, month, and year.
- Add another date field to calculate the future date. In the Advanced section, select the calculator icon in the Default Value box to enable the date calculation.
- Set the Start date to the ID of the previous date field.
- Set the Date Difference to +[10][11]. Replace 10 and 11 with the IDs of the number and dropdown/radio button field.
- That's it! When a user selects a start date, number, and unit, the results will display the future date.


Set up a Date Range
The Date Range feature lets your users select a start and end date from a single calendar field - ideal for event bookings, travel dates, or any other scenario that requires a time frame.
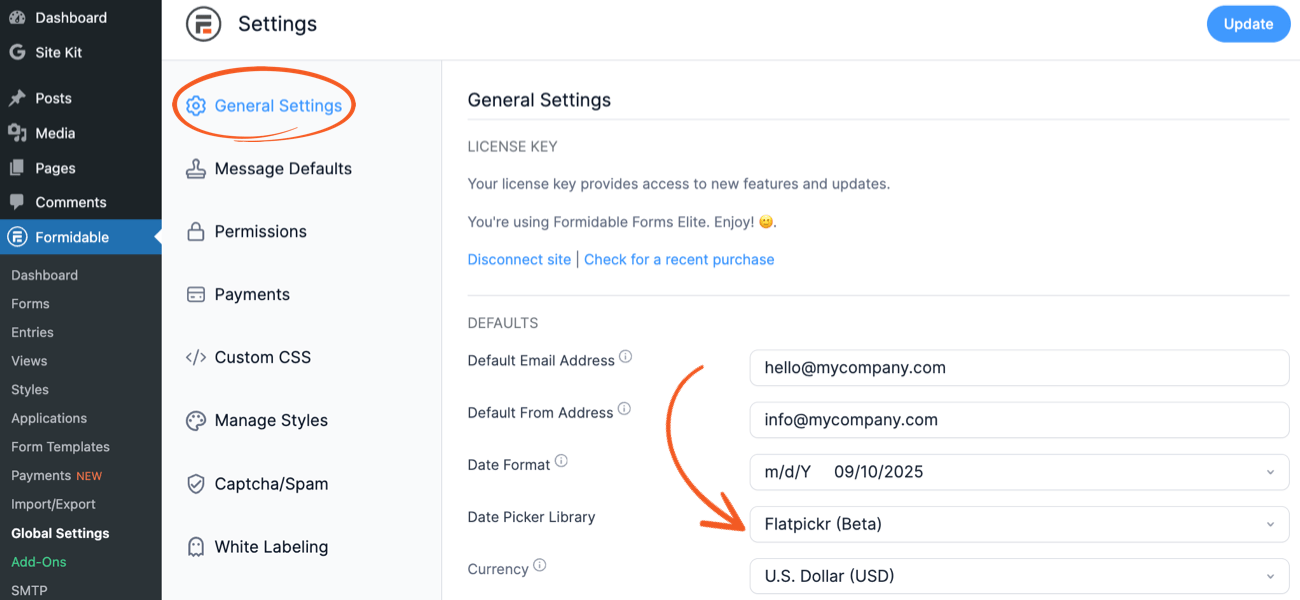
- Enable Flatpickr.The Date Range option is available only with the Flatpickr date picker library. If your form currently uses jQuery, switch it first by following the steps below.
- Go to Formidable > Global Settings > General.
- Under the Date Picker Library field, select Flatpickr (Beta).
- Click Update to save your changes.
- Add the Date Range field. Once Flatpickr is enabled, you can add a date range to any form.
- Open the form you want to edit and add a new Date field.
- In the Field Options for the date field, select the Date Range checkbox.
- When enabled, an End Date field will be added automatically next to the existing date field, which becomes the Start Date.
- Click Update to save your form.

That's it! Your date field can now accept a range of dates from your users.
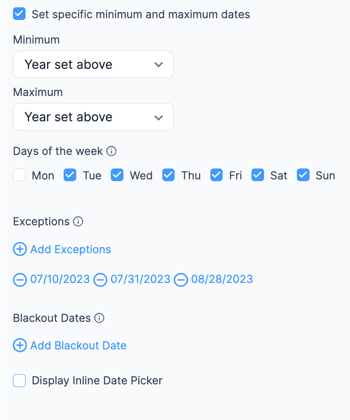
Set minimum/maximum dates
The Formidable Forms Pro plugin includes the option to set a dynamic year for the start and end year range. But if you would like this range to change when another date field changes, or set a more specific range that starts or ends on a specific date rather than at the beginning or end of the year.
- Open the field settings for the date field in your form.
- Check the box to Set specific minimum and maximum dates.
- The minimum and maximum dates can be set in a number of ways.
- Select Current date and insert +0 for the minimum date to not allow past dates to be selected, i.e., Book an appointment.
- Select Current date and insert +0 for the maximum date to not allow future dates to be selected, i.e., Select a birthdate.
- Select Current date and insert -18 years for the maximum date to only allow someone who is over 18 to submit the form.
- When using two date fields, set the second field to start 2 days after the date selected in the first field. In the second field, select the name of the first date field from the dropdown and insert +2 days in the box.
Using negative numbers for minimum date
If you want to restrict users from choosing a date 90 days prior to the current date, you can use negative numbers for the minimum date.
- Open the field settings for the date field in your form.
- Set a dynamic year range by inserting -1 for the Start Year and +0 for the End Year. This will set the start date to last year and the end date to the current year.
- Check the box to Set specific minimum and maximum dates.
- Set the minimum date by selecting Current Date and insert -90 days to not allow dates 90 days prior to the current date to be selected.
- Set the maximum date by selecting Current Date to not allow future dates to be selected


Blackout weekends
- Open the field settings for the date field in your form.
- Uncheck the All days box for Days of the week.
- Now you will see a list of each day of the week. Uncheck the boxes for any days of the week you do not want to allow.
- That's it! Here is the result:


Add an exception
When a day of the week is disabled, but there is a date you would still like to be selected, you'll need to add an exception. For example, if you blockout Saturdays but there are two Saturdays you would like to allow, add exceptions.
- After blacking out a day of the week, the Exceptions link will appear.
- Click this link and select the dates that should be selectable in your datepicker.

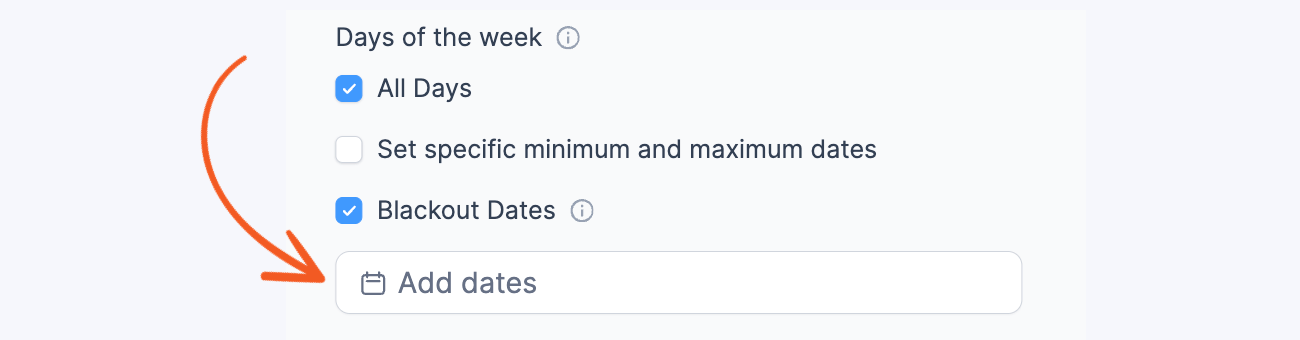
Add a blackout date
When there are specific dates (like a holiday) that should be excluded, use the Blackout Dates option.
- Open the field settings for the date field in your form.
- Click the Blackout Dates link and a datepicker will appear.
- Select each date that should be blacked out in your form.
Show inline datepicker
When the datepicker is set to show inline, it will appear on the form instead of a text field to click. To show the datepicker directly in the form, check the box to Display Inline Date Picker in the field options.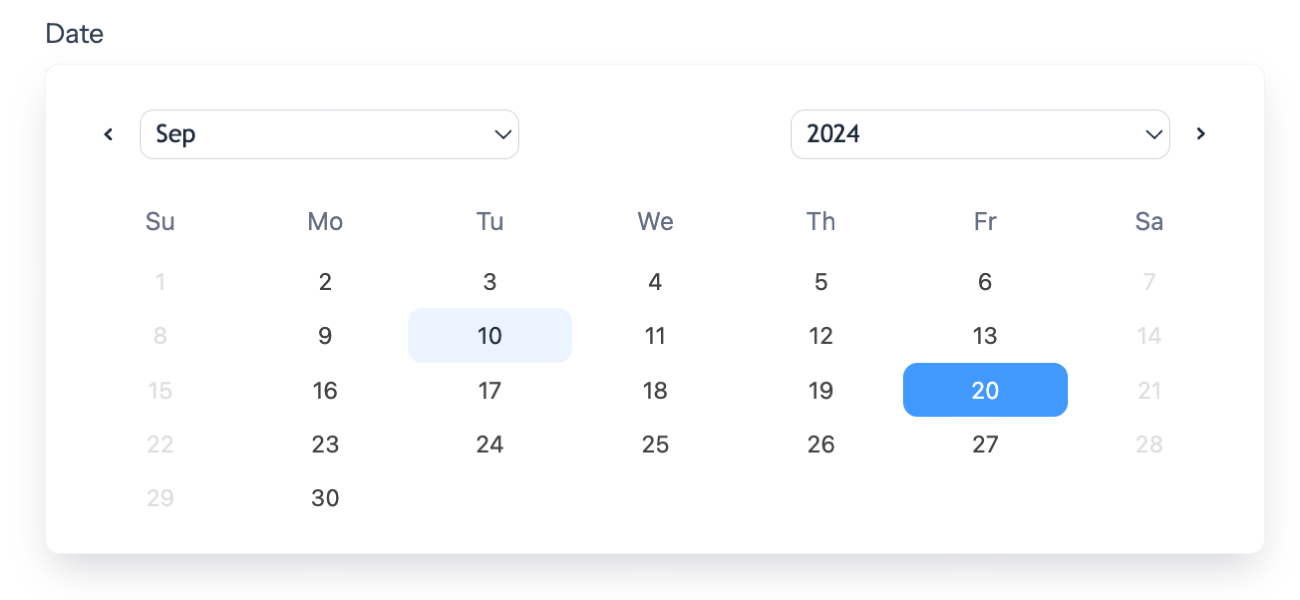
Book appointments
If you need more scheduling options, like booking a unique time slot, take a look at the Simply Schedule Appointments plugin. It's an easy and fast way of setting up open times in a schedule to allow a single visitor to select an open slot.
- Add an Appointment field to your form.
- Select the type of appointments you would like to book.
- Then your visitors can select a date and time.

Related developer hooks
- Blackout dynamic dates with the frm_date_field_options hook.
- Hide month and year selectors with the frm_date_field_options hook.
- Set the first day of the week for all forms with the frm_date_field_options hook.
- Set a specific field's first day of the week with the frm_date_field_options hook.
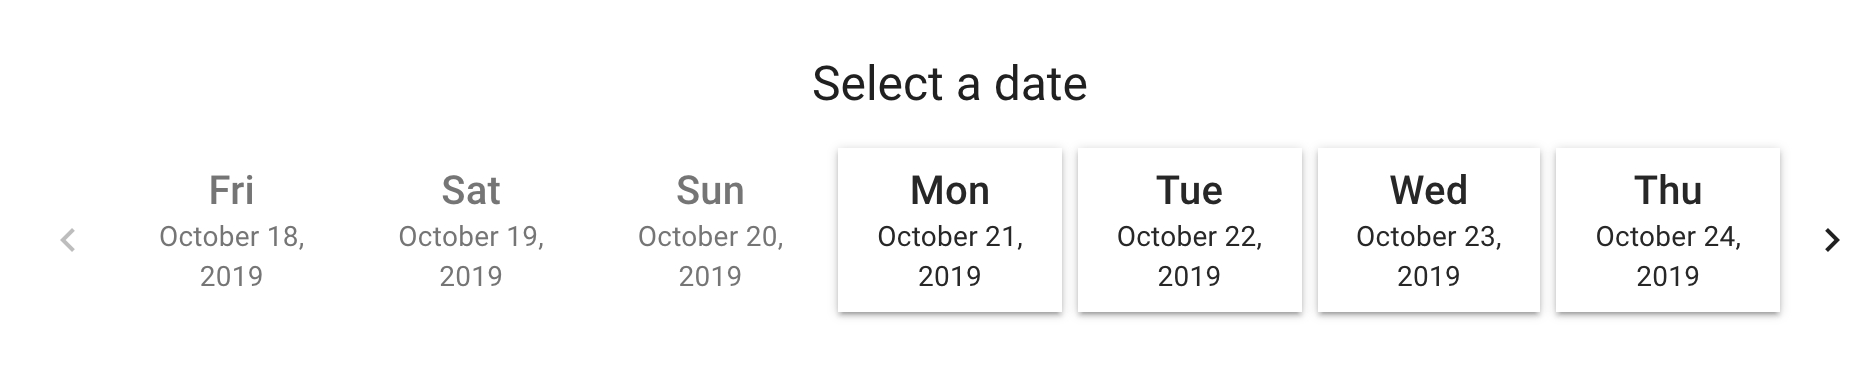
Beta feature
Datepicker Flatpickr Library
A new beta feature has been introduced that allows users to utilize the Flatpickr library for date selection in the datepicker, while maintaining existing functionalities and minor visual adjustments. Users can still opt for jQuery as the default library. To enable this feature, navigate to Formidable → Global Settings → General Settings and select Flatpickr (Beta).
When shown on a form, the datepicker will appear as follows.
