
Formidable Forms has made my life so much easier as an event planner.


Last updated on March 6, 2025 by Kyle Cash
How To Add Stripe Checkout to WordPress [4 Steps!]
Want to add Stripe Checkout to WordPress? This simple guide walks you through setup so you can accept payments quickly and securely.

Approximate read time: 6 minutes
Tired of clunky payment solutions that frustrate your customers — and cost you sales?
You need a simple, secure way to accept payments on your WordPress site. And that's where Stripe Checkout comes in. It lets you accept credit cards, debit cards, and digital wallets with a seamless checkout.
And with Formidable Forms, you can set it up in minutes — no coding required.
In this guide, we'll walk you through the steps to add Stripe Checkout to WordPress in a few easy steps. By the end, you'll have a fully customized payment form that makes it easy for customers to pay you.
Let's get started.
Upgrade your WordPress site with powerful, flexible forms.
How to add Stripe Checkout to WordPress
There are several ways to get Stripe Checkout pages on your website.
However, we recommend using Formidable Forms because of its flexibility. Its drag-and-drop form builder makes it easy for anyone to create a form in a few minutes, and its Stripe integration allows you to create a payment form that accepts multiple payment options.

Best of all, you can use the Lite version to create a free Stripe payment form (more on this in a bit). Or Pro version and still have access to Stripe. So, grab Formidable Forms first.
Then it's a few easy steps:
Step 1: Install and activate Formidable Forms
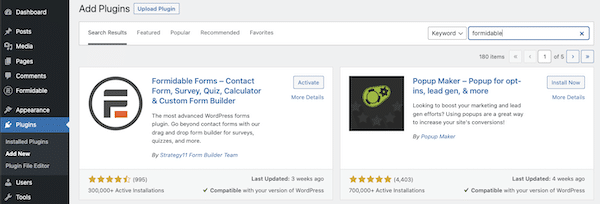
First, you must install and activate Formidable Forms to get started.
Whether you're using the Lite or Pro version (the Lite version has a 3% fee), you must download and install Formidable Lite. Go to your WordPress dashboard and Plugins → Add New to do so. Then, search for Formidable and click Install on the Formidable Forms free online form builder.
If you're using the Lite plugin, you can move on to the next step.
If you're using a premium version, you must take one more step to connect your account. Go to Formidable → Global Settings and click the Connect an Account button.

This opens a page that takes you to your Formidable Forms account, where you can connect it to the WordPress plugin. Once done, it returns to the WordPress dashboard and shows your active license type.
The image below says Elite, but it will show your chosen plan.

The last step in the setup is enabling the Stripe add-on and then connecting your account (if you have one). If you don't have one, create one, then continue following the steps. This allows you to add Stripe Checkout to WordPress and process payments easily.
First, go to Formidable → Add-Ons and toggle on the WordPress Stripe plugin.

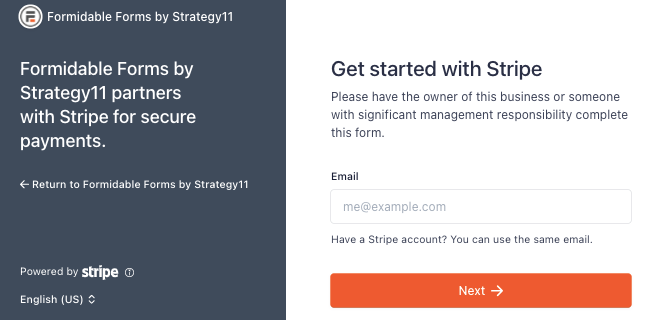
Then, go to Formidable → Global settings → Stripe and click the Connect to Stripe button. You can also turn on test mode before making any official attempts at a payment.
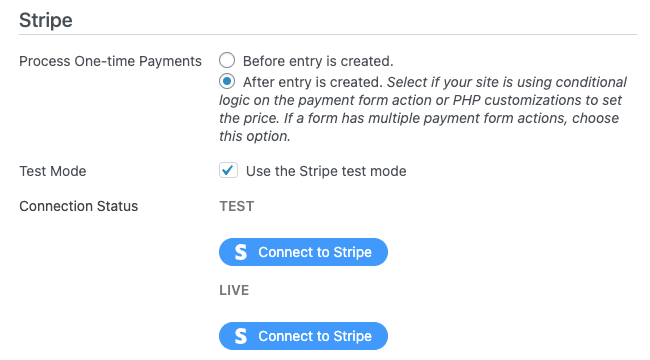
This will redirect you to Stripe's page, where you can log in and follow the setup wizard. Once finished, it will automatically redirect you back to your website.
Once that's all set up, it's time to create the Stripe payment form.
Step 2: Create a Stripe payment form
Next, in the WordPress admin, go to Formidable → Forms and click the Add New button at the top right.
Next, you have a few options. You can start your form from scratch, use a pre-built form template, or let our AI form builder do the heavy lifting. After you pick, the plugin opens the drag and drop form builder.
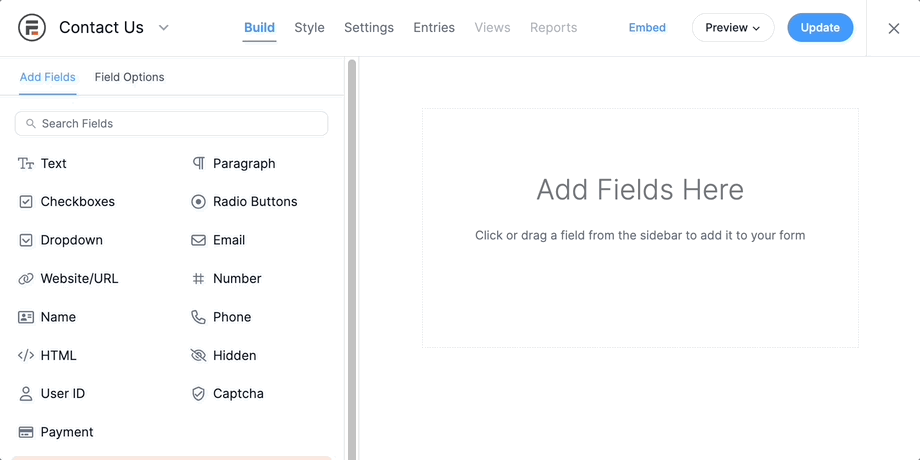
This form builder makes things super easy and fast. Plus, with one of our payment form templates, you can have most fields pre-filled. But if it's not, feel free to add any fields you need to the form (such as shipping addresses, email, name, etc.).
Be sure to include the Payment field type. It handles all the important stuff.

Once finished, click the Save button at the top right to save your progress and name the form (only you see this).
Step 3: Set up the Stripe form action
The next part ensures that the form processes the payment through Stripe. So, setting this up is a crucial step.
First, go to Settings at the top of the form builder, then click Actions & Notifications.
Next, click the Collect a Payment form action. Every time someone submits the form, it connects with your Stripe account to process the payment (so you get paid!).
Next, you can expand the Collect a Payment action and customize the settings:

- Action Name: Only you see this for easy reference
- Description: This information sends to Stripe along with the payment
- Amount: You can type in a set amount or use one of the field shortcodes to fill it
- Payment Type: One-time or recurring payments
- Capture Payment: Choose when the payment should happen (authorize now and collect later)
- Currency: Choose which currency the payment is in
- Stripe link: Enable Stripe link and more payment methods
Below that, the Customer Information can be pulled from the fields in your form. For example, your payment form can pull the Email, Address, and Name from those fields.
Take the time to enter all the necessary information then run a test payment to ensure everything is working.
Step 4: Publish the payment form
The last thing to do to get Stripe WordPress checkout is to publish your payment form so people can use it!
So, go to the post or page where you want to show your form and add a new WordPress block. Then, find the Formidable Forms block. Last, choose your form from the dropdown menu.
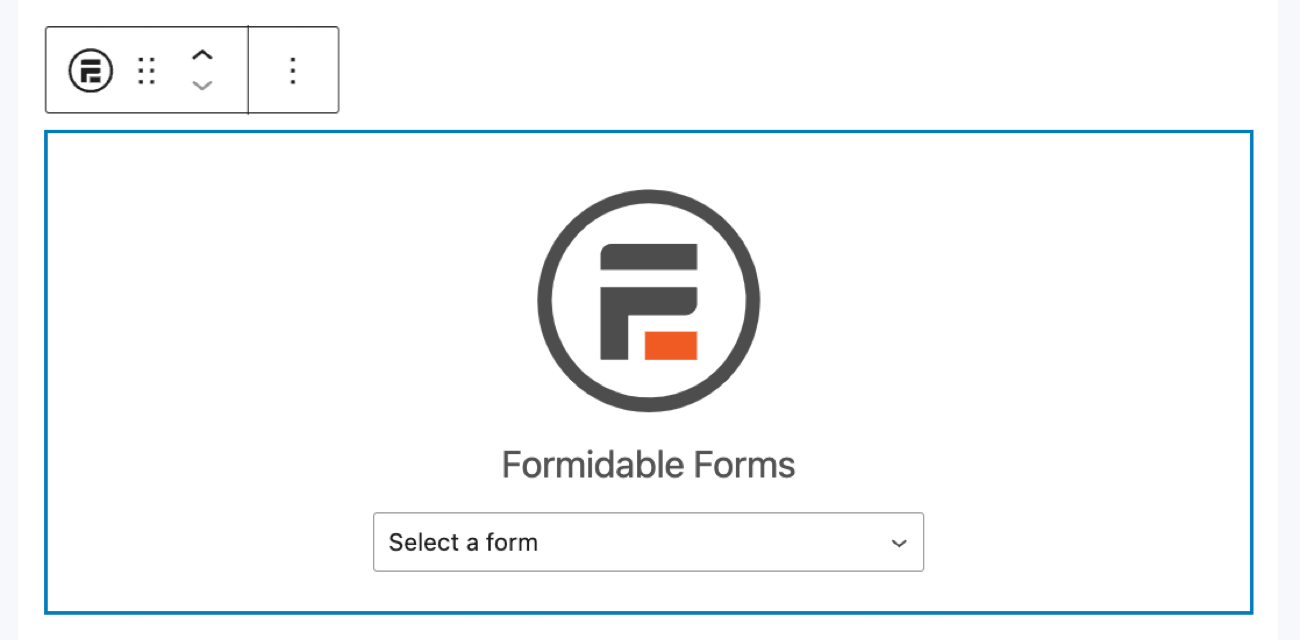
Once you choose your form, you're set with WordPress Stripe checkout! Anyone who fills out the form will automatically go through Stripe's checkout process using Formidable Forms.
It's really that easy to integrate Stripe payments! And, at the end, you can have a payment form that looks something like this:

From Idea to Reality in Minutes. Build Powerful Forms, Dashboards, Apps and More.
Formidable Forms makes advanced site building simple. Launch forms, directories, dashboards, and custom WordPress apps faster than ever before.
Ready to add Stripe Checkout to WordPress on your site?
As you saw, adding Stripe Checkout to WordPress is incredibly easy.
You're ready with just a few clicks and some settings changes. And you can accept credit card payments, bank accounts, ACH, and more. So, don't waste more time. Grab Formidable Forms now and get more than a simple Stripe payments plugin.
Also, follow us on Facebook, Twitter, LinkedIn, and YouTube for more Stripe tips and tricks! And join 50,000+ others who hear the latest from Formidable Forms each month!
Get the Formidable Forms Newsletter
Read more from the Formidable blog
 Sell Products on Your WordPress Site for Free (No WooCommerce Needed)
 Forms vs Apps in WordPress: Where Simpler Tools Collapse
 How a WordPress Payment Approval Workflow Works
This article may contain affiliate links. Once in a while, we earn commissions from those links. But we only recommend products we like, with or without commissions.

