
Translate your forms into multiple languages using WPML and the WP Multilingual add-on.
Upgrade your WordPress site with powerful, flexible forms.
Download and install
- If you haven't already, install and activate the current version of Formidable Forms Premium on your WordPress site.
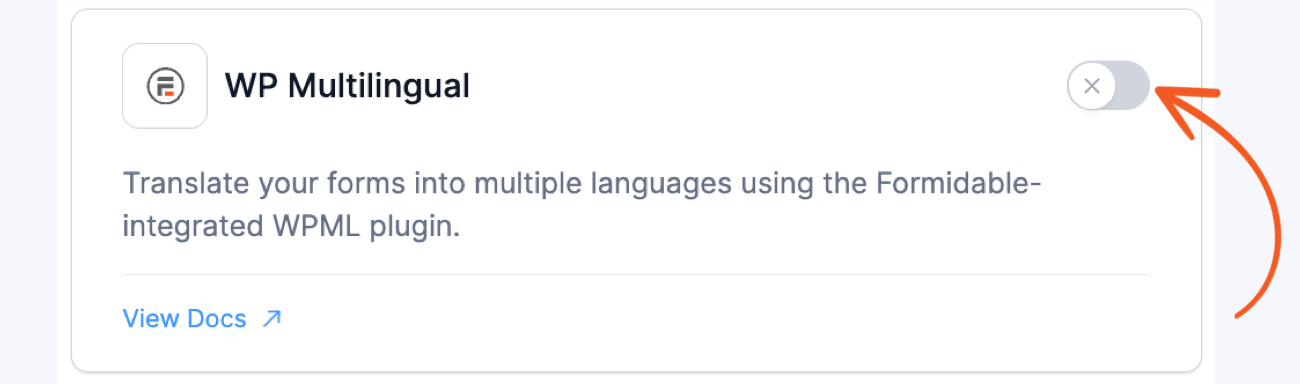
- After confirming your Formidable Forms license, proceed to the Formidable → Add-Ons page and toggle on the WP Multilingual add-on. On the Plugins page, the add-on is listed as Formidable Multilingual.

- Download and install the WPML core plugin and WPML String Translation add-on.
From Idea to Reality in Minutes. Build Powerful Forms, Dashboards, Apps and More.
Formidable Forms makes advanced site building simple. Launch forms, directories, dashboards, and custom WordPress apps faster than ever before.
Translate a form
After you activate WPML, WPML String Translation, and the WP Multilingual add-on, translate the form and then the page where it's embedded.
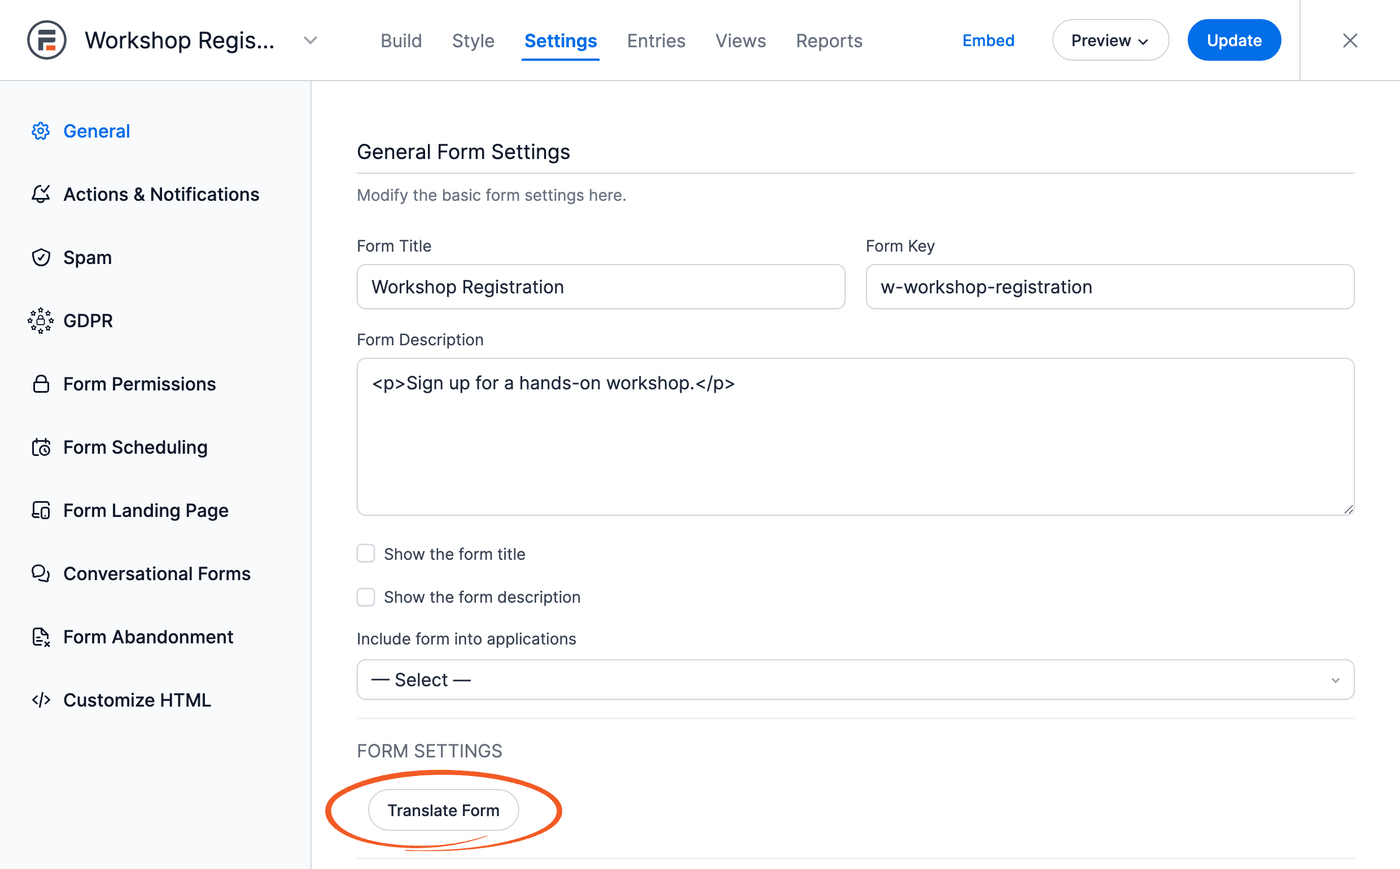
- Edit the form you want to translate, switch to the form Settings tab, and click the Translate Form button. The Translate Form button appears only when WPML and WPML String Translation are active.
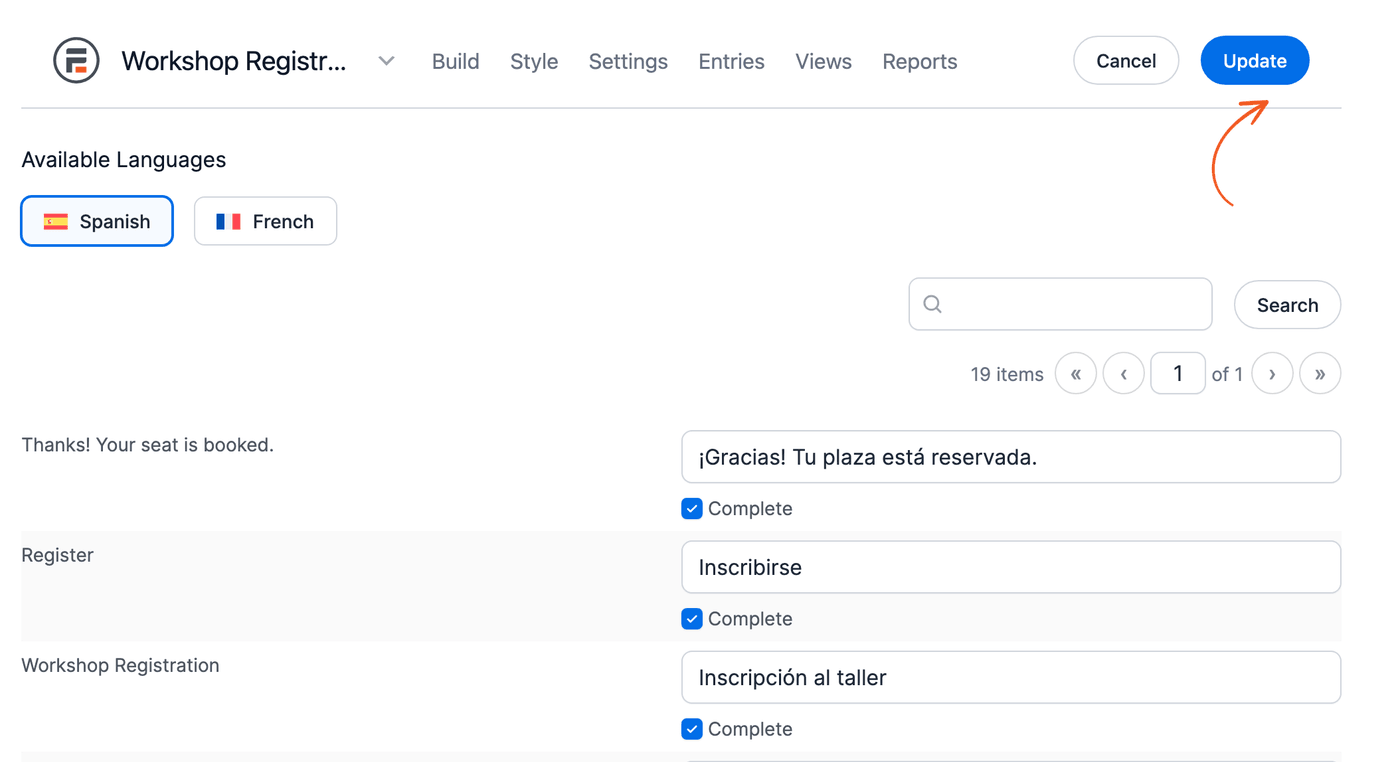
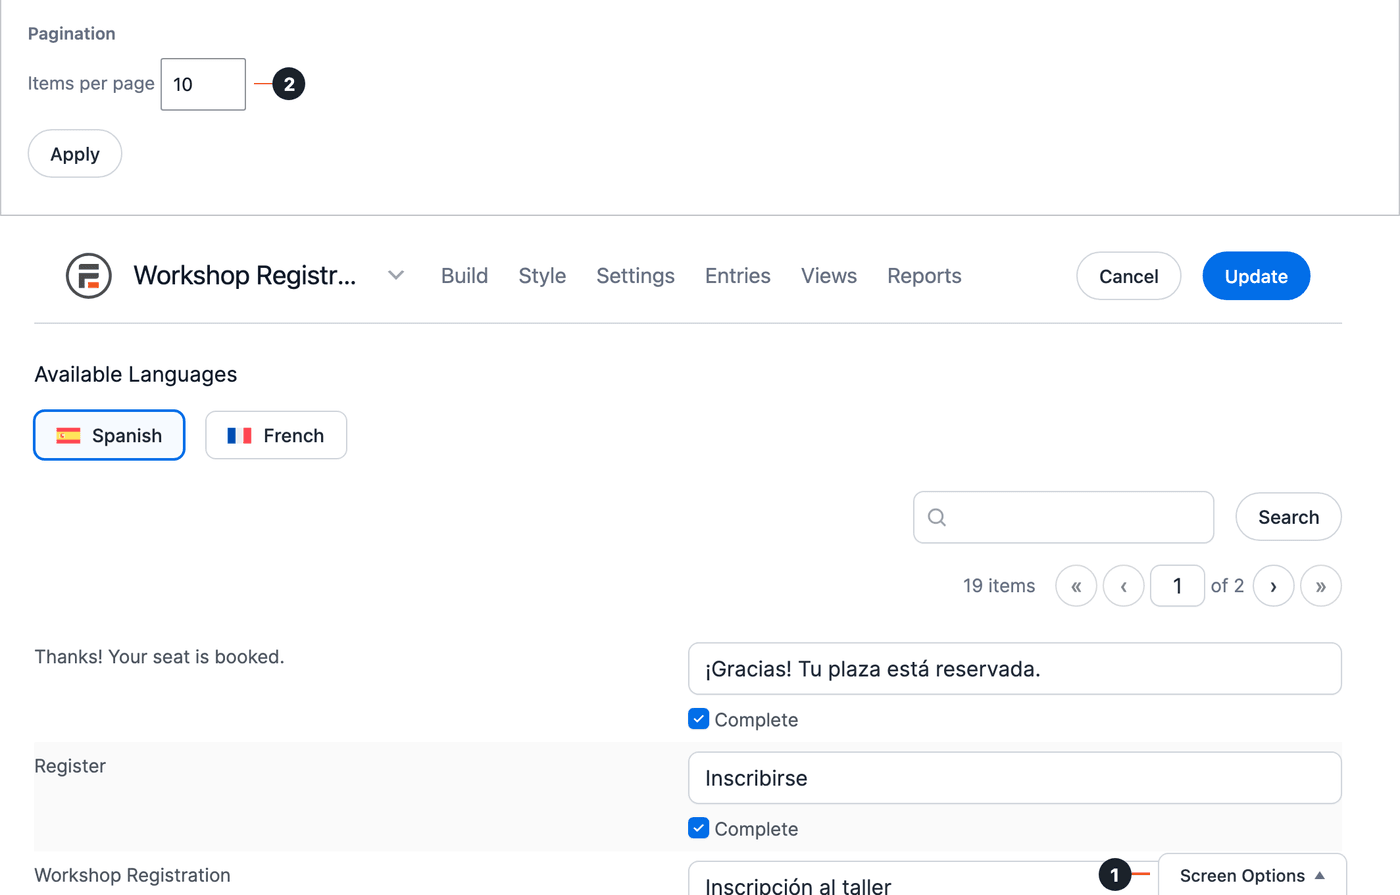
- Under Available Languages, select the language you're translating to. Enter your translations and click the Update button. The Complete checkbox under a translation is checked when you leave its field. If you prefer not to use a translation, uncheck the Complete checkbox. Repeat these steps for each language.
- If a validation message uses [field_name], such as the default message "[field_name] cannot be blank.", translate the field label (1) as well as the message (2). Keep [field_name] in the translated message. It shows the field label in the visitor's language only when that label is translated too. If the label isn't translated, the Spanish message reads "Name no puede estar vacío." instead of "Nombre no puede estar vacío." Fields that use the same message share one row, so one translation covers all of them.
- Embed your form on a page and publish it.
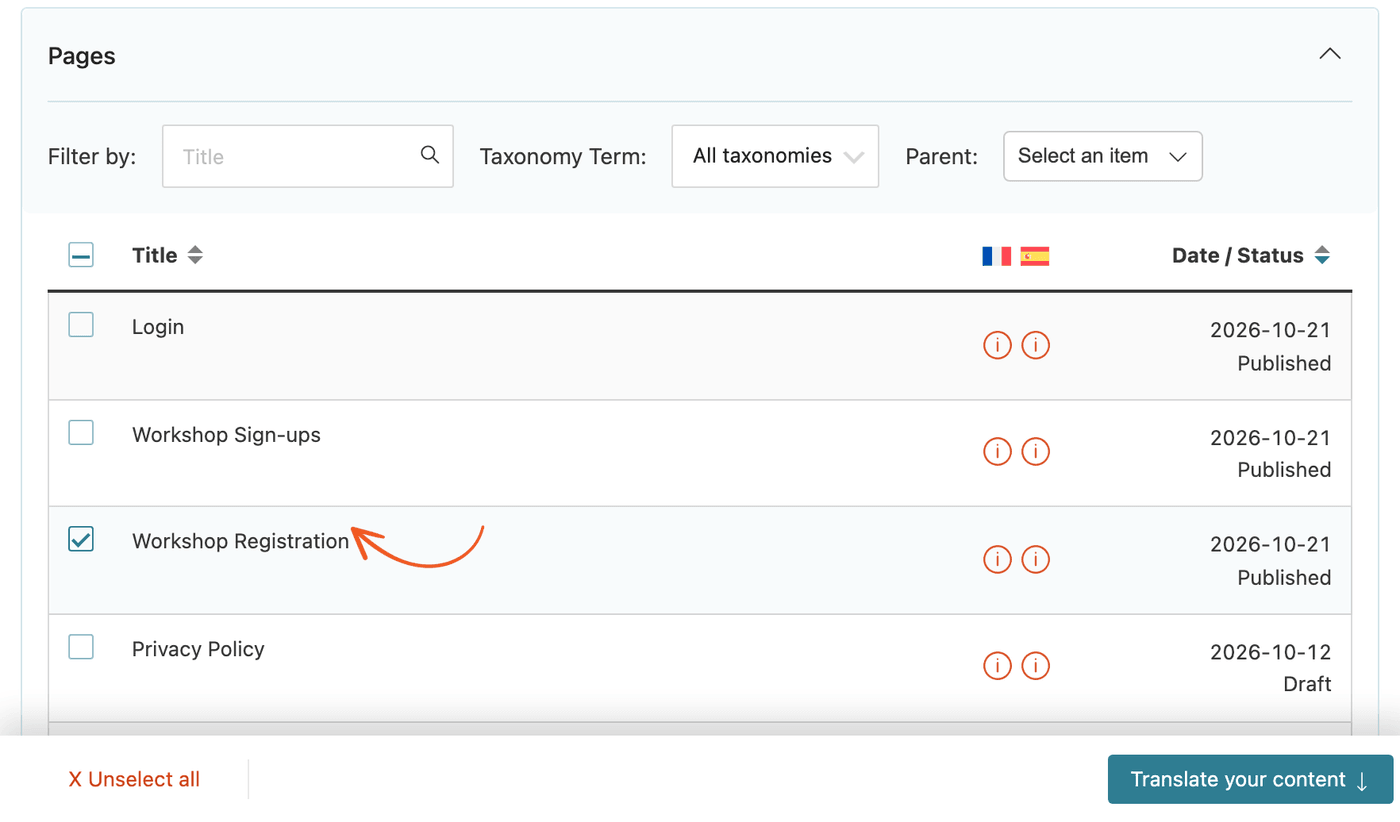
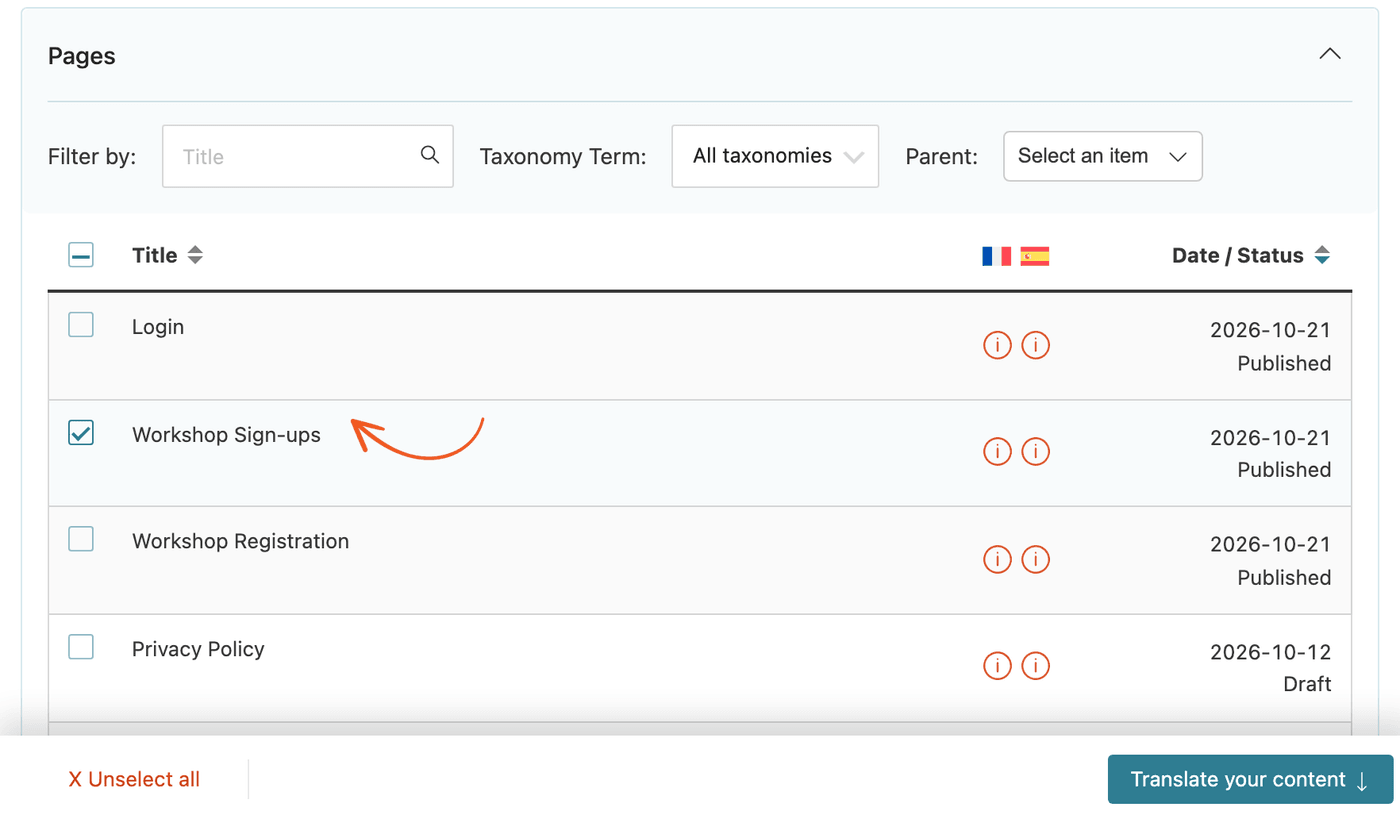
- Once published, go to WPML → Translations. On the Dashboard tab, select the page where your form is embedded.
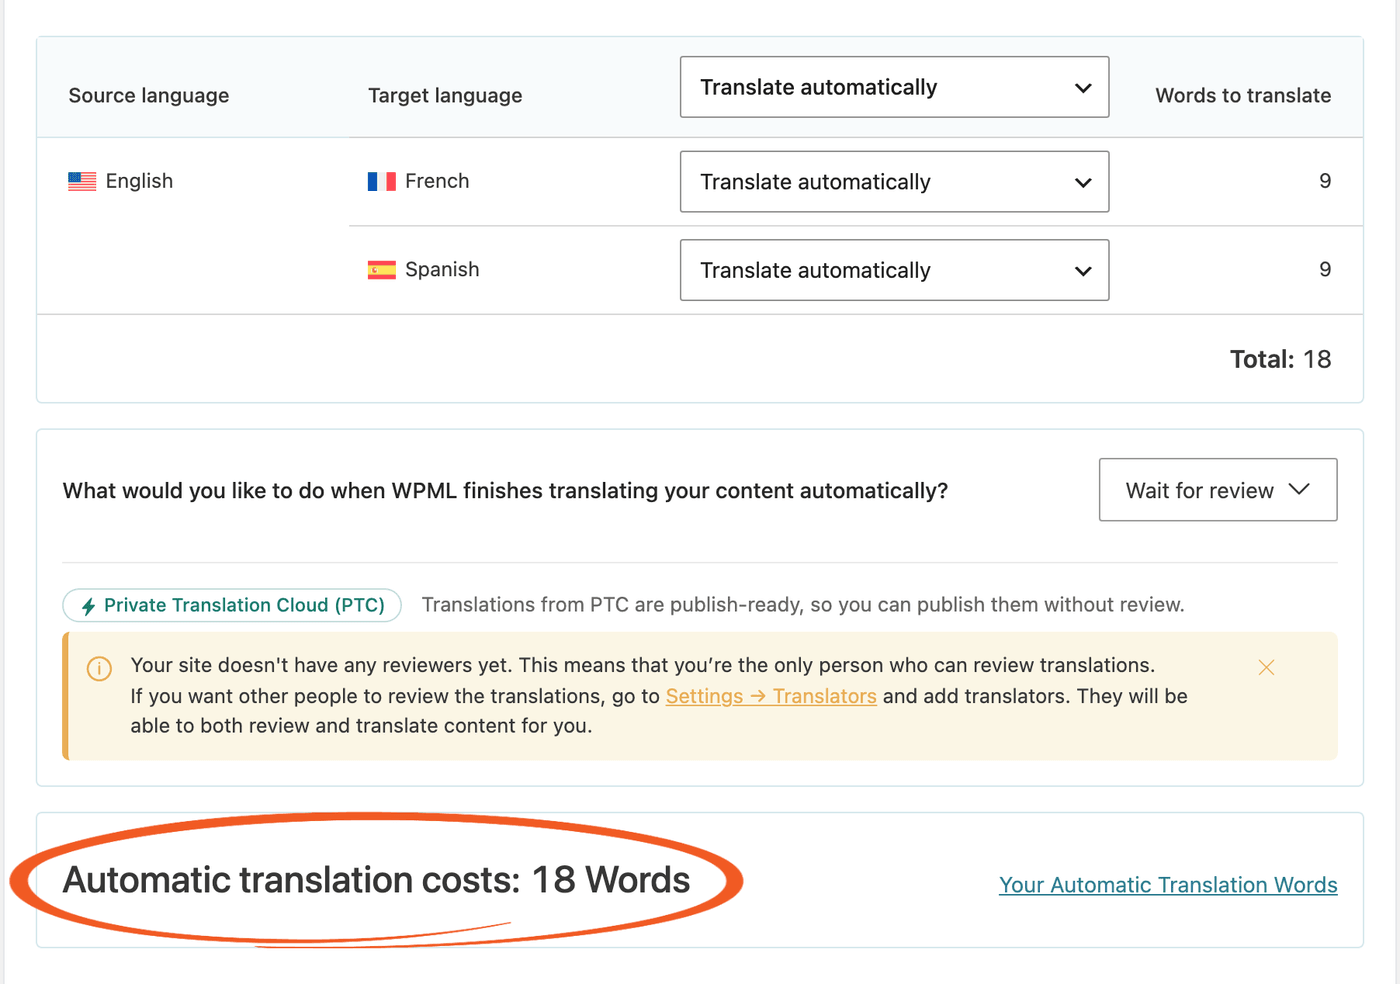
- Scroll down to Step 2, Translate your content, and select the translation method for each target language. You can translate automatically, by yourself, with your team of translators, or with translation services.
For the best translations, WPML recommends using its proprietary AI translator, Private Translation Cloud (PTC). This AI has the ability to analyze a site's context to ensure that translations are accurately adapted to your industry and target audience. WPML backs this service with a quality guarantee, offering a refund if users are not satisfied with the results.
- You can check the cost of automatic translation before you begin. When you choose Translate automatically, WPML shows the estimated cost for the selected content under Automatic translation costs, below the list of target languages. The exact wording depends on your WPML version. See WPML's automatic translation pricing for the current rates.
- Click the Translate content button to send your page for translation.
- If you chose a review option, or chose to translate it yourself, you can find the translations under WPML → Translations on the Translation Tasks tab. From there, you can review and publish them to your site.
You can edit any translation at any time if you need to make a change. Visit the translated page on the front end while you're logged in, and click Edit Translation in the admin bar, which will take you directly to WPML’s Advanced Translation Editor. The admin bar shows this link in the page's language, for example Editar traducción on a Spanish page.

Translation settings
- Pagination. If there are more strings than fit on one page, translation settings are shown on multiple pages. Open Screen Options (1), change Items per page (2), and click Apply.
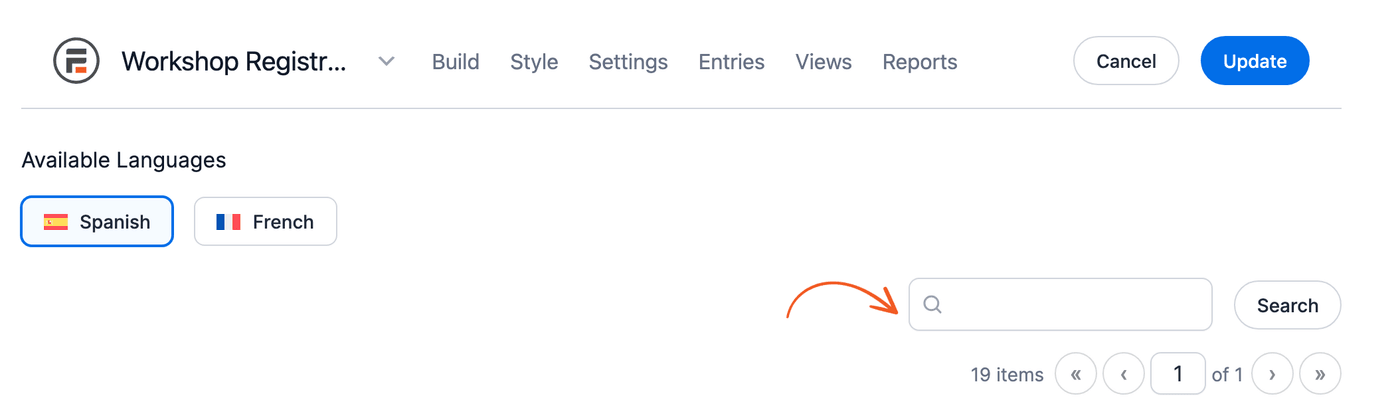
- Search. Use the Search box to find content or strings on the translation page.
Translate a View
To translate Views, you need to create separate Views for each language. To make each View display entries in a single language, we will use the View filtering options covered in the steps below.
- If you still need to, create a View for your default language, embed it on a page, and publish it.
- Once published, go to WPML → Translations. On the Dashboard tab, select the page where your View is embedded.
- Scroll down and select the translation method for each target language. Then click the Translate content button to send your page for translation. These are the same options as in Translate a form.
- Go to WPML → Translations, open the Translation Tasks tab, and enter your translations.
- Edit the form you want to translate and add a Hidden field. We’ll use this to filter the language. Activate this code snippet and set [current_wpml_lang] as the Default Value of your hidden field. Default Value is in the Advanced section of the field options.
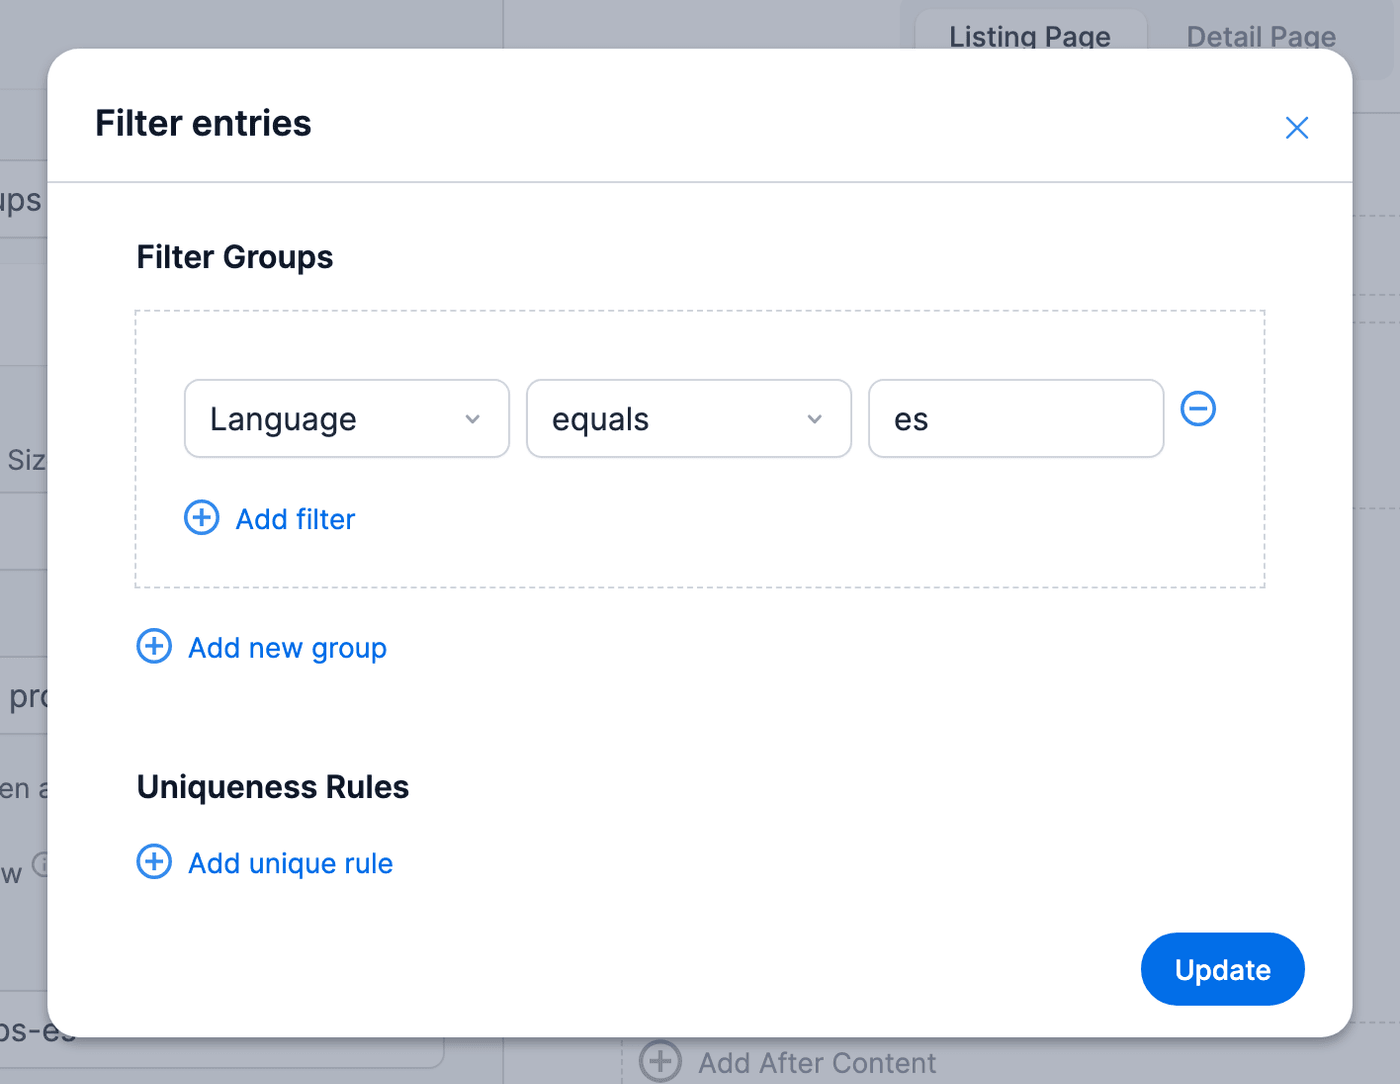
- Next, create a View for each one of your languages. To make each View display entries in a single language, click Filter entries and set your hidden field equals the language code you want to filter. Use the code WPML stores for the language, such as es for Spanish or en-us for English (see how to check the stored code).
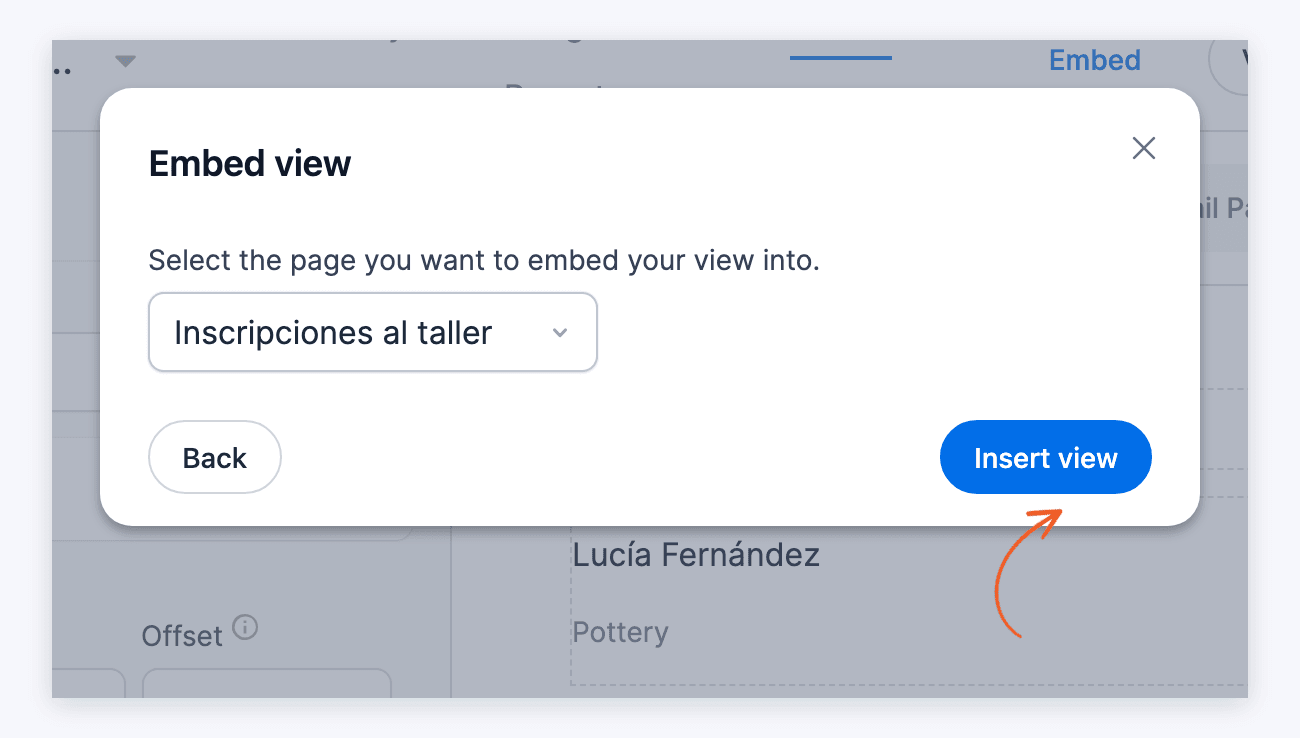
- Embed each View on the matching language version of your page. For example, we're adding the Spanish View to our Spanish page version here. A translated page starts with the content of the original page, so remove the default language's View from it, and only the language's own View shows.
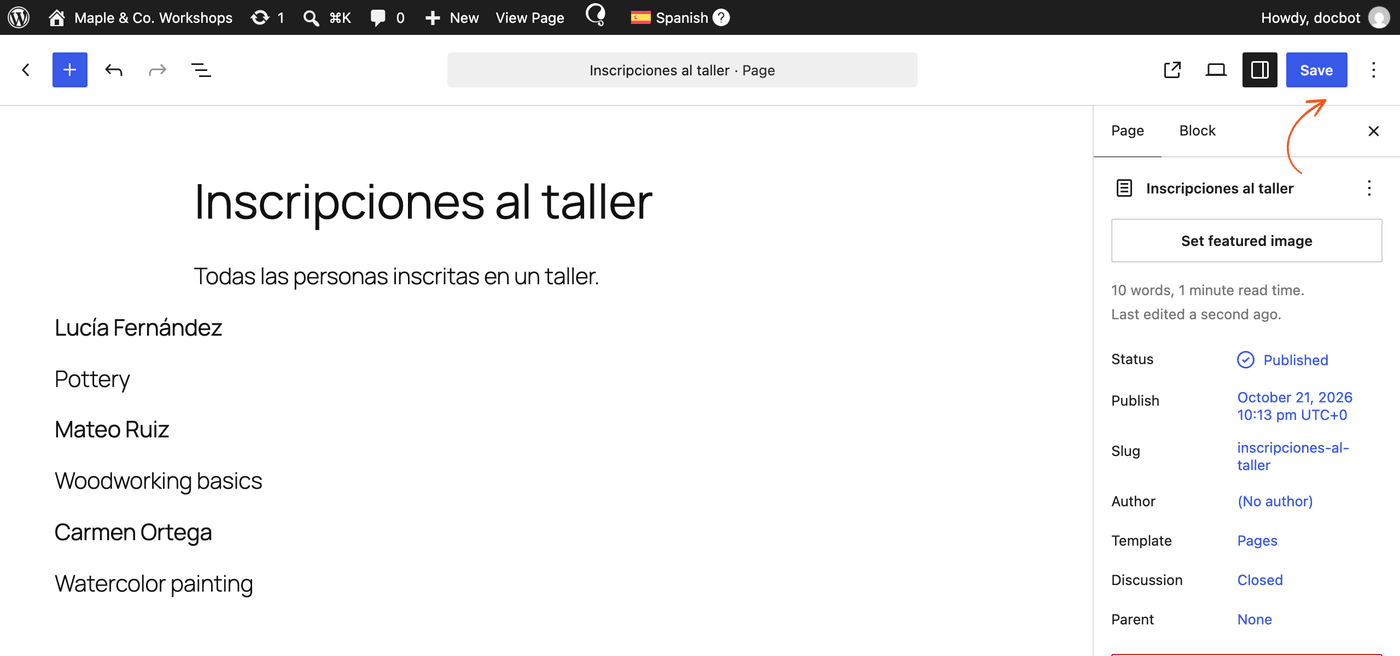
- Once the page loads, review your page and click Save to publish your View. If WPML shows a popup about editing a translated page when the editor opens, click Edit Anyway (Not Recommended) first.

Set datepicker language
To make the datepicker field in your form use a different locale, set the locale and then choose a datepicker language for each translation.
- Open the field settings for your date field and set the locale.
- Go to the form translation page for this form.
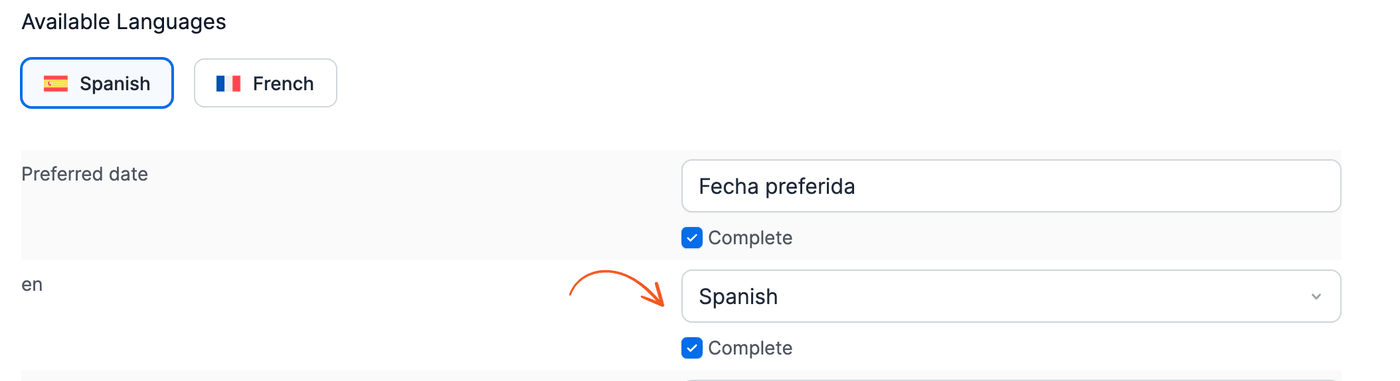
- Select each language under Available Languages. In the row that shows your locale, select the datepicker language from the dropdown, and click Update.
Sending translated emails
To send the email for the correct language, you'll need to set up multiple email form actions. Each of these emails will be sent conditionally, based on the language submitted.
- In your form builder, add a hidden field.
- Activate this code snippet and use [current_wpml_lang] as the default value for your hidden field. Default Value is in the Advanced section of the field options.
- In your form Settings → General page, click the Translate Form button to add the translations for your form and publish it on a page.
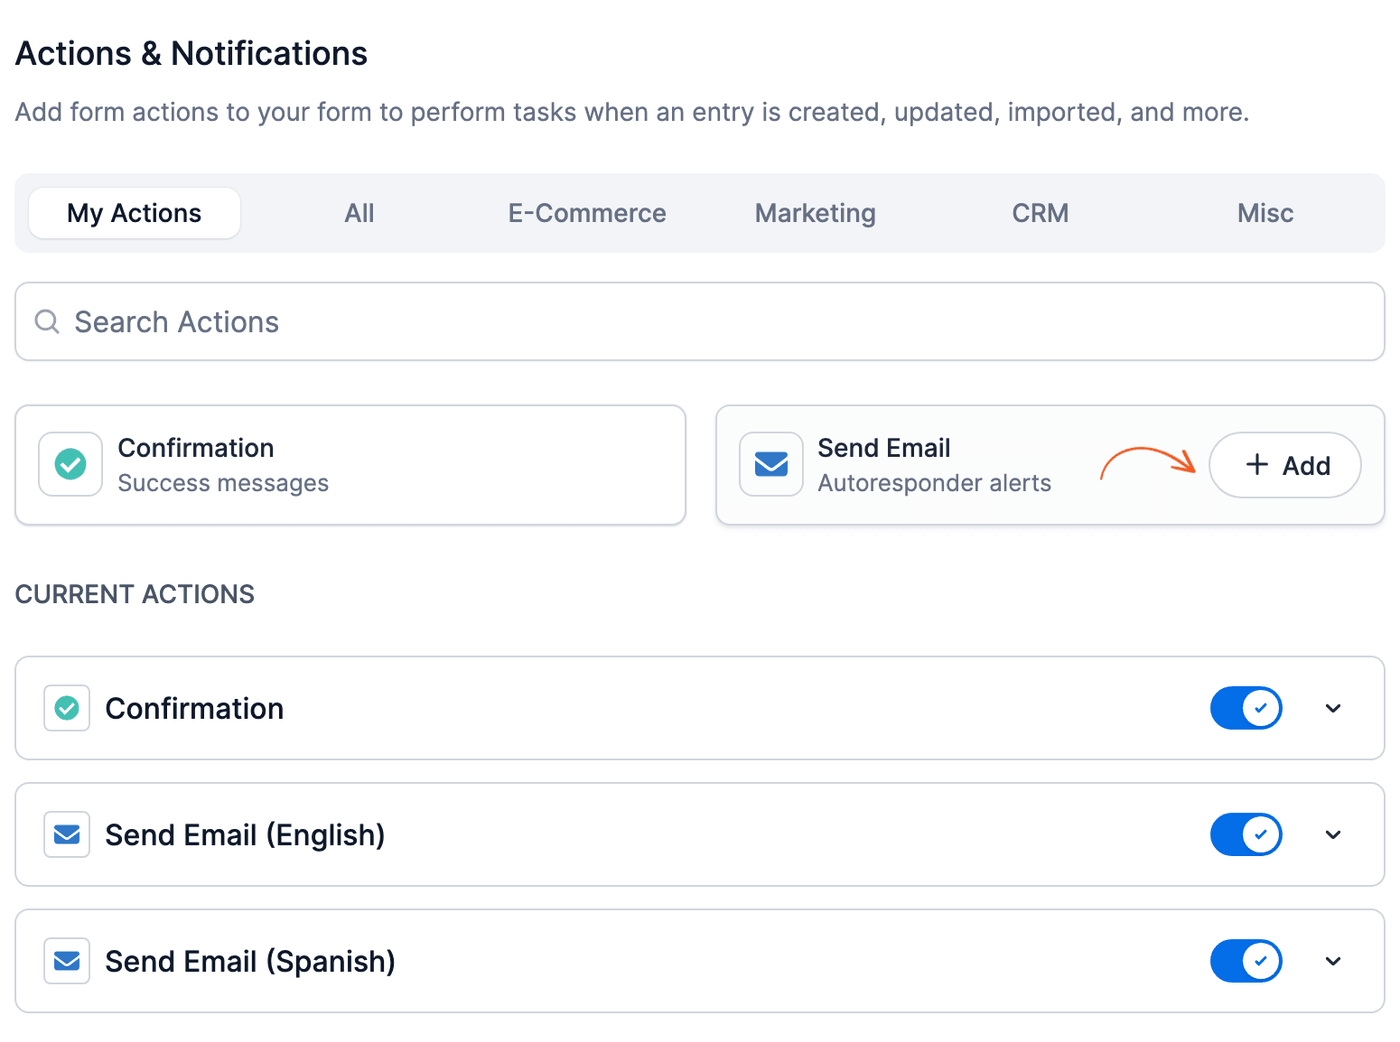
- In your form Settings → Actions & Notifications page, create an email action for each language that you want to translate. The form's existing Send Email action can be used for the first language. For each other language, hover over the Send Email card and click Add. The new actions are listed under Current Actions. Give each one a name, such as Send Email (Spanish), and set them up however you'd like.
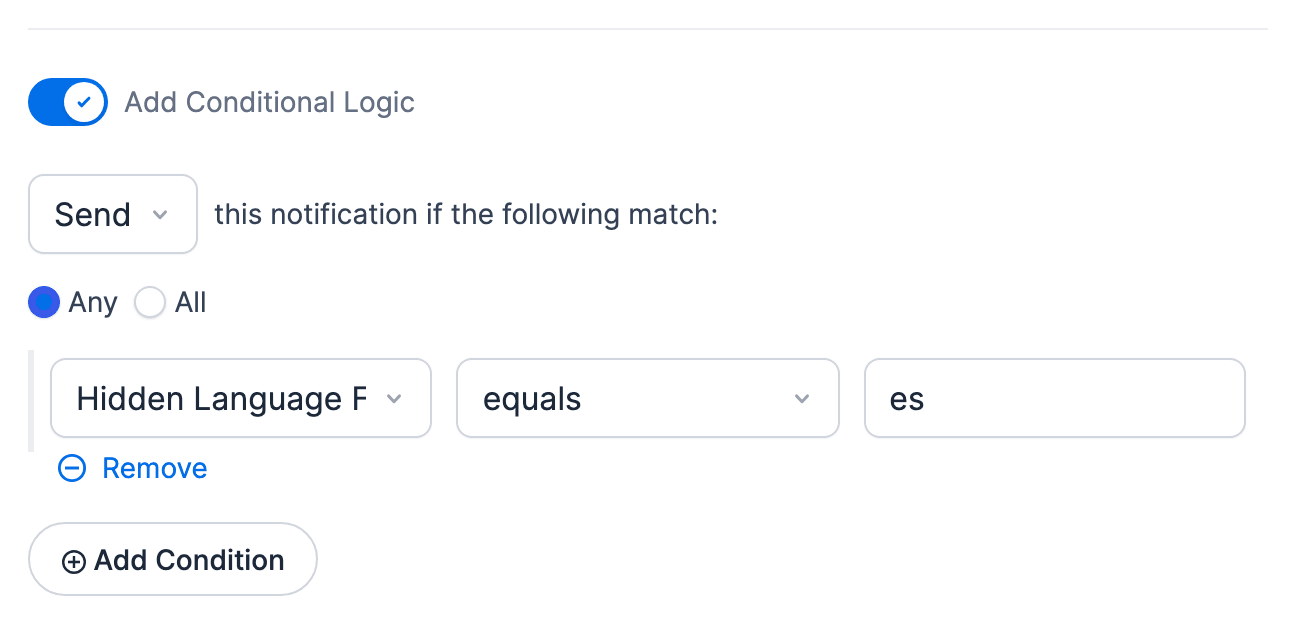
- To ensure that the correct email is sent depending on the language, turn on Add Conditional Logic in each one. Then set the hidden field to equal the language code. For example, use es for Spanish.Conditional logic in form actions is a premium feature. Your conditional logic will look like this:
Use the code WPML saves for each language, which is the value [current_wpml_lang] returns. To check it, go to WPML → Settings → Languages and click Edit next to the language. The code is listed as Stored code. For example, English with United States as its country is stored as en-us.
Translate success message
To translate the success message displayed after form submission, you must create a confirmation action for each language. The confirmation actions will be triggered based on the language submitted.
- To get the current language, add a hidden field in your form.
- Activate this code snippet and use [current_wpml_lang] as the default value for your hidden field. Default Value is in the Advanced section of the field options.
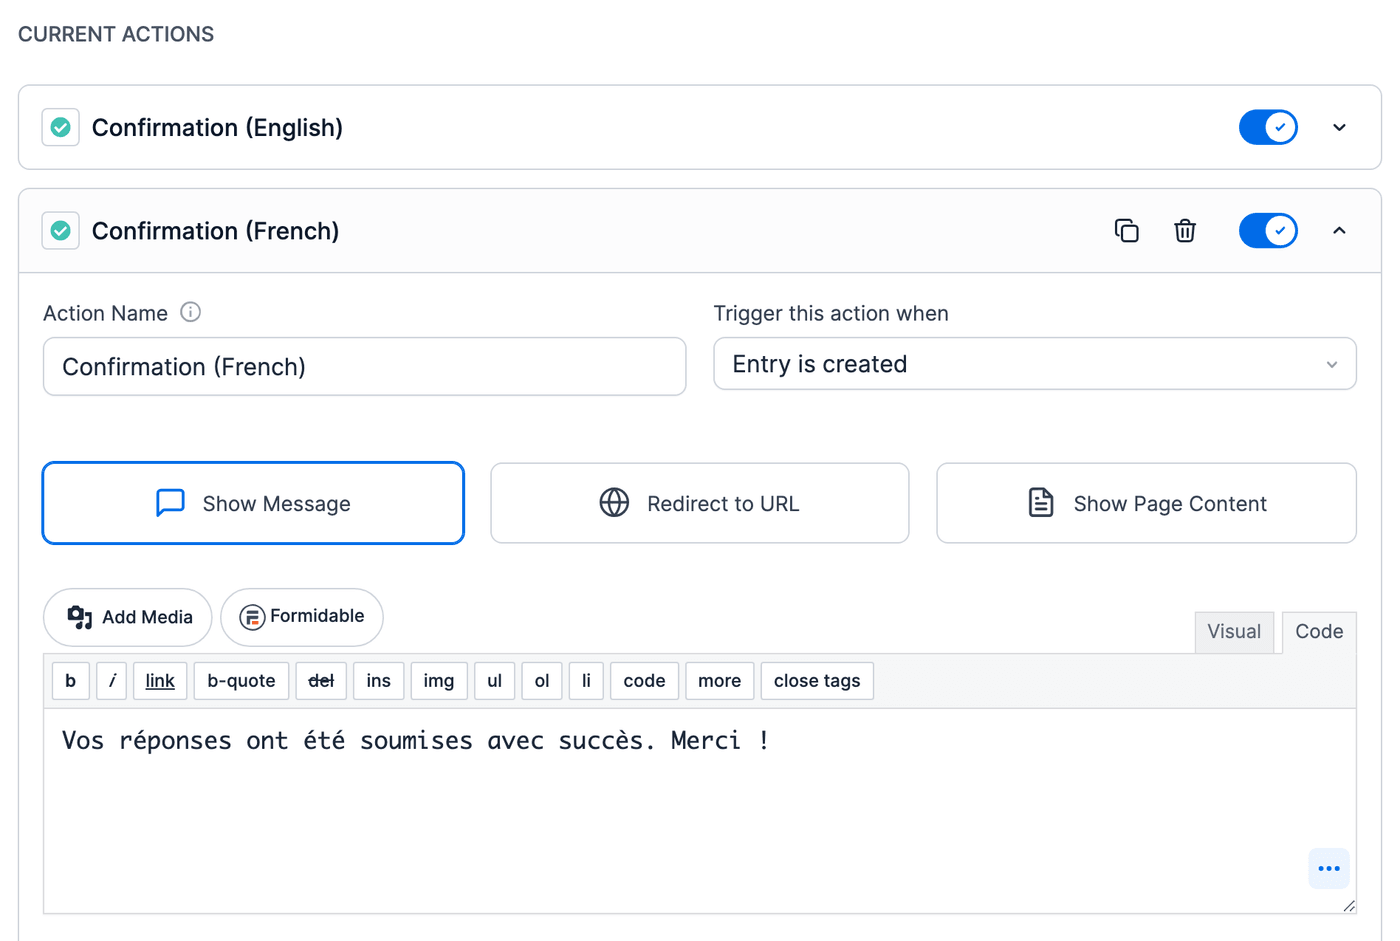
- In your form Settings → Actions & Notifications page, create a confirmation action for each language you want to translate. Use the form's existing Confirmation action for the first language. For each other language, hover over the Confirmation card and click Add. Select the Show Message button to customize the message and add in your translation.
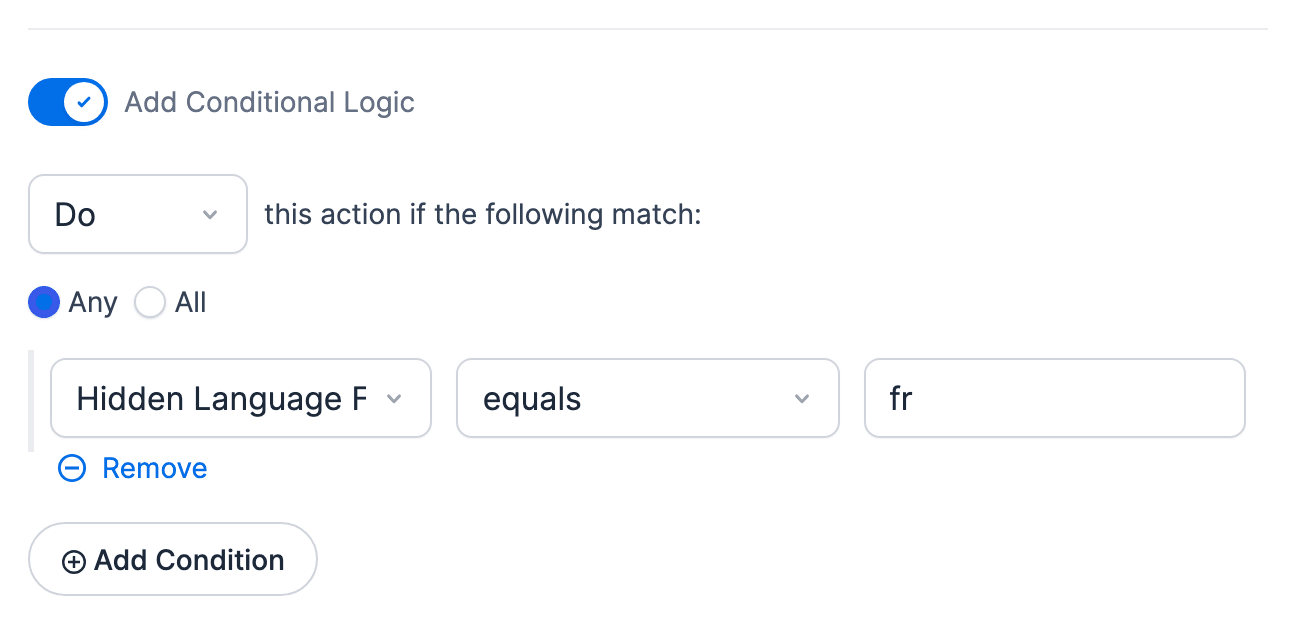
- To ensure the correct success message is shown depending on the language, turn on Add Conditional Logic in each confirmation action. Then set the hidden field to equal the language code. For example, use fr for French. Your conditional logic will look like this:
Redirect based on site language
To redirect to the correct translated page after submission, save the visitor's language in a hidden field and add it to the redirect URL.
- Activate this code snippet to get the current language.
- Add a hidden field to your form and insert [current_wpml_lang] as the default value. Default Value is in the Advanced section of the field options.
- Go to the form Settings → Actions & Notifications page. Under Current Actions, click the Confirmation action to open it.
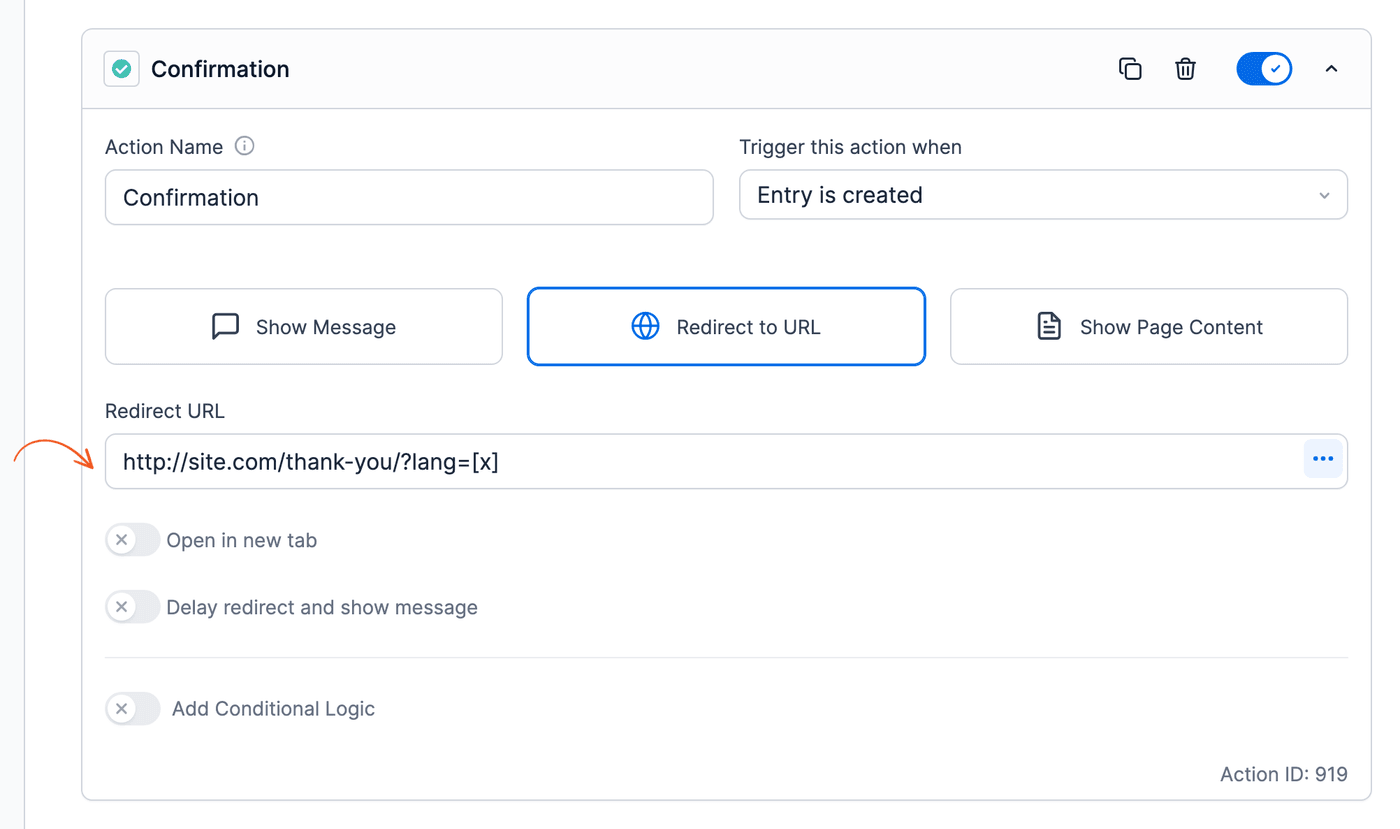
- Click the Redirect to URL button. In the Redirect URL box, enter the URL where you want users to be redirected, followed by ?lang=[x].
http://site.com/thank-you/?lang=[x]
Replace x with the ID of the hidden field containing the current language.
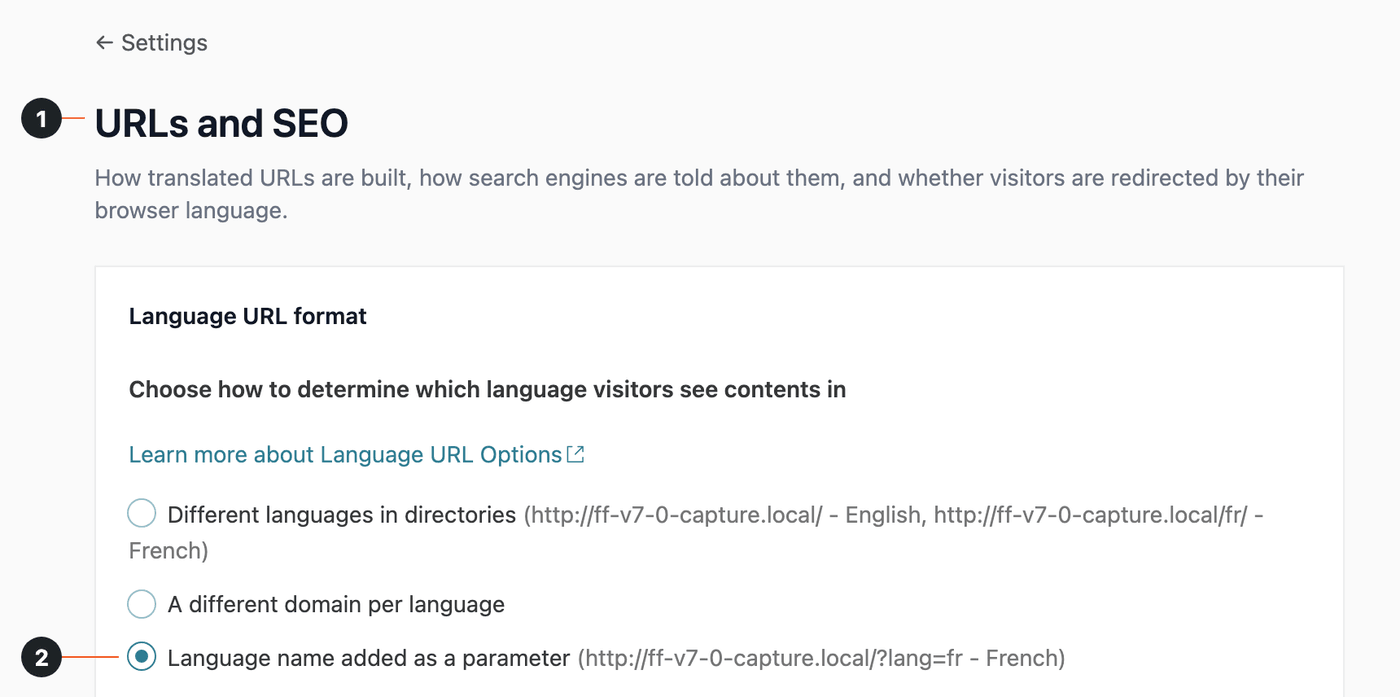
- Go to WPML → Settings and click URLs and SEO (1). Under Language URL format, select Language name added as a parameter (2) and click Save.

Redirect login form
If you have added a Login form using the User Registration add-on, you might be redirected to the default language after logging in or logging out. To set up a redirect to the language you want to use, do the following:
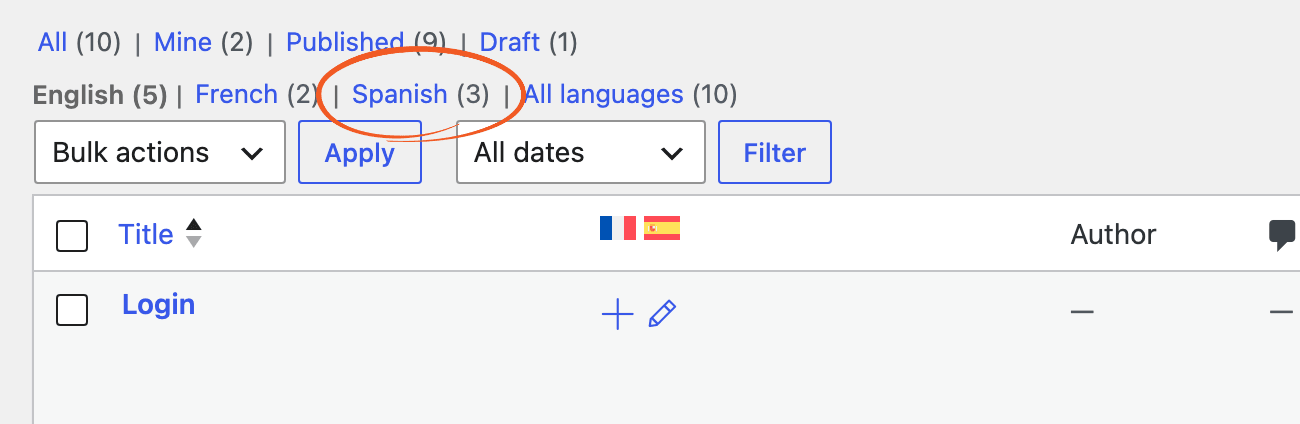
- Go to Pages and, above the list of pages, click the language you want to set up. Then edit the translated version of your Login page. For this example, the default language is English, and the second language is Spanish.
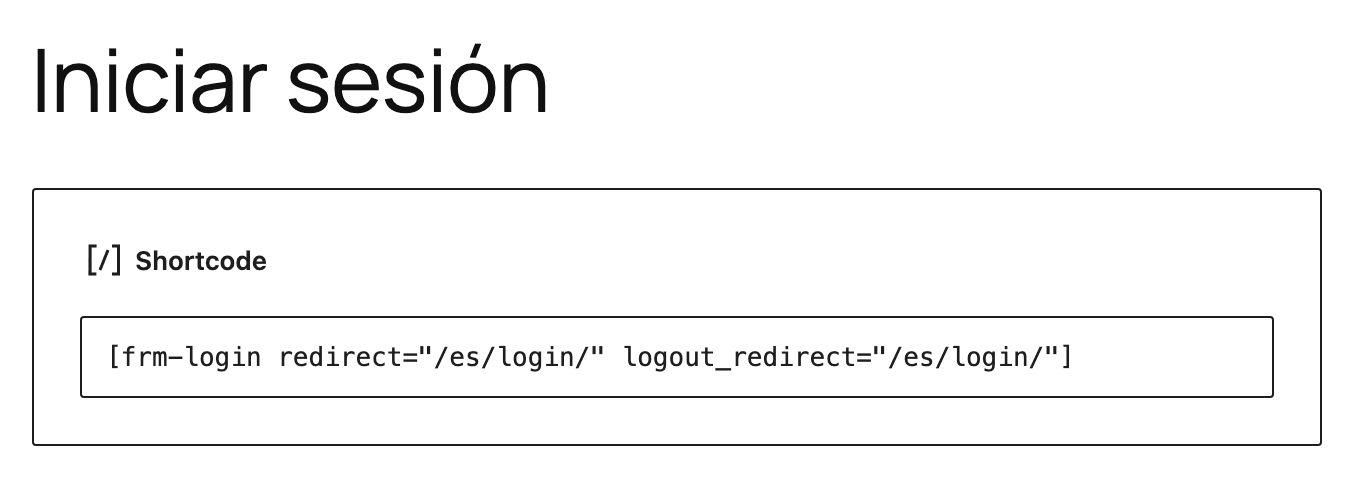
- Insert the login shortcode on your page, with the address of the translated login page in the redirect parameters.
[frm-login redirect="/es/login/" logout_redirect="/es/login/"]
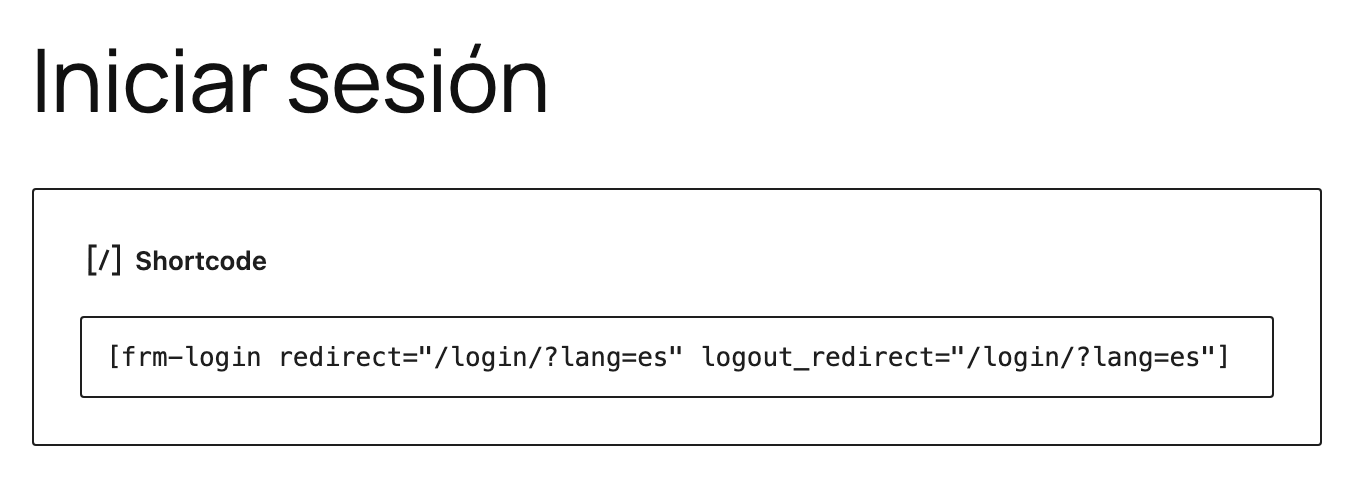
- If you have set your WPML Language URL format to set the Language name as a parameter, then your shortcode looks like this instead:
[frm-login redirect="/login/?lang=es" logout_redirect="/login/?lang=es"]
Set the reCAPTCHA language
Go to Formidable → Global Settings → Captcha/Spam. In the reCAPTCHA settings section, select Browser Default in the reCAPTCHA language dropdown, and click Update. The reCAPTCHA then uses each visitor's browser language. Learn more about how to set up reCAPTCHA.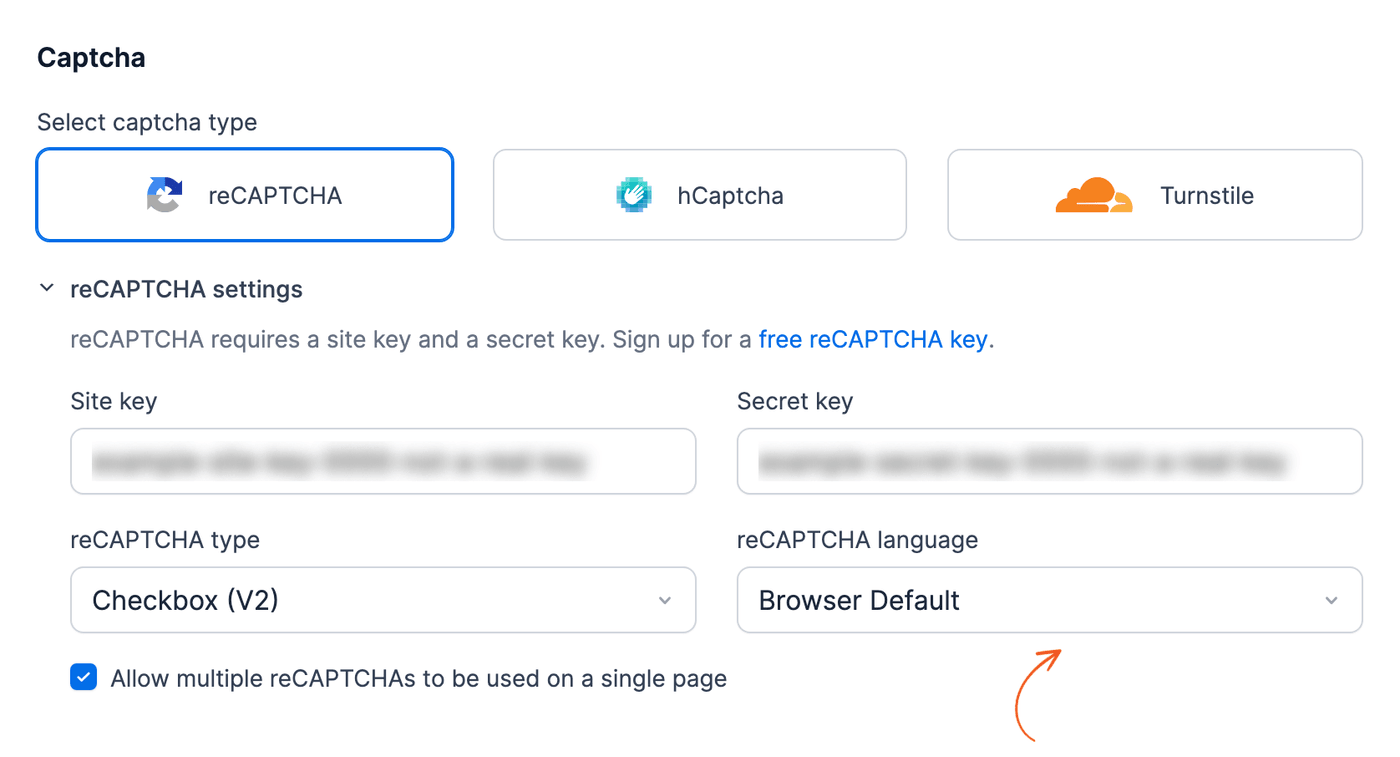
Translate values in custom HTML
To translate content in the form Settings → Customize HTML page, wrap each translation in a condition that checks the current language.
- Activate this code snippet to get the current language.
- Surround the content with frm-condition to only show it if the current language matched. Use current_wpml_lang as the source.
- For example, if the current language is French and you want to display its translated value, your final shortcode may look something like:
[frm-condition source=current_wpml_lang equals="fr"]Afficher le contenu[/frm-condition]
Replace fr with your selected language.
Translate Cascading Locations data
The Cascading Locations add-on imports country and state names in English. To show locations in each visitor's language, add translated entries to the Locations List form, mark every entry with its language, and filter the Lookup fields by the current language.
- Activate this code snippet to get the current language.
- Go to Formidable → Forms and edit the Locations List form. Add a Dropdown field named Language, with one option for every language on your site. Use the code WPML stores for each language as the option, such as en-us and es (see how to check the stored code). Click Advanced, set the Default Value to your default language code, and click Update. Entries added later from the Entries page then get the default language unless you pick another one. An entry without a Language value shows in no language.
- Set the Language of the entries you already have to your default language code. The imported entries have no language yet, so update them in bulk: export the Locations List entries to CSV, fill the Language column with the code (for example, en-us), and import the file into the Locations List form. The ID column maps to Entry ID, so the import updates the entries instead of adding new ones. Learn more about how to bulk update entries.
Keep every column in the file. The update replaces the whole entry, so fields without a column are left empty. Keep a copy of the original export: importing it again restores the entries, because it has the same entry IDs. Keep the import page open until the import finishes. Rows that aren't imported yet when the page closes keep their old values. A list with U.S. cities has about 56,000 entries, so the import takes a while.
- Add an entry for each location in each other language, with the country, state or province, and city names in that language and its Language selected. Add them from the form's Entries page, or import them from a CSV file with a Language column and without ID and Key columns. Add entries for every language on your site: on a page in a language with no entries, the location fields have no options to choose from.
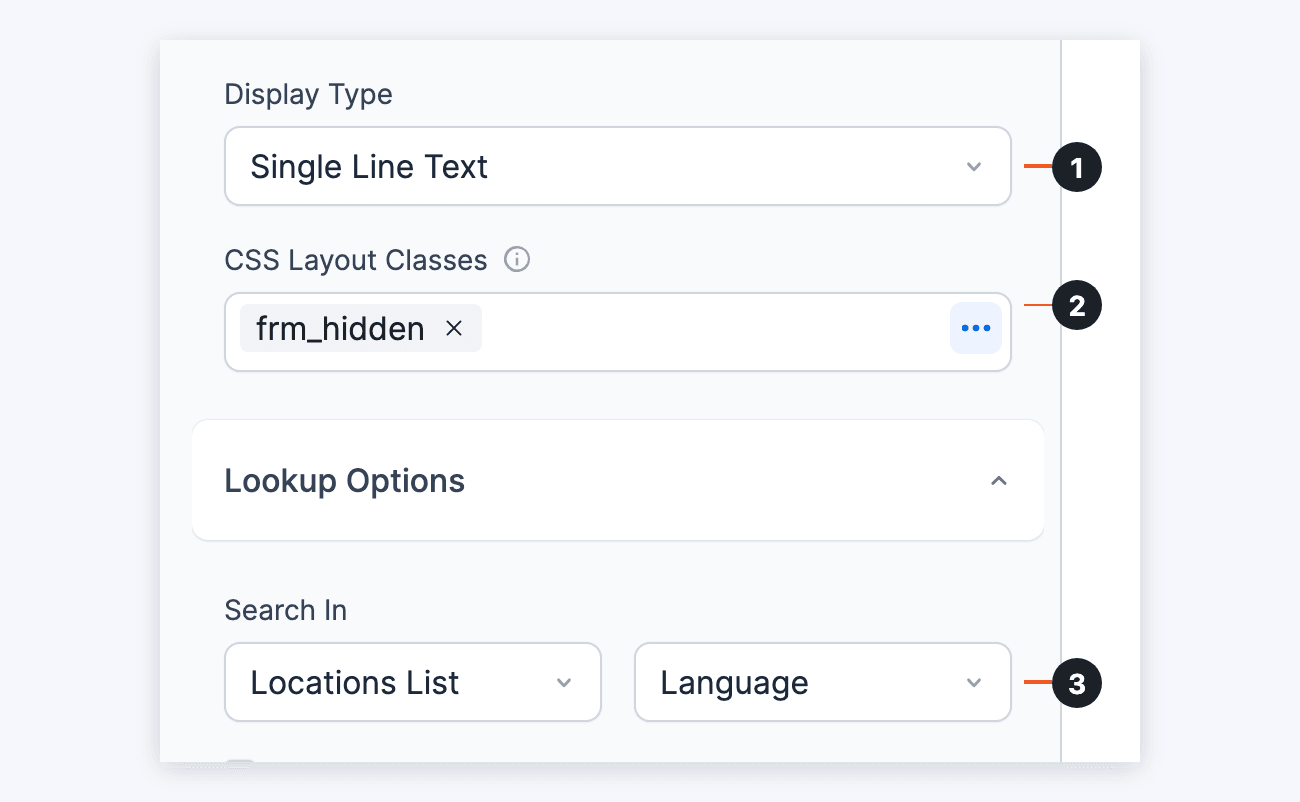
- Edit the form where visitors choose a location, such as the Location Lookup form the import adds. Add a Lookup field named Language and set it up as follows:
- Set Display Type to Single Line Text.
- Enter frm_hidden in CSS Layout Classes, so visitors don't see the field.
- Under Get Options From, select the Locations List form and its Language field. After the form is saved, this option is labeled Search In.
Then click Advanced, set the Default Value to [current_wpml_lang], and click Update. The other Lookup fields list the Language field by its label only after the form is saved. - Click the Country field to open its options. Under Filter by Lookup Fields, click Watch a Lookup Field and select Language. The Country field now lists only the countries saved in the visitor's language.
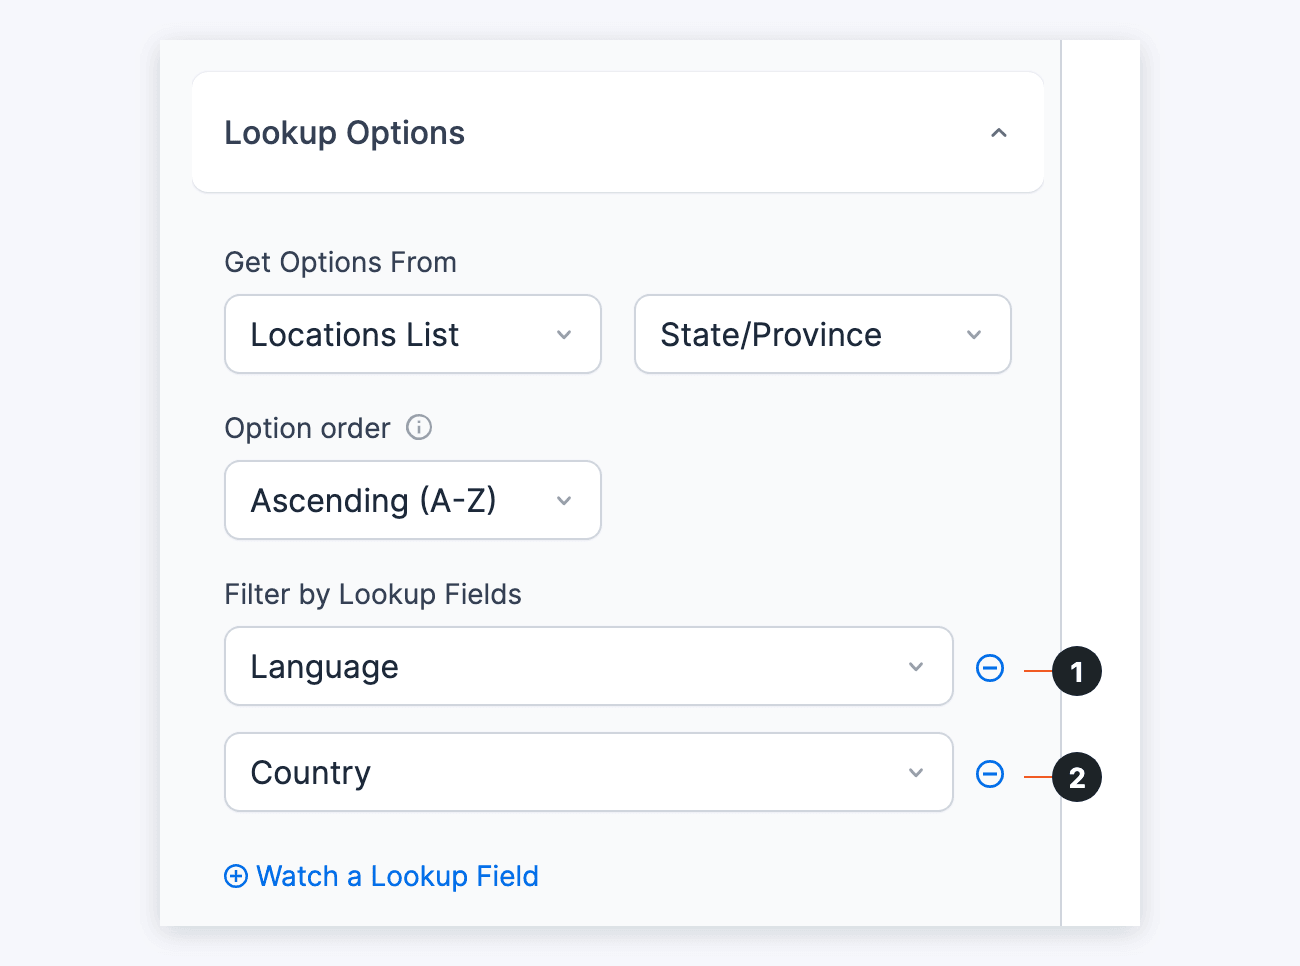
- Click the State/Province field. Under Filter by Lookup Fields, watch Language (1) and Country (2). A place can have the same name in two languages, such as Canada in English and French. Without the Language filter, its list of states shows the names from both languages. Set up the County/Area and City fields the same way: each one watches Language and the field before it.
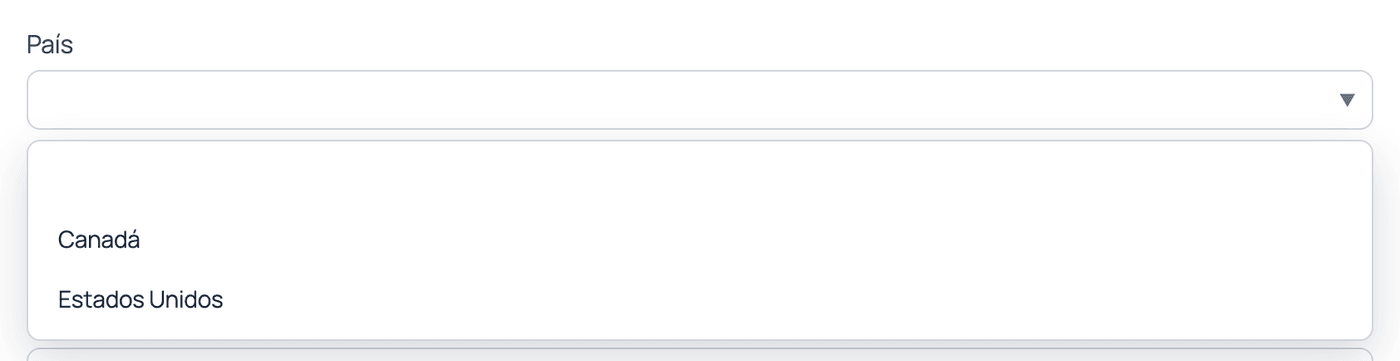
- Click Update. If you haven't already, translate the form and the page where it's embedded, so the field labels and the page exist in each language. Then open the form's page in each language. Each Lookup field lists only the entries saved in that language. Here, the Spanish page lists the Spanish country names.
Troubleshooting
Default language always shows
If the default language is always showing after setting up and saving your translation, this is usually related to settings in WPML. It works best if the default language in the WPML settings is the same as the default language set for the string translations.
English translation not working
If you translated a form that uses a default language other than English (such as Italian), the translations may not show up. Try the following steps to resolve the issue.
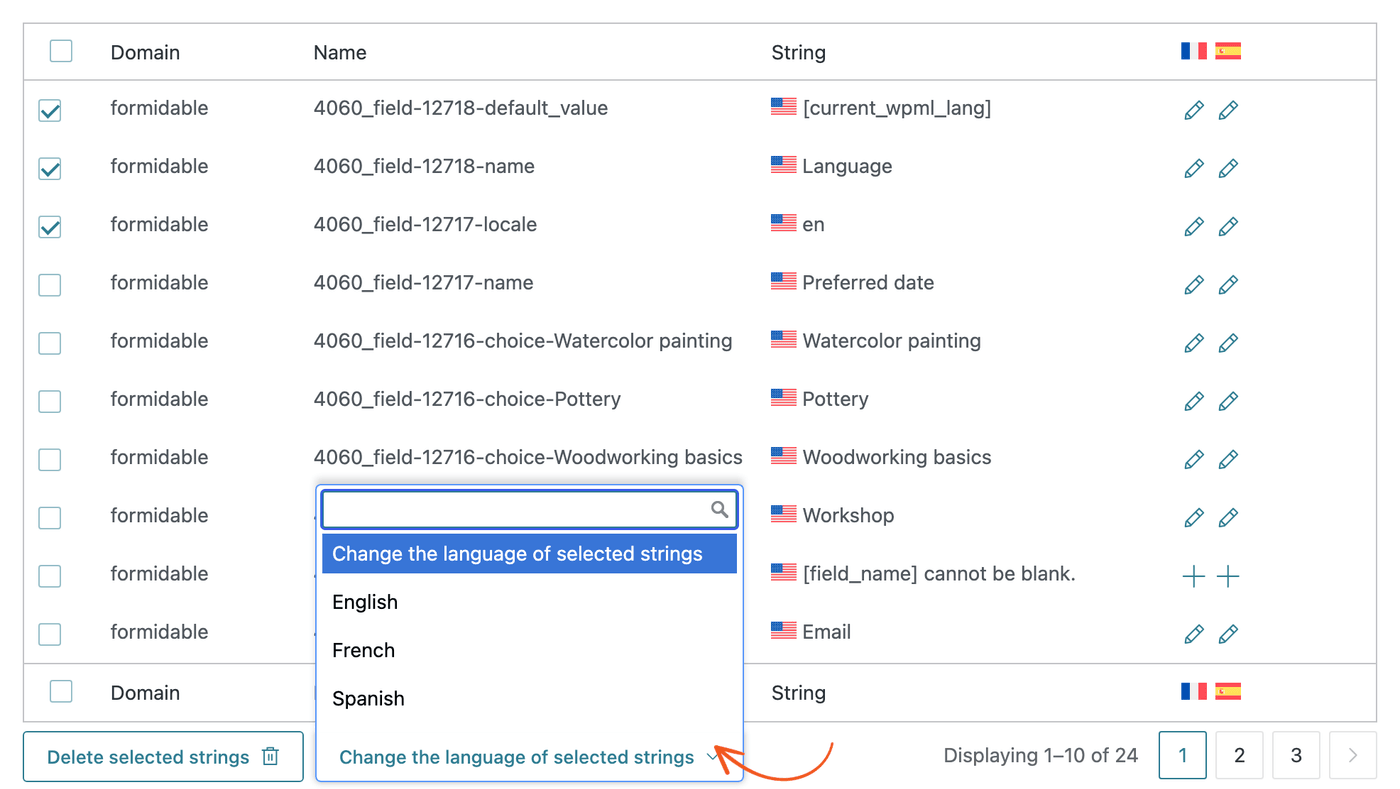
- Go to WPML → Translations, open the Strings tab, and search for the texts that show up untranslated.
- Select the strings, click Change the language of selected strings, and choose your site's default language.
- Now, try translating the strings in question once more.
If this does not resolve the issue, please create a ticket in the help desk for assistance.
Conditional logic not working
If you have added conditional logic to a field, this may break when you translate your form to a non-default language. To resolve this issue, enable separate values in your radio, dropdown, and checkbox fields. This way, only the displayed value is translated and the conditional logic will work across languages.
Error: Call to a member function
If you see this error message, check each of the following:
- Are Formidable Forms, Formidable Forms Pro, and Formidable Multilingual up to date? If not, please update.
- Are WPML Multilingual CMS and its necessary components (such as String Translation) up to date? If not, please update.
- Do you have the Polylang plugin installed? If so, you'll need to choose between the two. They are currently not designed to work together.
- Do you have another plugin installed that uses WPML or Polylang? If so, try deactivating it to check for a conflict.
Additional customizations
These code examples can be added to a child theme's functions.php file or the Code Snippets plugin (recommended). To learn more about how to use code examples like this, see the Formidable Hooks guide.
Get the current language
Use [current_wpml_lang] to get the current language by adding the code below.
add_shortcode( 'current_wpml_lang', 'current_wpml_lang' );
function current_wpml_lang() {
  return apply_filters( 'wpml_current_language', null );
}
Related developer hooks
- Move posts to a preferred WPML language with the frm_after_create_entry hook.
