
Instantly integrate Formidable Forms with OpenAI, with no API setup required. Use the AI field to display AI-generated responses and include them in the form before submission, email notification, confirmation message, or a View.

Upgrade your WordPress site with powerful, flexible forms.
Download and Install
- If you haven't already, install and activate the current version of Formidable Forms Premium on your WordPress site.
- After confirming your Formidable Forms license, proceed to the Formidable → Add-Ons page and toggle on the Form AI WordPress plugin.


From Idea to Reality in Minutes. Build Powerful Forms, Dashboards, Apps and More.
Formidable Forms makes advanced site building simple. Launch forms, directories, dashboards, and custom WordPress apps faster than ever before.
Standard field options
An AI field has the following standard options: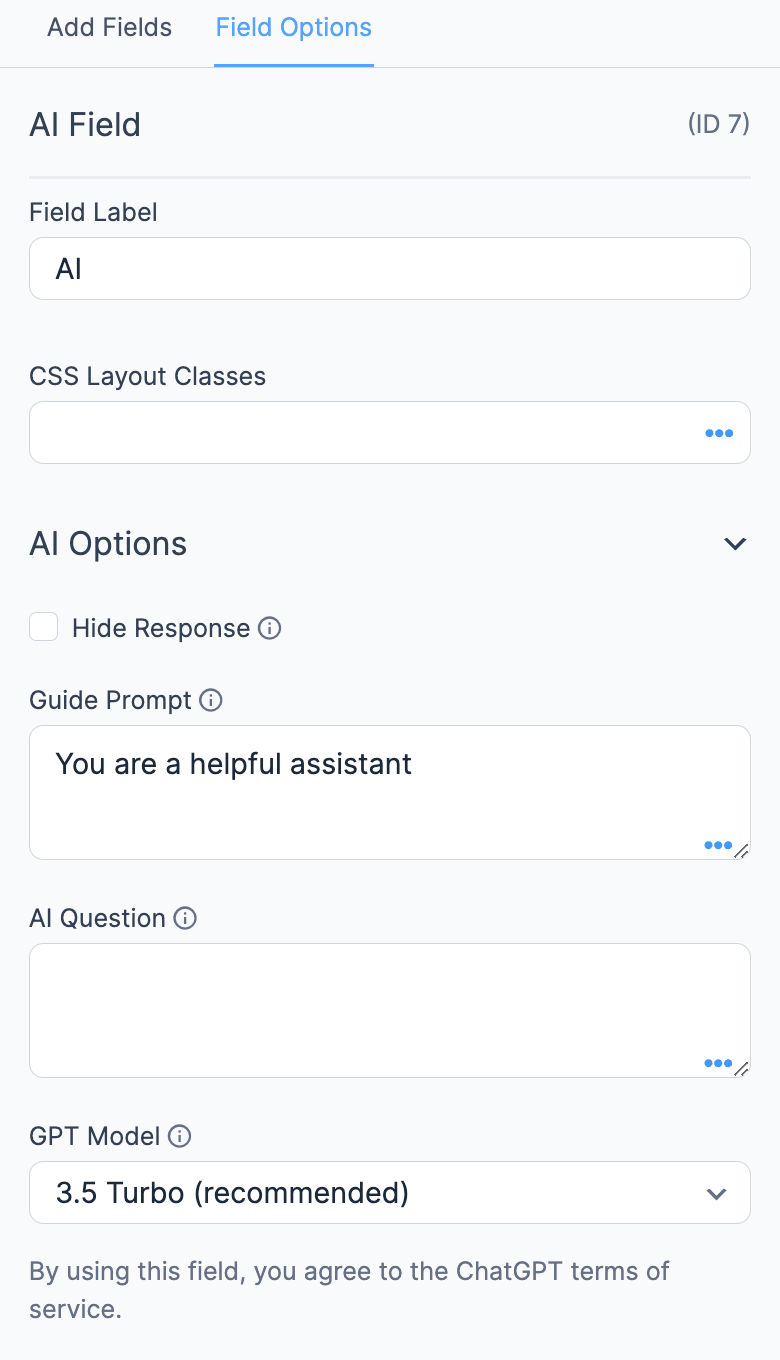
Field-specific options
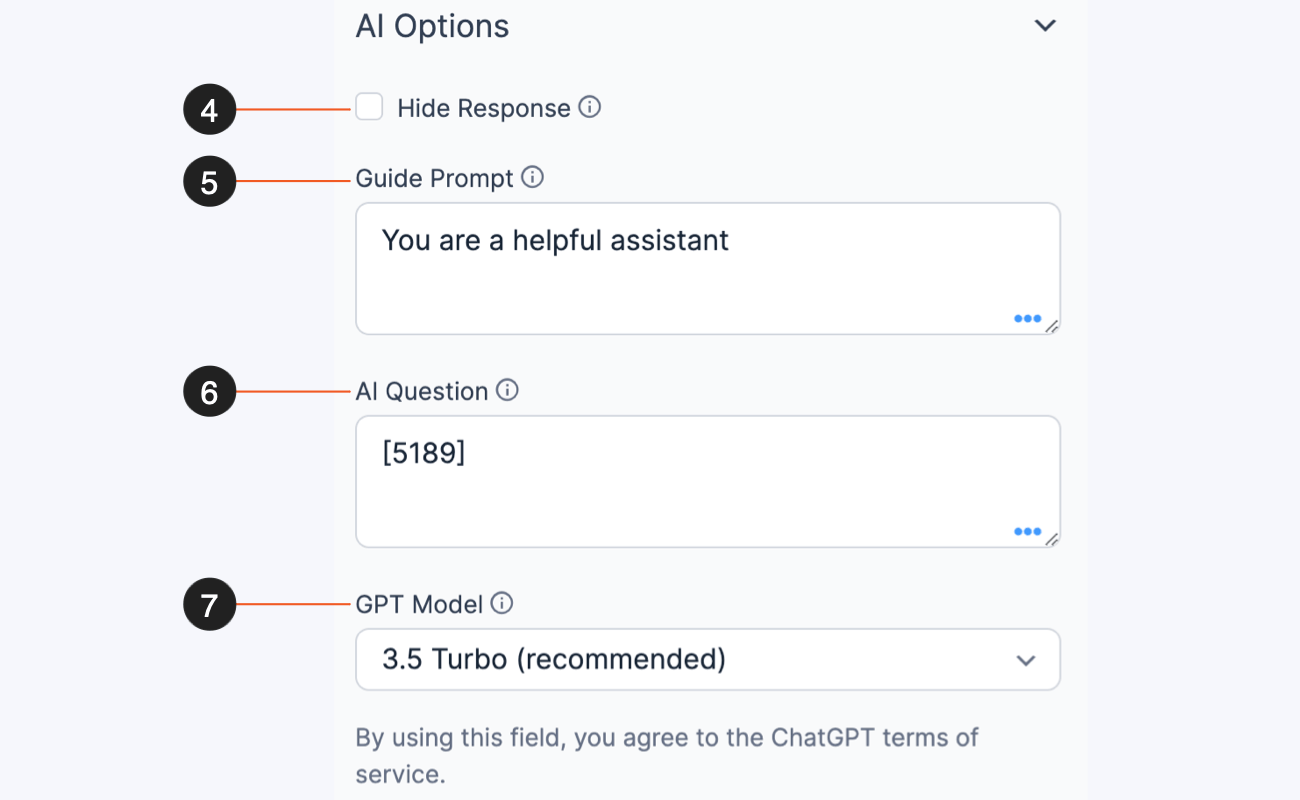
Hide response
Select this checkbox if you do not want the AI response to appear immediately in the form. It is helpful if you'd prefer to only show the message in an email, View, or summary field.
Guide prompt
Give Open AI more context for the type of response you would like to receive. We recommend keeping this short. This setting can accept field shortcodes that work with live form values.
AI Question
Create questions using multiple fields and static text with the AI Question field setting. This field allows field shortcodes to update in real-time and will re-trigger the AI prompt when updated.
GPT Model
This field supports GPT-3.5-turbo and GPT-4o-mini model options. GPT-3.5-turbo is typically faster and more concise, and GPT-4o-mini has higher quality responses.
Field icons
Field action icons allow you to duplicate, delete, and move a field on the form builder page. See the field action icons article for more information.
Create a form with AI form builder
Creating forms can be time-consuming, especially when building the form from scratch. With the AI form builder, you can input the type of information you want to collect, and it will automatically generate custom-tailored forms based on your specific needs. Follow the steps below to get started.
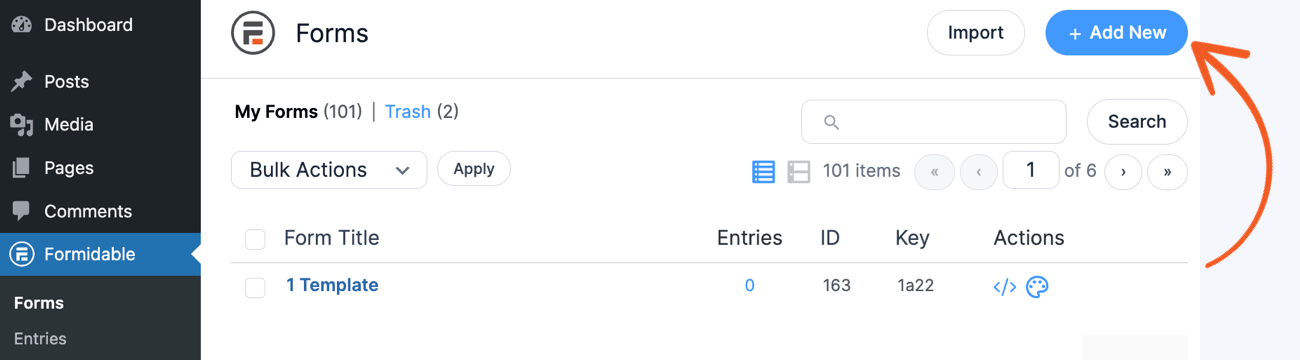
- Go to Formidable → Forms and click Add New at the top of the page.
- Select the Create with AI button to start creating the AI-generated form.
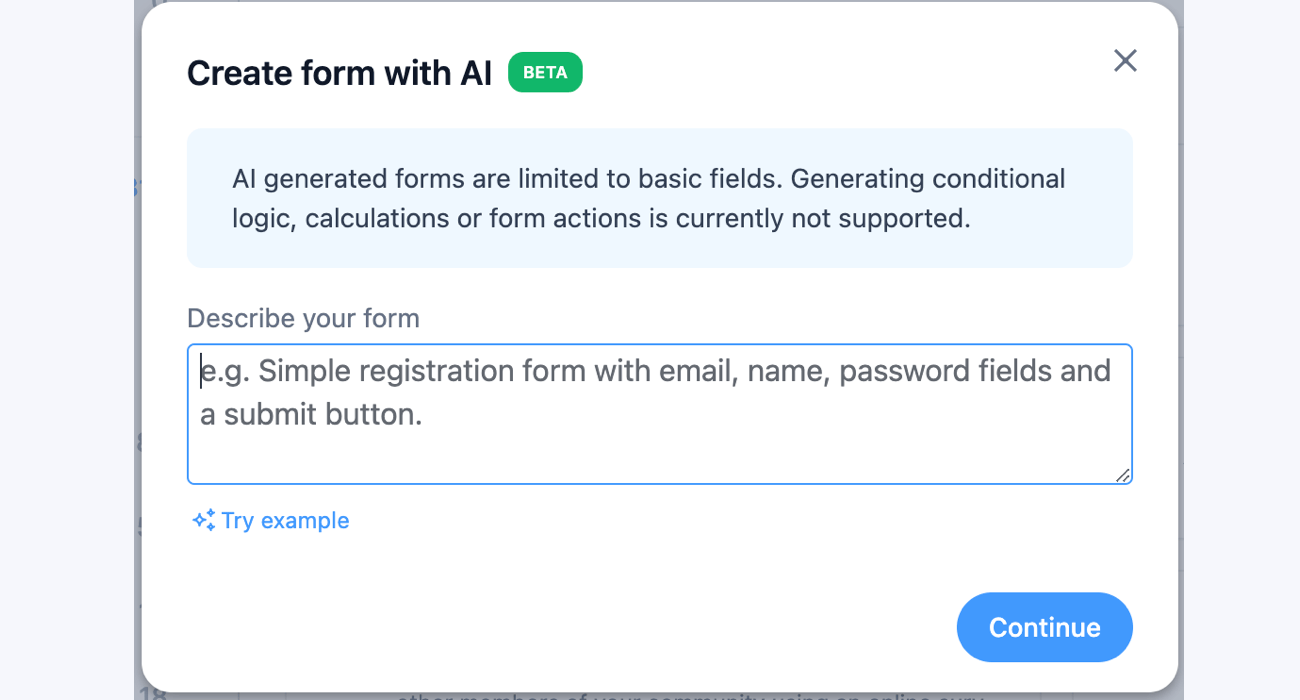
- A popup will appear where you can tell the AI form builder what you need. Describe your form and share a brief or detailed prompt or the basic fields you want to be included.
You also select the prompt suggested by the AI by clicking Try Example. - Click the Continue button and wait for the AI form builder to generate the form preview.
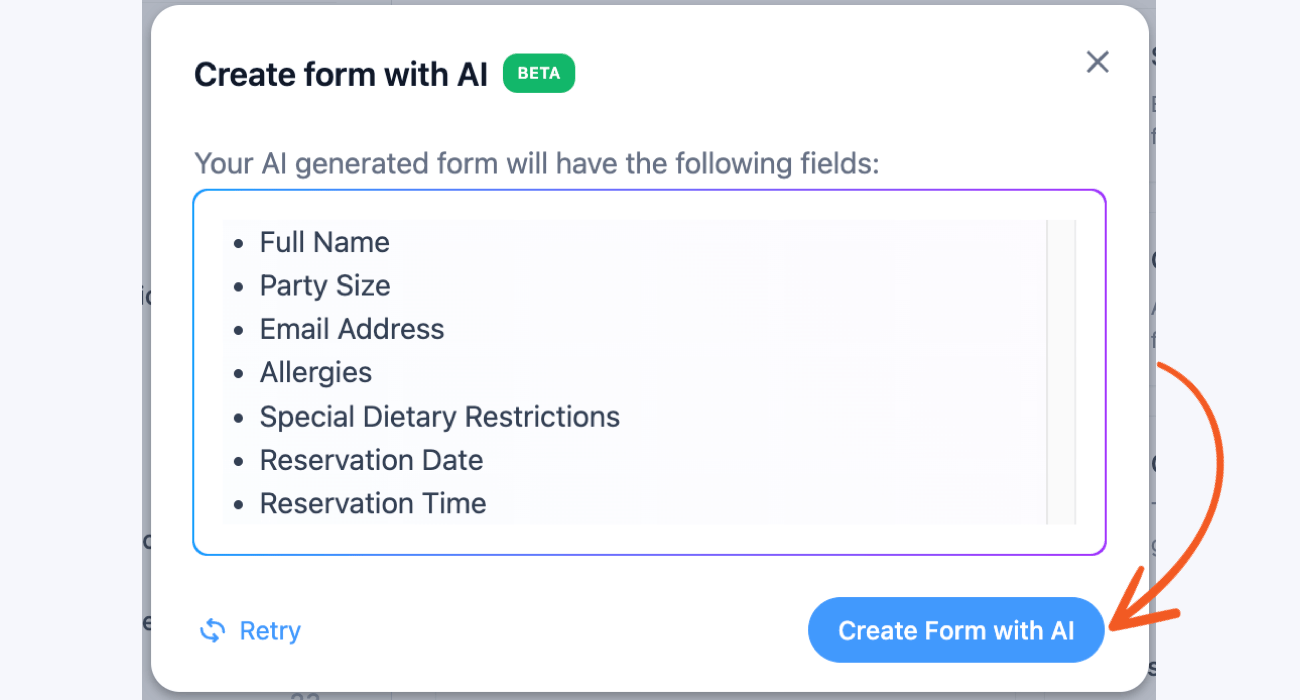
- If you are satisfied with the result, click the Create Form with AI button to complete the process.
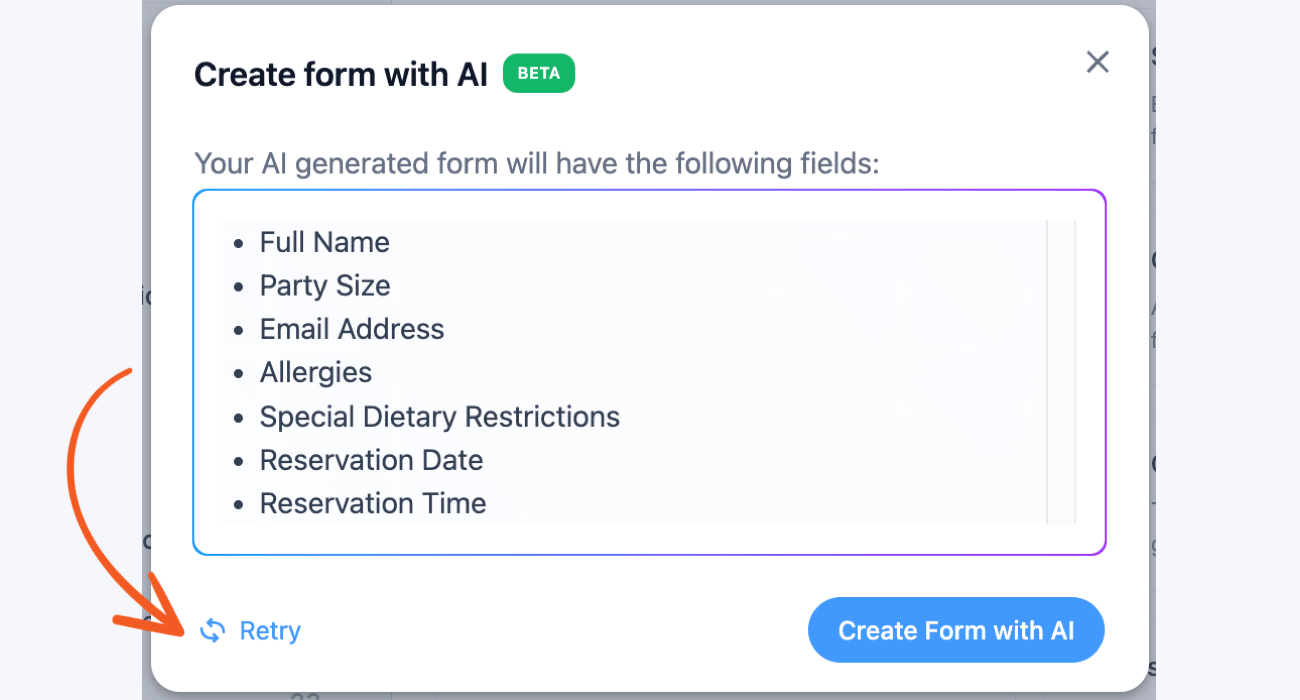
If the results are unsatisfactory, you can click the Retry link to generate a new form. - That’s it! You will then be redirected to the form builder, where you can edit the AI-generated form and delete any questions you don’t need.


How to add an AI field

If you want to have an AI field embedded on the form, follow the instructions below.
-
- If you still need to, create a form or edit the form where you would like to use the AI field.
- Add a text or paragraph field in the form builder where users can type in their questions.
- Find the AI field on the left sidebar and click or drag and drop it into your form.
- If you do not want to see the AI response immediately in the form, select the Hide Response checkbox in the AI field options. By default, this option is unchecked.
- Give Open AI more context for the response you would like to receive by typing it in the Guide Prompt box. It can also include shortcodes.
- Compose the question and type it in the AI Question box. It can consist of multiple shortcodes and text.
- Select the AI model that fits your needs. The 3.5 Turbo GPT model is recommended, but you can choose the 4o-mini for a more detailed response.Note: While 4o-mini can create long, detailed responses, you might consider having shorter answers. In this case, you could try including the phrase "brief response" in the prompt or by specifying a maximum word limit.
- Save the form and click Preview. When the form is visited, the AI field will appear and be ready to use.


-
-
- Character limits: To keep costs down, only the first 1,000 characters in a request will be sent to OpenAI.
- The combined length of your question, prompt, and generated response cannot exceed about 4,000 characters.
-
Create an AI Question using multiple fields
When you create your prompt, you can combine multiple field shortcodes and additional text in the AI Question field. This helps improve your AI interaction and gives you better results. For example, you can ask a question like this:
Create a recipe using the ingredients on [100], exclude these specific ingredients [110], and follow the [113] diet.
Where 100, 110, and 113 are the IDs of the other form fields.
Display AI fields
Insert [x] in a form's confirmation message, email, or View to display the submitted AI values. Replace x with the ID or key of the AI field.
Additional customizations
The Customize HTML for this field includes:
[if loading]<div class="frm_ai_loading">insert content here</div>[/if loading]
Between these loading tags, you can add anything custom.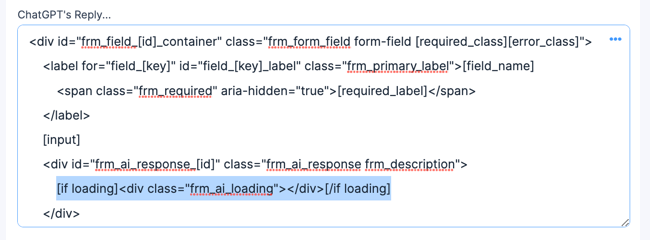
Related developer hook
- To manage the values sent using the AI, use the frm_ai_data hook.
