Want to create and edit PDF forms right from your WordPress dashboard? This post will show you how to use a PDF editor in WordPress using Formidable Forms.
Approximate read time: 6 minutes
Looking for a PDF editor in WordPress?
Whether creating certificates, displaying a menu, or customizing PDF invoice packing slips, an editable PDF in WordPress saves you time.
This post will show you how to design your PDF using the best PDF editor WordPress plugin for your WordPress site, Formidable Forms. You’ll learn how to create a form to enter the information you need and display it in a PDF you designed.
So, let’s get started.
Why should you use a PDF editor in WordPress?
There are plenty of reasons to use a WordPress PDF editor plugin.
Whether you want to create a beautiful PDF template, make it easier for people to view PDFs on your website, or offer gated content people have to sign up for, having control over the design and publishing of your PDF means you get to decide what goes on your website.
And there are a few different people who could find this helpful. Here are a few:
- Business Professionals — If you regularly create PDFs for customers or clients to download, having a way to create your own makes your life easier.
- Marketers — PDFs are among the most common ways to share content or marketing materials. And having a way to design them yourself means you have complete control.
- Freelancers — Do you send out invoices via PDF? Then, ditch your PDF software and create your own!
- Teachers — You can even create lesson plans and other educational materials using your own PDF editor!
- Restaurants — Want to customize your menu and display it on your website? A PDF editor is perfect for that.

There are plenty of edit PDF WordPress plugins (like Gravity Forms and Gravity PDF), but they don’t offer the flexibility and power of the option we recommend.
And that’s Formidable Forms.
How to use a PDF editor in WordPress
To get started, you’ll need to download Formidable Forms to start generating PDFs.
Formidable is the best WordPress form plugin, and it includes the ability to embed a PDF document for download.

This tutorial also requires access to Formidable Views and the PDF add-on, which will help you design and publish your PDF.
If you don’t know what Formidable Views is, don’t worry. It’s simply a powerful way to take form entries and show them in any way you want — PDFs, as their own page, or even as an Instagram-like feed!
You can test the free online form builder, but both add-ons are included in the premium version of Formidable Forms in its Business Plan.
So, pick up a license for all the plugin offers, get it installed and activated, and then it’s five simple steps:
For our example, we’ll show you how to customize a certificate PDF, which is perfect for course creators or educational businesses.
Step 1: Install the Views and PDF add-on
In your WordPress dashboard, go to Formidable → Add-Ons.
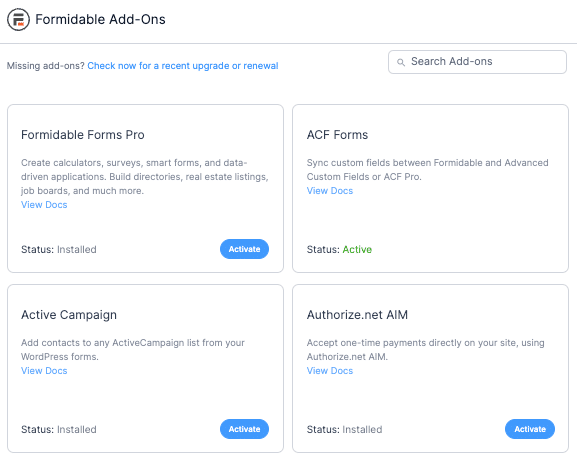
We must install and activate two plugins: Visual Views and PDFs.
You can scroll to find them or use the search bar to search for them. Once they’re activated, we’ll create the form to enter the information to show on the PDF.
Step 2: Create your form
First, go to Formidable → Forms and click Add New to create a new form.
With Formidable’s business plan, you can access many different pre-built templates. So, if you know what you’re looking for, try searching for a template to match it. You'll find a ready-to-go PDF invoice template, an award or certificate template, a PDF signed agreement template, and a letter of recommendation template.
If none of these templates suit you, choose Blank Form to start creating a form from scratch using Formidable’s drag and drop form builder.
Once you choose the form type, click Create.
Formidable’s form builder is user-friendly, so you can add any fields based on the information you need to collect. For example, we’re creating PDF certificates for anyone who completes one of our courses.
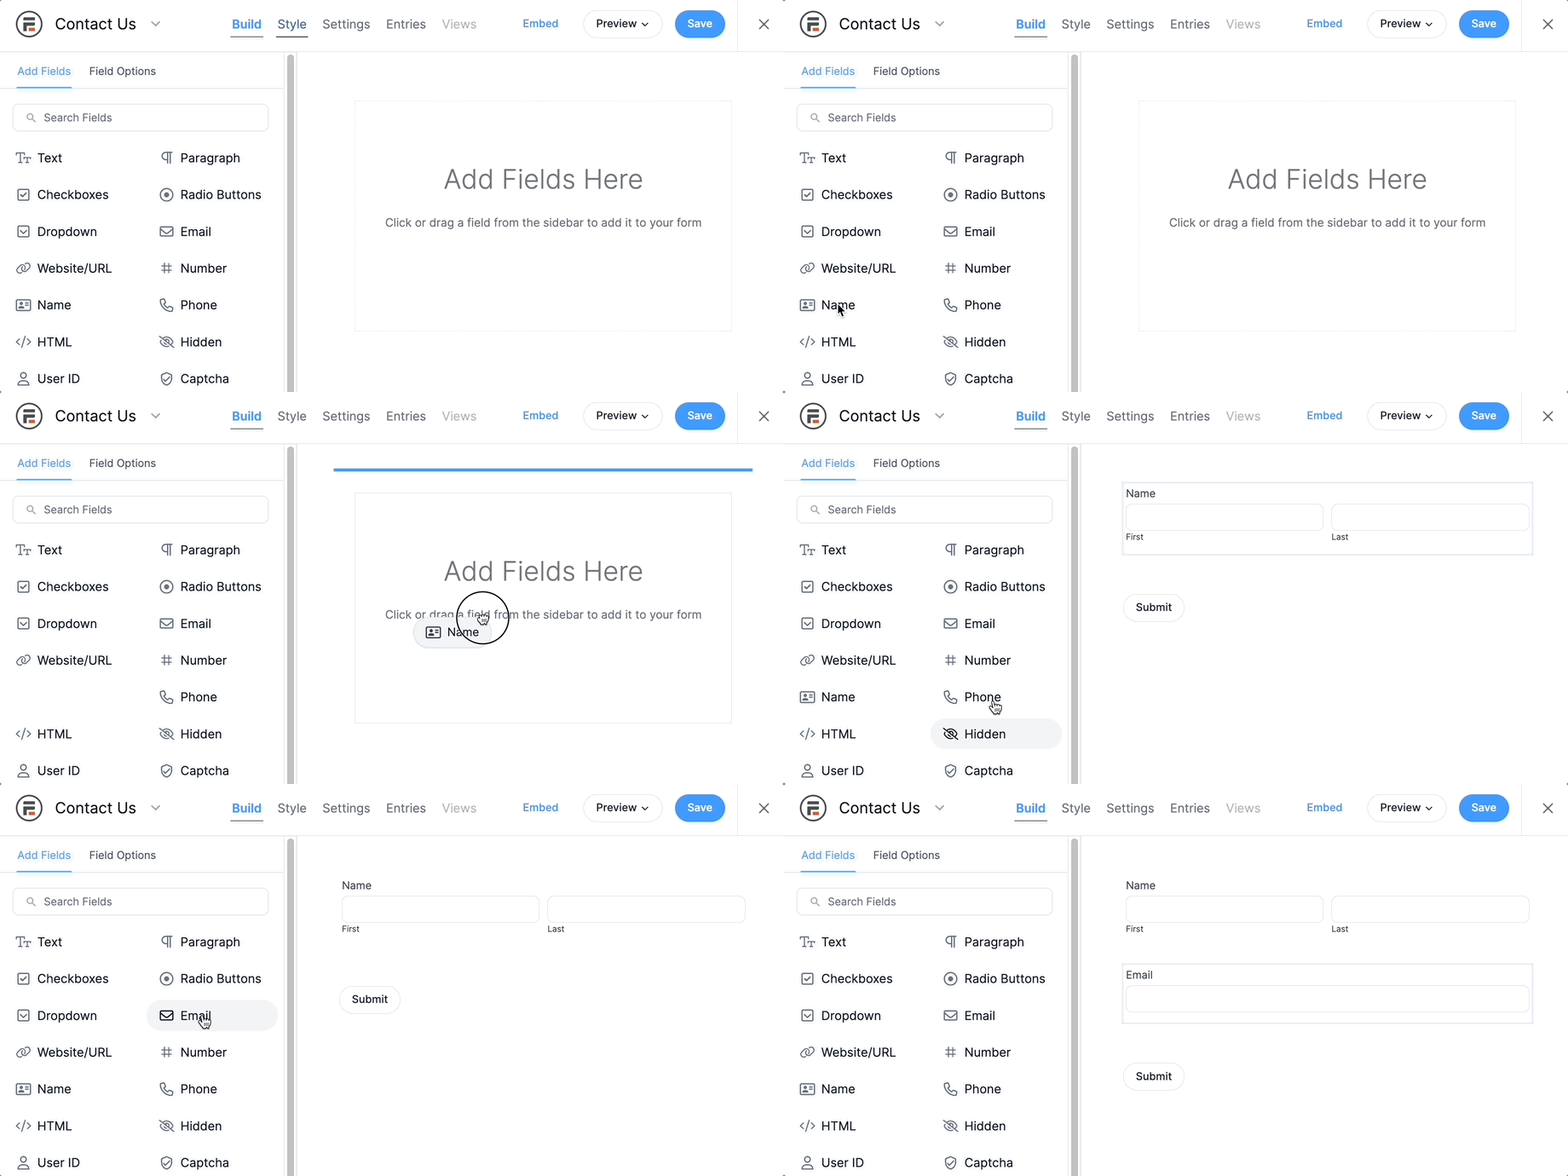
So, we’ll add a Name, Date, Dropdown, and Paragraph field to customize some of the text on the certificate.
Feel free to customize your own based on what you need to display.
Once you’re finished, click Update to save your changes.
The next step will be easier if we have a test entry as we design the View. So, click Entries at the top of the page and Add New to submit a test entry.
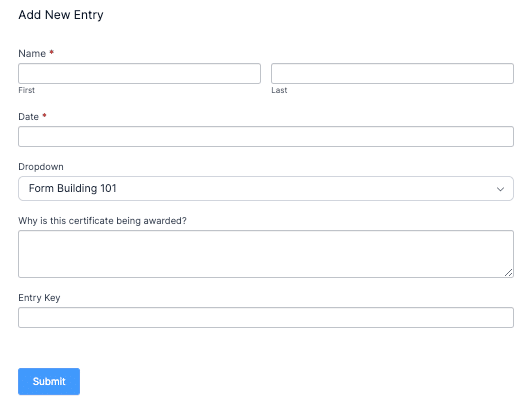
It will also give you an idea of what your form looks like to anyone who fills it out. Simply type in any name you want, then hit Submit, and the entry will be ready for the next step.
Now, we’ll create a View to display the information how we want.
Step 3: Create a View
Inside your form builder, select the Views tab, then click Add New to start.
You can choose whichever View type you want, but we’ll use a Grid type for our example.
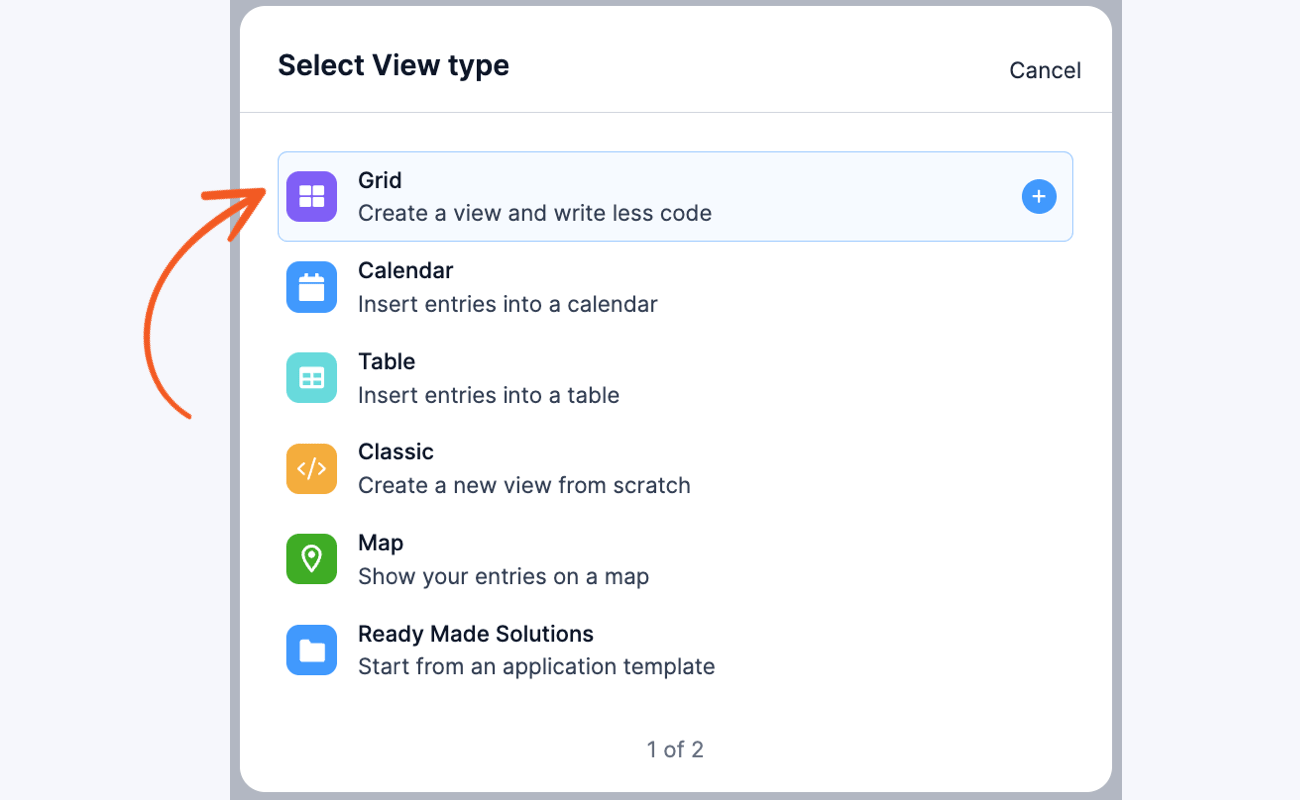
Next, give your view a name and click Create a view.
You will begin on the Listing Page, where you can display a collection of entries (such as menu items, names, etc.).
You also have the Detail Page. This is for viewing specific entries in more detail.
For our example, we’ll keep the Listing Page simple with only the person's name and a link to the detail page.
The Detail Page will show the customized PDF we’ve come up with.
Then, click the Layout Builder button and begin designing your layout. Like the form builder, the Layout Builder is also drag-and-drop.
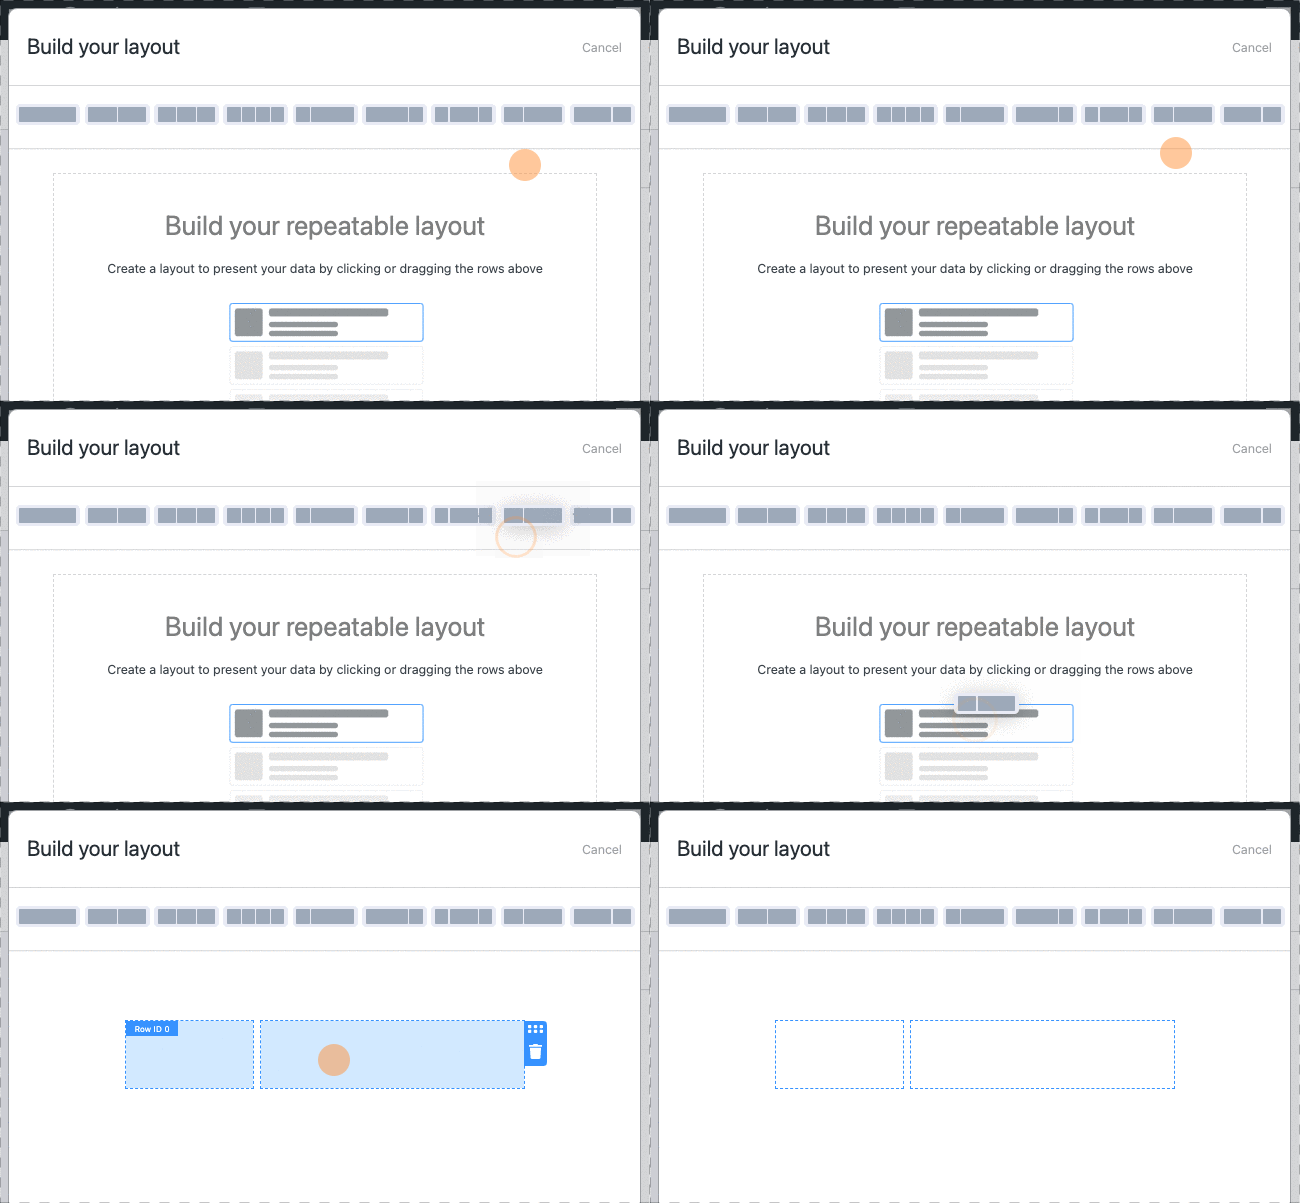
We’ll drag a single block using the Layout Builder. Next, click the column, and it’ll show you the Visual/Text Builder. Here, you can customize your listing page how you’d like.
For our example, we’ll keep it simple by including the [detaillink] inside a piece of link HTML, and we’ll also add the shortcode for the user’s name to make it easy to identify. So, it’ll come out looking something like this:
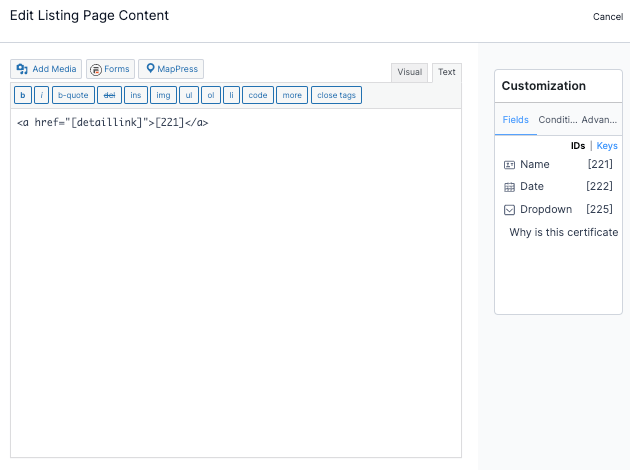
That will show the name, so we'll see the PDF when we click the link.
Step 4: Customize the PDF
Next, we’ll click the Details Page and customize our PDF.
Like the Listing Page, we’ll click the Layout Builder for the Details Page.
For our example, we’ll drag a column of three, with a single column beneath it, then another three columns beneath that one.
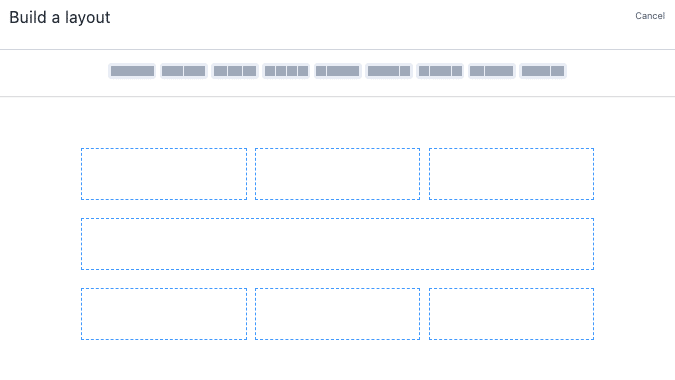
You can create a custom PDF in WordPress; however, if you like using Formidable's customization options, click Save Layout when finished.
Now, we can start customizing the different columns. So, we want our View to look like a certificate you’d see.
We’ll click on each column and use the Text editor to add code to customize it exactly how we want. You don’t have to use code to make something beautiful. Just click the column you want to edit and select the Visual editor.
You can even add pictures using WordPress’ media library.
You’ll notice you can use different shortcodes as you edit your View. If you put these into the editor, the information from that field will automatically be inserted into the area. This means you can even sign PDFs with signatures collected in your form!
For example, using our test entry earlier and the certificate we designed, ours would look something like this:
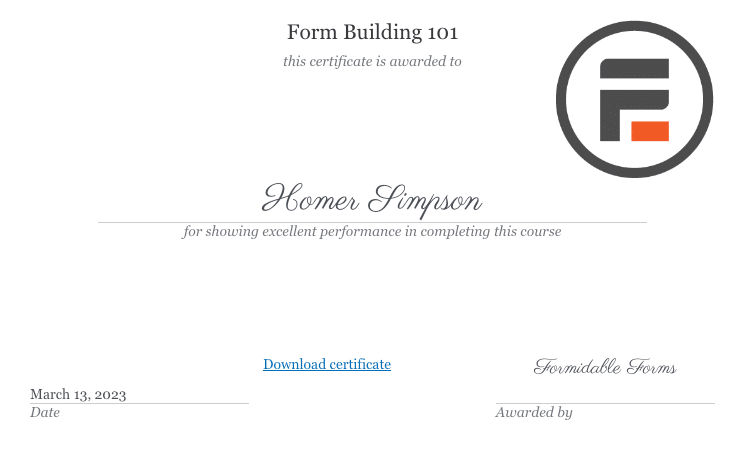
So, play with your own View and see what you can develop!
If you'd like to start using a template, you'll love our Certificate Template!
But you’ll have a general idea of what your PDF will look like here.
Now we want to get your View ID before we publish the link. So, on the left side of your View, find the shortcode with:
[display-frm-data id=]The number after ID is your form ID.
Keep it for the next step.
Step 5: Publish the PDF download link
We need to add a shortcode to your page or post to upload the PDF to your site.
So, head to the post or page where you want the link, and type the following code:
[frm-pdf view=”*YOUR VIEW ID*” entry="*ENTRY NUMBER OF DETAIL*" public=”1”]Next, update your page, click preview, and you’ll see the download link.

When you click the download button, you’ll see your PDF file open in a new window in a PDF reader or PDF viewer!
Since it's a certificate, we'd like it to appear in landscape mode. To do this, we just have to add orientation="landscape" to the shortcode.
So it will look like this:
[frm-pdf view="119" entry="10" orientation="landscape" public="1"]The 119 is the ID of our View, 10 is the entry detail we want, orientation helps us show it correctly, and public makes sure it's visible.
If you're having trouble or want more information, check out our Knowledge Base docs!
Then, it’s as simple as downloading the PDF!
Ready to make a PDF editable in WordPress?
And just like that, you have a form builder, PDF generator, and a PDF embedder all in one.
This post showed how to use Formidable Forms as a WordPress editable PDF plugin to customize your PDF needs. Using one plugin, you can turn information from contact forms, order forms, and more into a PDF form you designed that works with any theme (including WordPress Elementor).
So, don’t wait any longer! Let's add a PDF to your WordPress website today with Formidable Forms.
And follow us on Facebook, Twitter, LinkedIn and YouTube for more tips and tricks.
 How To Sell Digital Downloads on WordPress [Step by Step!]
 How To Add a WordPress PDF Viewer to a Website
 Print to PDF on WordPress (Posts, Form Entries, & More)
I have done all the steps completely, but the view does not show in the pdf.
Can you reach out to our support team so they can help you get this working?
Can you choose to only display certain fields from the form on the pdf or does all the information collected have to appear?
Thanks for the comment, Mel.
You can choose which field information you want to display on the PDF by using the shortcode for that field in the Visual/Text Editor in Views.
Hope this answers your question!
Amazing new functionality.
How can we add a background image for the PDF?
I second this request.
It is possible to add a background image currently, but it requires the use of CSS in the before content section. To see this in action, you can look at our new "Certificate" application and see how we added a background image to the before content section.
The code we used is: .frm-certificate{ background: center / 69% no-repeat url('http://sandbox.formidableforms.com/demos/wp-content/uploads/sites/17/2023/03/certificate-bg.jpg');}
Time for me to learn a little more. I'm thinking of the user being able to upload an image and then being able to add that image to the form...
Great functionality, definitely one of the great powers of this plug-in. Being just new with Formidabele, but in my opinion by far the most clean approach to get some nice PDF's out of forms.
We use it for generating certificates of completion, and for creating PDFs in a custom "annual review" process our company uses. This used to require a separate 3rd-party plugin, but I'm happy it's available now within Formidable!
This is a real step forward, well done guys!
Awesome! Great stuff.
Amazing
I want to generate a business plan, the data will input by the user. The form will be a multi-page and data will include some repeater fields as well. Is this possible with Formidable forms?
Hi there,
Yep, this all sounds very doable with Formidable Forms!
Is it possible to attach the custom PDF to the email? I know it's possible to attach a PDF of the entry to email, but it's not custom.
Hey Oriol,
Yes, this is possible. Please create a new ticket here: https://formidableforms.com/new-topic/, and we'll guide you on how to do this.