
There are virtually limitless possibilities for displaying data in a Formidable View. This article explains several commonly used View concepts that add more flexibility and functionality to your Views.
Upgrade your WordPress site with powerful, flexible forms.
Set up a nested View
Typically, Views can only display data from one form. You can use a nested View, however, to display data from two forms inside of a single parent View. In order to set up a nested View, you must have a field in both forms that stores identical data. We'll refer to this field as the "shared field". It can be a user ID field, a field that stores a unique ID number, a Dynamic field, or even a Text Field.
The following instructions show one way you can can set up a nested View.
- Let's start by creating two forms. For this example we’ll have an "Employee Profile" form (Form A) which contains the fields "Name", "Address" and "Employee ID Number".We’ll also create an "Additional Details" form (Form B) which contains the fields "Employee ID Number" and "Date Of Birth". For this example we will use the number field titled Employee ID Number as our shared field.
- Create a new View that displays entries from Form A; we'll call this View A. It will be the parent View that holds the nested View. We can now add some field IDs to the Content as if you were creating a basic View.
- Next, create a new View that displays entries from Form B; we'll call this View B. The View Type should typically be set to Grid. In the Content for this View, you should add the field IDs for the data you want to nest into View A — in this example it is our Date of Birth field.
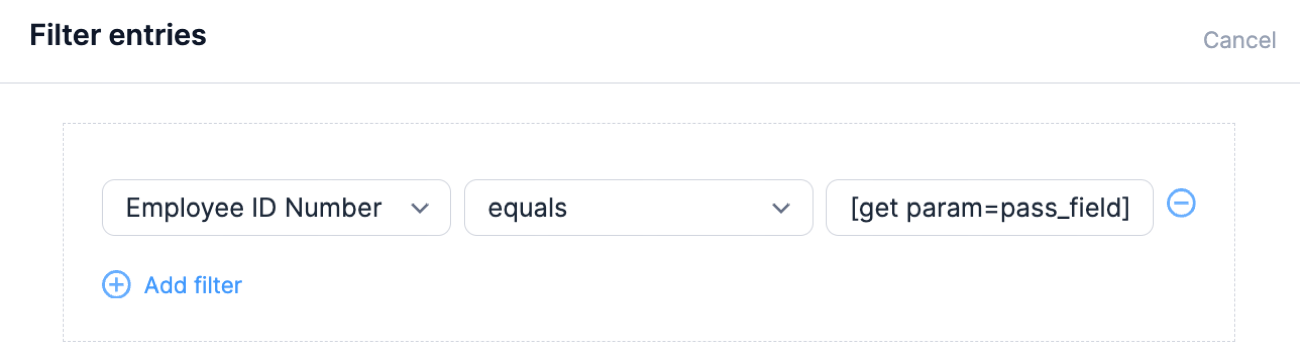
- In the Content section, add a filter using the Employee ID Number as your shared field. It should say something like:
- Employee ID Number equals to [get param=pass_field]
 If you're using a User ID field as your shared field, your filter will say:
- User ID equals to [get param=pass_field]
NOTE: The pass_field parameter of the filter can be anything — it is not linked to a field title or ID. If you change pass_field for something else, it must also be changed in the shortcode in the next step. This part of the filter must match the shortcode exactly. - Go back to View A. Add this shortcode for View B inside of View A's Listing Page or Detail Page Content. It will look like this:
[display-frm-data id=x pass_field="[y]"]
Replace x with the ID of View B. Replace y with the ID of the "shared field" from Form A. If your shared field is a userID field, add show=ID to the shortcode:
[display-frm-data id=x pass_field="[y show=ID]"]
For our example, the ID of View B is [158], our shared field (Employee ID Number) is [143], and our get_param value is "pass_field" — so our shortcode is:
[display-frm-data id=158 pass_field=[143]]
- Publish View A on a page. Include filter=limited in the view shortcode you insert on the page. This tells the view to process the shortcode for View B. When you visit that page, you should see entries from Form A alongside values from Form B.
 If you're using a User ID field as your shared field, your filter will say:
 NOTE: The pass_field parameter of the filter can be anything — it is not linked to a field title or ID. If you change pass_field for something else, it must also be changed in the shortcode in the next step. This part of the filter must match the shortcode
From Idea to Reality in Minutes. Build Powerful Forms, Dashboards, Apps and More.
Formidable Forms makes advanced site building simple. Launch forms, directories, dashboards, and custom WordPress apps faster than ever before.
Link to a View from another View
There may be times where you would like to link to the detail page of one View (View B) from another View (View A). A real-world example of this would be a case where we have a list of applications that were submitted for a job. We could have View A list all of the applicant's names, and View B list all of the details for a specific application. In scenarios like this, you can follow the instructions below to link to View B from View A:
- Create a new View (View B) and add some content to it.
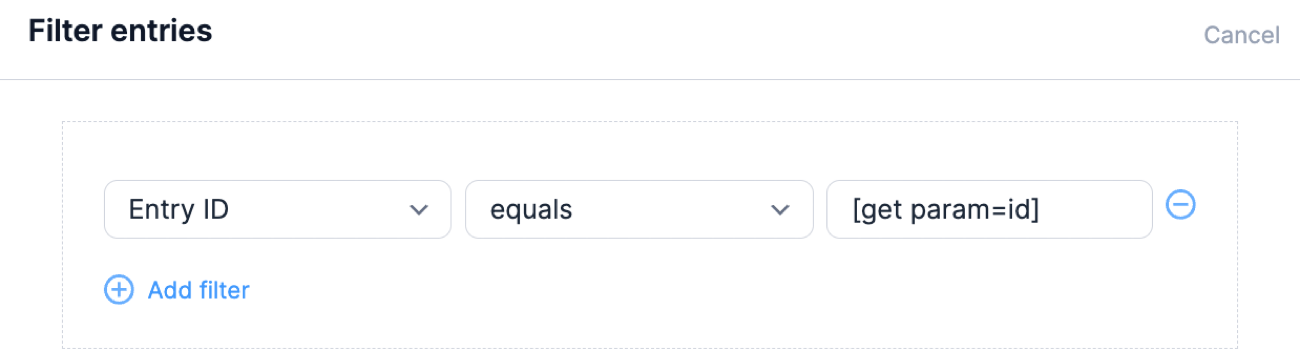
- Go to the Content section for View B. Add a filter that says Entry ID equals to [get param=id]. Now save your View.
- Now that we have finished View B, let's publish it on a page. Make note of the URL of that page, as we will be needing it shortly.
- Create a new View (View A) and add some content to it.
- In the content box of View, we can add a link to View B. You link will most likely look like the following:
<a href="url-to-page-with-View-B?id=[id]">View Application Details</a>
Duplicate Entries on the Front End
If you would like users to be able to duplicate an entry from the front-end of your site, follow the steps below.
- Create a View which displays entries for your user to duplicate.
- Add a Duplicate button link to the content of the View by adding the page URL that contains your form. The easiest way to duplicate entries is to use the same form for the original and duplicate entries. Add an entry key parameter to the end of this URL. Your HTML link will end up looking like this:
<a href="mysite.com/mypage/?pass_entry=[key]">Duplicate</a>
Leave [key] as it is. This will dynamically generate the entry key.
- If you have an embedded form, you'll also need the ID for the embedded entry. Add the ID of the embedded form field to the URL like this:
mysite.com/mypage/?pass_entry=[key]&emb_entry=[id]
Change 25 to the id of your embedded form field.
- Go into your form. Put [frm-field-value field_id=x entry=pass_entry] in each field and replace x with the ID of the field.
- Add this shortcode in the field options in the Default Value box.
- If it is a Dynamic field, you must get the ID of the linked entry. You can do so with this shortcode:
[frm-field-value field_id=x entry=pass_entry show=id]
Replace x with the ID of your Dynamic field.
- If it is a field in an embedded form, add the default values in the other form. But instead of using entry=pass_entry, include entry=emb_entry.
[frm-field-value field_id=x entry=emb_entry]
Replace x with the ID of your field.
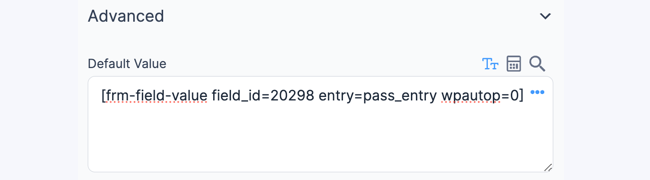
- If it is a Paragraph field, you can include wpautop=0 in the shortcode to ensure that the input value doesn't contain any <p> and <br> tags.
[frm-field-value field_id=x entry=pass_entry wpautop=0]
Replace x with the ID of your paragraph field.
- Add this shortcode in the field options in the Default Value box.
- Now when you click the "Duplicate" button or link, you will be taken to the form with the fields automatically populated with the entry's data. Please note that it is not currently an option to automatically populate multiple rows in a Repeatable Section.


Organize View by a field
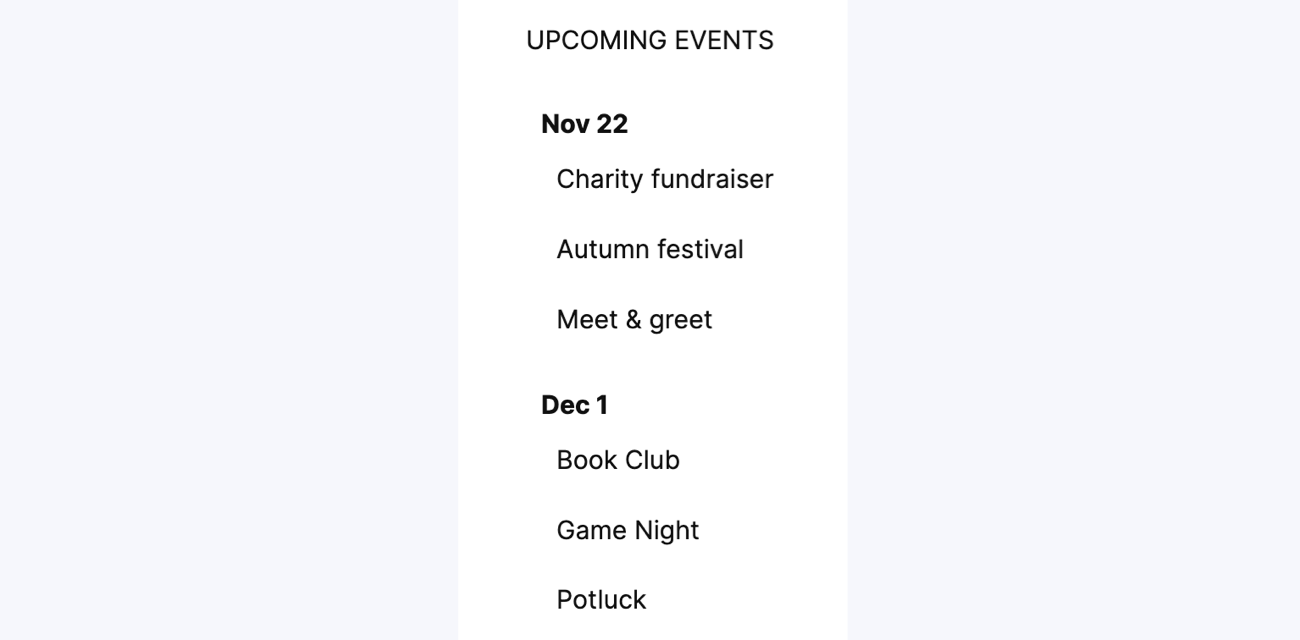
When displaying entry information, it can be helpful to organize it by category. For example, you can show all upcoming events for a specific date.
 Follow the instructions below to categorize the information in your View by a specific field in your form.
- If you still need to, ensure that your form has at least a Date field and a field for Events.
- Create a View for your form, and select Classic or Grid. This will be the View for the Events, where you can add the ID of the Events field to display the submitted entries.
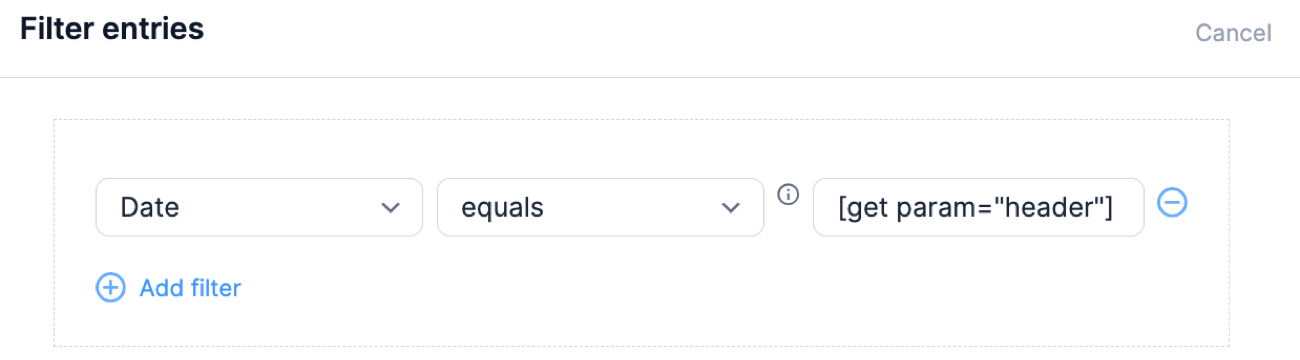
- In the View builder, add a filter that sets the Date field equals to [get param="header"]. You can change the header to any text you would like.
- Create a second View for your form and select Classic or Grid. This will be the View for the Upcoming Events, where you can add the ID of the Date field and the shortcode of the first View with the header filter.
[102]
[display-frm-data id=100 header="[102]"]
Replace 100 with the ID of the first View created for Events. Replace 102 with the ID of your header field, which is the Date.
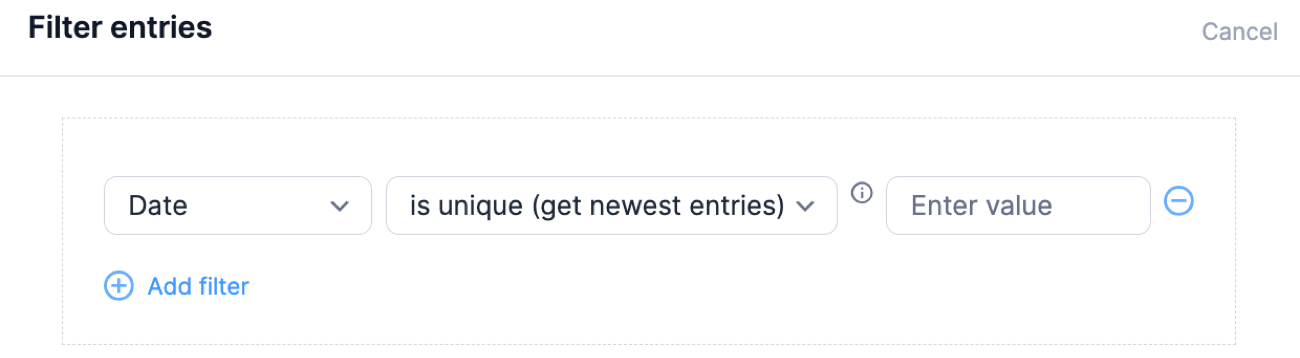
- In the View builder, add a filter that says Date - is unique (get newest entries) only to show each Date once.
- Publish the second View on a page. When you visit that page, you should see the upcoming Events entries displayed categorically by date.
Organize View by a Dynamic field
If you have a form (Form B) that includes a Dynamic field pulling entries from Form A, you can create a nested View setup to display entries categorically, with the Dynamic field as the category. Follow the instructions below to categorize entries in your View by a Dynamic field in your form.
- Create a View for the form (Form B) that contains the Dynamic field. Set it to display All Entries and add any content you would like.
- In the Content section, add a filter that sets your Dynamic field equals to [get param=data_id].
- Create a View for the form that your Dynamic field pulls entries from (Form A). Set it to display All Entries.
- Add something like this to the Content:
[x]
[display-frm-data id=y data_id=[id]]
Replace x with the ID of a field in Form A. Replace y with the ID of the View created in step 1. Leave [id] as is. This will dynamically generate the entry ID.
- Publish the second View on a page. When you visit that page, you should see entries displayed categorically, with the Dynamic field as the category.

Filtering Entries
It can be helpful to filter Views based on parameters in the URL, the current user, date ranges, etc. Find more information on filtering entries.
Link child entry to parent
If the (child) form includes a dynamic field to select the (parent) entry, this will link the child entry to the parent entry. There are different ways to set this up.
- Include the child form on a page that shows the parent entry with the comment system.
- Click on a parent entry link to pre-select the parent entry in the child form by linking to a View from another View.
- Set the dynamic dropdown field to get entries from the parent form, and select the entry to link up.
Show form based on another form
You may want to conditionally show a form only if an entry has been submitted on another form. An example of this use case is when you want to verify the email address first before the main form is accessible to the user. Follow the instructions below to conditionally show Form B if the email address has been verified in Form A.
- Create Form A with an email address field, and publish the form on a page.
- Create Form B and add some content to it. It would only be visible to users who verified their email addresses through Form A.
- Create a single entry View with entries from Form A.
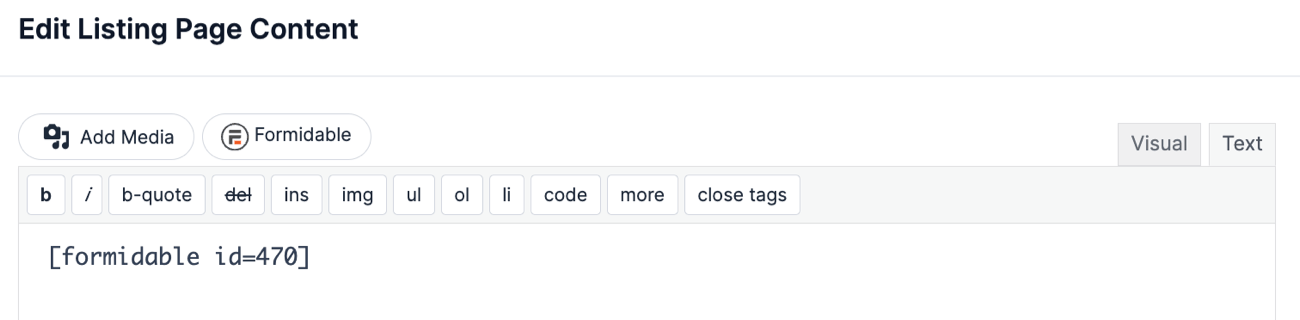
- In the Listing Page Content box, insert the [formidable id=x] shortcode for Form B.
- Set up the View filters such as:
- Entry key equals to [get param=pass_entry default=1]
- Email equals to [get param=email default=1]
Add default=1 to the filters. If the URL is tampered with, that filter will not be ignored.
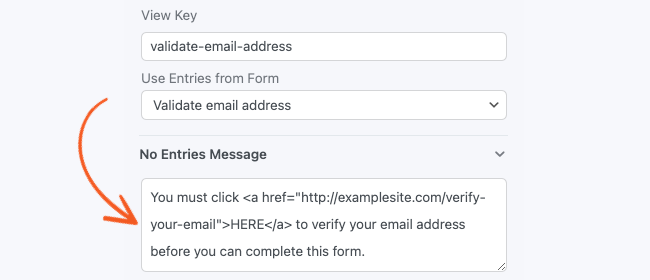
- In the No Entries message box, insert the shortcode for Form A or a link to the published form.
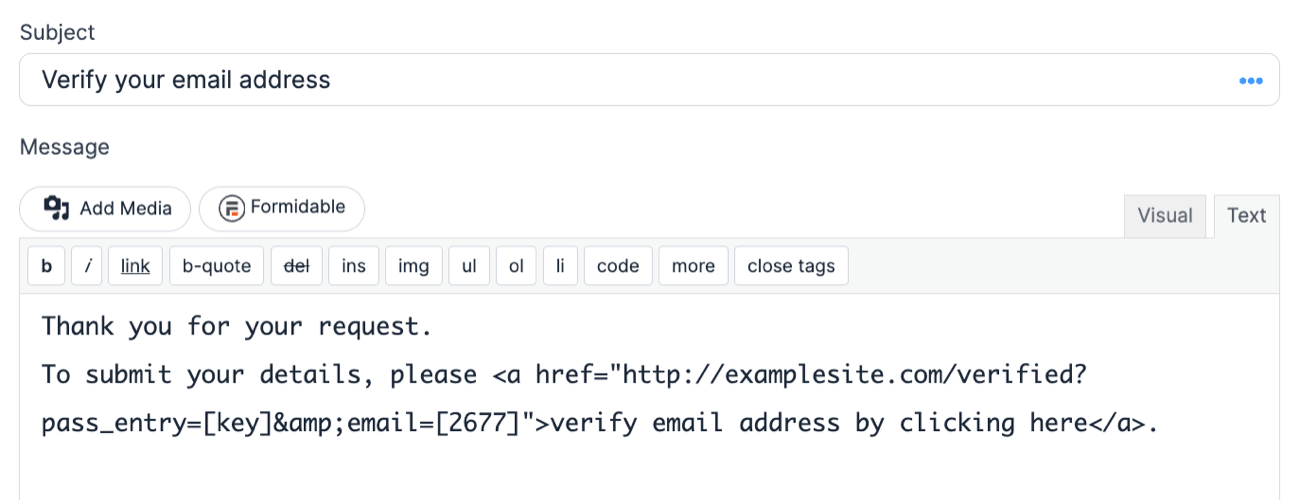
- Go to your Form A Settings → Actions & Notifications → Send Email form action. In the email message, add a verification link in the email message by adding something like:
<a href="http://examplesite.com/verified?pass_entry=[key]&email=[2677]">verify email address by clicking here</a>
Replace 2677 with the ID of your email address field.
- Publish the View on a page. The View will look for a match between the data in the URL and an entry in Form A. The View content, with the Form B shortcode, will only be visible if both the Entry Key and Email Address match an entry in Form A. When it finds a match, Form B will be displayed.

Create a unique View URL
You may want to create a unique View for users who are not logged-in to your site. To set this up, you could have a View that uses the entered email address in a new form to create a link to show the associated entry in your main form. The link is sent to the email specified in the form, so only the person with access to that email will be able to see the data from the entry.
- If you haven't yet, create a View and call it Main Entry View. It is where you will display all the data you want to show to your user.
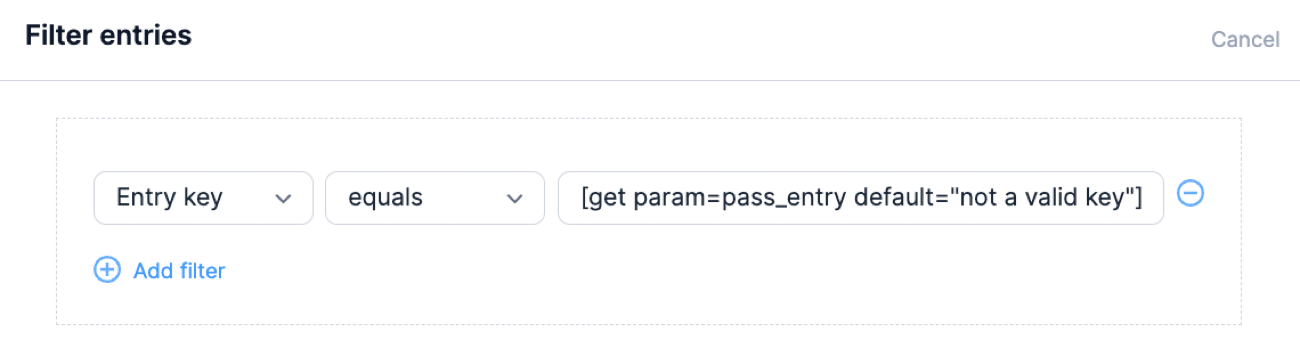
- In the View Builder, add a filter that says:
Entry key equals to [get param=pass_entry default="not a valid key"].
- Publish the Main Entry View.
- Create another View and set it up as a Single Entry View.
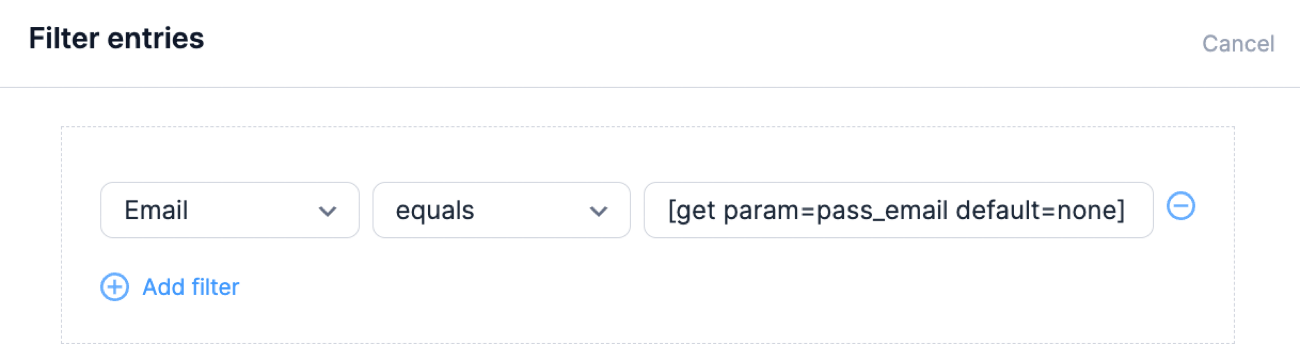
- In the View Builder, add a filter that says:
Email field equals to [get param=pass_email default=none].
- In the Content section, insert a link to the Main Entry View and add [key] at the end as a param. e.g. yoursite.com/main-entry-view/?pass_entry=[key]
- Publish your Single Entry View.
- Create a form with an email address field.
- Go to your form Settings → General, and set up the form to not store submitted entries.
- Add an email notification. Include the link to the Single Entry View and add the email ID at the end of the param. e.g. yoursite.com/single-entry-view/?pass_email=[100]. Where 100 is the ID or key of the Email field in this new form.

Create a next/previous button on a detail page
If you want to create a next and previous button on a detail page, follow the instructions below. The setup involves three separate views: the main View with a detail page, the next button View, and the previous button View. The main View remains unchanged, while the detail page is where you can add the buttons to navigate through the previous and next entries.
- If you haven't yet, publish your main View with a detail page on a page/post. If you still need to create a detail page, see this guide on creating a basic detail page.
- Click the link for the Detail Page and copy the URL. Look for the entry ID at the end of the detail page URL and replace it with [id]. It should look like this:
https://yoursite.com/search-results/entry/[id]
Replace https://yoursite.com/search-results with your Detail page URL.
- Create a Single Entry View called Previous button View. This View will hold the Previous button to be embedded in the main View.
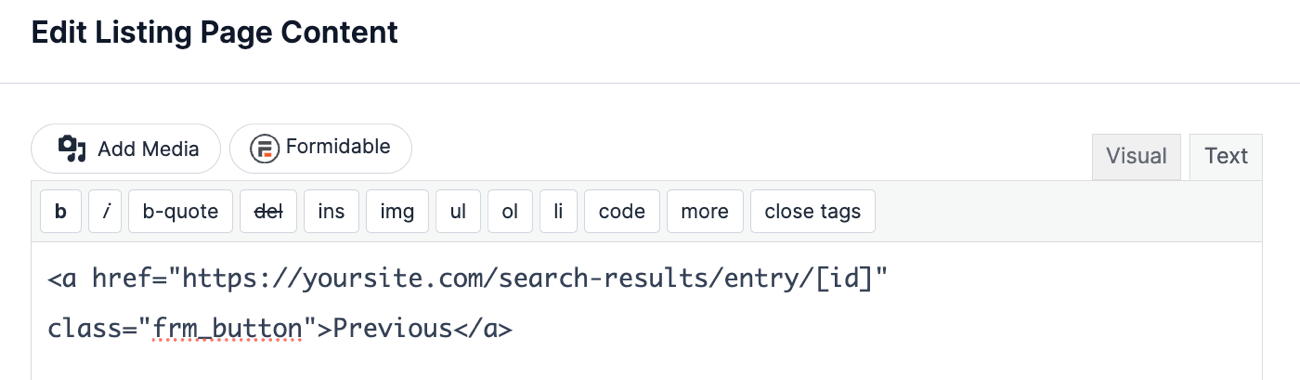
- In the Listing Content box, create a button using the URL for the Detail Page you copied. It should look something like this:
<a href="https://yoursite.com/search-results/entry/[id]" class="frm_button">Previous</a>
Replace https://yoursite.com/search-results with your Detail page URL.
- In the View Builder, click the Filter entries link and add a filter: Entry ID is greater than [get param=pass_entry].
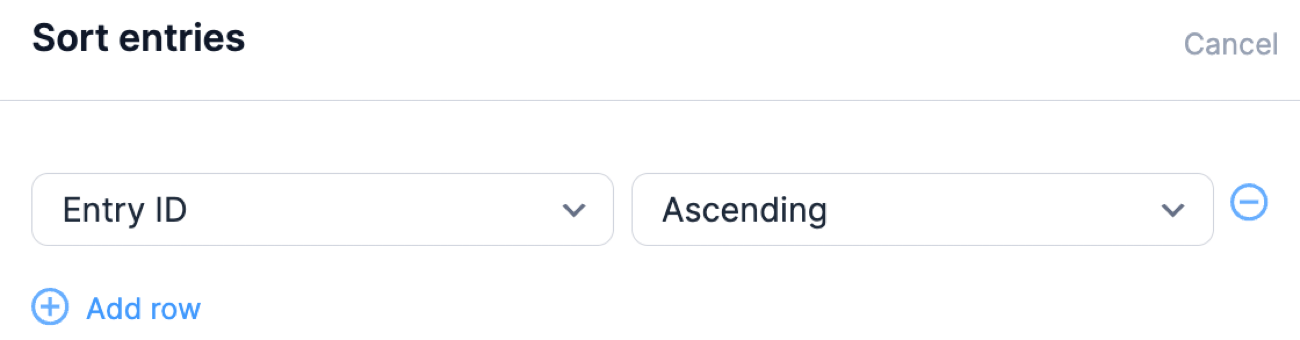
- Click the Sort entries link and add a sort: Entry ID → Ascending.
- Look for the No Entries Message box in the right sidebar of the View builder and remove the default message.
- Create another Single Entry View called Next button View. This View will hold the Next button to be embedded in the main View.
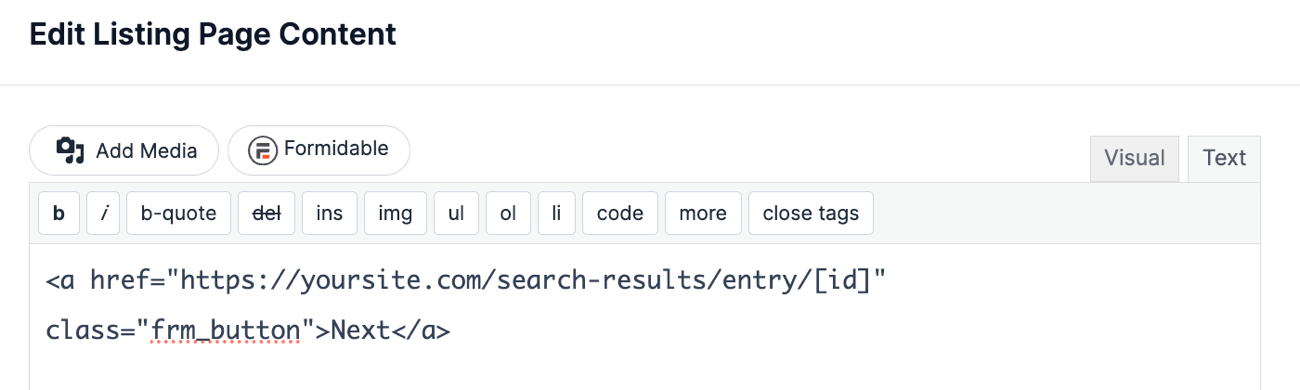
- In the Listing Content box, create a button using the URL for the Detail Page you copied. It should look something like this:
<a href="https://yoursite.com/search-results/entry/[id]" class="frm_button">Next</a>
Replace https://yoursite.com/search-results with your Detail page URL.
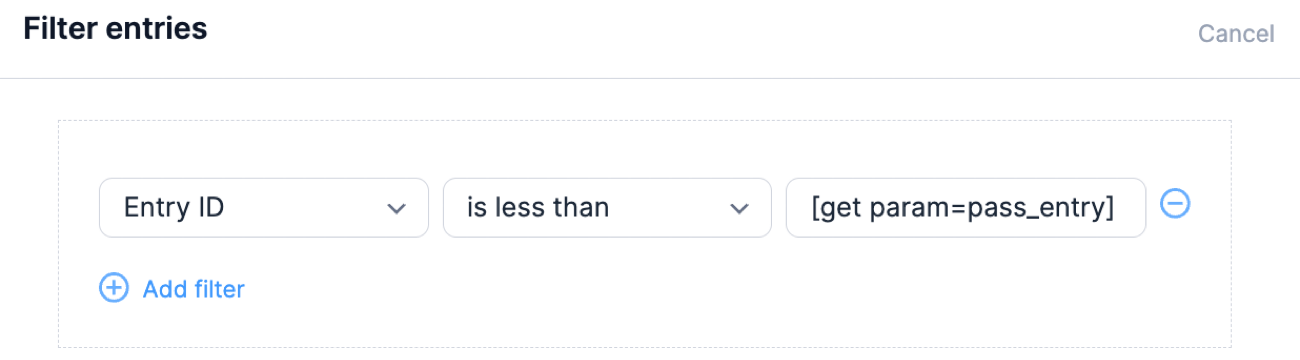
- In the View Builder, click the Filter entries link and add a filter: Entry ID is less than [get param=pass_entry].
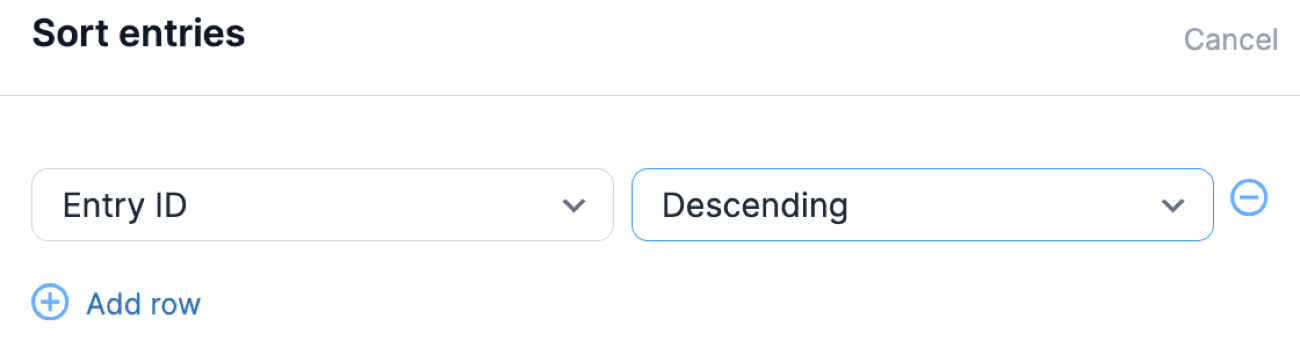
- Click the Sort entries link and add a sort: Entry ID → Descending.
- Look for the No Entries Message box in the right sidebar of the View builder and remove the default message.
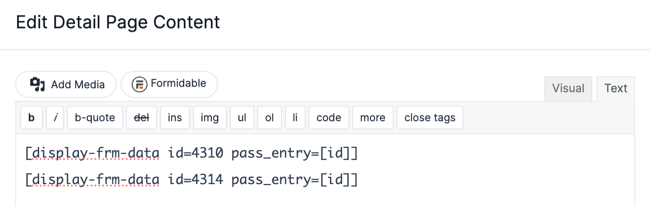
- Go back to your Main View. In the Detail Page Content, embed the View shortcodes of the Previous button View and the Next button View. Add the pass_entry=[id]] for each shortcode.
[display-frm-data id=4310 pass_entry=[id]]
[display-frm-data id=4314 pass_entry=[id]]
Replace 4310 and 4314 with the ID of the Next and Previous button View.
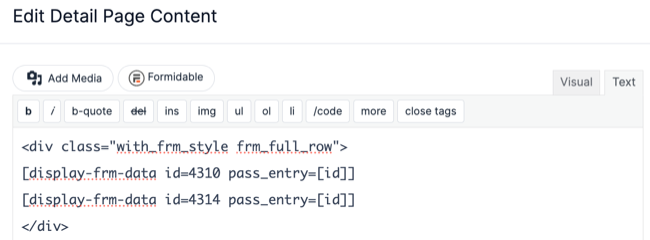
- (Optional) If you want to display the Previous and Next links in a single row, use the built-in View classes frm_full_row. See View classes for more information. Your content would look something like this:
<div class="with_frm_style frm_full_row">
[display-frm-data id=4310 pass_entry=[id]]
[display-frm-data id=4314 pass_entry=[id]]
</div>
- Click Update to save your changes.

Canonical URL
Canonical URLs are filtered for Views to make sharing easier for detail pages and pages with get param filters. It only applies to the URLs of Views, not the pages where a View is nested. Read more about canonical URLs.
When a View is nested in a page, some sharing tools will link to the View listing page rather than the active detail page or URL with where filters. Some sharing tools (including Facebook and the Safari share option on iOS) would always share the URL of the listing page instead without filters.
If you need to filter the canonical URL for a specific View on a target page, use the get_canonical_url hook.
