
I’ve been a long-time Gravity Forms user, but Formidable forms could do more out-of-the-box for what this client needed. Now that I’ve used Formidable, I’ll be using it again for new clients. Great support, too.


Last updated on January 2, 2024 by Formidable Team
How To Accept Payments on WordPress [3 Options!]
Looking to accept payments on WordPress? This step-by-step guide will show how to accept payments on WordPress today in a few simple steps!

Approximate read time: 9 minutes
Globally, charge cards are the most popular choice for online payments. 💳
So if you can't receive credit card payments on your website, you're missing out on a lot of business.
Whether you want to sell digital products on WooCommerce or physical products, you need a way to process card payments. And by offering customers' preferred payment method, they'll be much more likely to make a purchase!
Lucky for you, we know a great plugin to accept credit card payments on WordPress. And you won't even have to set up an online store!
In this post, we'll show you the easiest way to accept credit card payments in WordPress without a shopping cart. 🛒 ❌ We just need the best form builder for WordPress: Formidable Forms.
So, let’s get started!
Upgrade your WordPress site with powerful, flexible forms.
How to accept credit card payments on WordPress
The exact steps to follow depend on the payment gateway you choose. If you aren't sure which to pick, check out these articles on Stripe vs. PayPal and Authorize.net vs. Stripe.
And before collecting any payment information, it's strongly recommended that you secure your site with an SSL certificate. Learn more about SSL for WordPress.
Option 1: Use Stripe to accept credit card payments on WordPress
Stripe is one of the most trusted online payment services, so it’s a great choice for your website. Plus, Formidable's WordPress Stripe integration is included in the free plugin!
- Install Formidable Lite
- Connect WordPress to Stripe
- Build your Stripe form
- Set up your form to collect payments
- Publish your form
Step 1: Install Formidable Lite
To start collecting credit card payments through Stripe, first pick up the free Formidable Forms plugin.
If you don't already have it, just enter your email and website below to be taken straight to the download page. 👇
Once you've installed and activated Formidable Lite, you're ready to move on to the next step!
Step 2: Connect WordPress to Stripe
In the WordPress admin, go to Formidable → Global Settings → Stripe, and click the Connect to Stripe button.
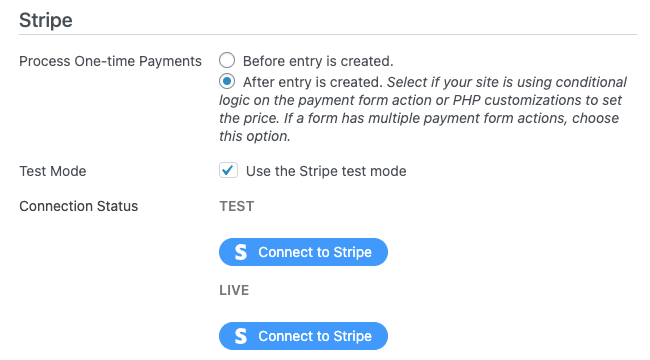
You'll then be redirected to Formidable's Stripe setup wizard to log into your Stripe account or create one.

When you're done, you'll be taken back to your WordPress dashboard.
Step 3: Build your Stripe form
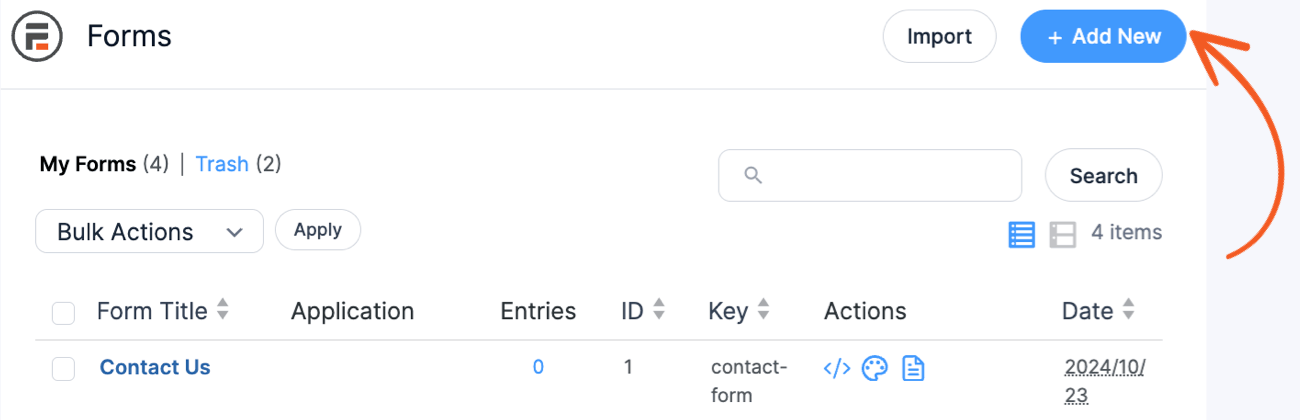
Next, head to Formidable → Forms and click Add New to make your Stripe form.
Choose to Create a blank form or pick our pre-made Stripe payment form template to make things even easier.

Give your form a name, then click Create to begin building your form or customizing the form template.
Feel free to adjust the form to fit your needs: add fields, change the label text, and more. Just make sure to add the Payment field to your form if you aren't using a template.

Once you’re finished creating your form, click Update to save your changes.
Step 4: Set up your form to collect payments
Now, go to Settings → Actions & Notifications → Collect a Payment. You can give your payment a name for reference and customize any payment settings you like.
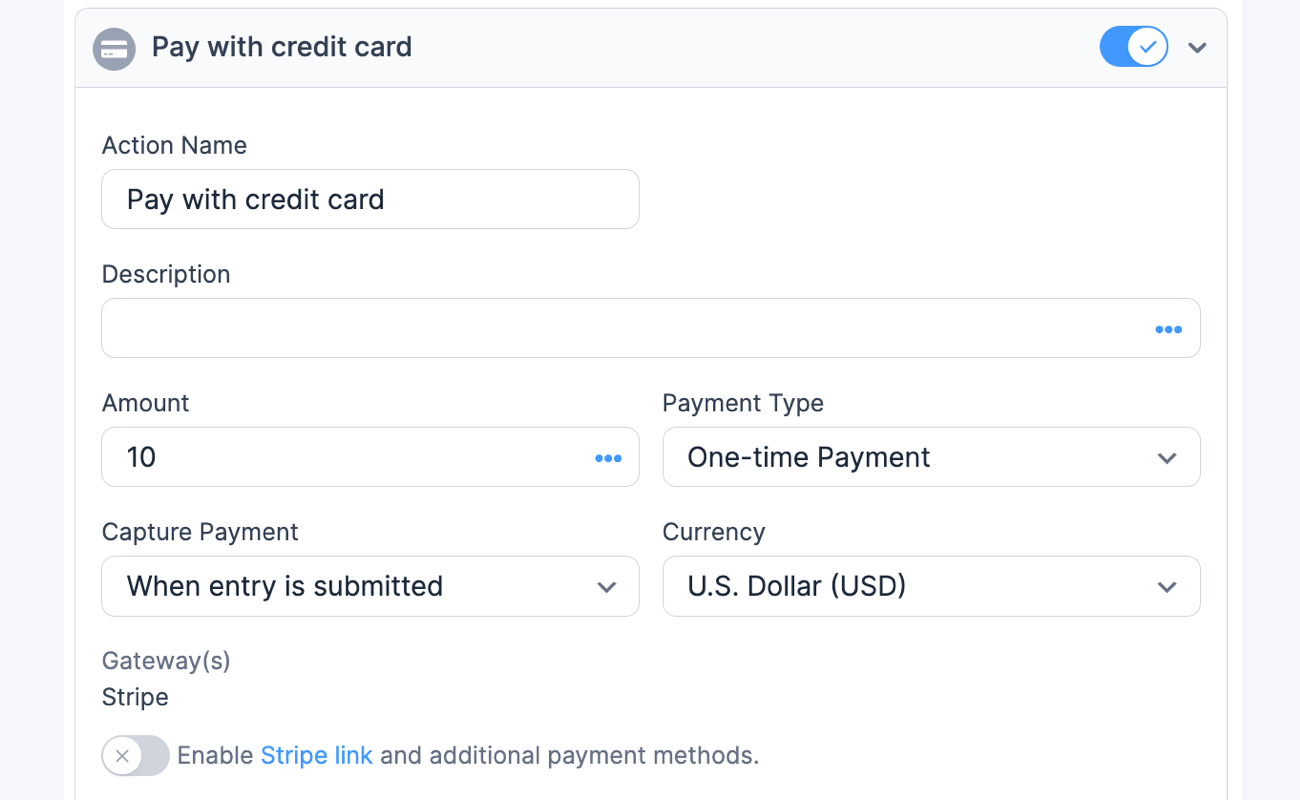
Set up recurring payments, choose the transaction currency, add a payment amount, and more.
After, click Update to save your changes, then let’s display your Stripe WordPress credit card payment form!
Step 5: Publish your Stripe form
Now we need to get your form on your site so people can start paying you!
So, go to the post or page where you want to show your form and add a new WordPress block. Search Formidable and choose the Formidable WordPress block.
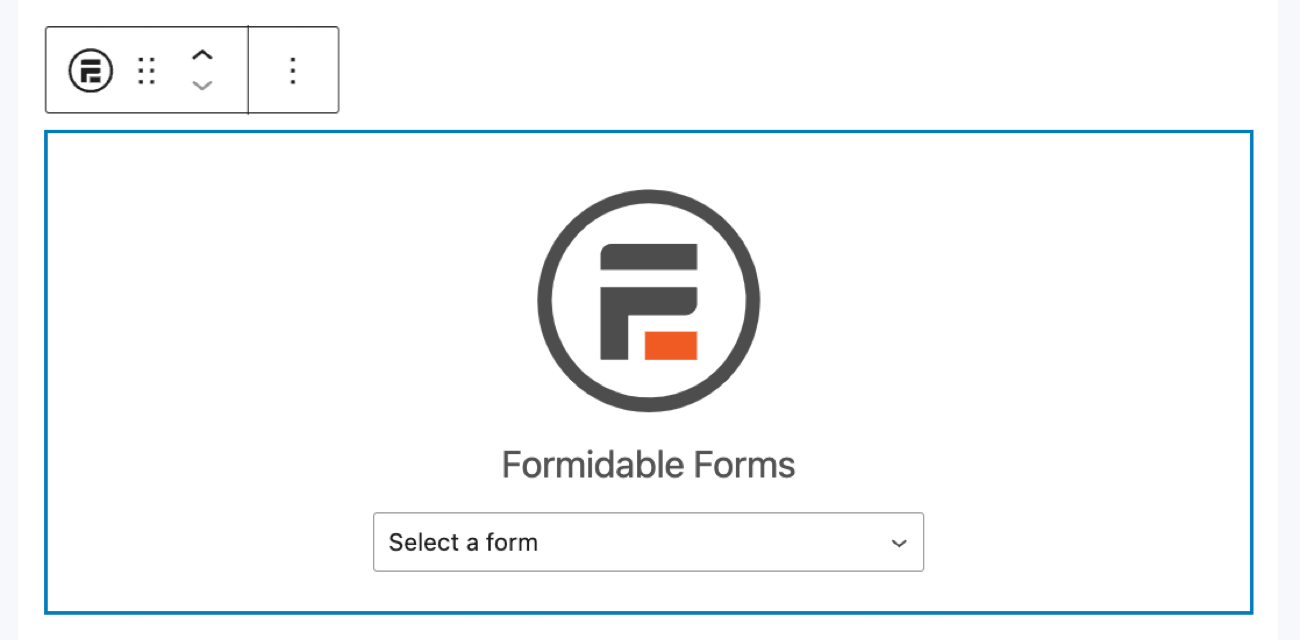
Choose your form from the dropdown menu, and WordPress will display your form.
Update or Publish the post/page. 🥳 Your website now has payment processing for credit and debit cards!
Option 2: Use PayPal to accept credit card payments on WordPress
Right up there with Stripe, PayPal is another top online payment processor.
The steps to make a PayPal form are very similar to those for Stripe, but with one key difference — you'll need the premium version of the WordPress form maker.
- Install and activate Formidable Forms
- Install the PayPal add-on
- Create your PayPal form
- Configure your form to collect payments
- Publish your PayPal form
Step 1: Install and activate Formidable Forms
The first step to adding PayPal to your WordPress site is to install and activate Formidable Forms. The PayPal integration is included in the Business plan and above.
Don't have a license yet? Click below to get it now. 👇
Step 2: Install the PayPal add-on
Next, select Formidable → Add-Ons from your WordPress sidebar. Find PayPal, click the Install button, and then Activate once it appears.
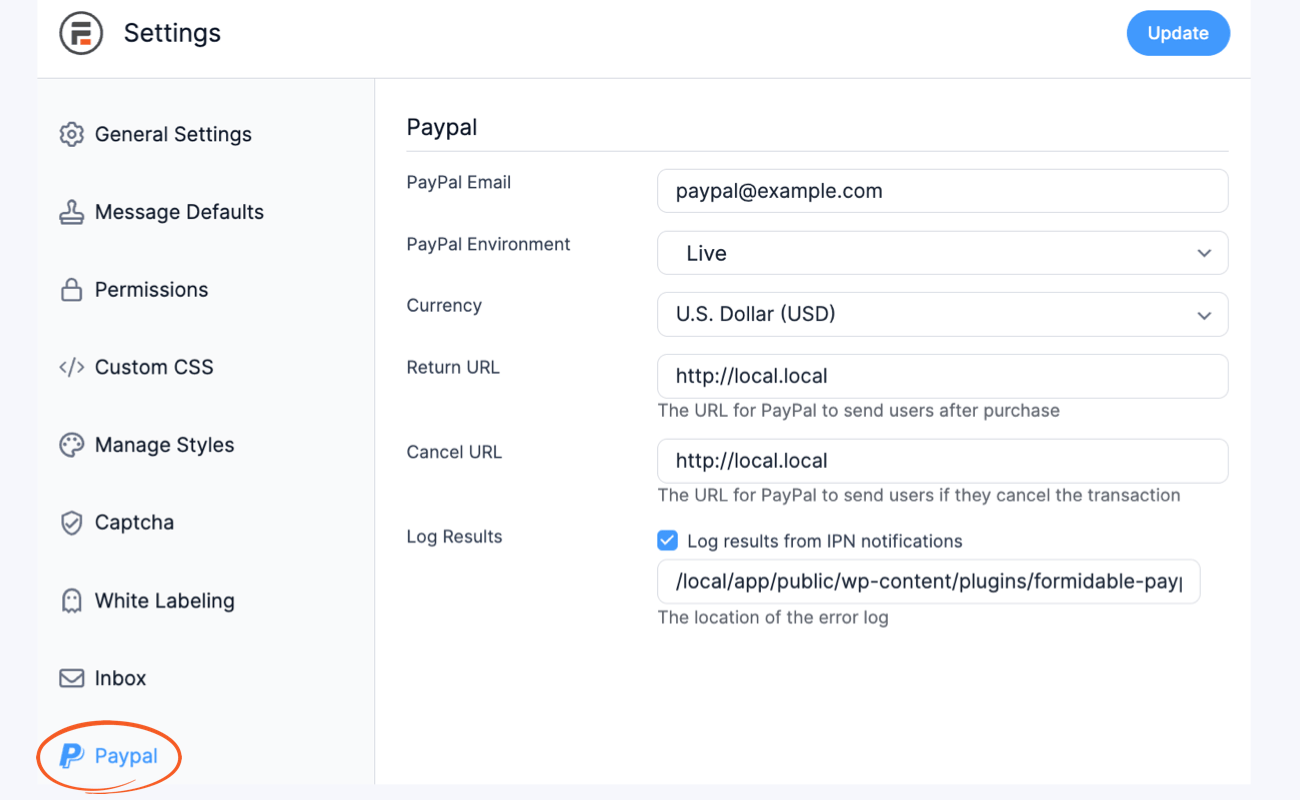
Now, let's connect your PayPal account to your WordPress forms.
Under Formidable → Global Settings → PayPal, enter your PayPal email address and other required information. Finally, hit Update.
Step 3: Create your PayPal form to accept credit card payments
In your WordPress dashboard, go to Formidable → Forms and click Add New at the top of the page.
You can choose to Create a blank form or the PayPal Donation template to speed things up.
Next, give your form a name and click Create.
Feel free to adjust the form to fit your needs. If you’re selling products or services, you’ll want to change all the “Donation” references on your labels.
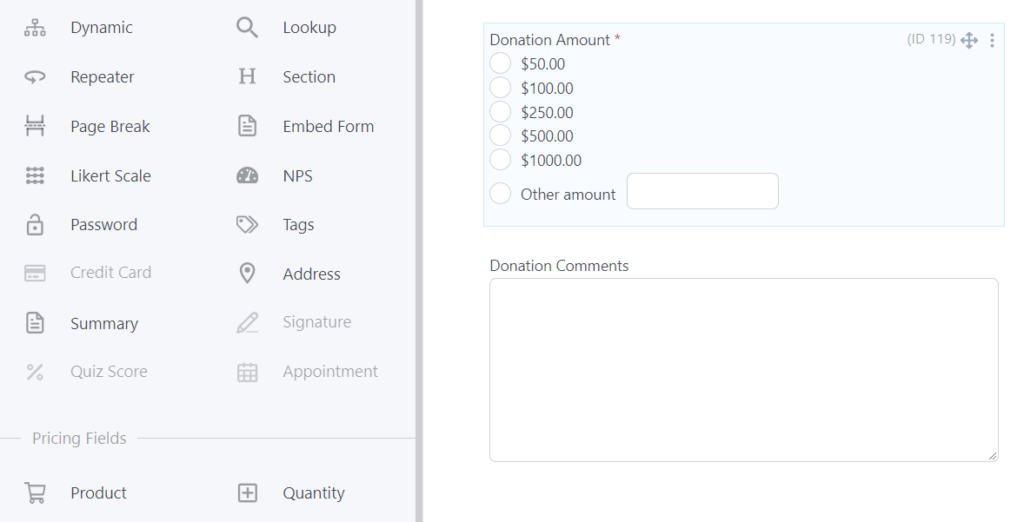
You can also add an automatic calculation field to update the price as the customer adds to their shopping cart.
When you’re done with your form, click Update to save your changes.
Step 4: Configure your form to accept payments via PayPal
Next, go to Settings → Actions & Notifications → PayPal.
You can adjust your settings here to change what payment method to process, the amount, and the currency.
Most of these settings will already be good to go, but feel free to change them if you need.
Last, we just need to get your form on your site!
Step 5: Publish your PayPal form
Open the WordPress post or page where you want to embed your PayPal form.
In the Gutenberg editor, a new block and search for Formidable. Next, insert the Formidable WordPress block, and select your form from the dropdown menu.
Hit Update, and you’re finished! Well done! 🙌
Option 3: Use Authorize.net on WordPress to accept credit card payments
The final WordPress payment gateway we'll cover today is the lesser-known but equally secure Authorize.net.
Like for Stripe and PayPal, the process follows the same basic steps, but you will need Formidable Elite for this tutorial.
- Install and activate Formidable Elite
- Connect Authorize.net to your site
- Create your Authorize.net form
- Add your form to your WordPress website
- Publish your payment form
Step 1: Install and activate Formidable Elite
First, you'll need to install Formidable Forms. The Authorize.net payments integration is included in the Elite plan. Click the orange button below to get your license. 👇

Once you have your premium plan, simply follow these steps to activate your Formidable Forms license.
Step 2: Connect Authorize.net to your site
Now that you have Formidable Forms on your WordPress site, go to Formidable → Add-Ons. Search for Authorize.net, then click Install, and finally Activate the add-on.
Next, we need to connect to your Authorize.net account.
To do this, go to Formidable → Global Settings → Authorize.net → API Login ID. Keep this page open, and then open another tab.
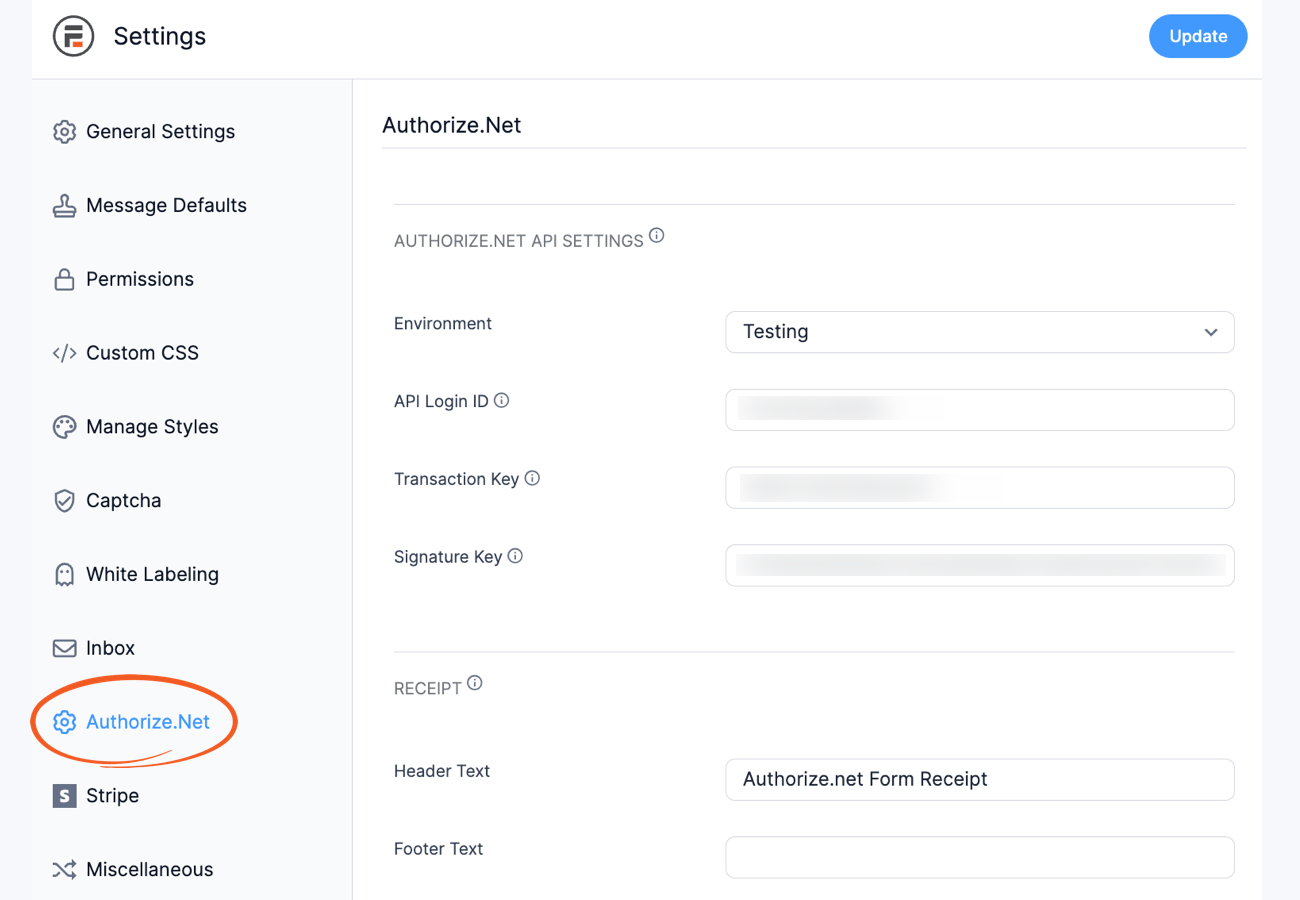
In the other tab, open Authorize.net, log into your merchant account and click Account.
Then, click API Credentials & Keys (under Security Settings). Copy the API Login ID and paste it into Formidable.
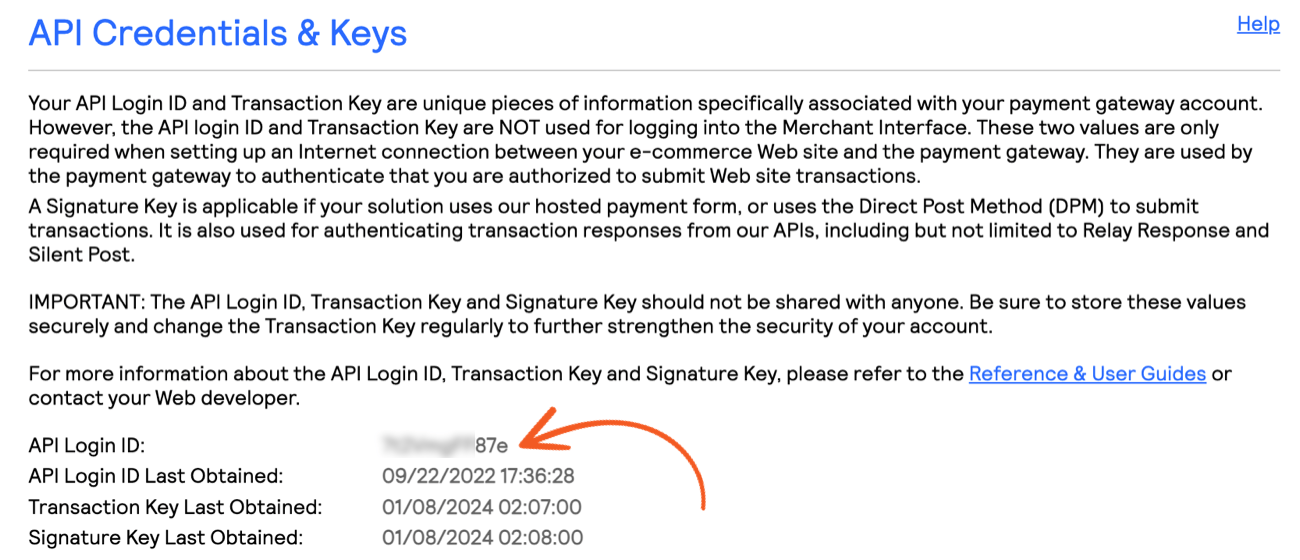
Next, go back to your Authorize.net account and head to the API Credentials & Keys page. Select New Transaction Key, then Submit, to get a Transaction Key.
And now, copy and paste this into Formidable.
Still with us? 🥴 We're almost done, promise!
Back in Authorize.net, go to API Credentials & Keys, select New Signature Key, and Submit.
Copy and paste this into the Signature Key field in Formidable.
And finally 😮💨, set the Environment to Live. Once you click to save your changes, your WordPress website will be connected to Authorize.net!
Step 3: Create your Authorize.net form
Now that your account's connected, let’s make your Authorize.net payment form.
In WordPress, go to Formidable → Forms and click Add New.
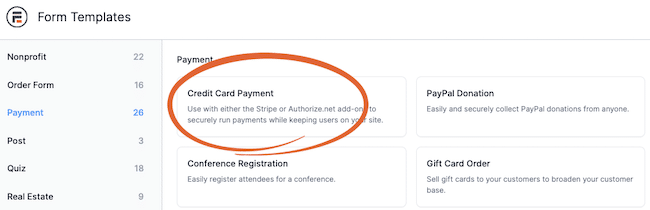
Create a blank form or use the Credit Card Payment template to get started faster.
Name your form, then click Create to open the form builder.
Here you can build your form from the ground up or modify the template as you like.
Add any fields, edit the text, and more. But don't forget to add a Payment field if you aren't using one of our payment form templates!
Step 4: Set up your form to collect Authorize.net payments
Next, go to Settings → Actions & Notifications → Collect a Payment.
You can adjust these settings to take subscription payments, various currencies, different payment amounts, and more.
But let's focus on the Gateway setting.
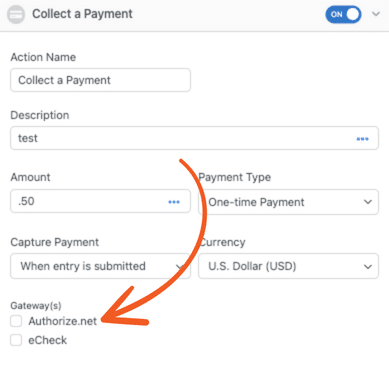
Check the Authorize.net option to accept payments in your form. ✅
You can then change the Customer Information and Shipping Information (if necessary). If you want, you can leave the shipping information blank and it will automatically match the billing information.
Then, hit Update to save your changes.
Now, let’s get your Authorize.net form online!
Step 5: Add your form to your WordPress website
Navigate to the page or post where you want to add your payment form.
Insert a new WordPress block, and search for Formidable. Choose Formidable’s WordPress block, then choose your form from the dropdown.
Last, click to Publish or Update your post or page, and voilà! 🪄 Your site now has an Authorize.net credit card payment option.
From Idea to Reality in Minutes. Build Powerful Forms, Dashboards, Apps and More.
Formidable Forms makes advanced site building simple. Launch forms, directories, dashboards, and custom WordPress apps faster than ever before.
Start accepting credit card payments on WordPress
You don't need to have a WordPress credit card payment plugin in order to accept credit card payments on WordPress. You just need to install Formidable Forms and add a payment gateway, then you're good to go!
So, don’t waste any time — grab Formidable Forms and start making money online today!
👉 Want to create a complete eCommerce store on WordPress? Learn how to use Easy Digital downloads to sell digital products or how to create an online store in WordPress.
And for more WordPress tips and tricks, don't forget to follow us on Twitter, Facebook, and YouTube!
Read more about adding payment forms!
 How a WordPress Payment Approval Workflow Works
 Why Recurring Payments Fail in WordPress After Month 3
 How to Add Discount Codes to Your WordPress Forms
Did you know that Formidable Forms is the best WordPress form plugin available today? Get started with our free form builder or try our full-featured WordPress form maker risk-free for 14 days!
This article may contain affiliate links. Once in a while, we earn commissions from those links. But we only recommend products we like, with or without commissions.

