
The Styles section in Formidable gives you the ability to create and customize multiple styling templates that can be applied on a form-by-form basis. No coding experience is needed.

Upgrade your WordPress site with powerful, flexible forms.
Access the Form Styler
For quick access to the Form Styler, go to the Formidable → Forms list. Click the style name in the Style column and select Edit Style. The Style column is available on the Basic, Plus, Business, and Elite licenses.
The form's Style tab opens in a new browser tab. Click Edit style at the bottom of the preview to open the style's Quick Settings.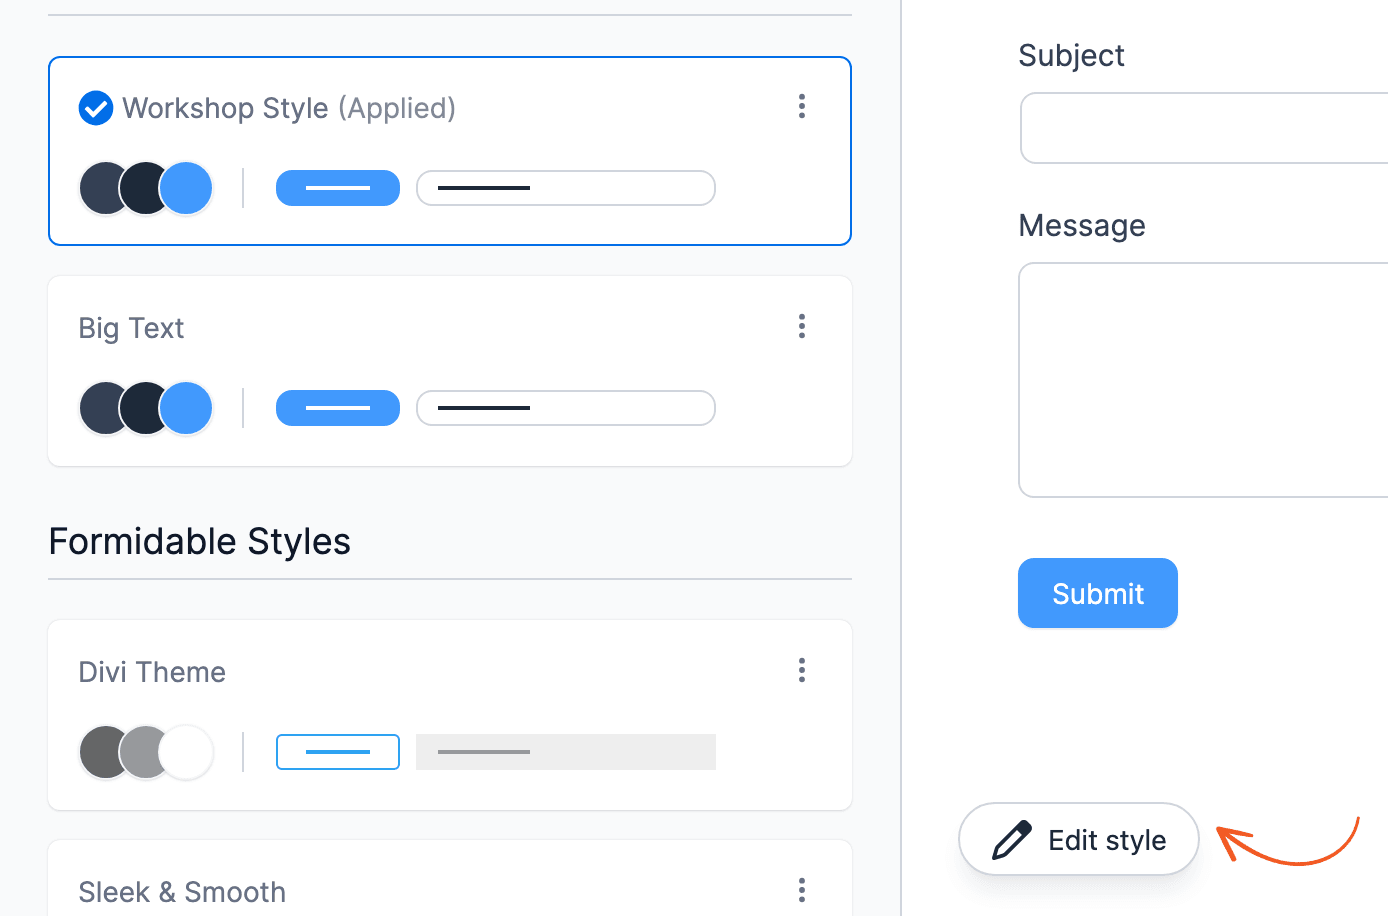
You can also go to Formidable → Styles. It opens the Quick Settings of your default style.
From Idea to Reality in Minutes. Build Powerful Forms, Dashboards, Apps and More.
Formidable Forms makes advanced site building simple. Launch forms, directories, dashboards, and custom WordPress apps faster than ever before.
Quick Settings
The Quick Settings set the primary color, the field text and border colors, the button text color, and the vertical spacing between fields.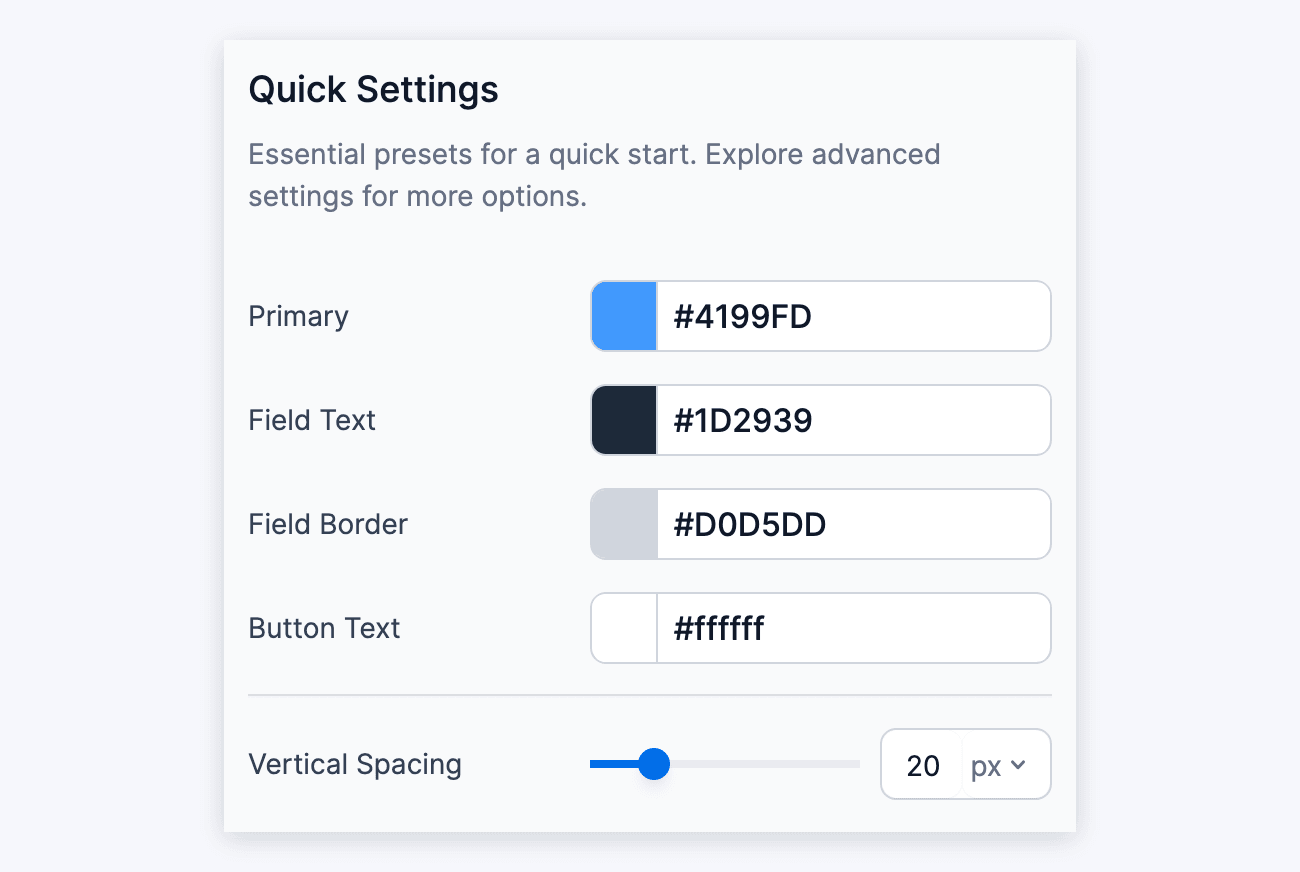
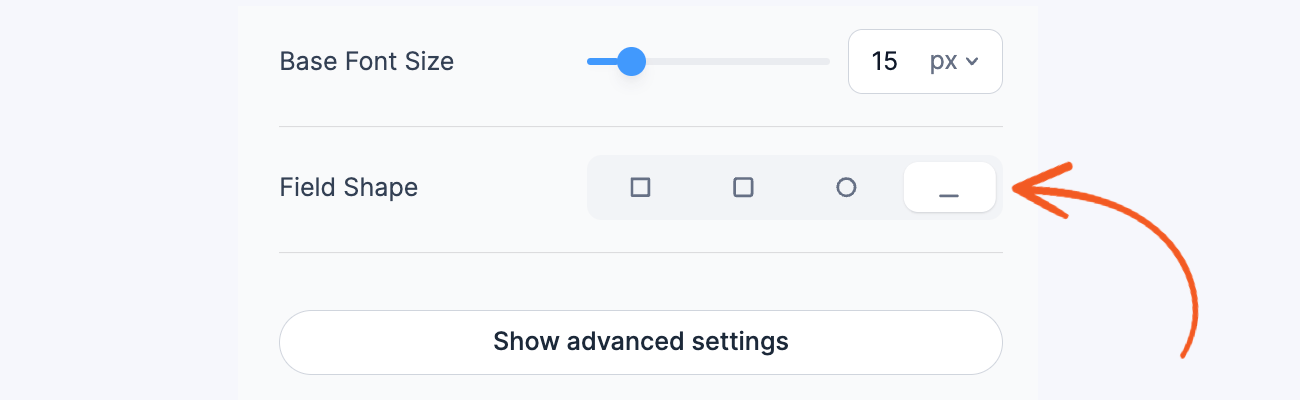
Below them, set the input field padding and the base font size. Then choose a Field Shape:
- Regular: square corners.
- Rounded corners: set how round they are in Corner Radius.
- Circle: fully rounded ends.
- Underline: only a bottom border.
The Quick Settings end with the Custom CSS toggle and the style class. Both are covered in their own sections below.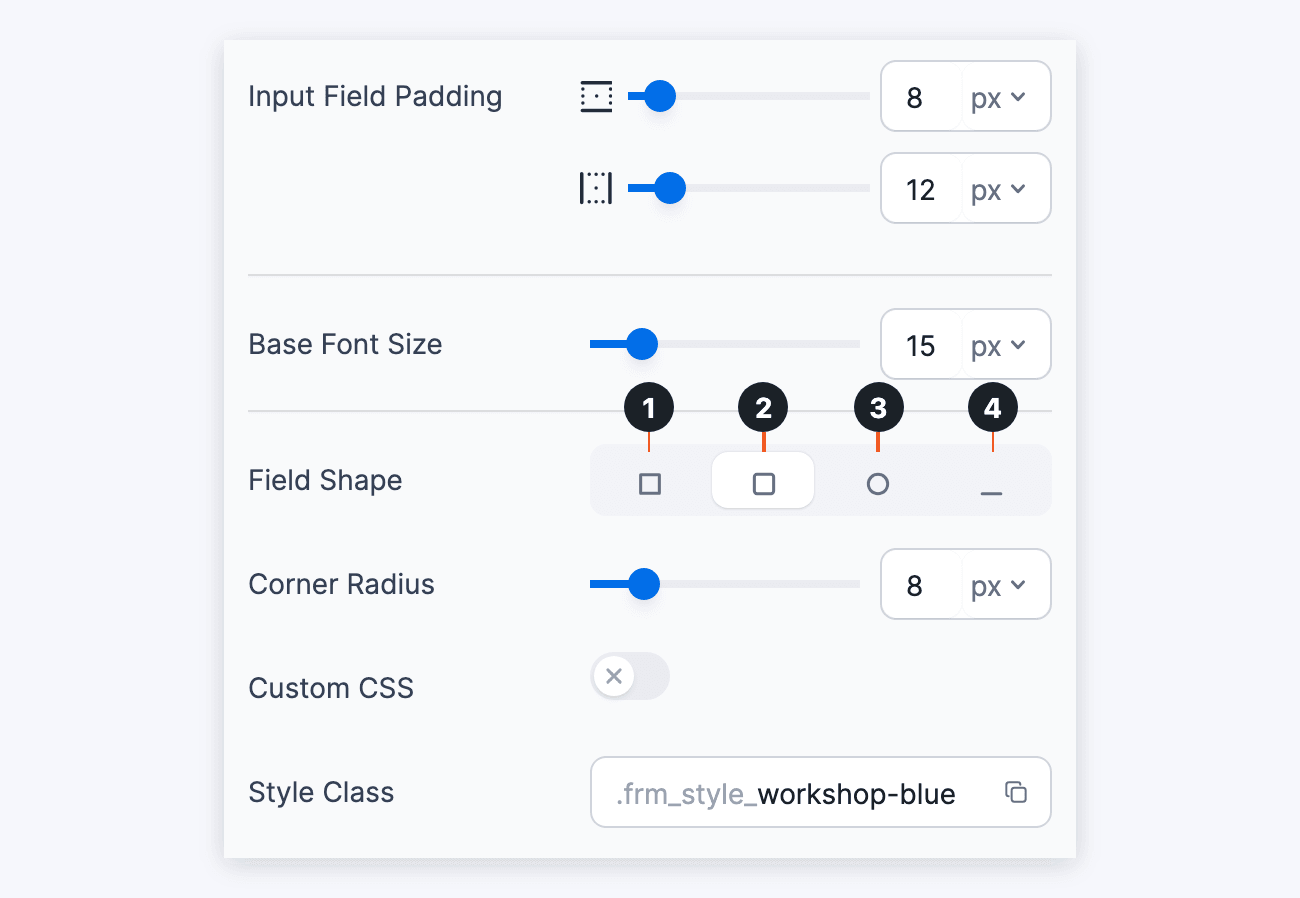
Custom CSS area
To further customize your form style, you can use the new Custom CSS area option. Toggle the box and start writing your code; it will be applied to the form style you are editing. You don't need to start your CSS with the style class. When you save, Formidable adds the class for you, so the CSS only applies to forms that use this style.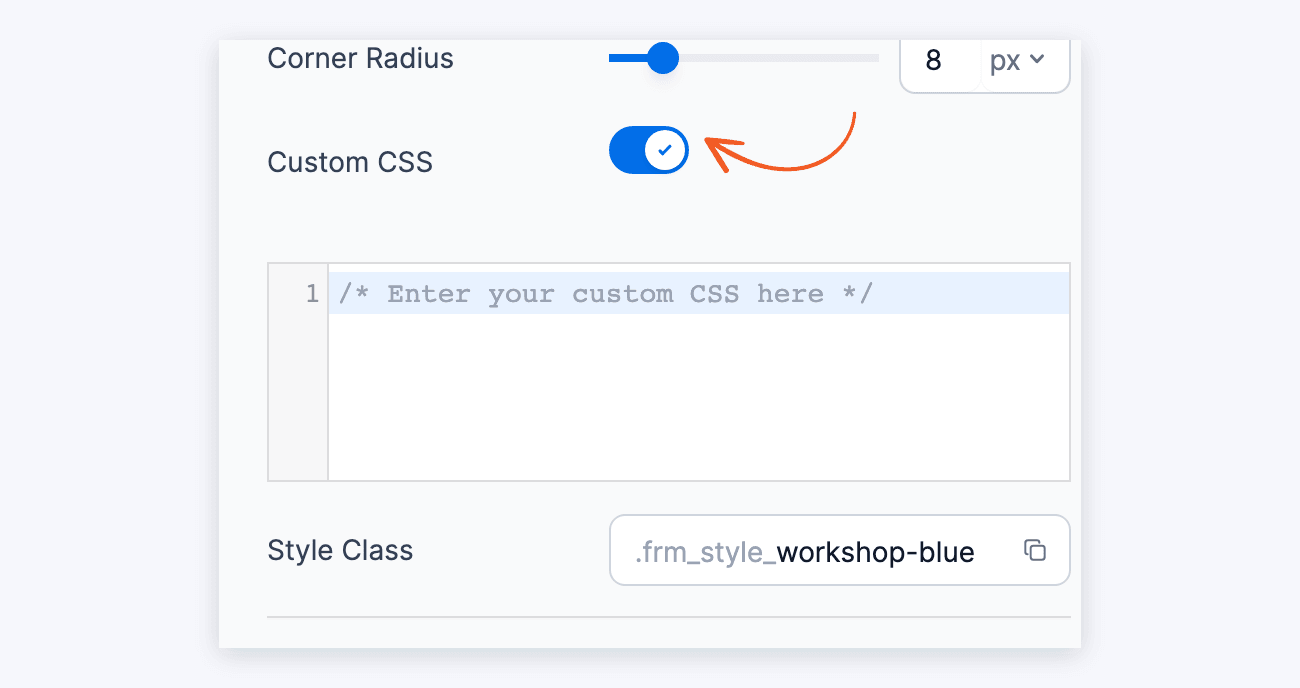
Advanced Settings
The advanced settings have more detailed styling options for your style template.
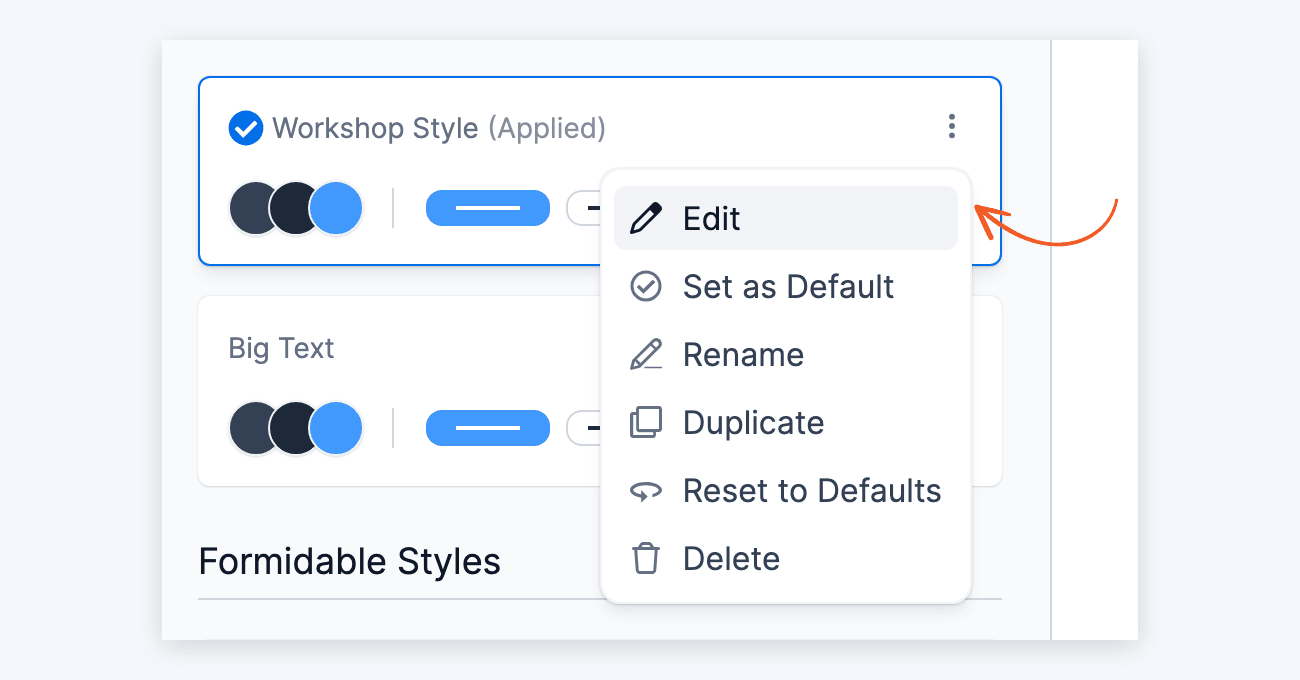
- On the form's Style tab, click the menu icon on your style and select Edit.

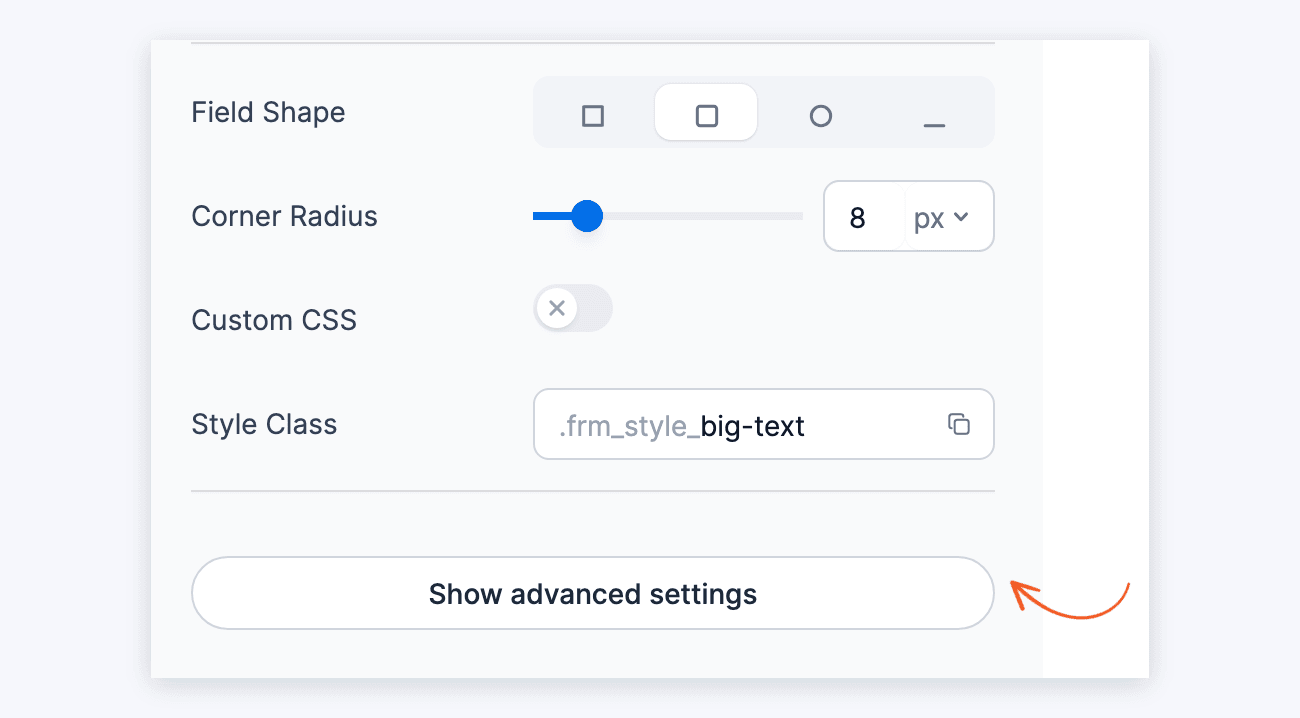
- At the bottom of the Quick Settings, click Show advanced settings. This also saves the style.
- The advanced settings open as a list of sections, with General open first. Click a section's name to open or close its settings. With every section closed, the list looks like this.
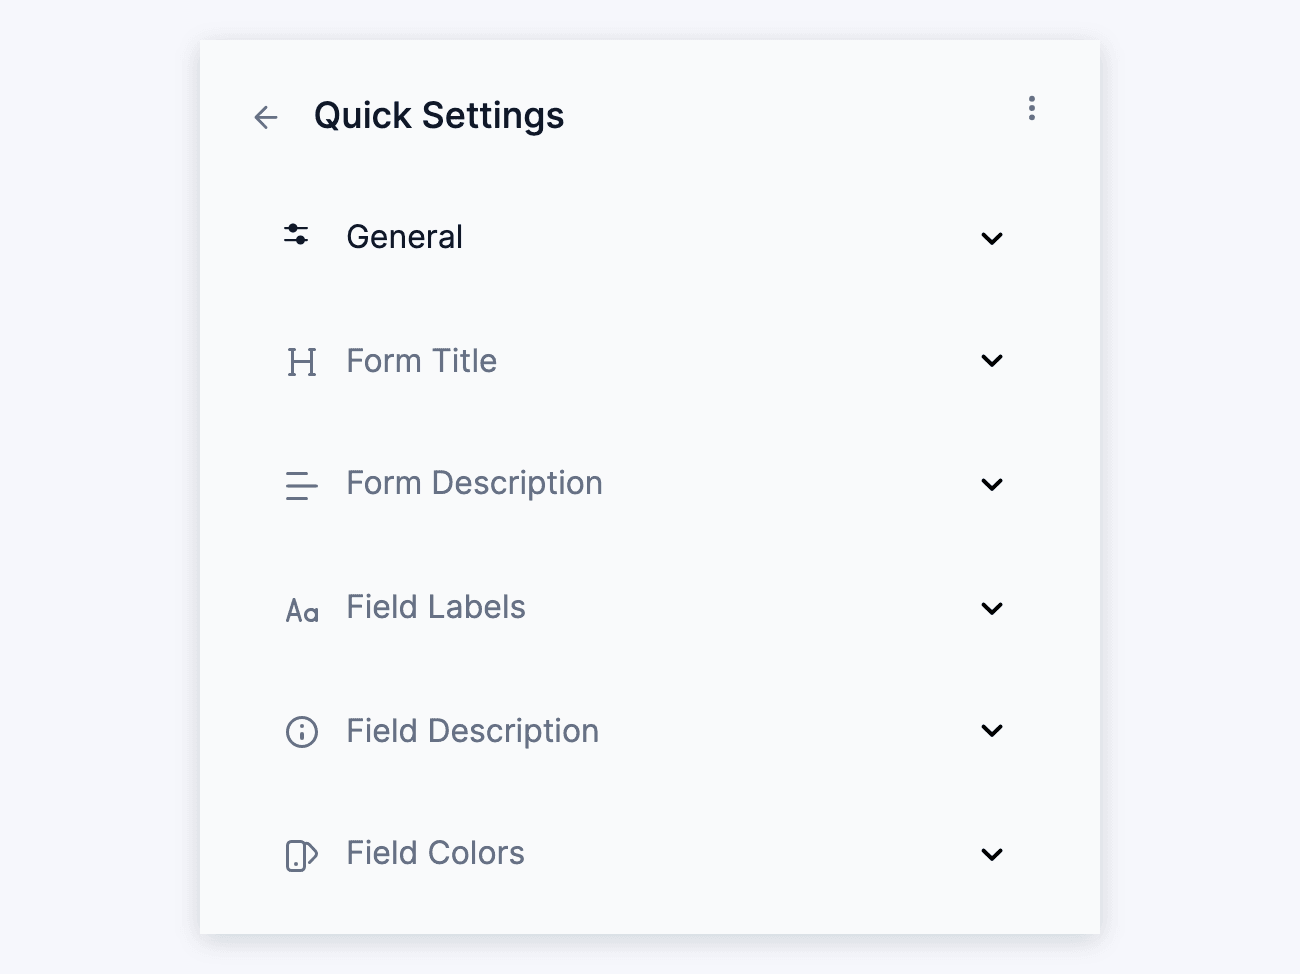
The sections below are the ones most forms use. The advanced settings also have sections for Check Box & Radio Fields, Buttons, Section Fields, Repeater Fields, Date Fields, Toggle Fields, Slider Fields, and Progress Bars & Rootline.
General Styles
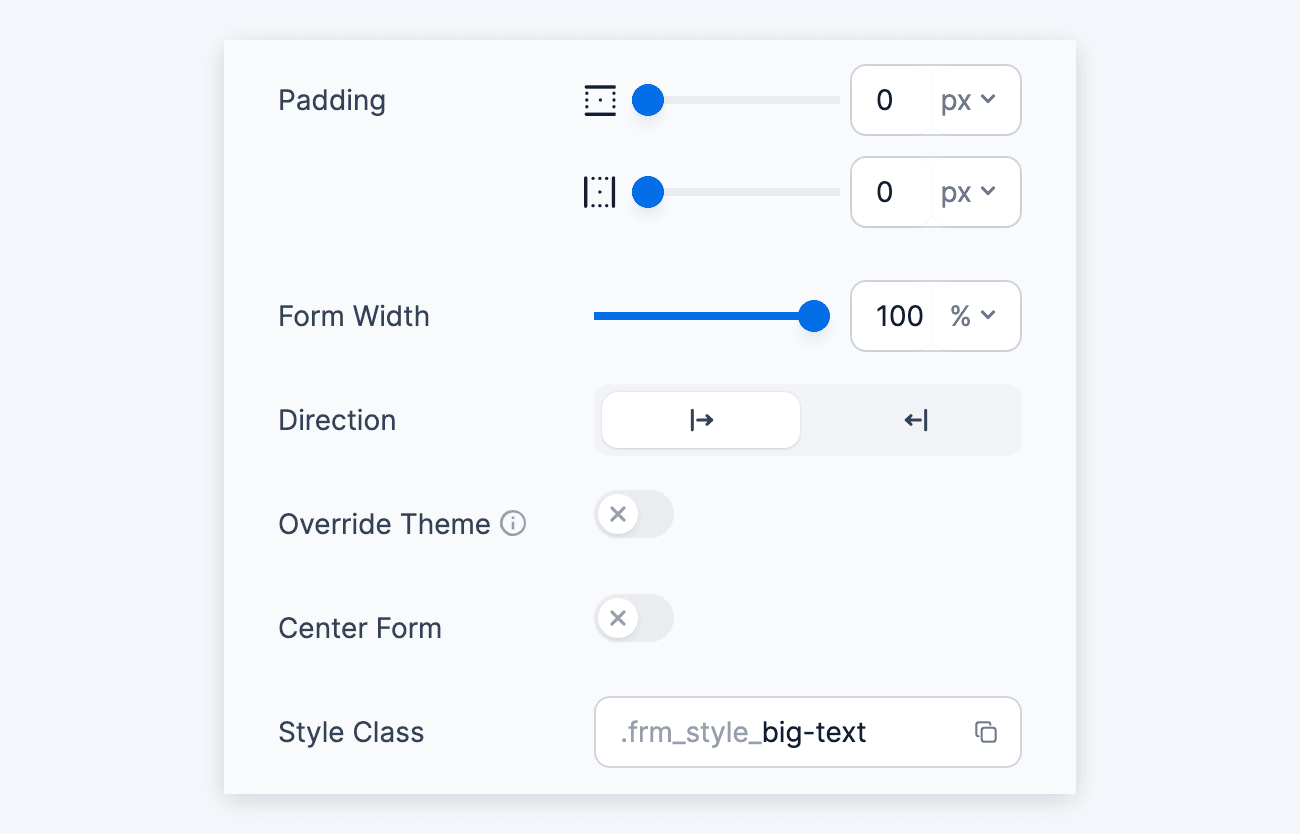
In General Styles, you can customize the font family, background image, background color, text alignment, border color, border width, padding, form width, and direction. It also includes settings to override the theme and center the form, and it shows the style class.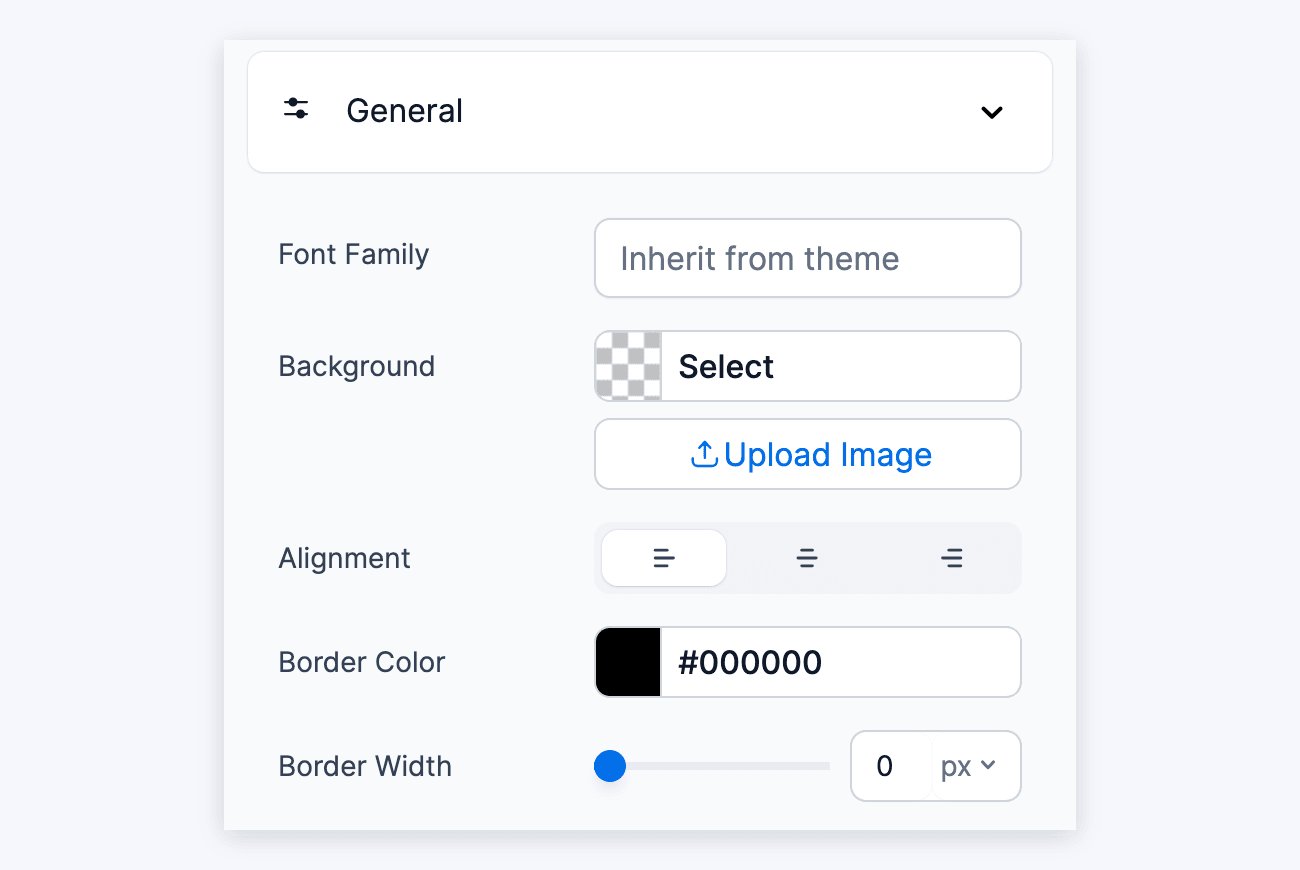
Form Title Styles
Set the color and font size of the form title, and adjust the margin around it.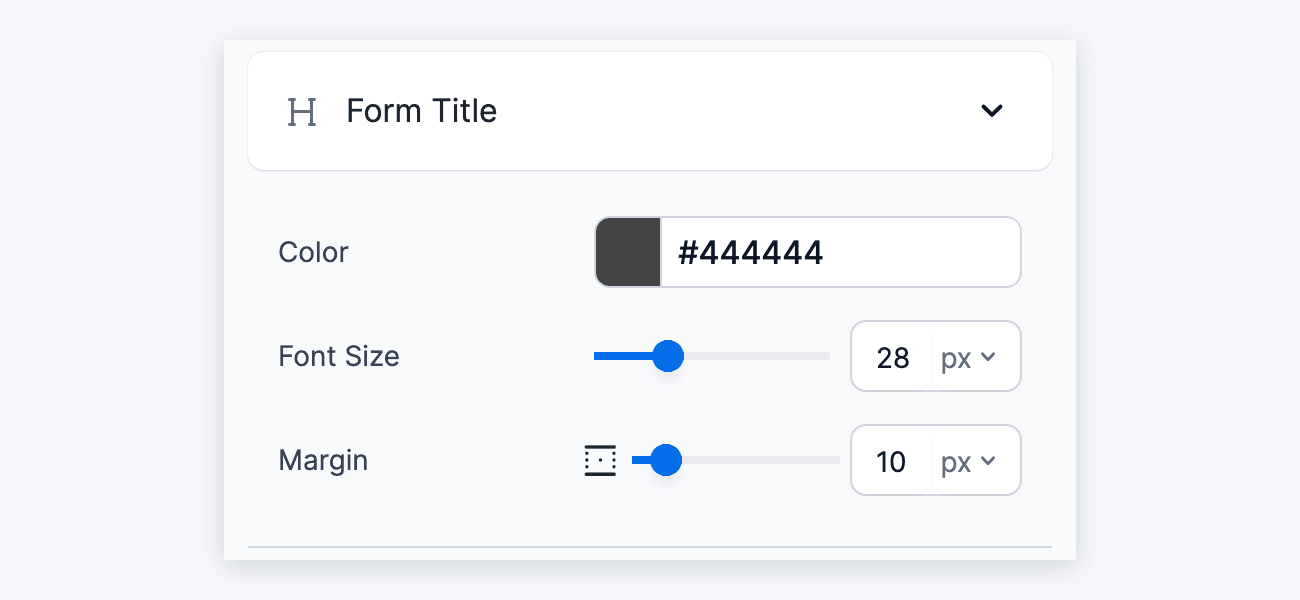
Form Description Styles
Set the font size and color of the form description, and adjust the margin and padding around it.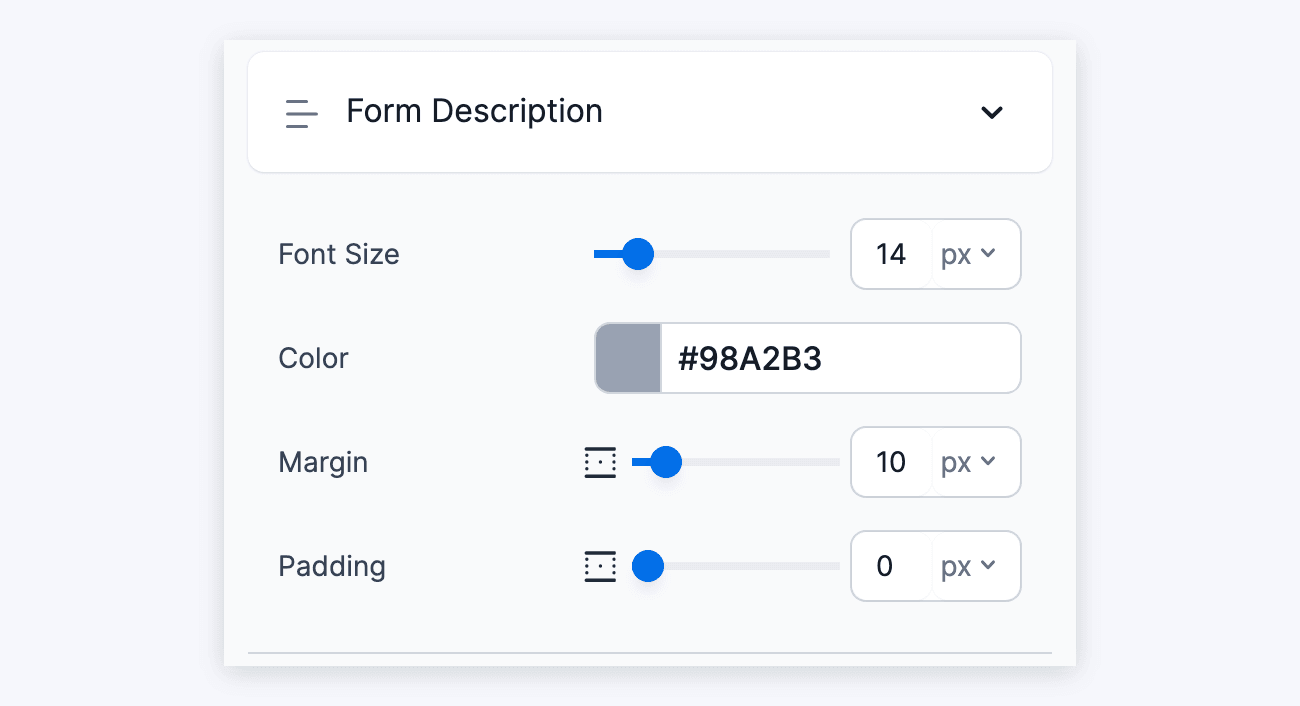
Field Labels Styles
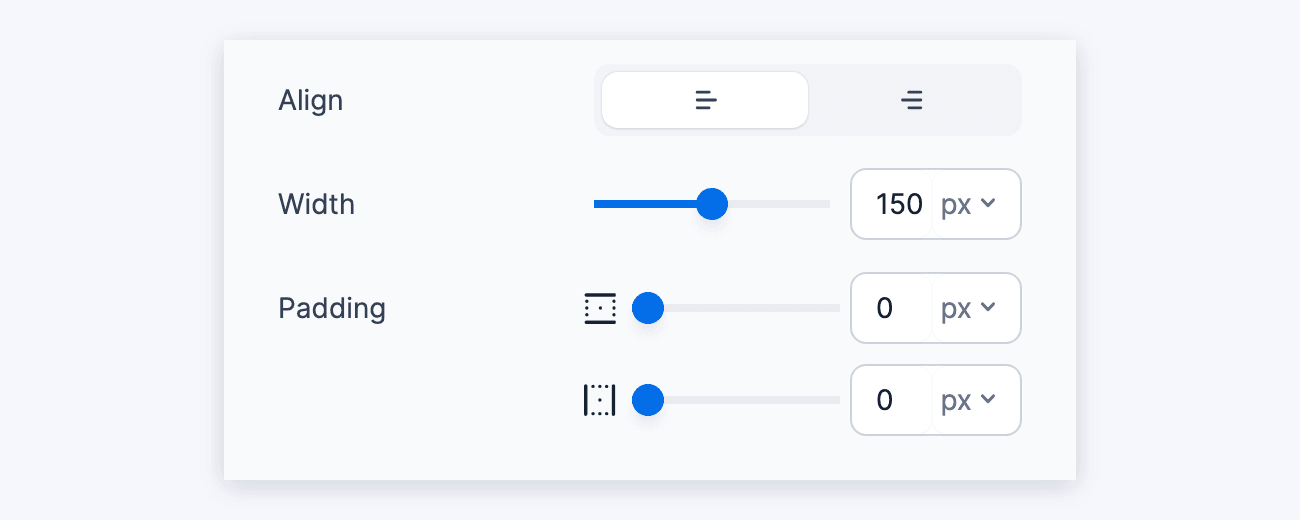
You can set the color, font size, and weight of the label text on your form. You can also adjust the position, alignment between left and right, width, and padding of the field label. The Required Indicator tab sets the color and weight of the required field indicator.
Field Description Styles
Set the color, font size, and weight of the description text on your form field. It includes selecting the style, aligning left and right, and the margin of the field description.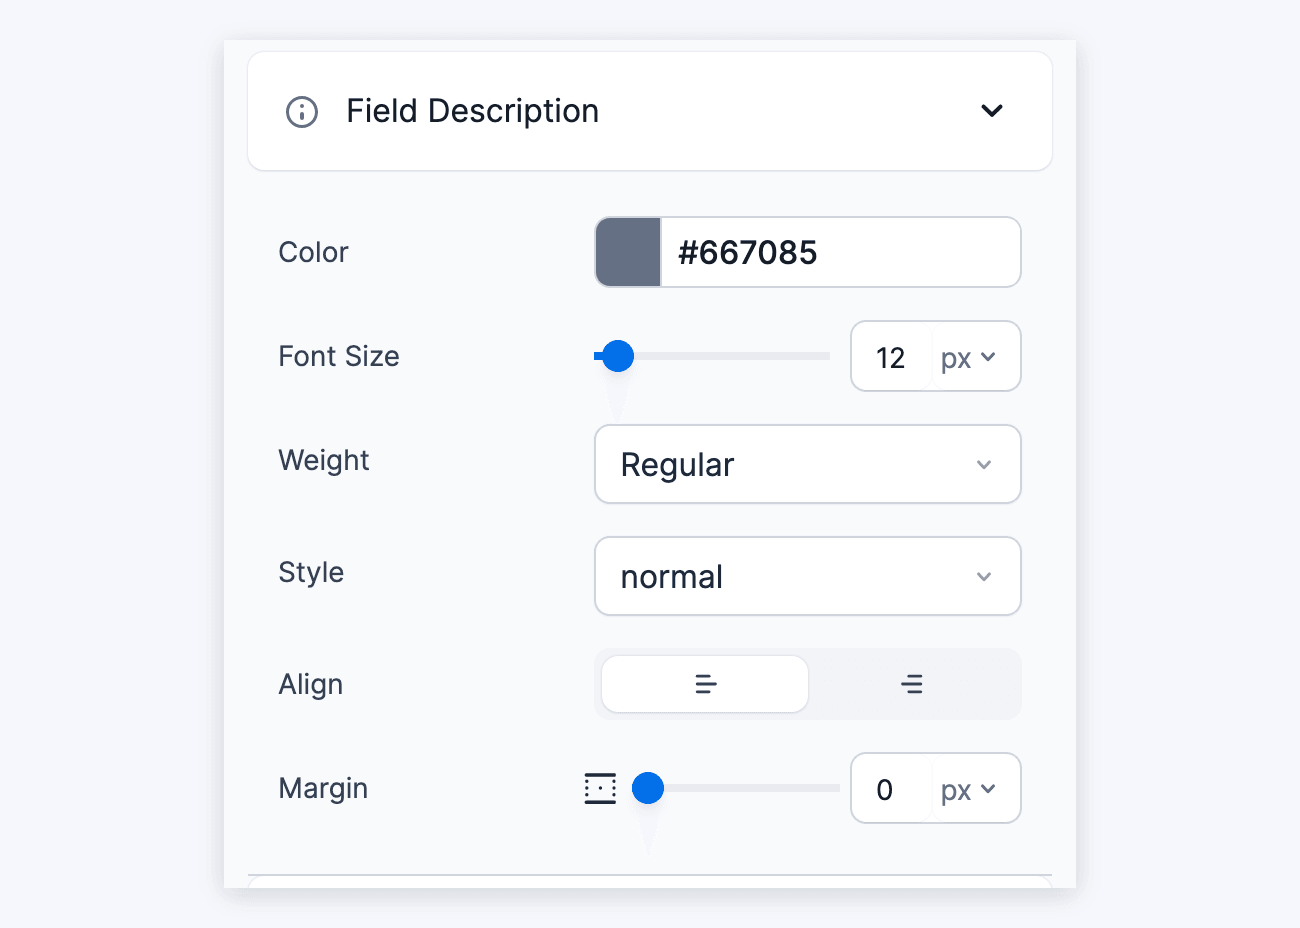
Field Colors Styles
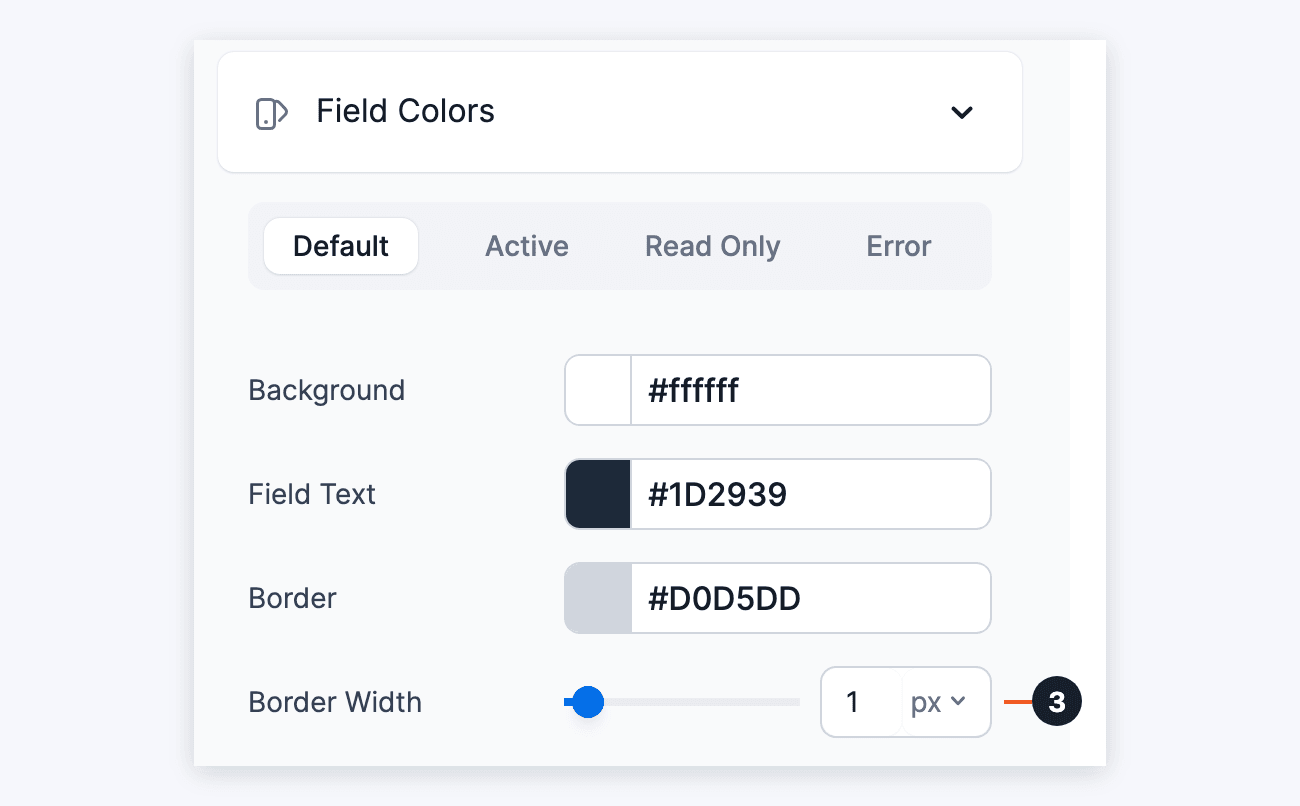
Set the background color and field text color, and the color, width, and style of the border. Turn on Remove Box Shadow to take the shadow off the fields. Each field state has its own tab: Default, Active, Read Only, and Error.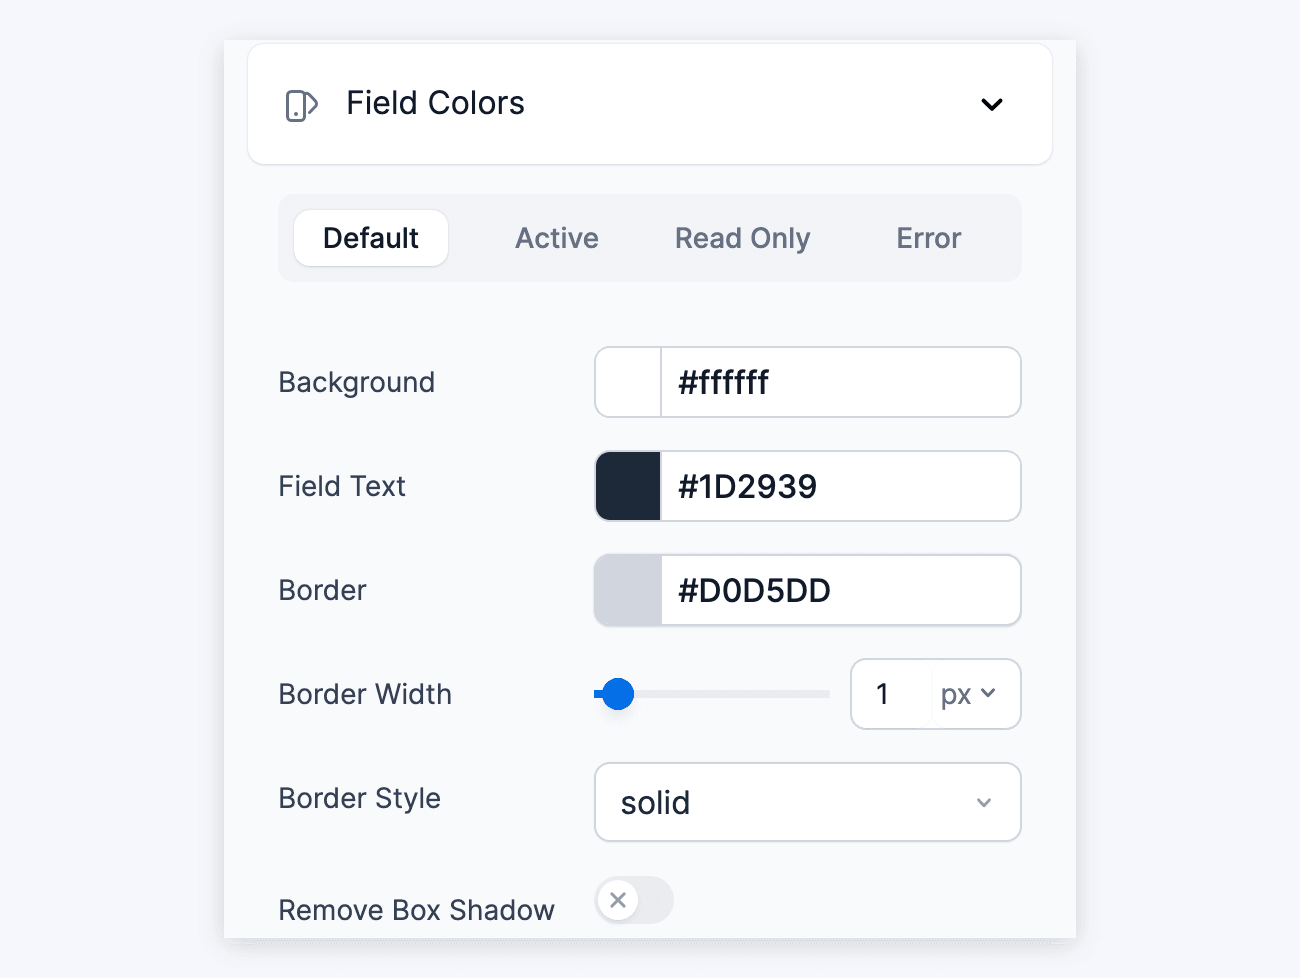
Field Settings Styles
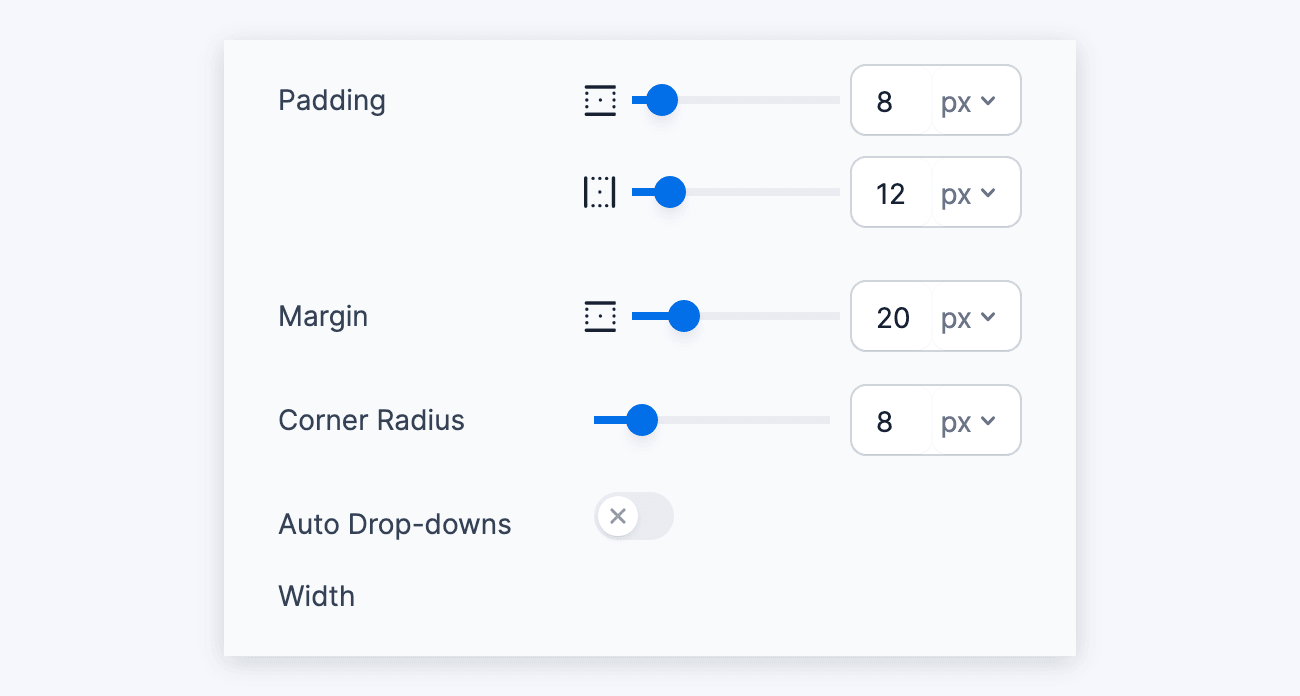
Set the font size, weight, height, width, padding, margin, and corner radius. Turn on Auto Drop-downs Width to size each dropdown to fit its content.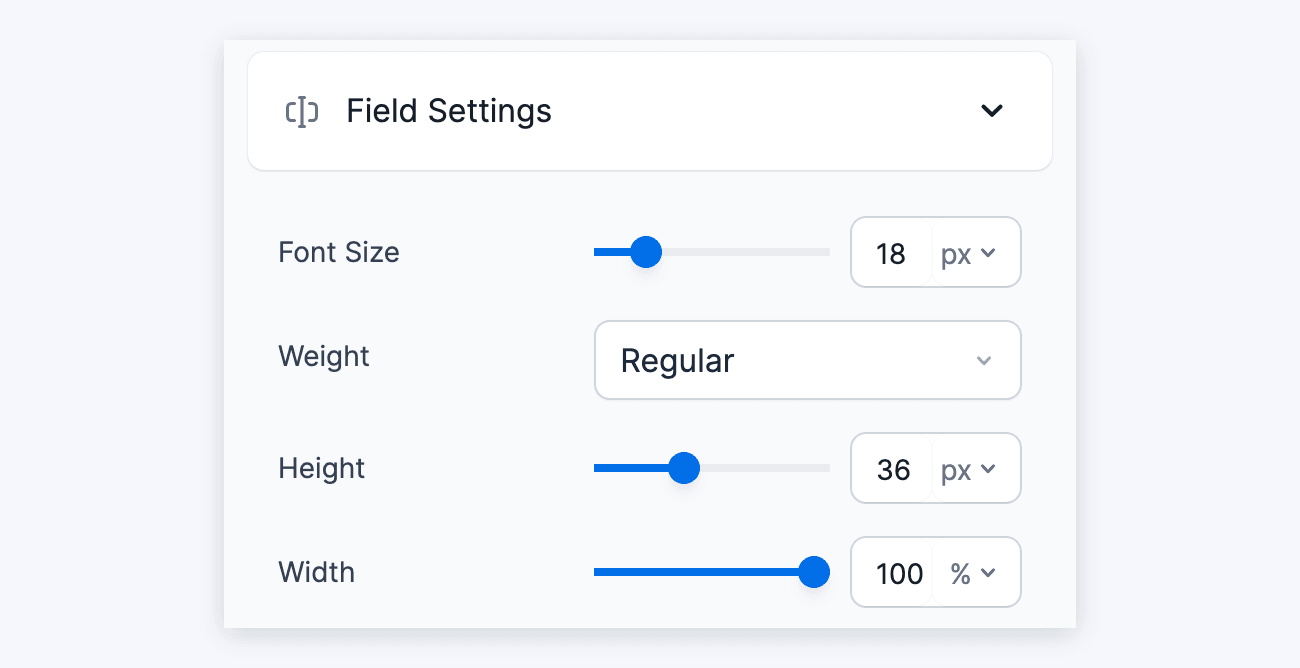
Form Messages Styles
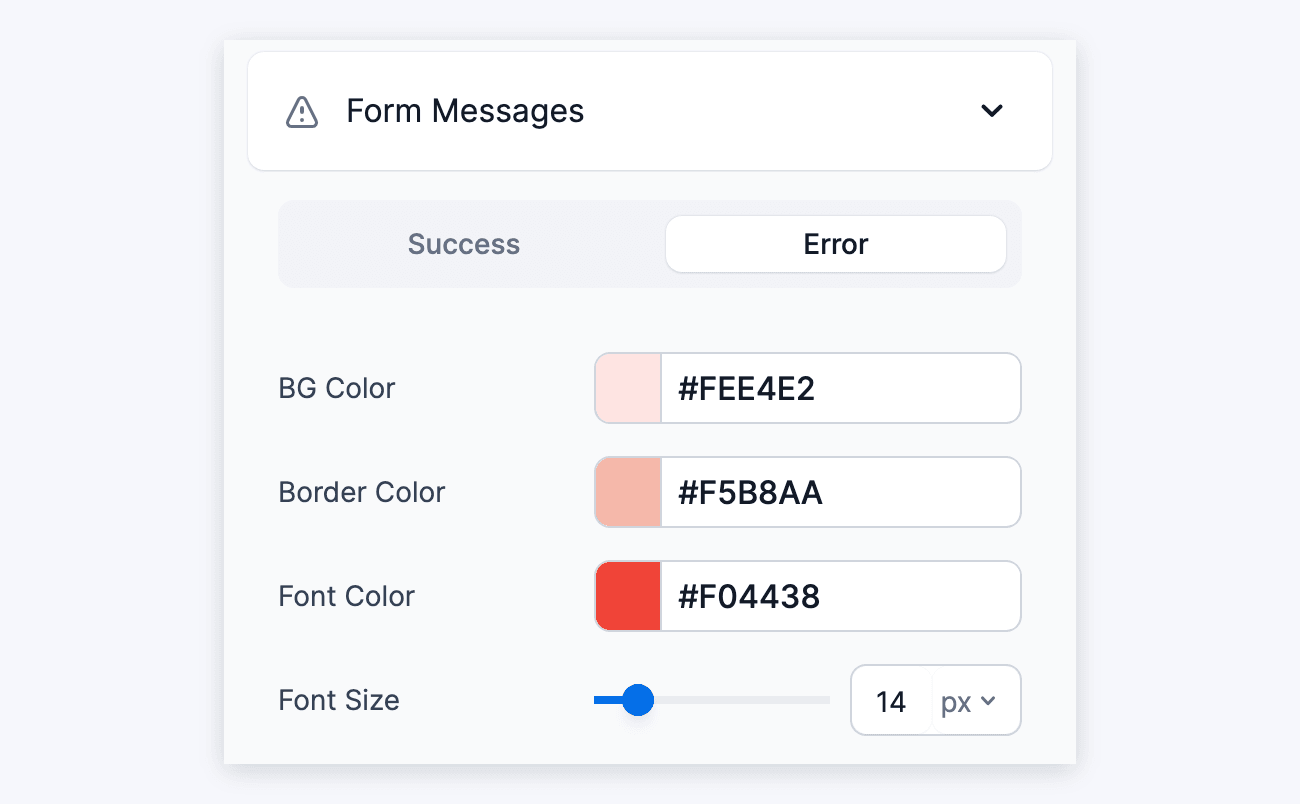
Set the background color, border color, font color, and font size of the success and error messages.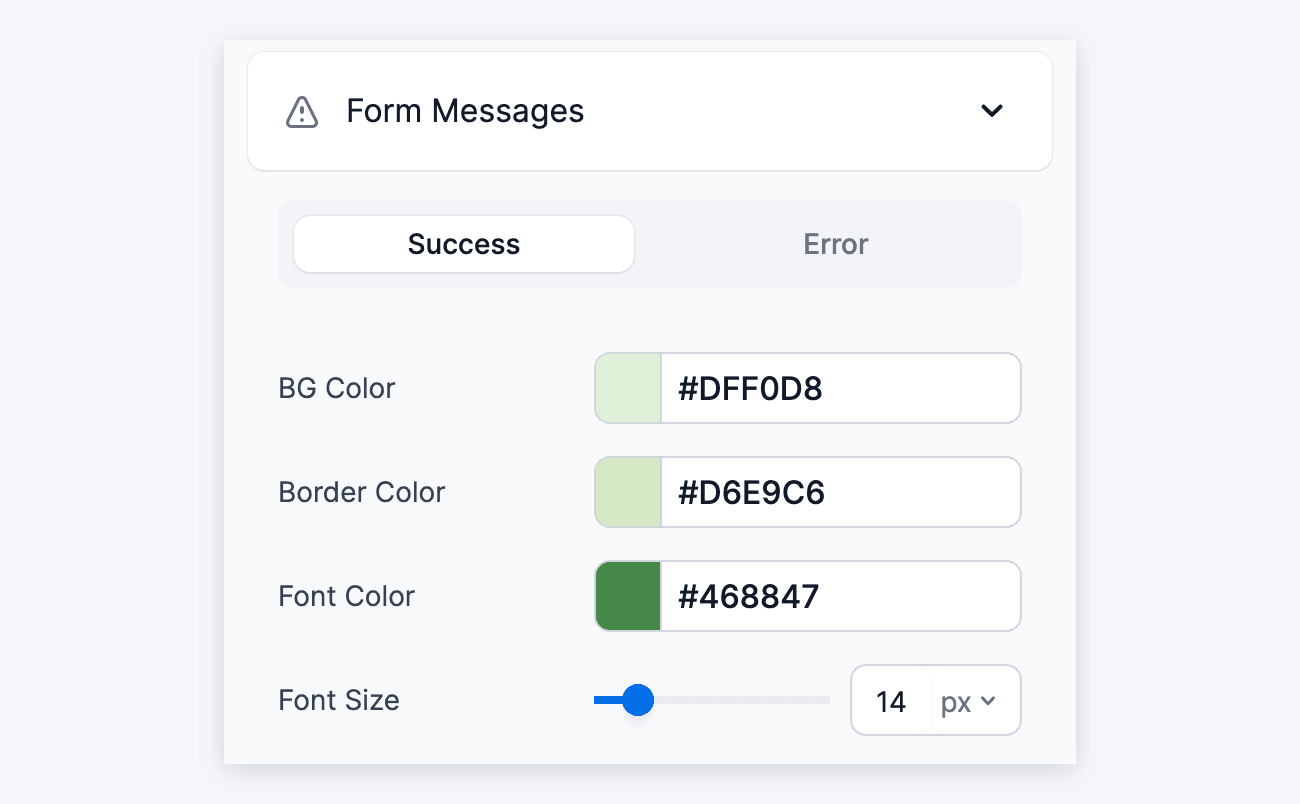
Create a new style
Creating more than one style is available on the Basic, Plus, Business, and Elite licenses.
Create a new style template for your forms.
- Choose a form and click the Style tab.
- Click the + New Style link.
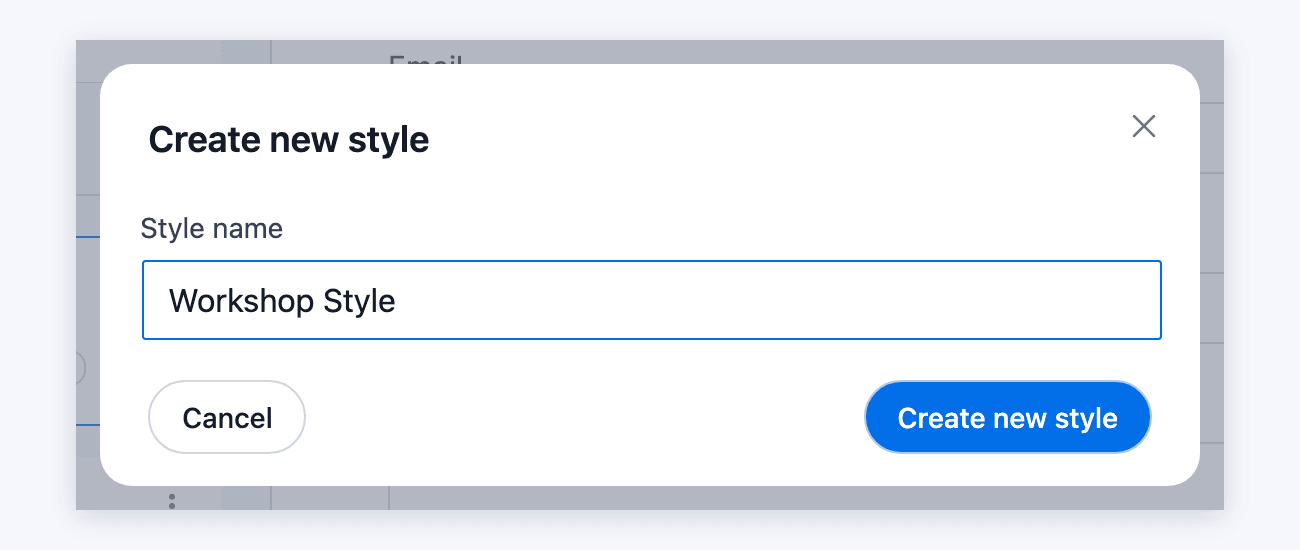
- Add a style name. Click the Create new style button.
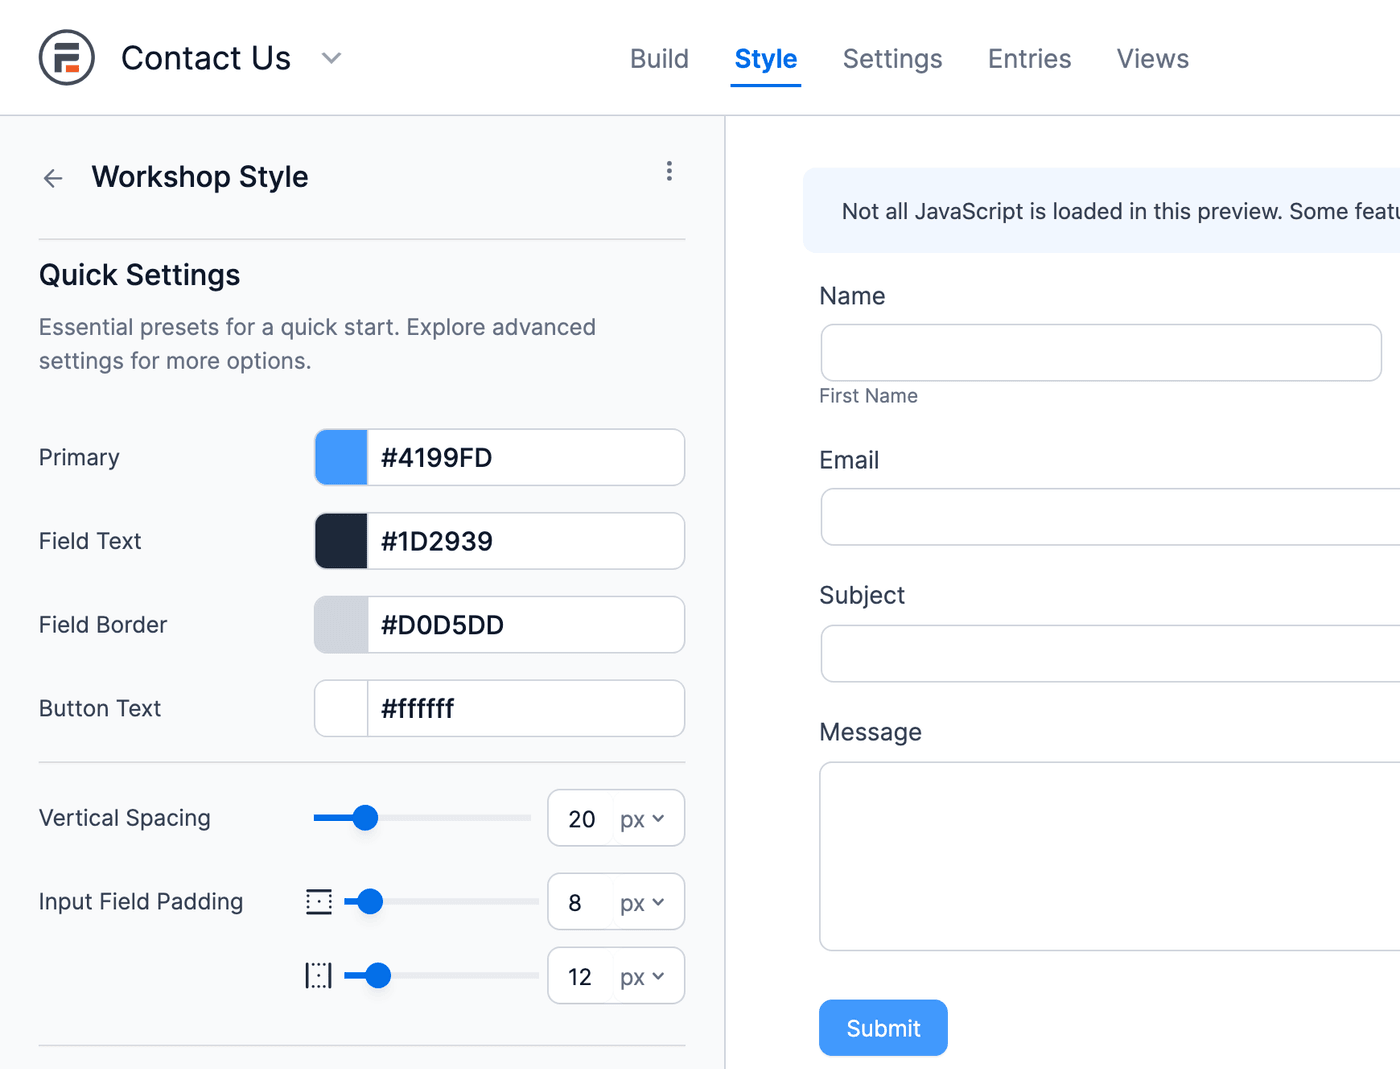
- You will be redirected to the Form Styler, where you can customize your new style template.
- Click Update to create the style. It isn't saved until you click Update or Show advanced settings.


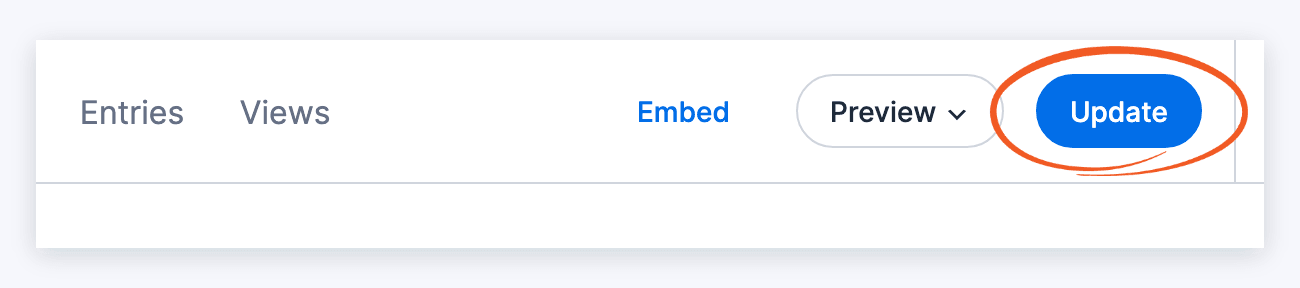
The new style isn't applied to your form yet. To use it on the form, apply the style.
If you need more styling options than the Form Styler provides, add custom CSS using the Custom CSS tab in your Formidable → Global Settings page or in your theme's style.css file. It will be applied to every form that uses Formidable styling.
Edit a style
Update or change an existing style template.
- Select your form, and click the Style tab.
- Click Edit style at the bottom of the preview. It opens the style applied to the form.
To edit another style, click the menu icon on that style and select Edit. - You will be redirected to the Form Styler, where you can edit your chosen template.
- To find the style class associated with the template, look for Style Class at the bottom of the Quick Settings. You can also rename the style class there.
- Click the Update button to save your changes.
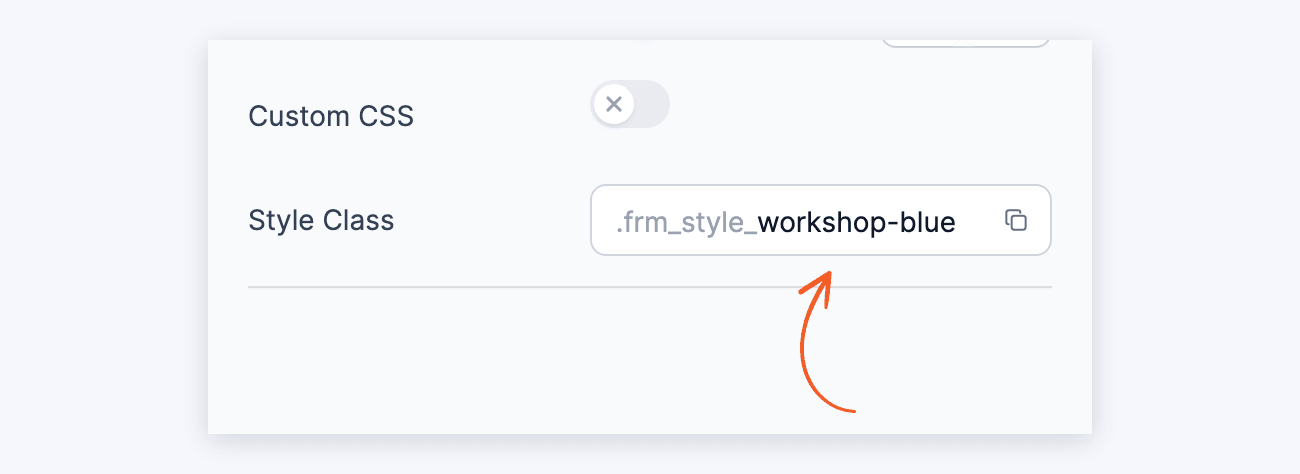
If you update your style templates, but your form still does not reflect the changes you made, a possible reason might be that your theme's or another plugin's style rules conflict with the ones you set up. Overriding the theme styling is one approach to solving this.
Set a default template
Any template can be set as your default style. The default style will be applied automatically to any new forms unless the style template is changed.
- Select your form, and click the Style tab.
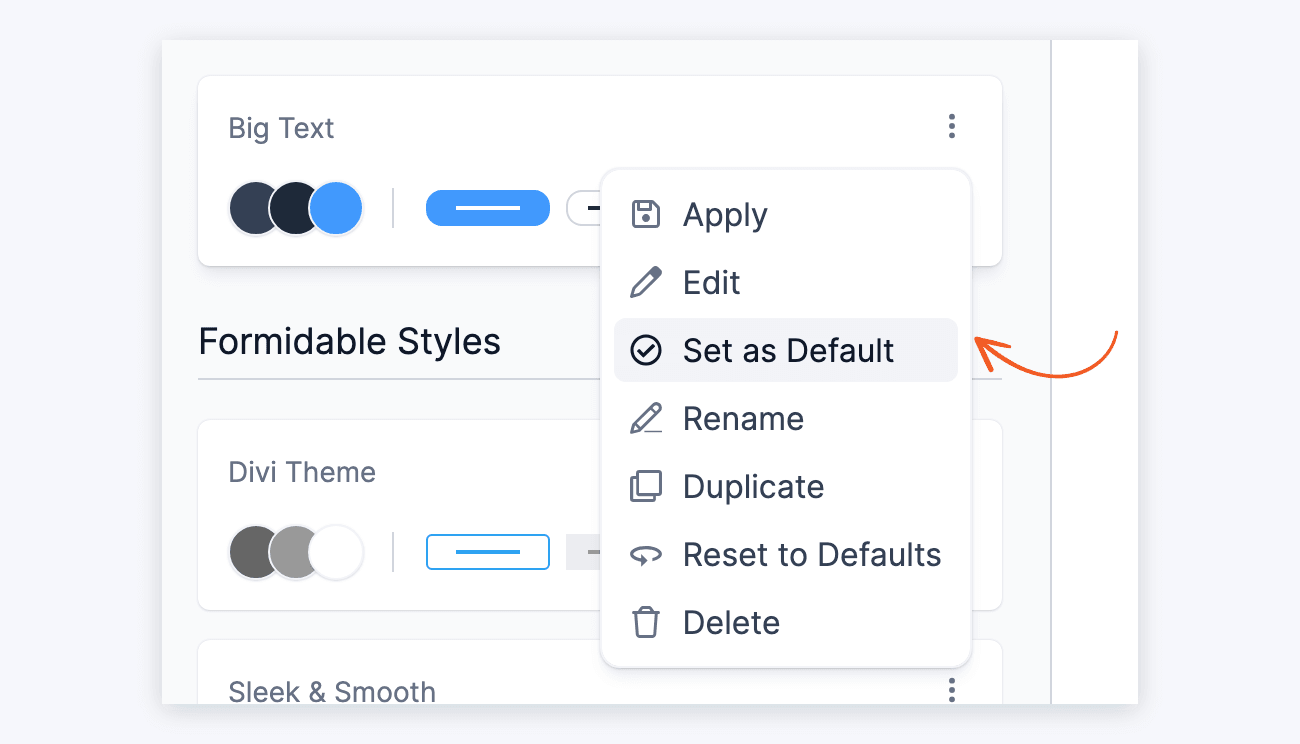
- Choose a style template from the left sidebar. Click the menu icon and select Set as Default.
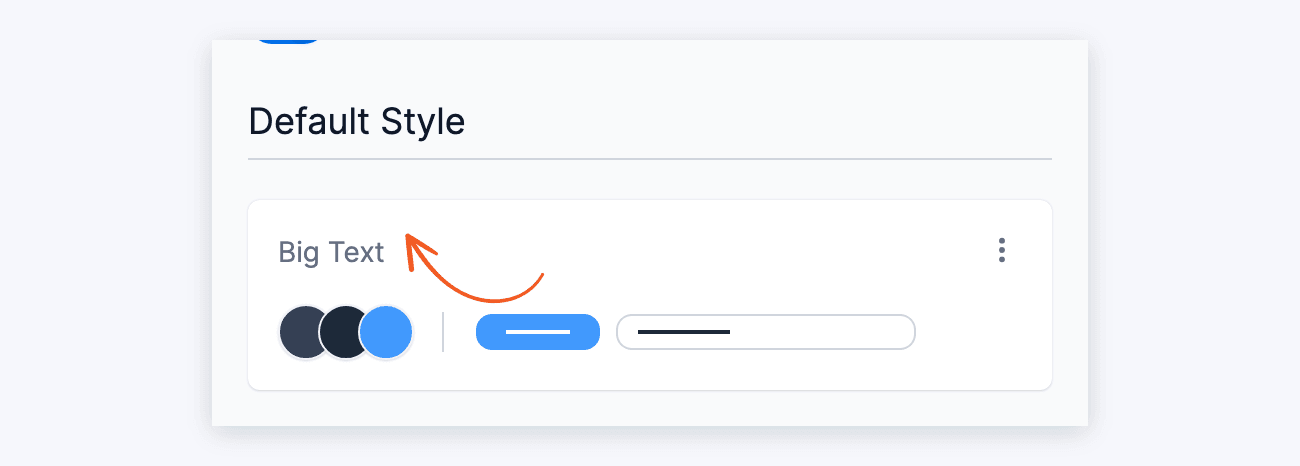
- The chosen style will then become the new default style.
Rename a style
Change the name of a style template.
- Select your form, and click the Style tab.
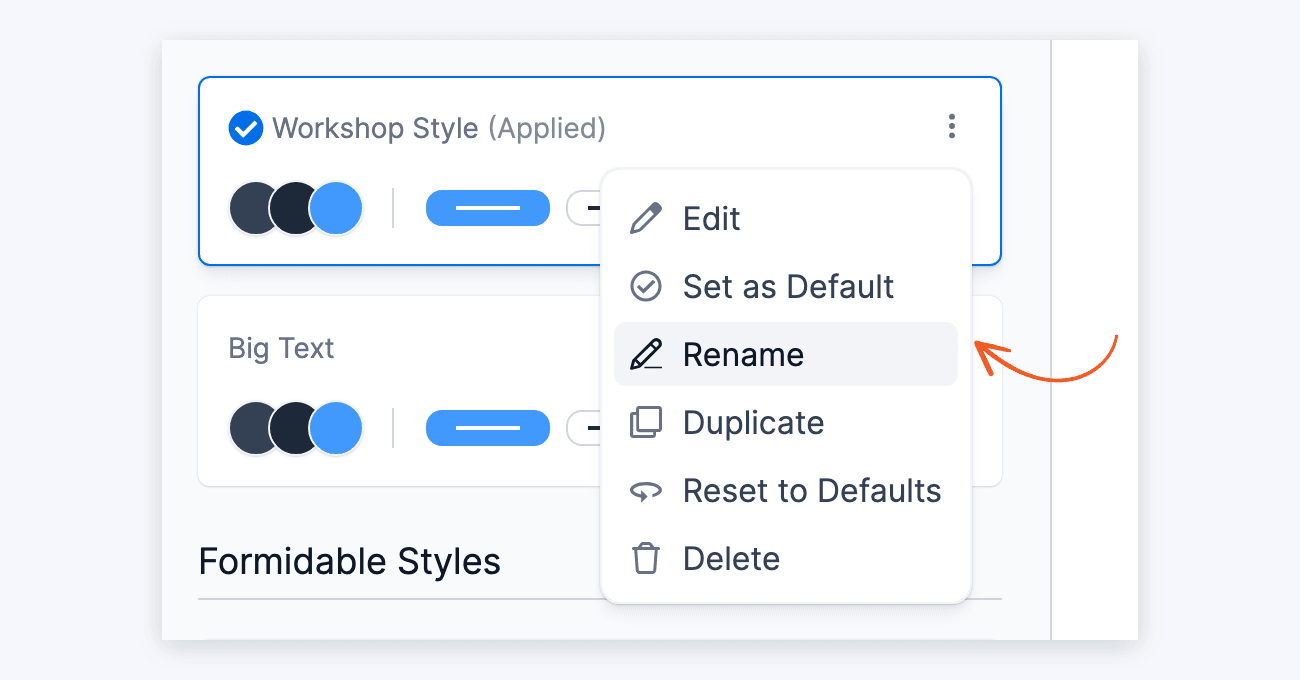
- Choose a style template. Click the menu icon and select Rename.
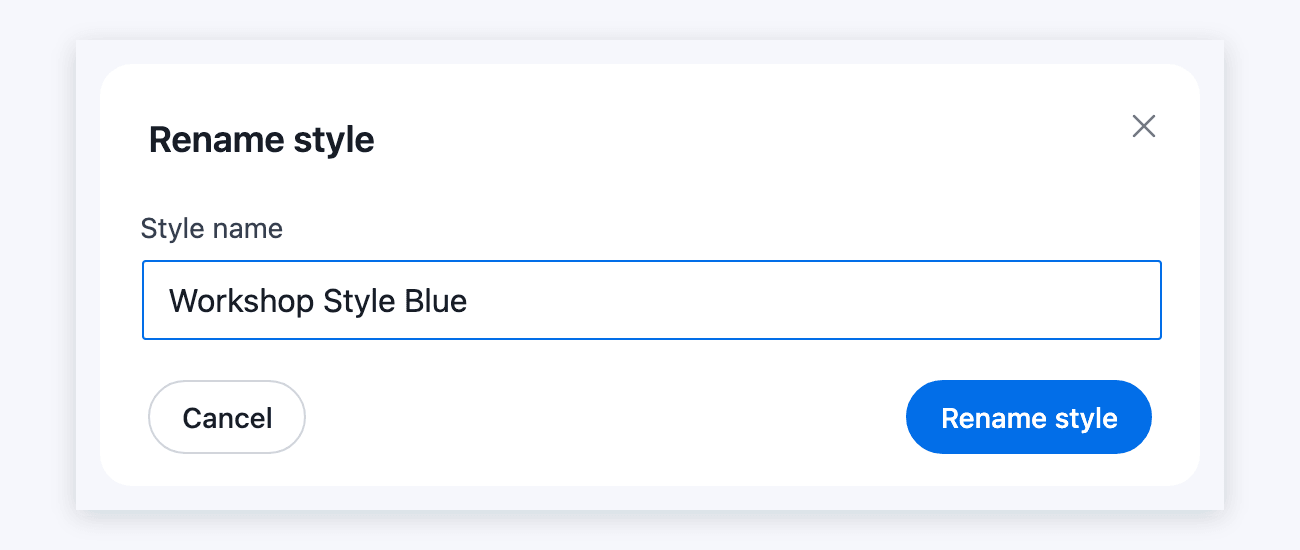
- Add a new style name. Click the Rename style button.
- The style template immediately updates to reflect the name change.
Rename the style class
Each style adds a CSS class to the forms that use it, such as .frm_style_formidable-style. You can rename the part after .frm_style_ to something that's easier to recognize in your CSS.
- Open the style in the Form Styler, as described in Edit a style.
- At the bottom of the Quick Settings, click in the Style Class box. The
.frm_style_prefix is fixed, so type only the new name after it. - Click Update to save your changes.
Formidable saves the new name in lowercase, with hyphens in place of spaces. If another style already uses that class, it adds a number to the end, such as -2. The new class replaces the old one on every form that uses this style. CSS you added in the style's Custom CSS area moves to the new class automatically.
Duplicate a style
Make a copy of a style template.
- Select your form, and click the Style tab.
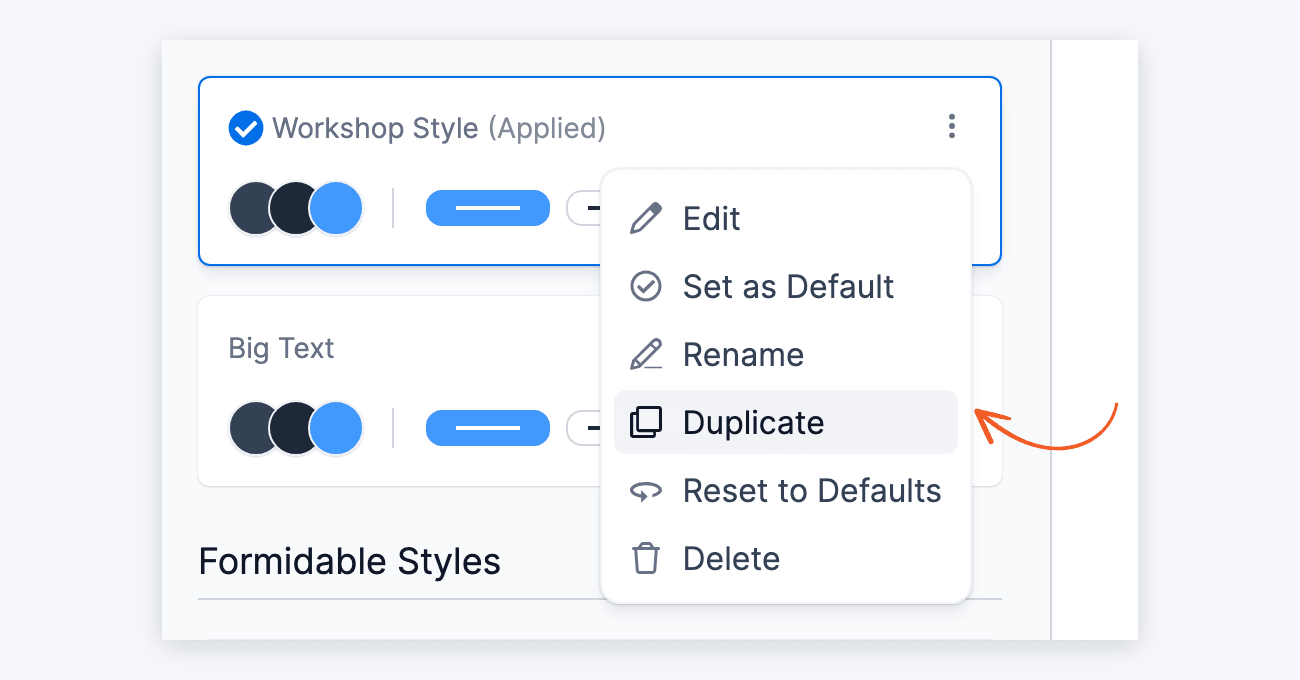
- Choose a style template. Click the menu icon and select Duplicate.
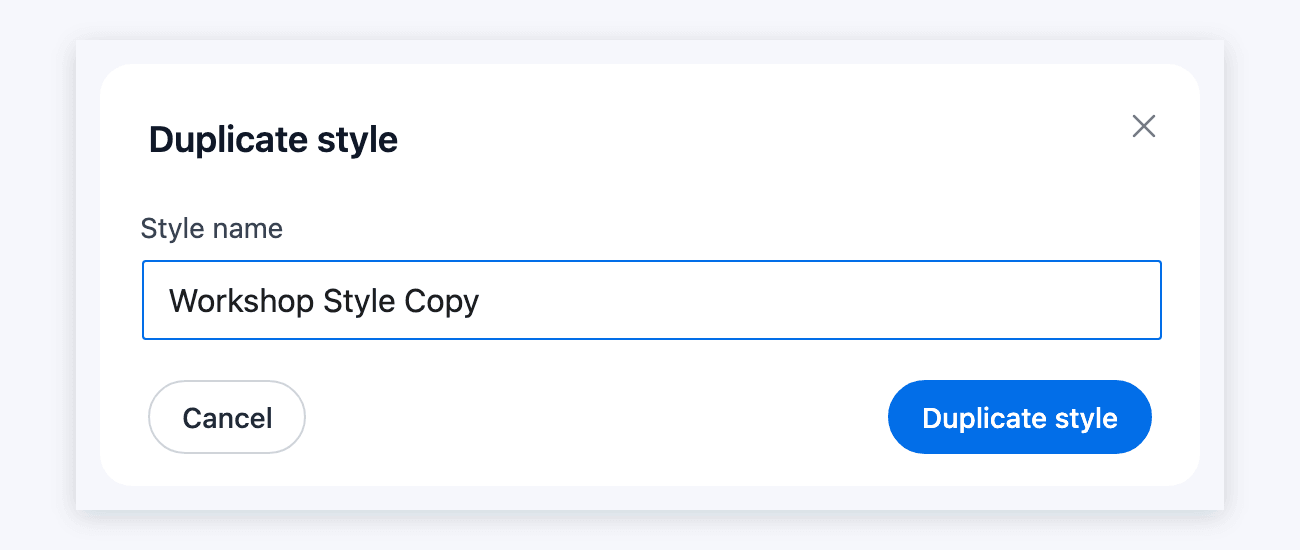
- The Style name box starts with the original style's name. Replace it with a new style name. Click the Duplicate style button.
- You will be taken to the Form Styler, where you can edit the template you have duplicated.
- Click Update to create the copy. It isn't saved until you click Update or Show advanced settings.
Reset a style
Reset a style template to its default settings.
- Select your form, and click the Style tab.
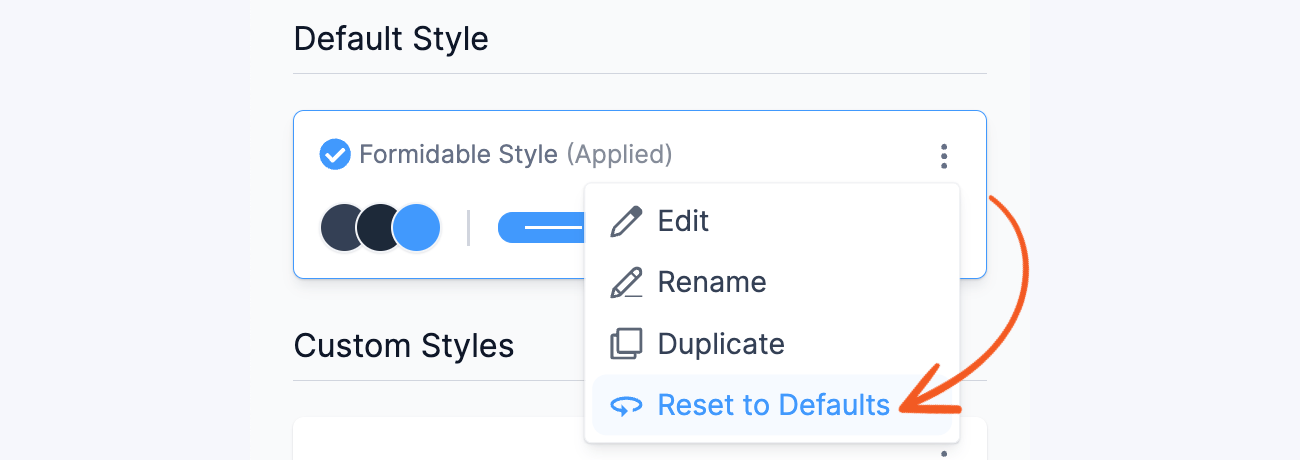
- Choose a style template. Click the menu icon and select Reset to Defaults.
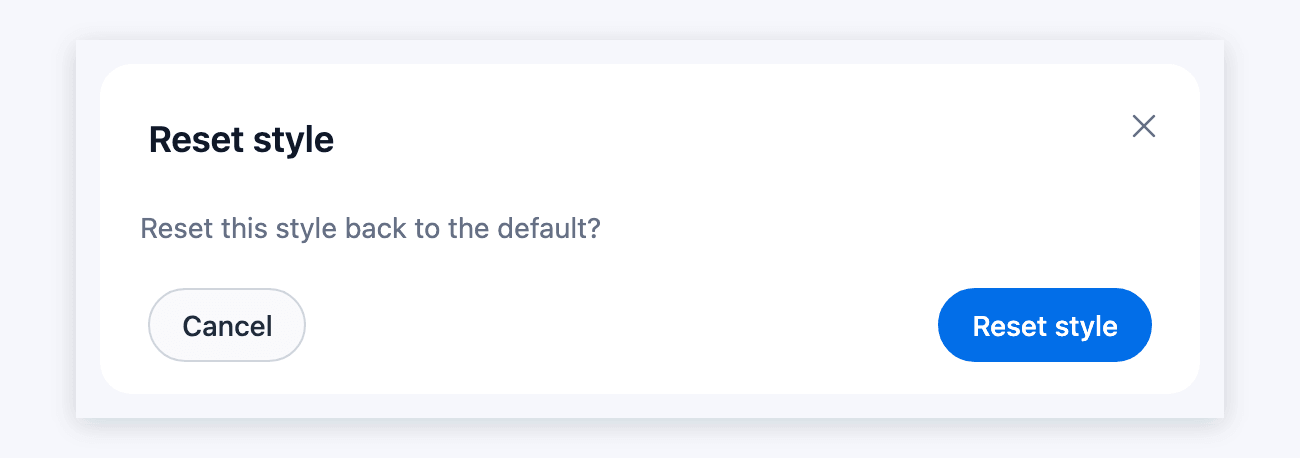
- Click the Reset style button to reset the style to its default configuration.
- The style template immediately updates to reflect the changes.
Delete a style
Only styles that have not been specified as default styles can be deleted.
- Select your form, and click the Style tab.
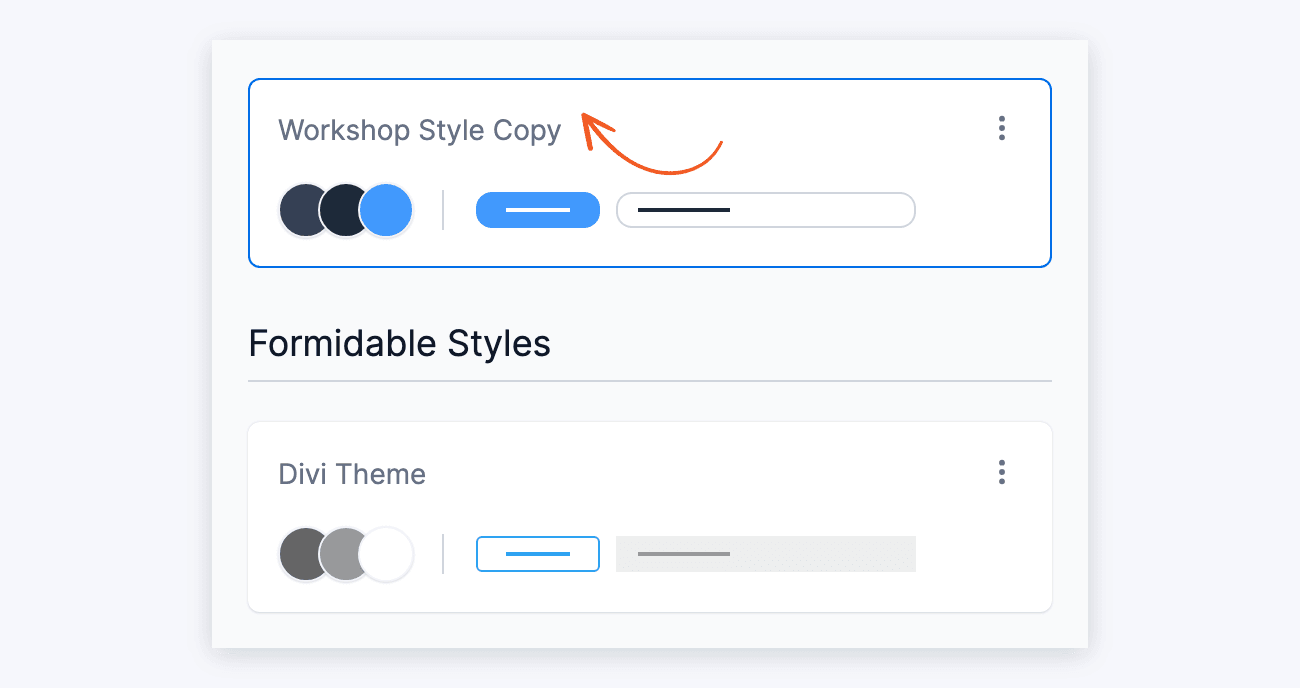
- Select the style template from the Custom Styles section that you want to delete.
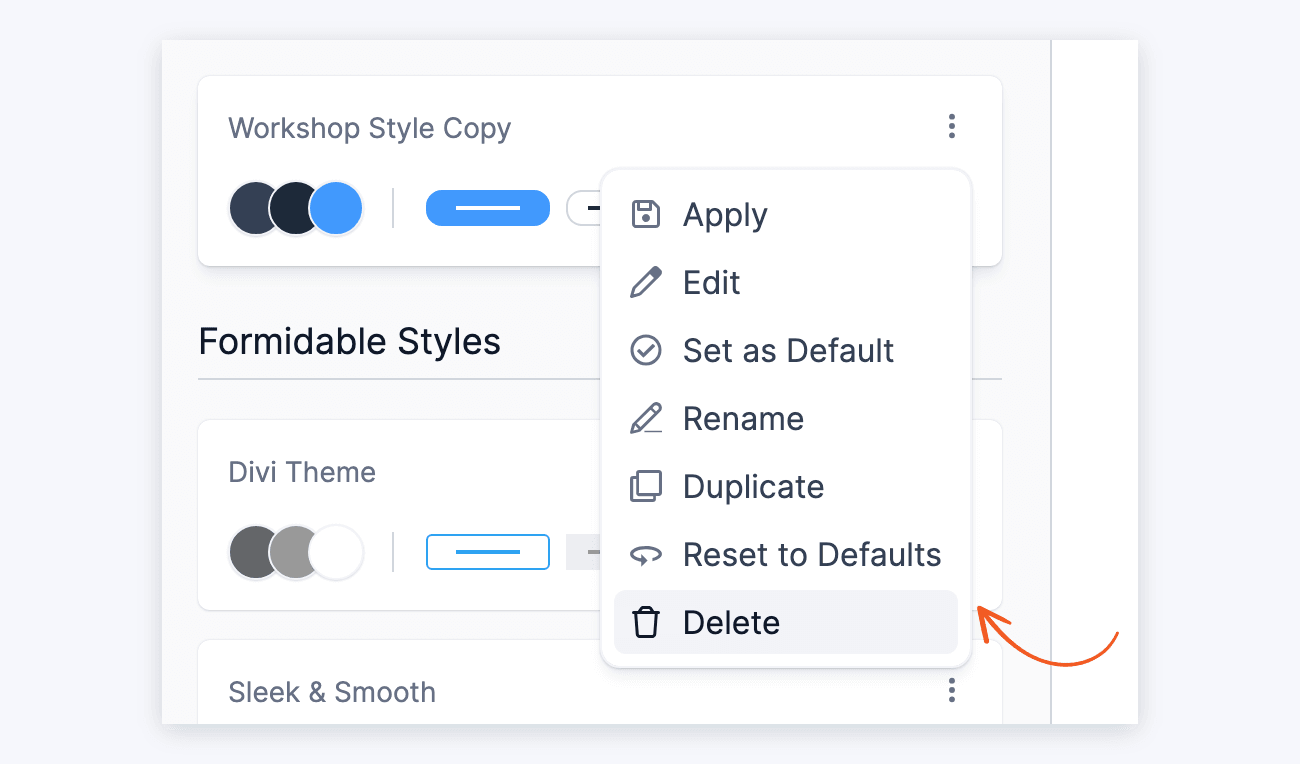
- Click the menu icon and select Delete.
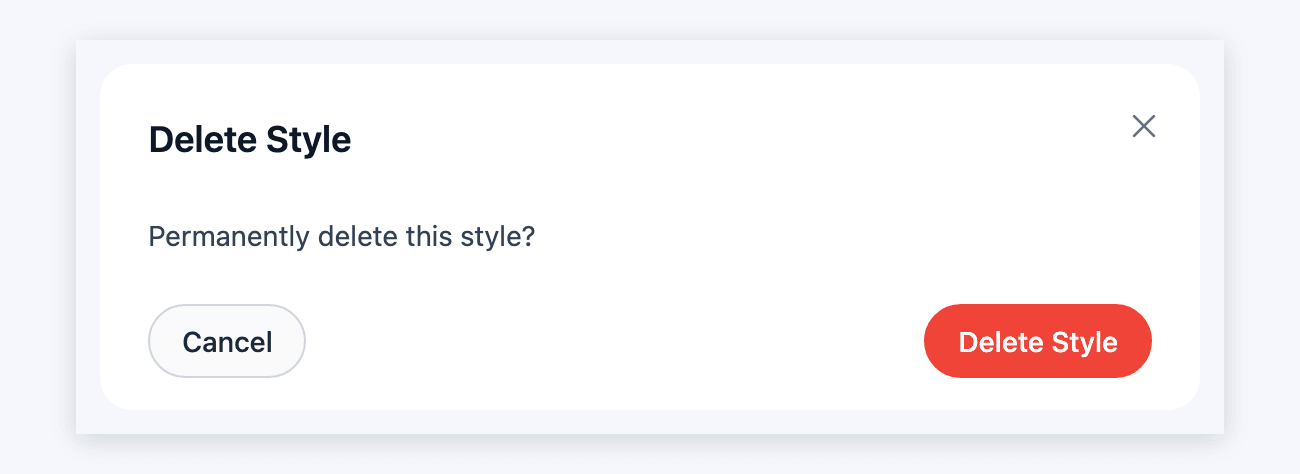
- Click Delete Style to confirm.
Manage styles
Each form can use a different style template.
- Choose a form and click the Style tab.
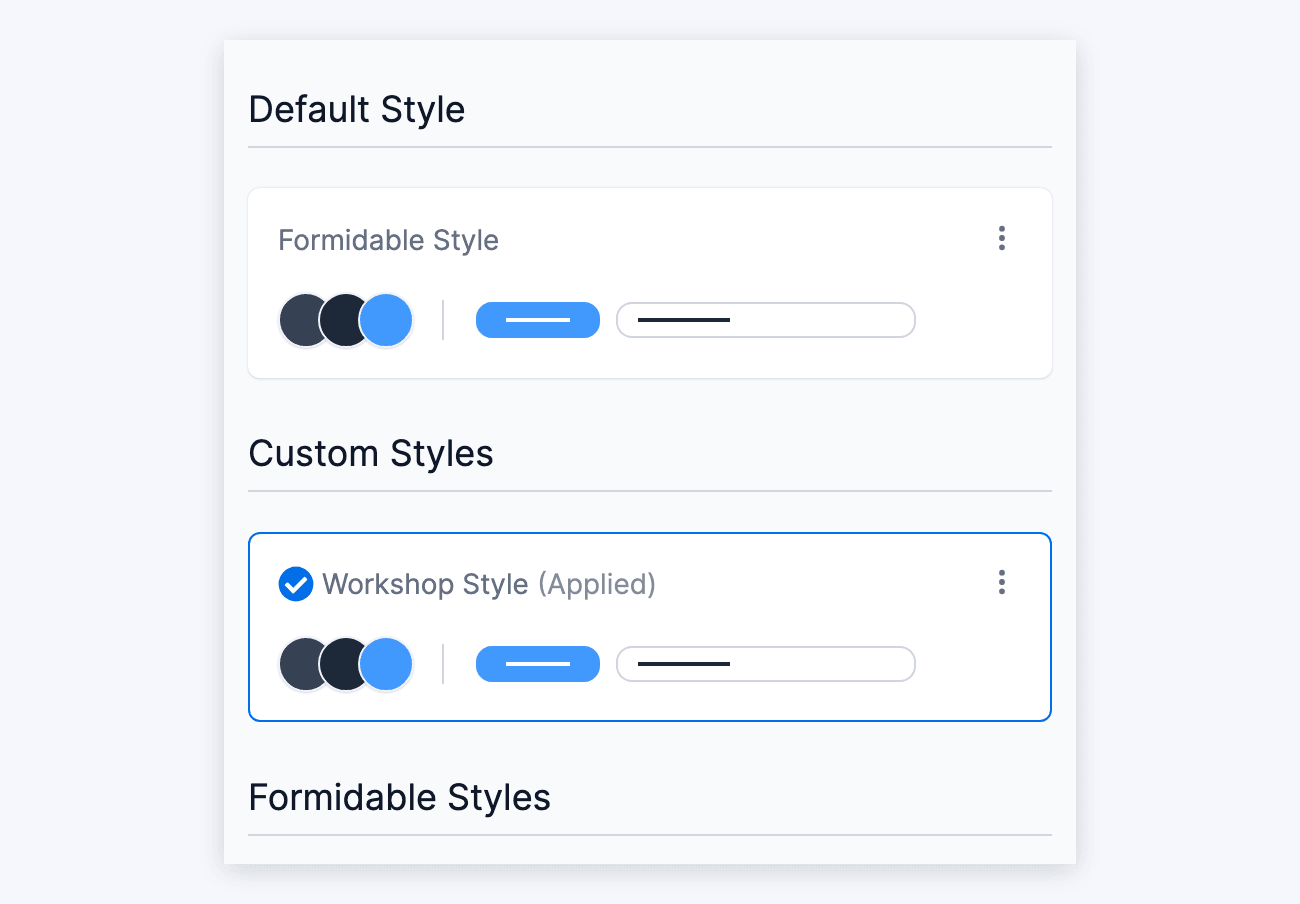
- In the left sidebar, you will see these sections:
- Default Style: The style template you have selected as default.
- Custom Styles: All the custom style templates you have created.
- Formidable Styles: All the Formidable style templates you can access.
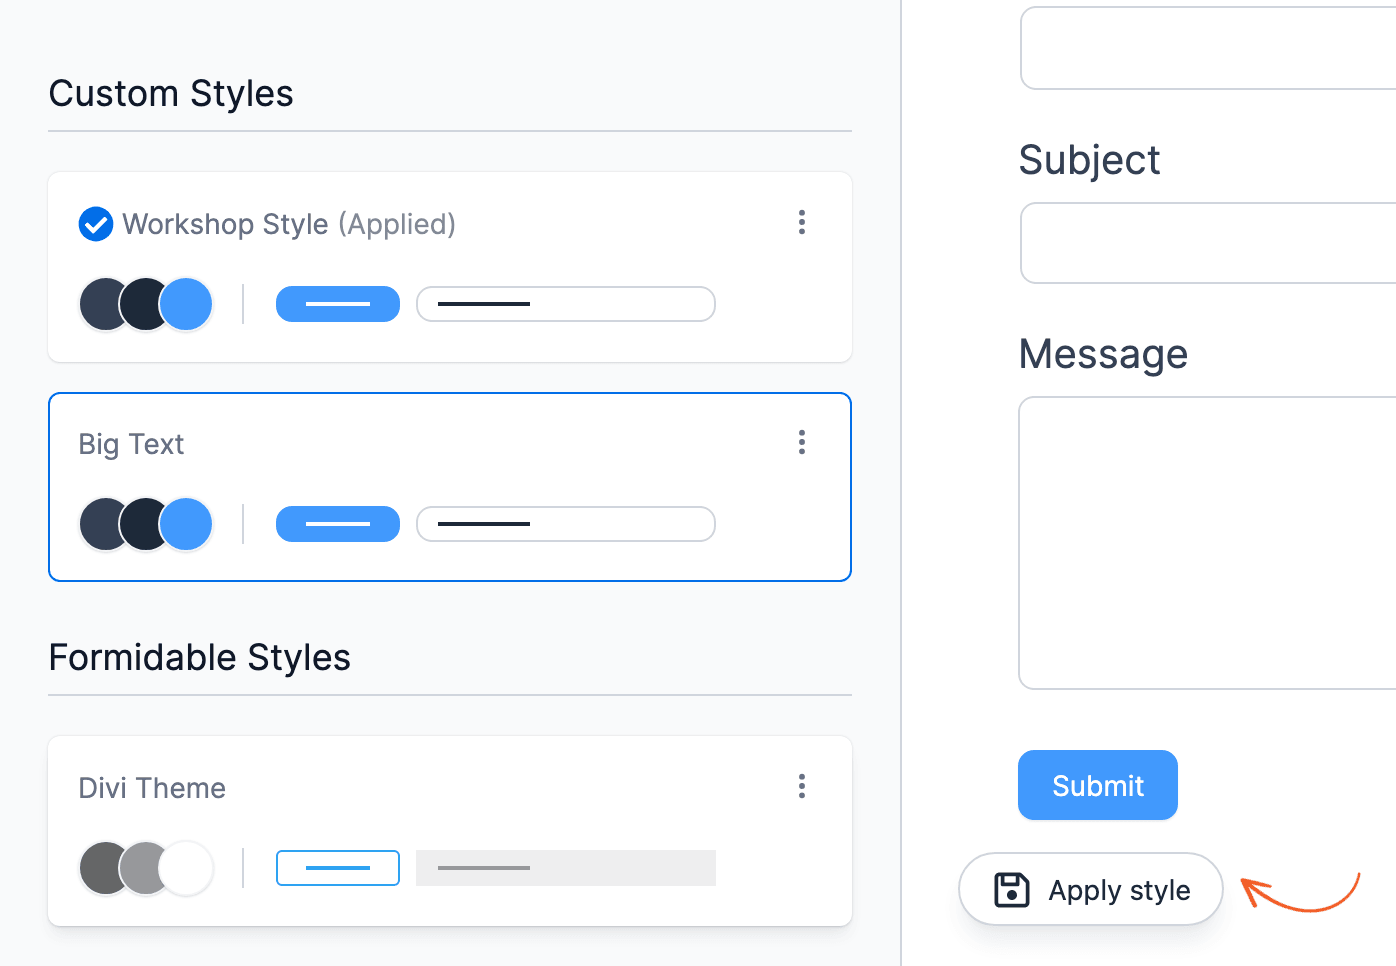
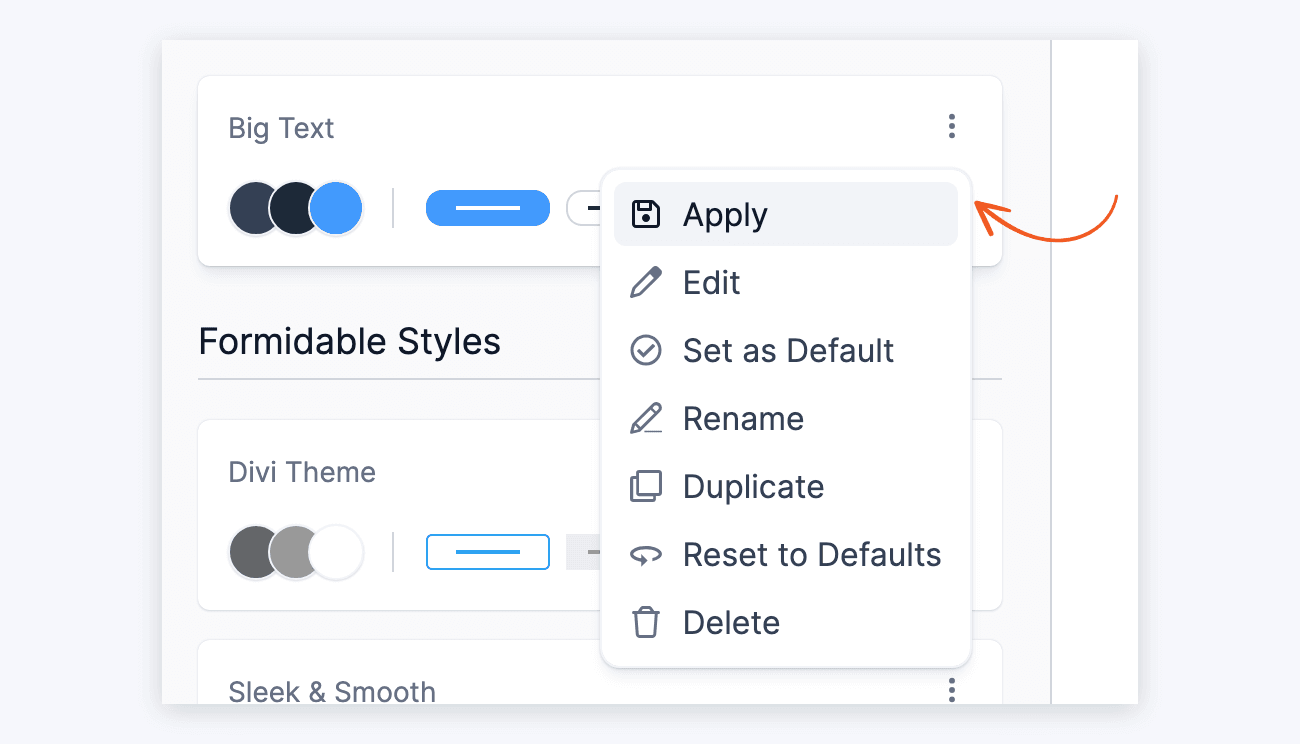
- Select a style template and click the Apply style button. For a template in Formidable Styles, the button says Install and apply style.
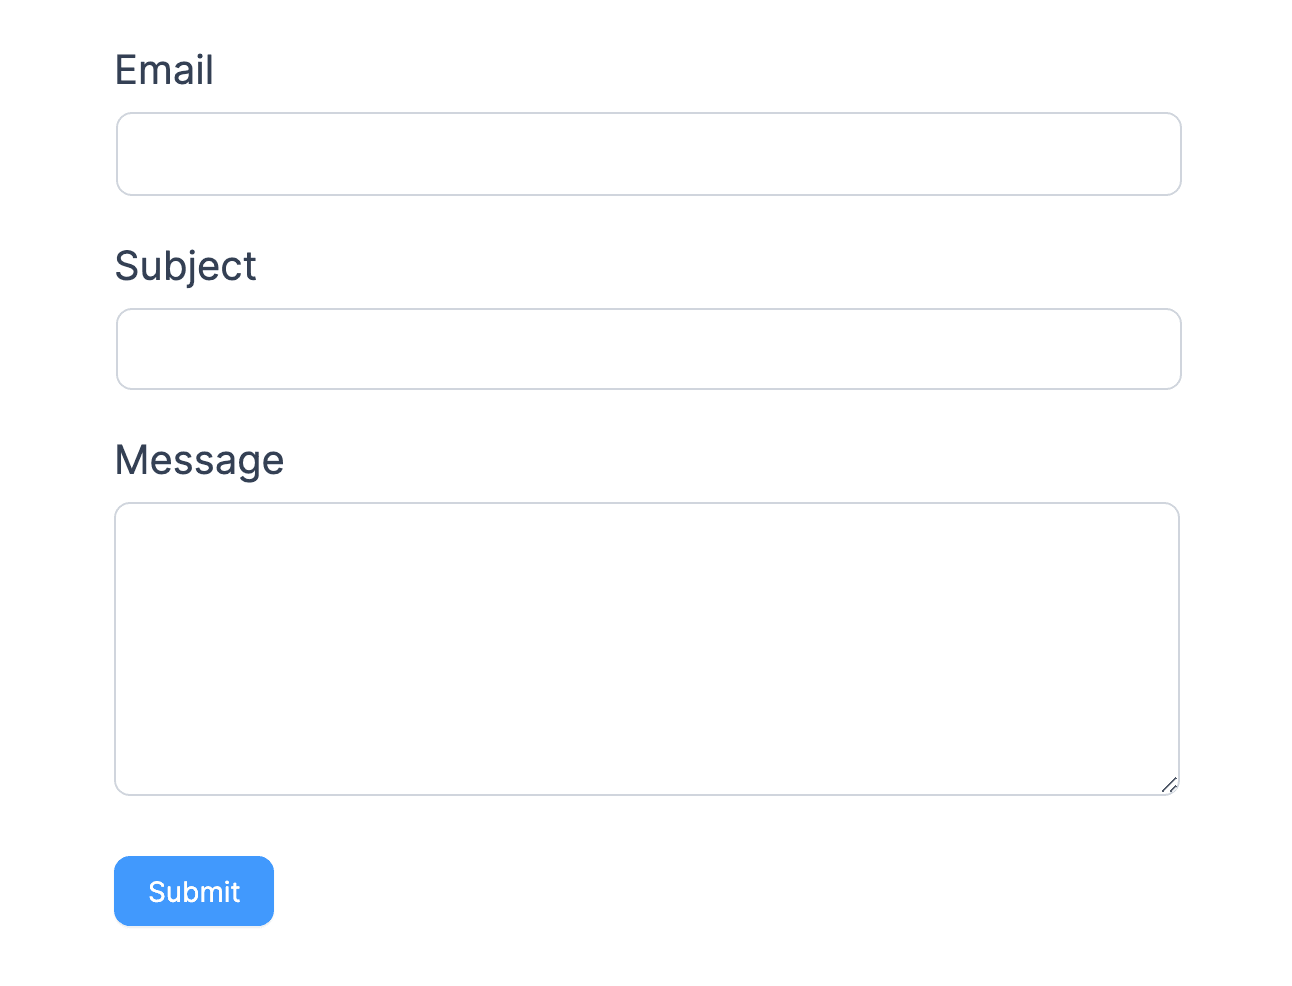
The preview shows your form in the selected style.
Or by clicking the menu icon and selecting Apply. - That's it! On the right side of the styler, a preview of your form is created automatically using the selected style template.
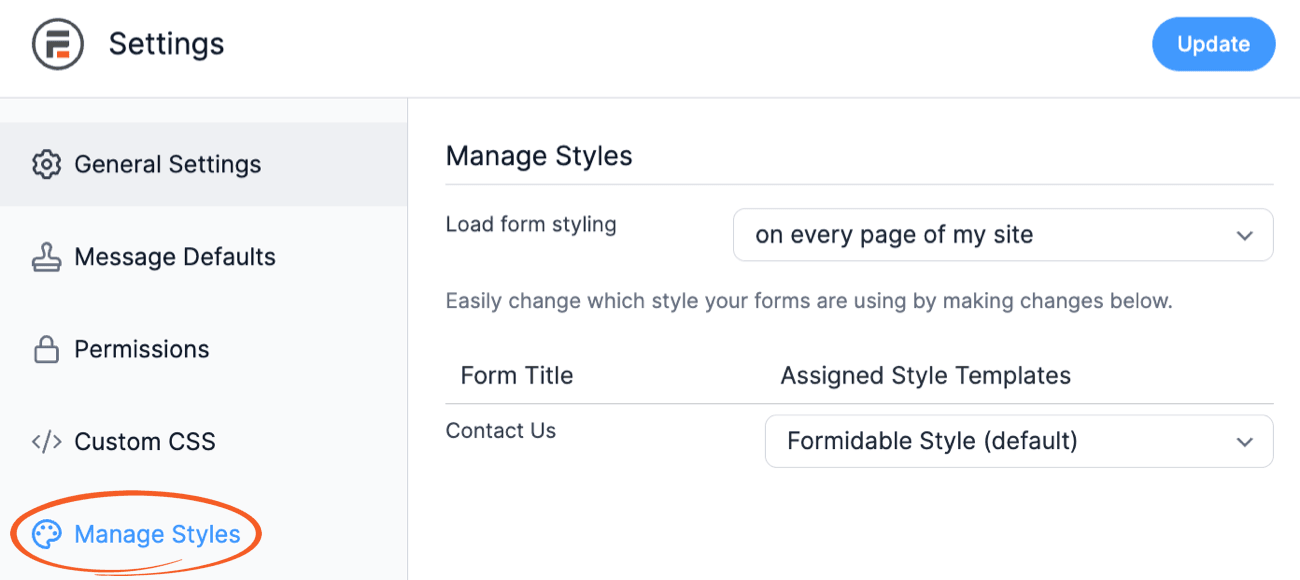
- If you need to manage the style templates for all your forms, go to Formidable → Global Settings → Manage Styles and choose the styling you want to apply for each form.
Override theme styling
If you find that your theme is influencing the look of your forms, you can instruct Formidable Forms to override your theme's styling.
- Select your form, and click the Style tab.
- Click Edit style at the bottom of the preview. It opens the style applied to the form.
To edit another style, click the menu icon on that style and select Edit. - Click Show advanced settings and open the General section. Then turn on Override Theme. Doing this will add !important to many of the lines in the Formidable Forms CSS stylesheet to prioritize your form's styling over your theme's styling.
- Click the Update button to save your settings.

Preview a style
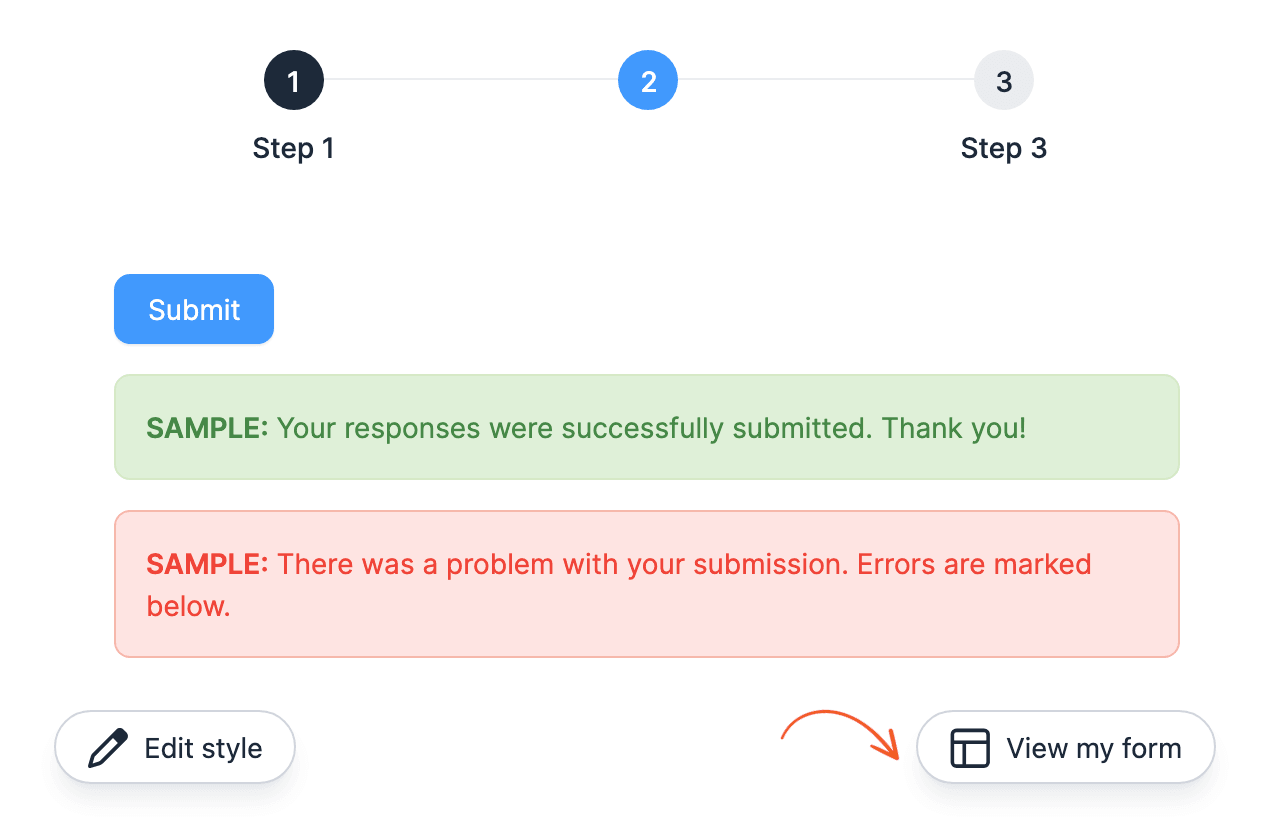
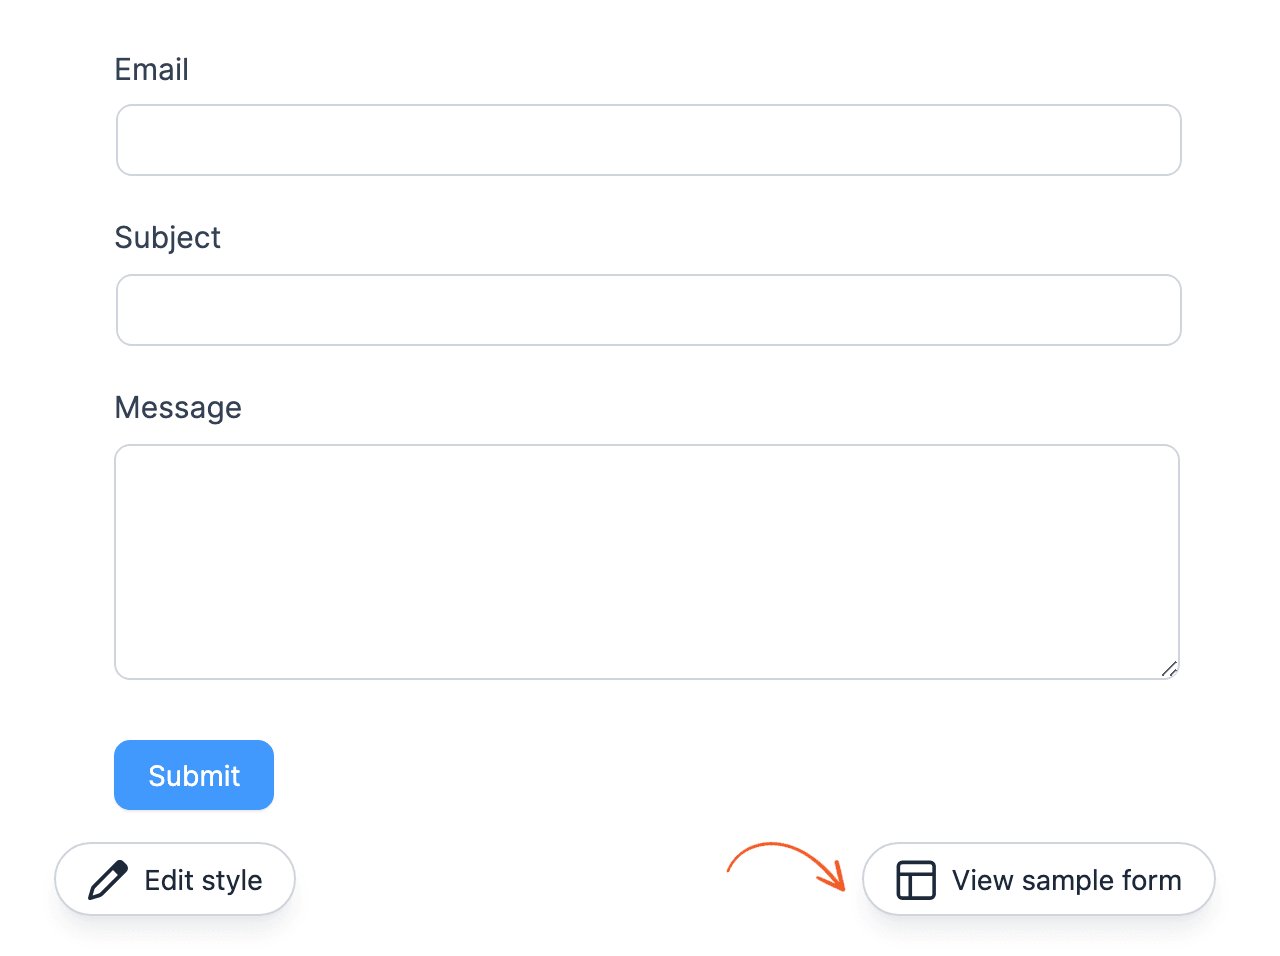
You can preview how a style will appear on a form with the following options:
- View my form: Click this button to preview the style template on your current form.
- View sample form: Click this button to preview the style template on a sample form.
Styling options
Checkbox and Radio fields Style
Add custom styling to the checkbox and radio button fields of your form by selecting a custom text size, weight, and color for both field types.
Use the Check Box (1) and Radio (2) dropdowns to set how options are arranged in the checkbox and radio fields that use this style:
- One Column stacks each option on its own line (default).
- Two Columns, Three Columns, or Four Columns arranges the options into that many columns.
- Inline Options puts all options on a single line.
The Two Columns, Three Columns, and Four Columns layouts are a premium feature.
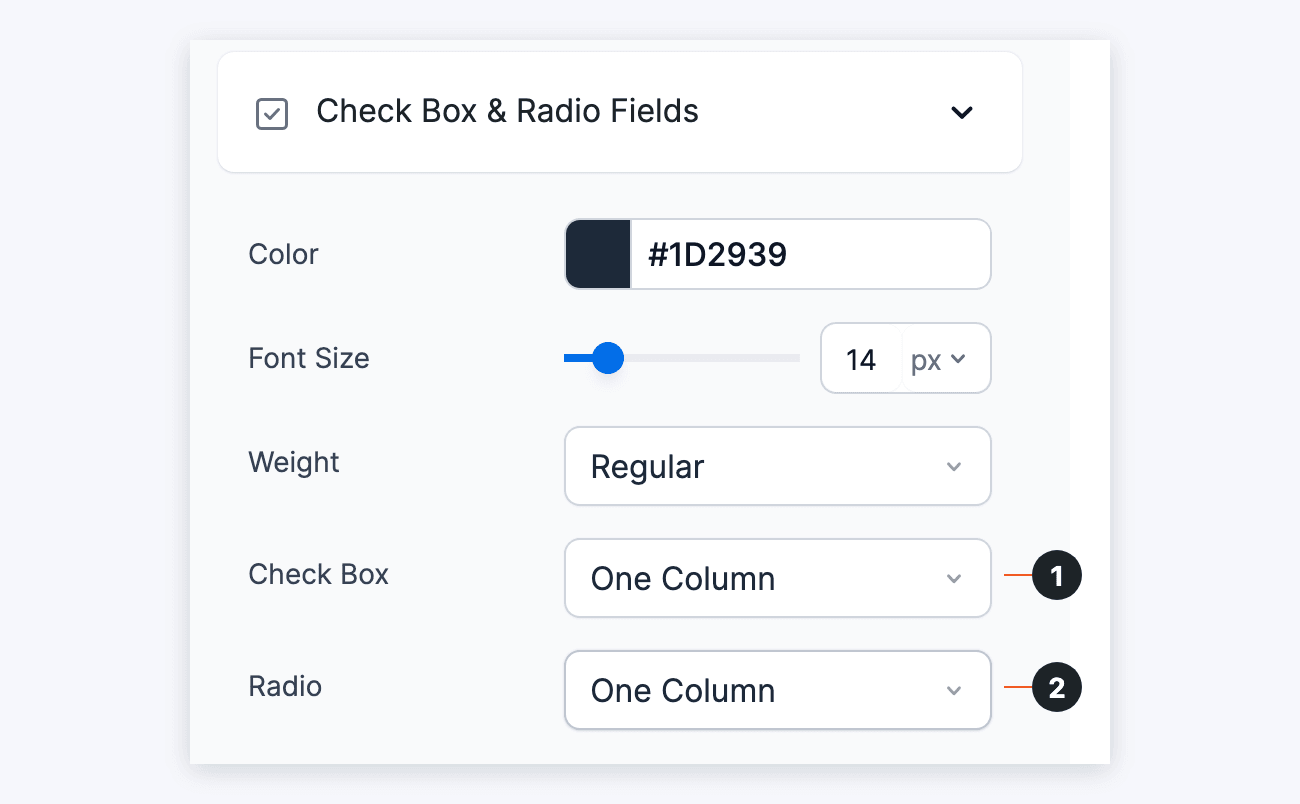
This layout applies to any checkbox or radio field whose Option Layout is set to Use Style, which is the default. You'll find Option Layout in the field's advanced options. A field set to another layout keeps its own layout.
Learn more about how to set the option layout of a field.
Button Style
By default, the button color is set to blue. This styling is applied to all buttons used on the site including multi-paged form buttons (Next and Previous), Repeater buttons (Remove and Add), and Submit button.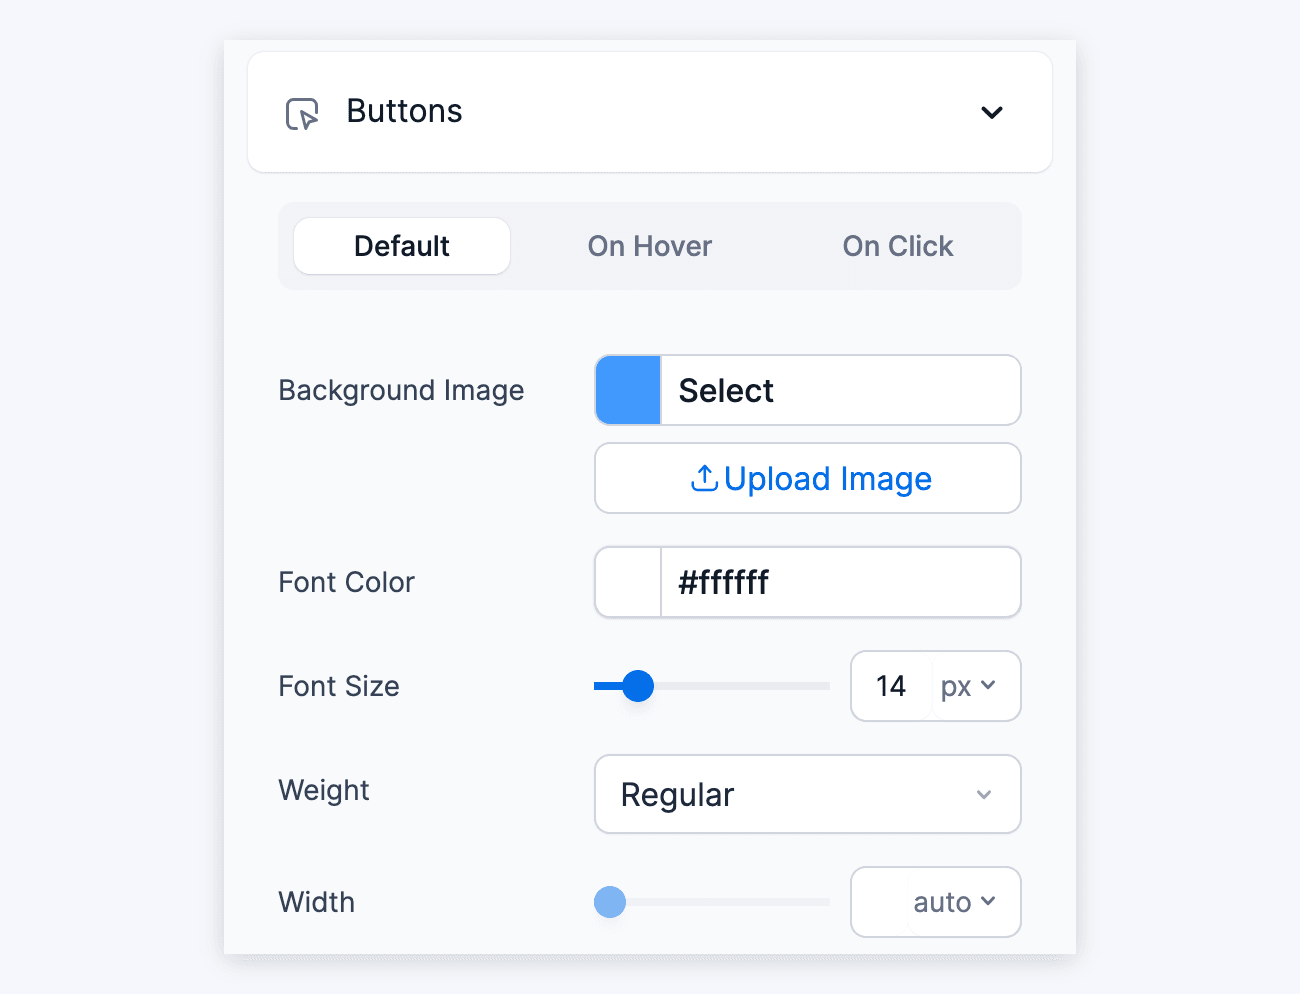
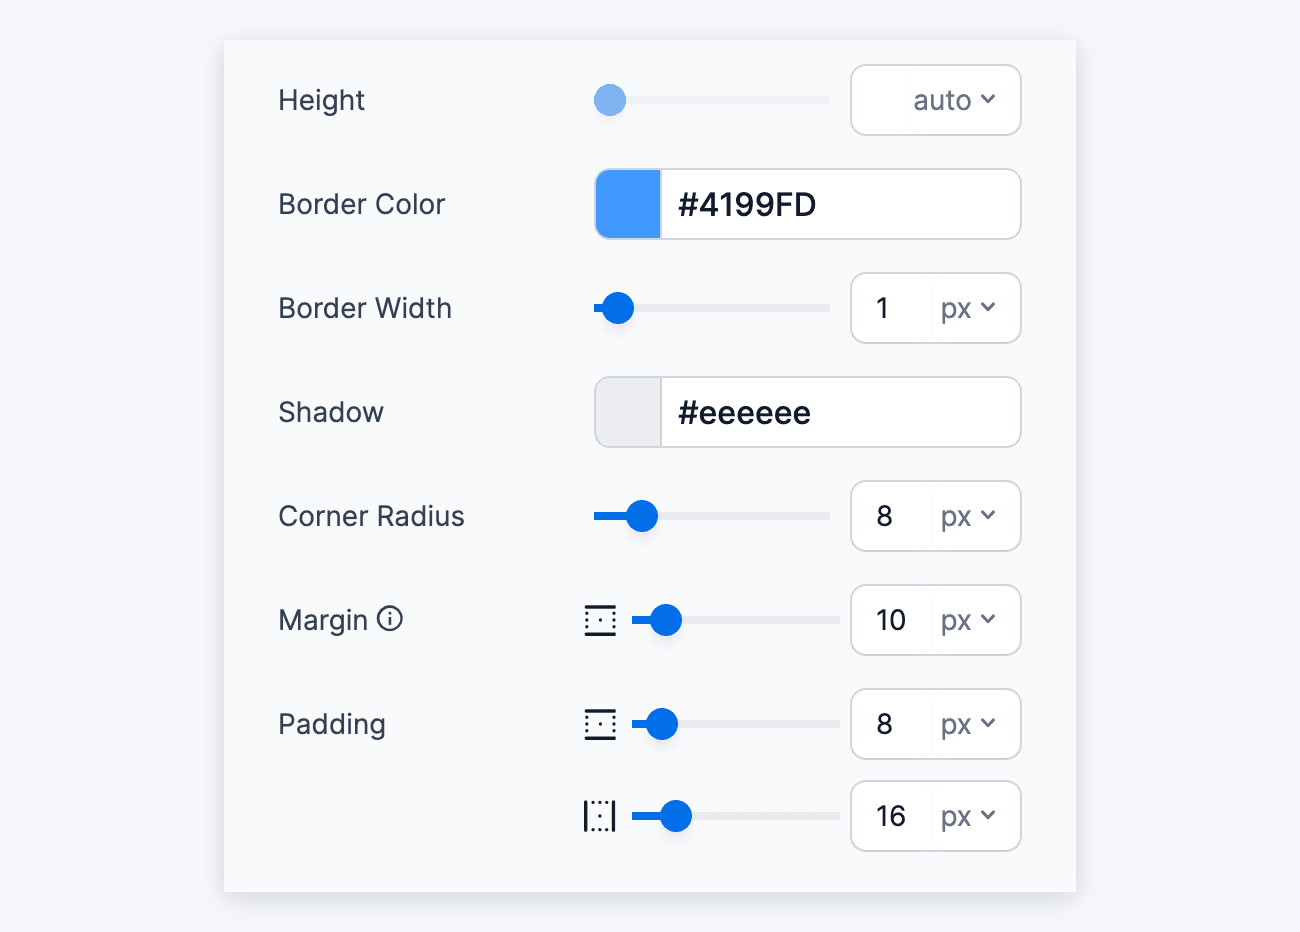
- Disable submit button styling: If disabled, you may not see the change take effect until you make 2 more styling changes or click the Update button.
- On Hover and On Click: These tabs have the same styling options. Define the background color, border, and text color.

The padding box is a shorthand property that can contain up to four values for top, right, bottom, and left.
Examples
Center a form on the page
To center your form on the page where it is displayed, open the style in the Form Styler, as described in Edit a style. Then click Show advanced settings and open General. Centering only works when the form is narrower than the page, so set Form Width (1) to 80% or lower. Then turn on Center Form (2) and click Update.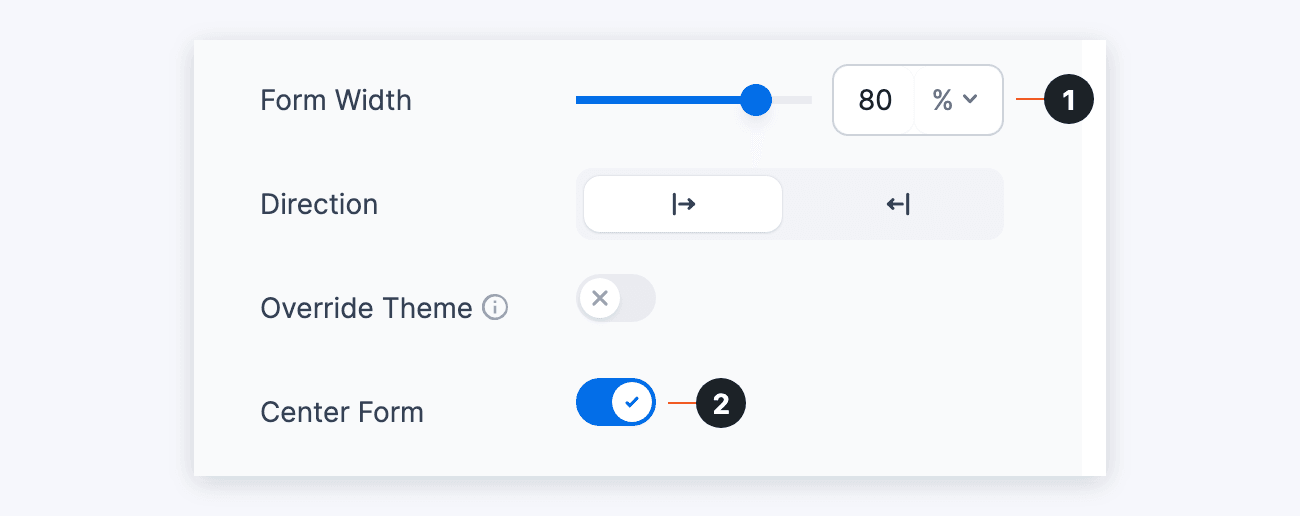
Only show bottom border in field
To remove the field borders and only show the bottom border:
- Open the style you want to change in the Form Styler, as described in Edit a style.
- In the Quick Settings, select the Underline icon as the Field Shape. It's the last icon. The fields then show only a bottom border, with square corners and no box shadow.
- To make the line thicker, click Show advanced settings and open Field Colors. Then change the Border Width, for example to 2px. With the Underline shape, this width is used for the bottom border only. The Error tab has its own Border Width.
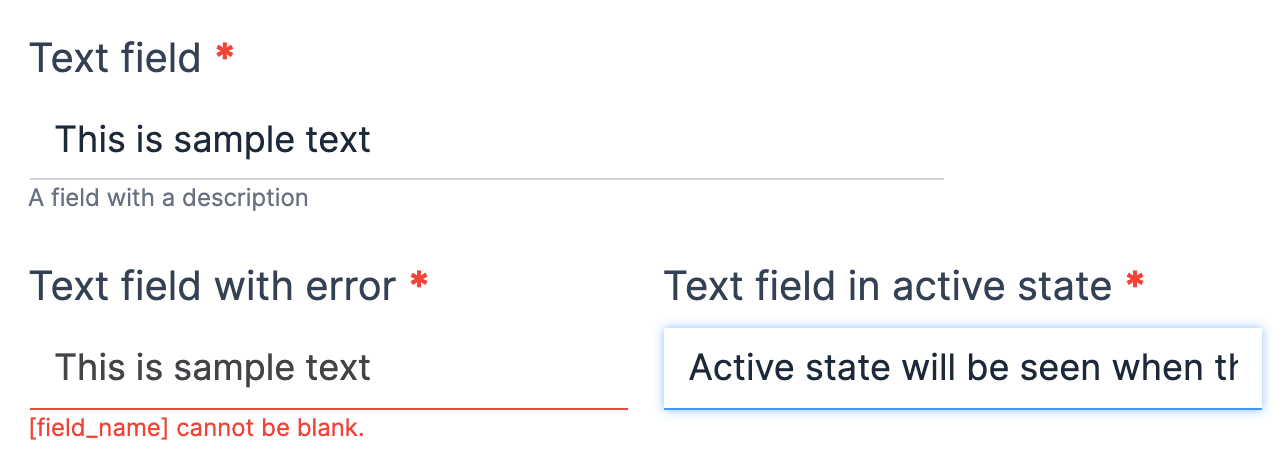
- Click the Update button, and your fields now look like this. A field with an error shows its line in the error color. A field you're typing in still shows the glow set in the Field Colors Active tab.
Styling placeholder text
To change the color of the placeholder text inside a field, open the style in the Form Styler and click Show advanced settings. Open Field Colors. Look for the Read Only tab and select the color you want from the Field Text selector. This color is also used for the text in read-only fields. Note: This will not work if you are styling a Dropdown placeholder text.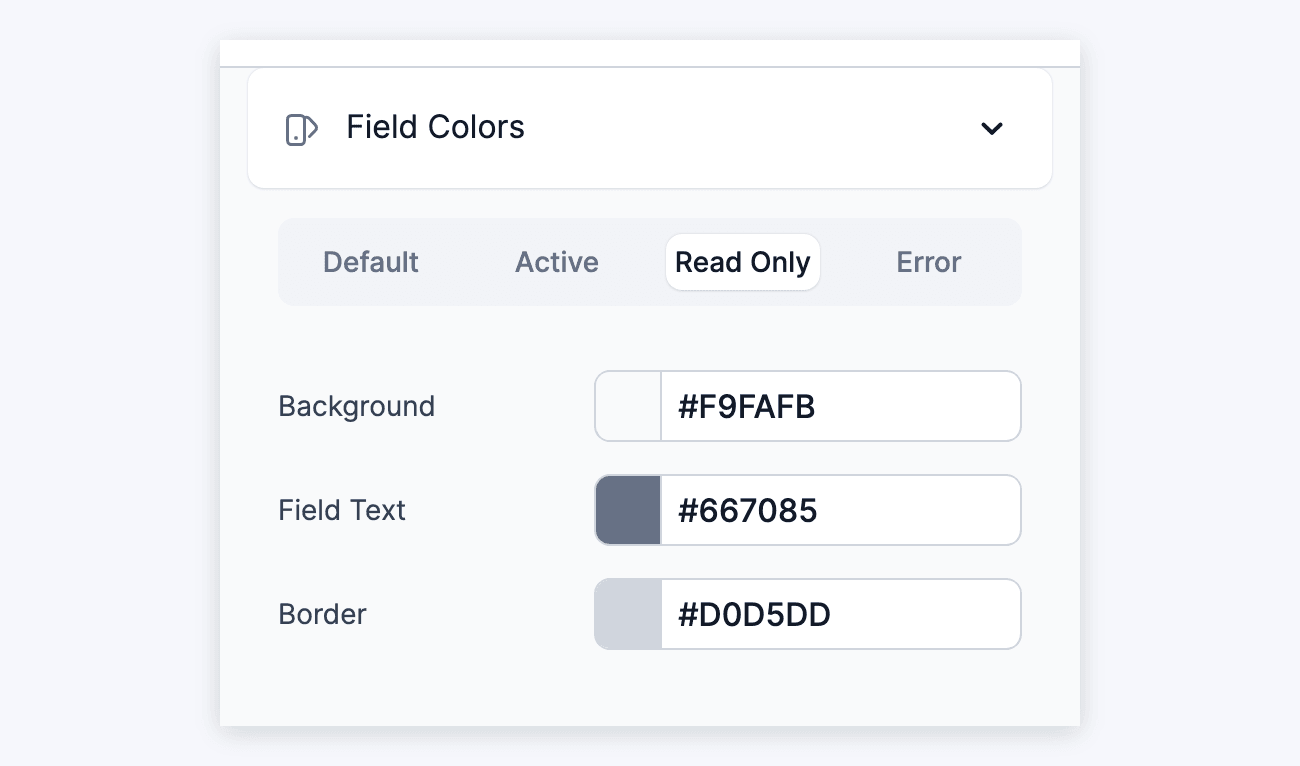

Set transparent colors
Need a transparent background on your form? Most of the color options in the styling settings will use 'transparent' for the color when left blank. Select the setting, remove the current color value, and save the style.
Set font family
To change the font used in your forms, open the style in the Form Styler and click Show advanced settings. In General, find the Font Family setting. Insert a single font or a series of comma-separated fallback font options in double quotes.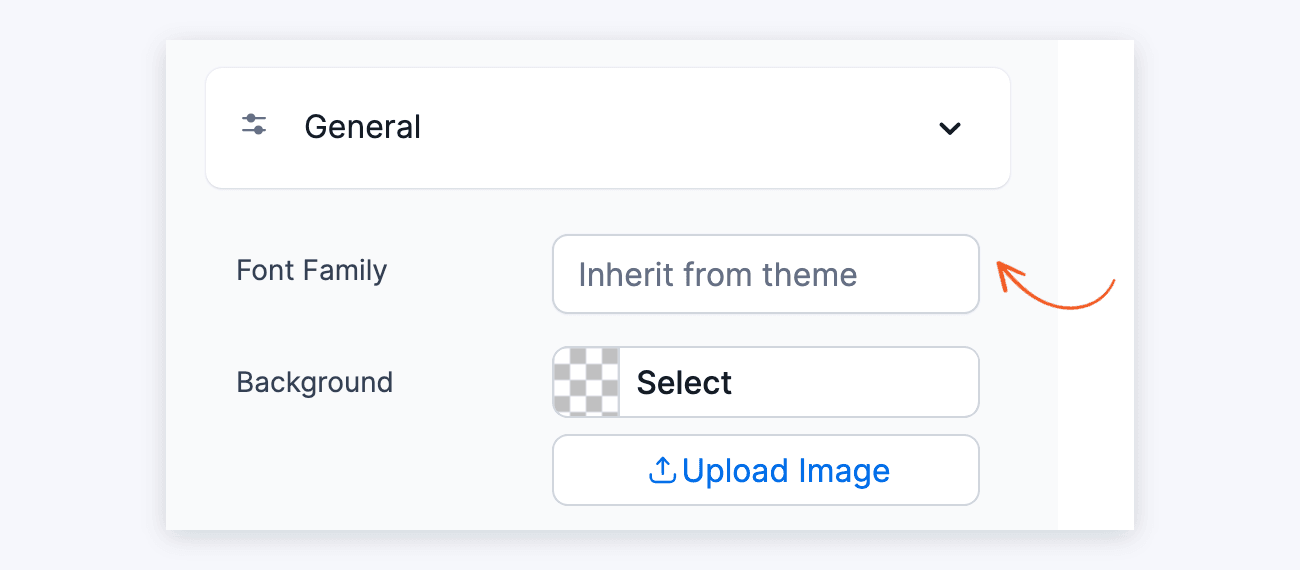
To let your theme set the fonts, clear out this setting. If it is blank, this setting will be ignored.
To use a Google font, add it here the same way as if you were adding it in CSS. You will need to load the font in your theme. Once you use the font and test it on your site, the same CSS will work for your forms too.
Note: If a font is two words, be sure to use quotes around it.
Add side margins on buttons
The Margin setting in the Buttons section takes one value, and it adds that space above and below the buttons only.
To add space on the left and right of the buttons too, add this CSS to the style's Custom CSS area. Change 10px to the space you want, and click Update to save your changes.
.frm_submit button {
  margin-left: 10px !important;
  margin-right: 10px !important;
}
Enable RTL Support

To turn on RTL support for your form:
- Open the style your form uses in the Form Styler, as described in Edit a style. Then click Show advanced settings.
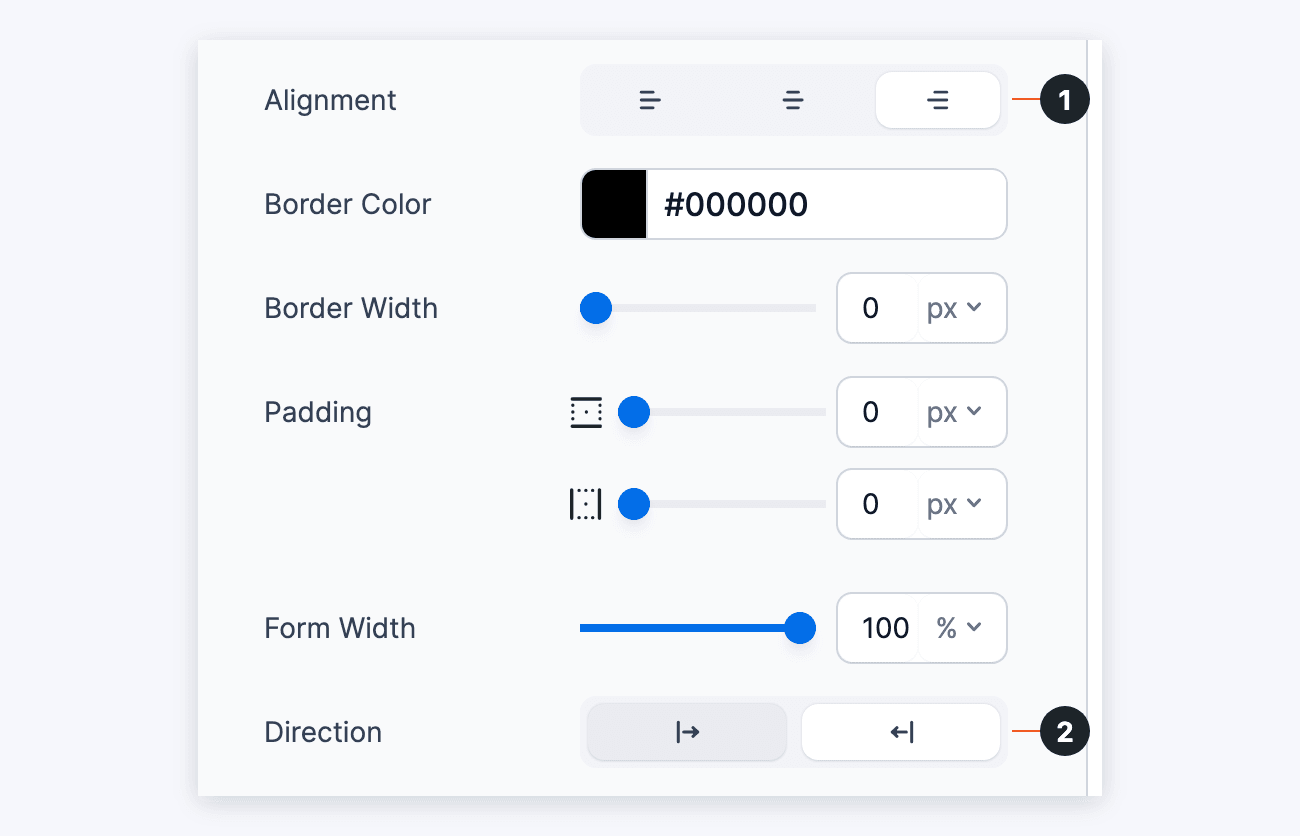
- Go to General Styles:
- In Alignment, select Right (1). It's the last icon.
- In Direction, select Right to Left (2). It's the second icon.
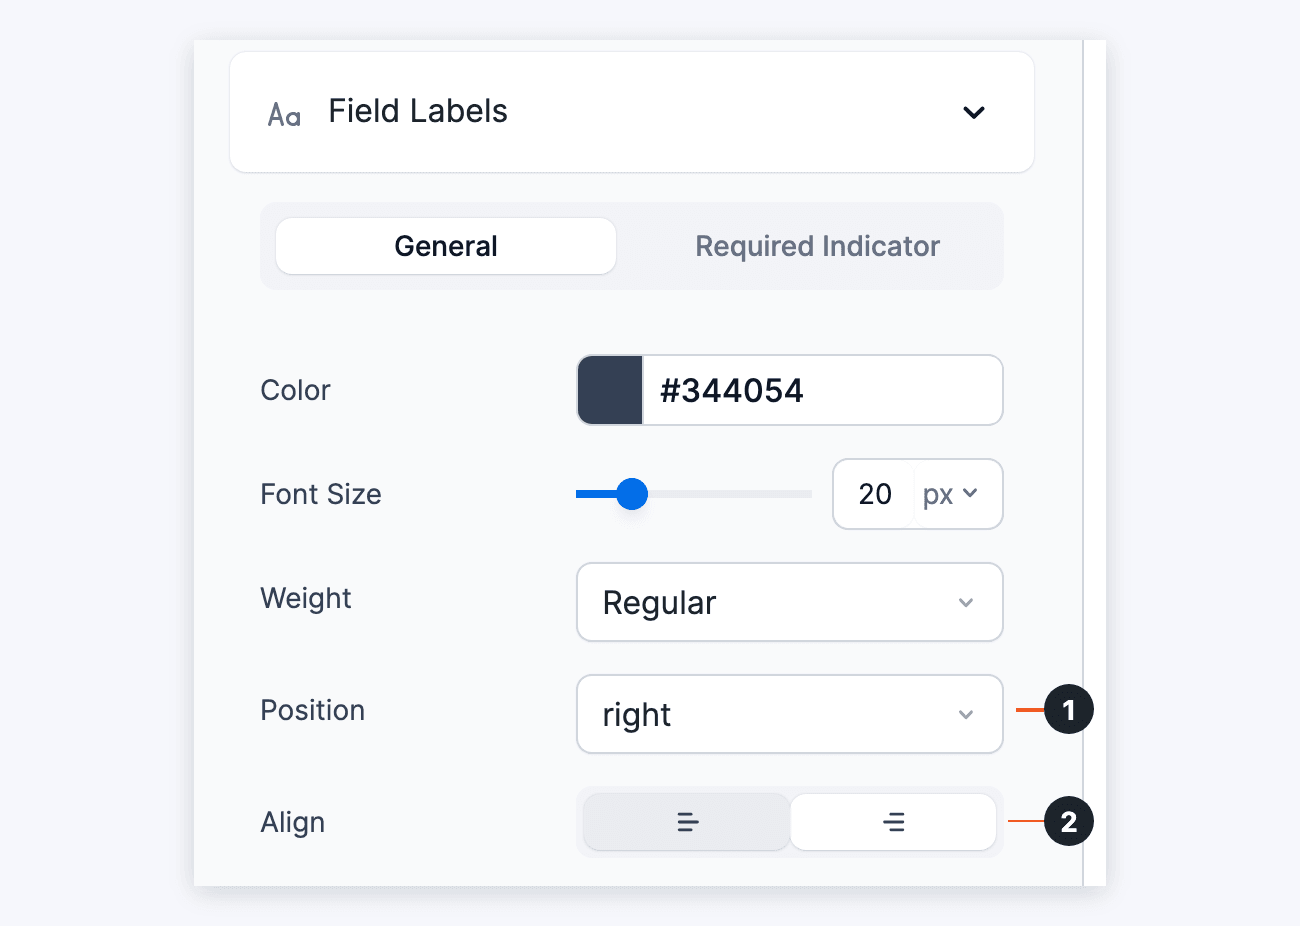
- Go to Field Labels Styles:
- In the Position dropdown, select right (1).
- In Align, select Right (2). It's the second icon.
- Click Update to save your changes.
However, keep in mind that this only enables support for your forms, not the rest of your website. Your theme also needs to have RTL support.
Add a background image
This setting is available on the Basic, Plus, Business, and Elite licenses.
Add an image as the background of your form.
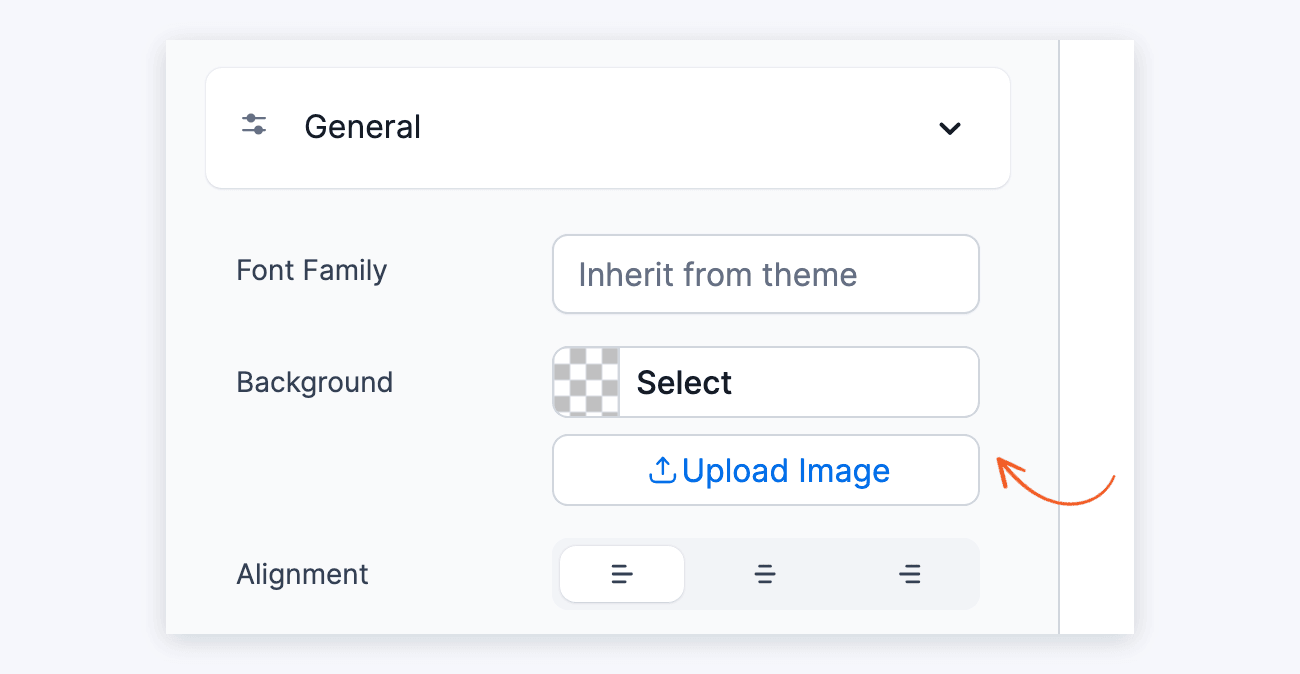
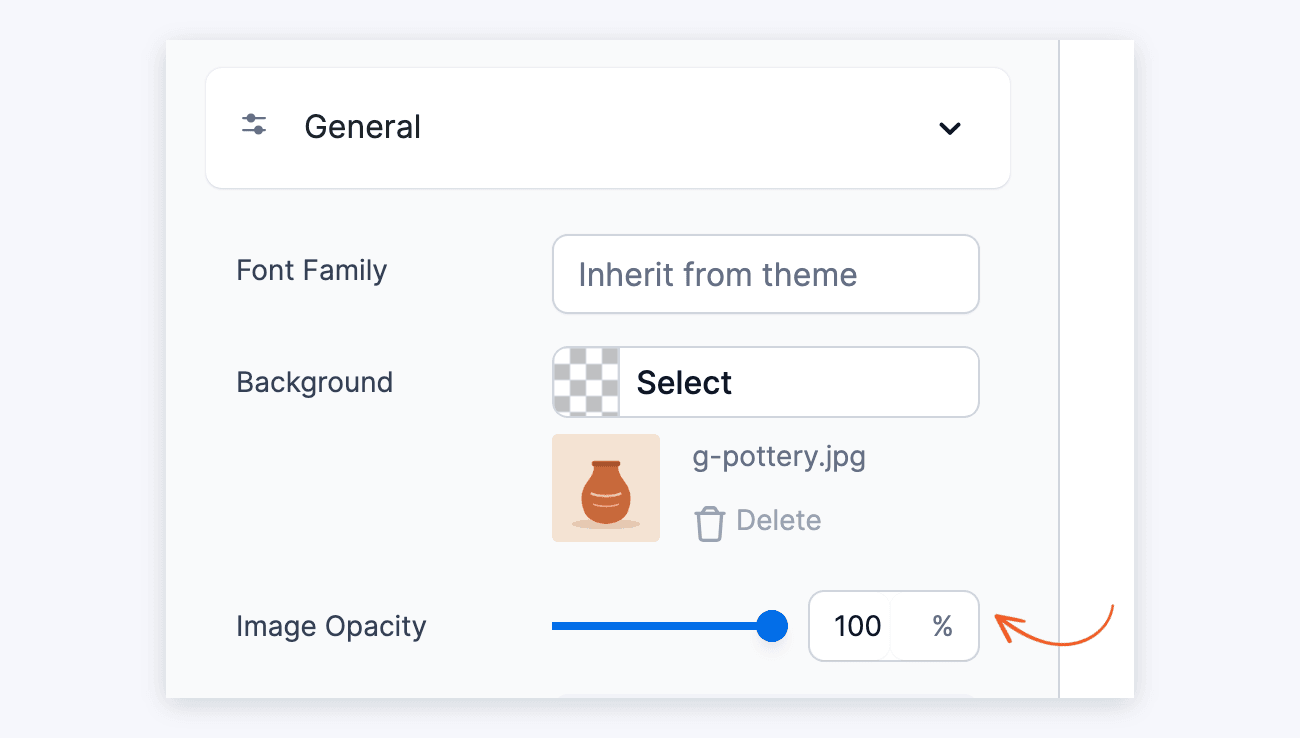
- In the General section of the advanced settings, click the Upload Image button under Background and select your preferred image.
- You can change the Image Opacity after you have uploaded an image. The background image opacity uses percent inputs such as 100% or 50%. You can also use decimal values in the range of 0 and 1 (such as 0.5 and 1), where 0 turns the background image fully transparent, and 1 turns it fully opaque.
Change color opacity
The color picker is available for most of the sections in the Form Styler. You can select a color or insert the HEX, RGB, RGBA value in the input box. To set the opacity, use the Alpha slider on the right side of the color picker.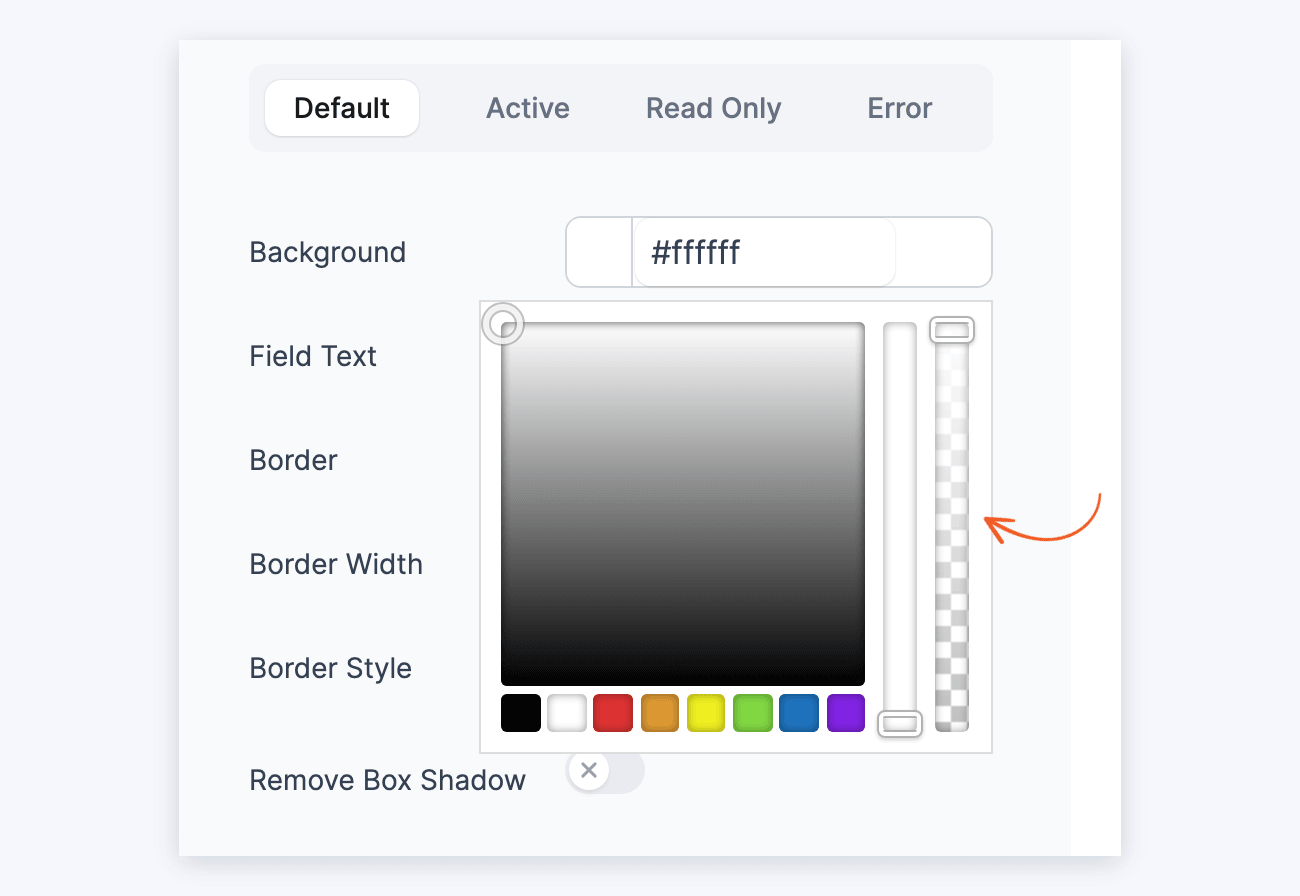
Styling frm_color_block class
The background color of the frm_color_block CSS layout class comes from your default style, and it is the same on every form.
To change it, open the style under Default Style in the Form Styler and click Show advanced settings. In Field Colors, on the Default tab, choose a color in the Border selector. Then click Update.
The block's background is a lighter shade of that color. This also changes the field border color of forms that use the default style.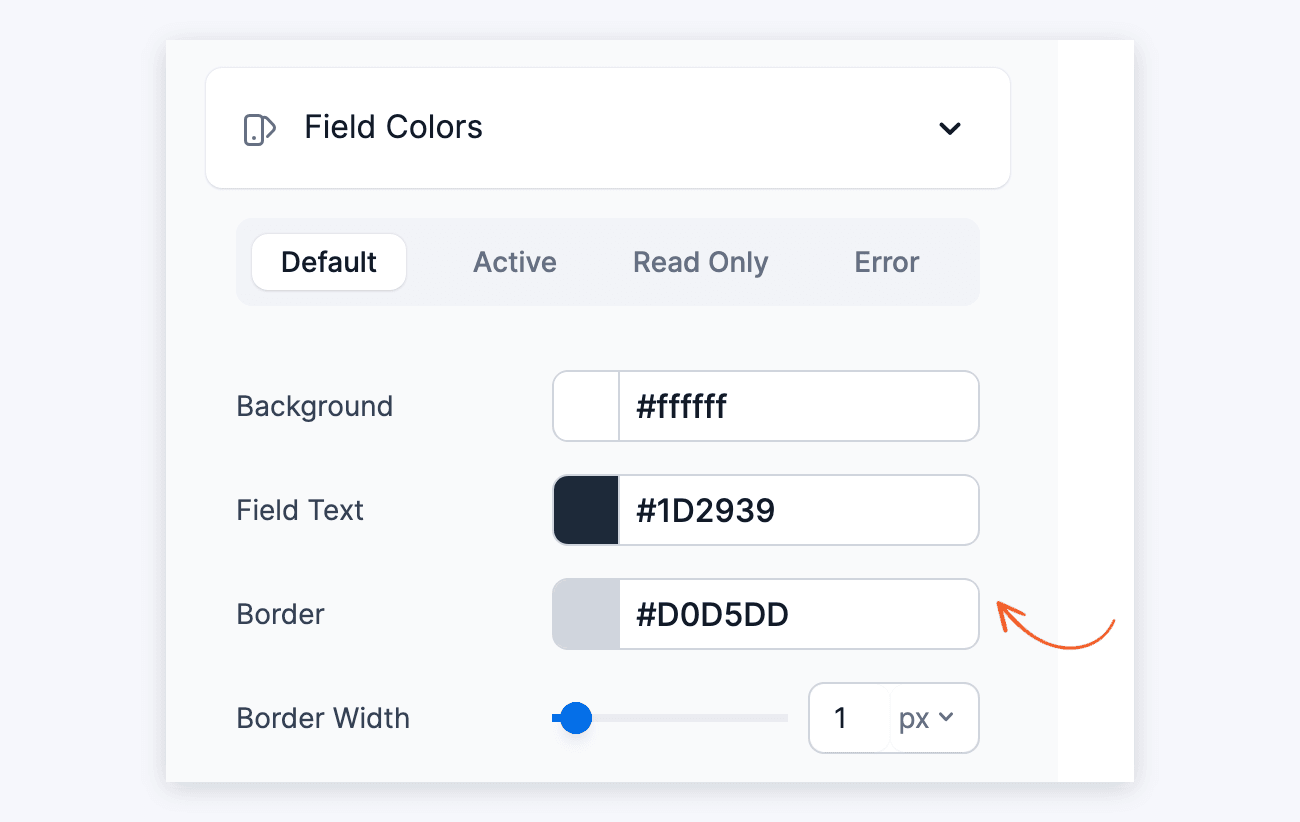
Troubleshooting
Form looks different on a page
When the form styler shows you one result, and you see another result on the front-end, this means your theme is overriding some of the form styling.
- Make sure Formidable styling is enabled in the Global settings.
- Check the styling settings for the specific form to make sure the styling is not turned off.
- Turn on the option to override the theme styling as described above.
- Clear all caches including browser cache, and any caching plugins or server caching.
- If there are still problems, temporarily switch to a different theme to verify the conflict is coming from your theme. If you confirm this is a theme conflict, let us know and we can add it to our to do list.
- If the form has the same problem with a different theme, check the page HTML and resolve major HTML issues.
Form styling loaded via PHP
Each time the plugin is updated or the styling settings are saved, Formidable generates a CSS file with your active styles. Formidable decides where to put that file in this order:
- Plugin folder: plugins/formidable/css/formidableforms.css. This is the default location.
- Uploads folder: uploads/formidable/css/formidableforms.css. This is used only if you opt in (see below). Formidable will skip straight to this location when opted in, instead of using the plugin folder.
- Dynamic (AJAX) version: if neither file can be created, Formidable falls back to a dynamic version with a URL such as wp-admin/admin-ajax.php?action=frmpro_css. This works, but it doesn't cache as well as a real CSS file.
On some servers the plugin folder is read-only, to prevent anything from writing to plugin code. If that's the case, the file can't be generated in its default location.
Generate the CSS file in the uploads folder
You can have Formidable write the file to the uploads folder rather than the plugin folder. This happens in two ways:
- Automatically, if your site uses the WordPress DISALLOW_FILE_MODS constant. Sites that make the /plugins/ folder read-only are often already using this constant, in which case no extra setup is needed.
- Manually, using the frm_add_css_to_uploads_dir filter. Use this if you want the file in the uploads folder but don't want to set DISALLOW_FILE_MODS (which affects your whole site)
Generate the static CSS file
Try the steps below to create the static css file. Save the form styling settings after each step.
- If you are required to enter FTP information when updating plugins, the plugin doesn't have permission to create this css file. Contact your web host for help disabling this FTP credentials requirement.
- Delete the Formidable Forms plugin and install it again. This may correct basic file permissions issues.
- Check the folder permissions on the formidable/css folder via FTP to make sure they are high enough to allow the folder to be writable.
- Save the styling settings again.
