
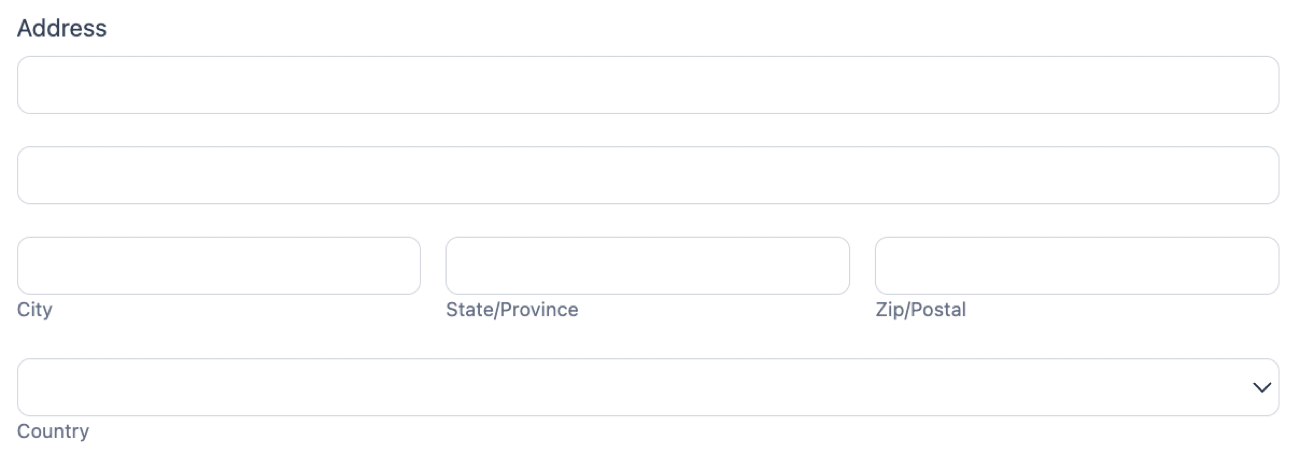
The Address field provides the inputs for entering an address. This means you can add all the inputs for an address with a single click instead of adding, renaming, and formatting multiple fields. To add one, click Address in the Add Fields list of the form builder.
Upgrade your WordPress site with powerful, flexible forms.
Standard field options
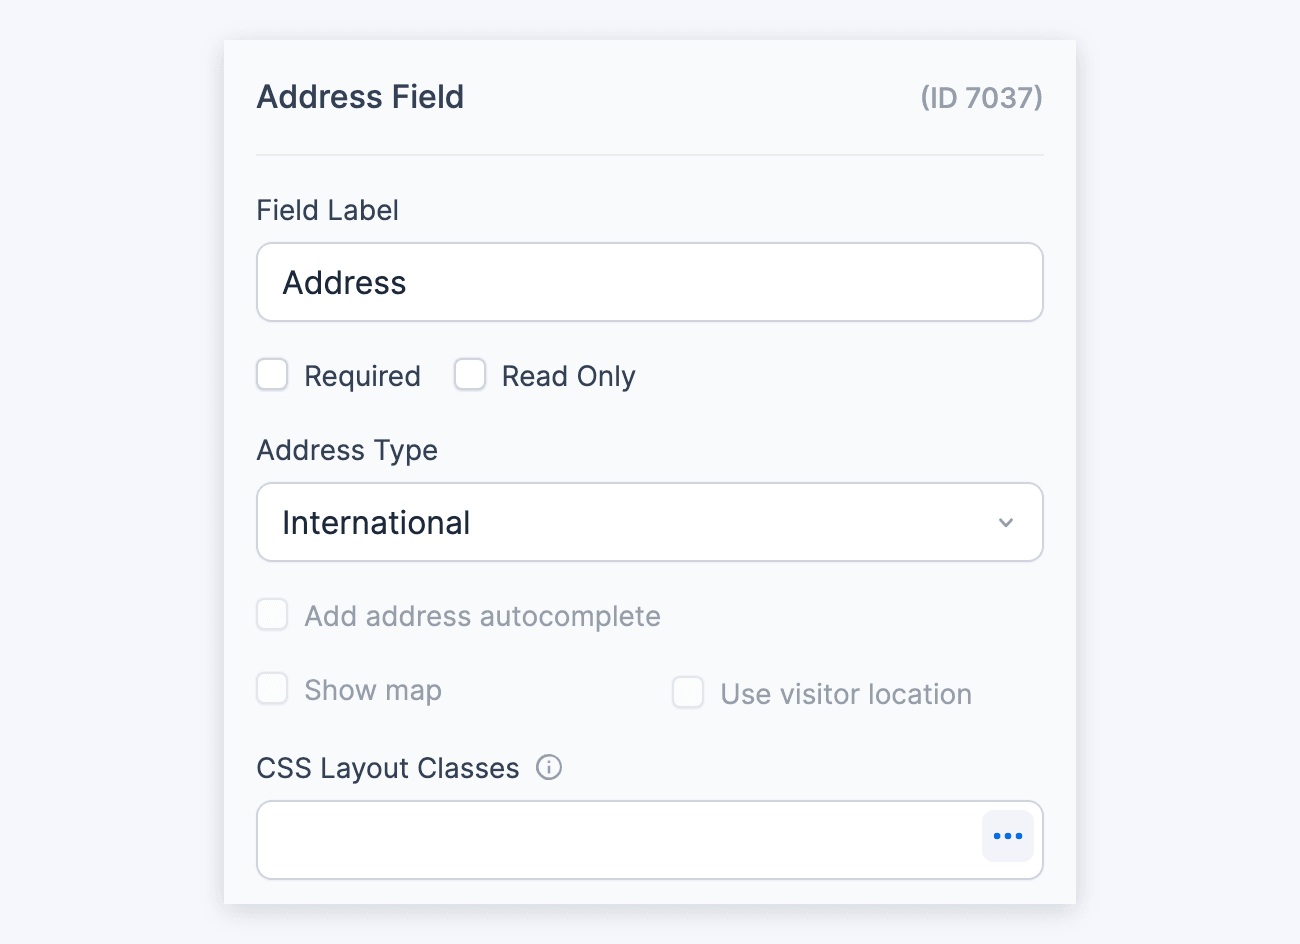
An address field has the following field options.
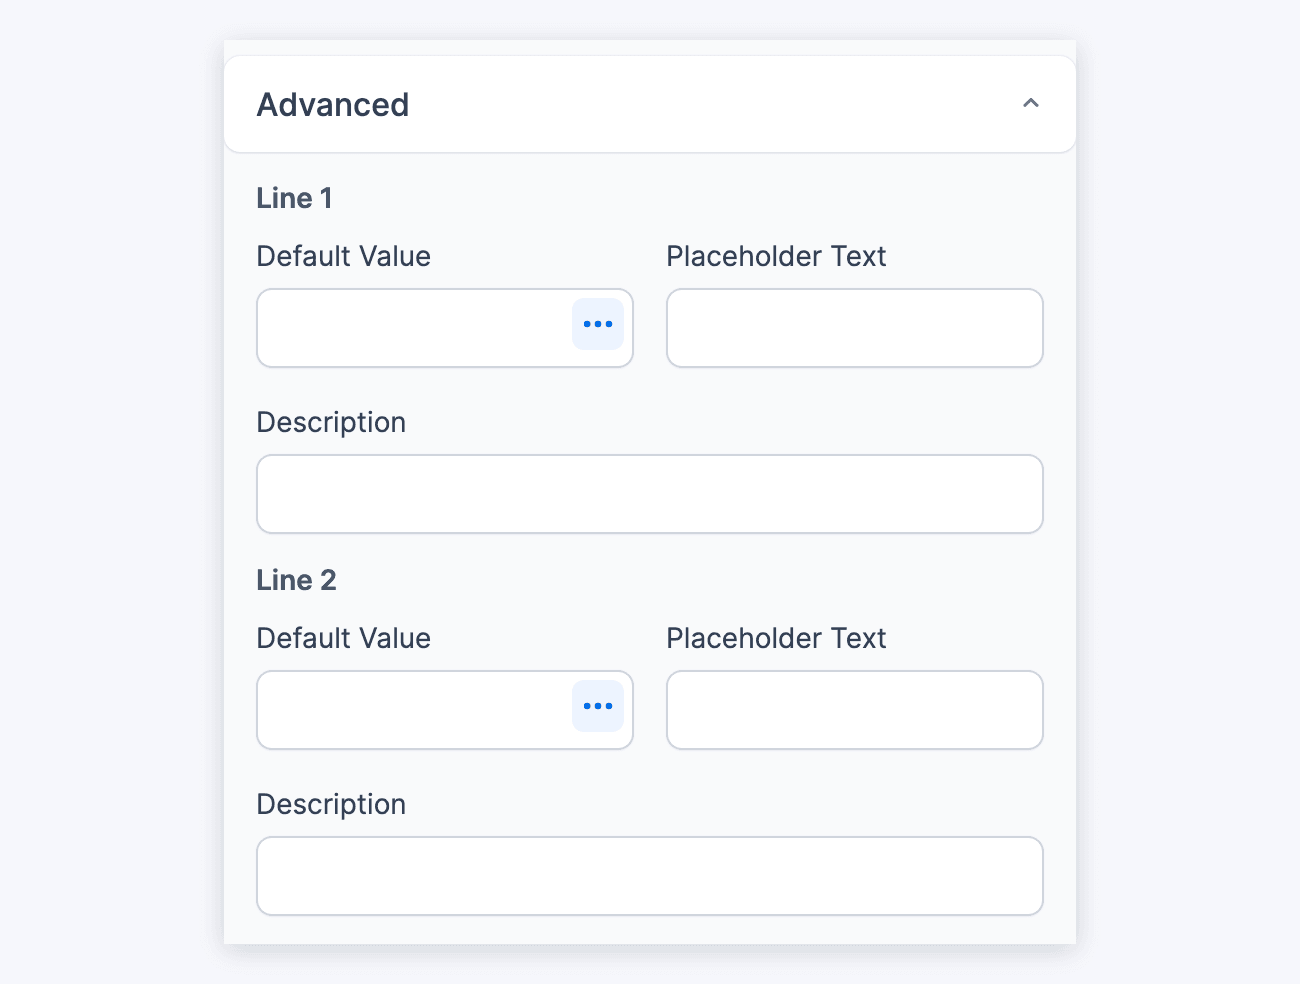
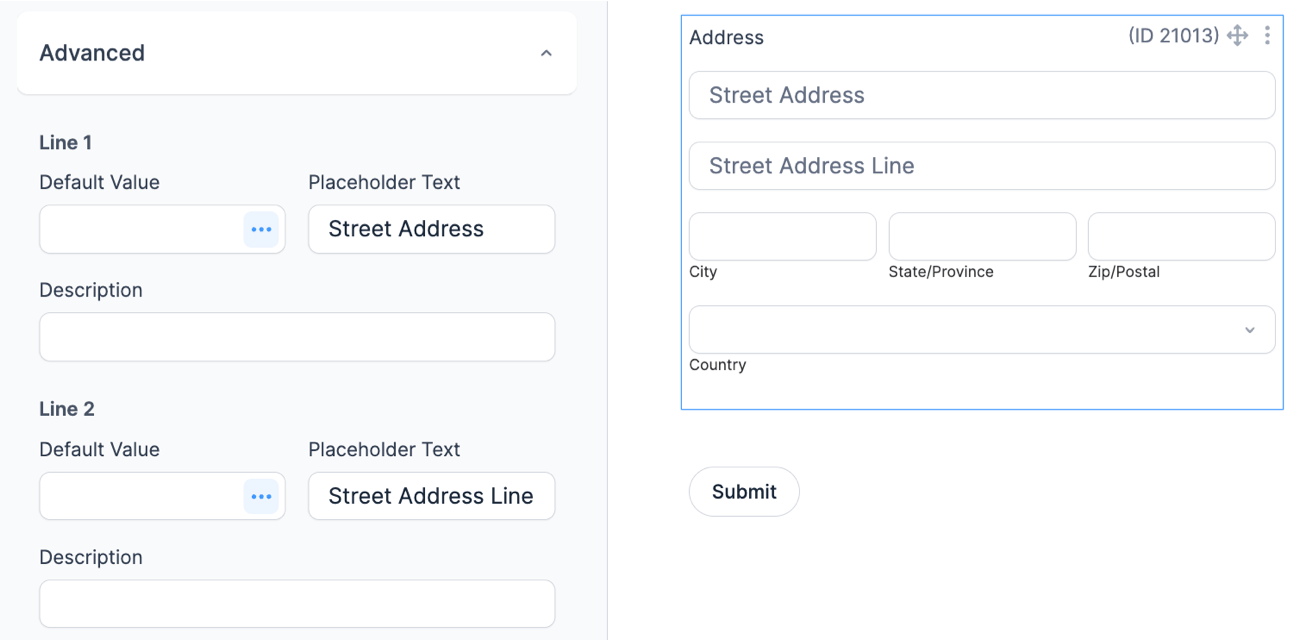
The Advanced section has a Default Value, Placeholder Text, and Description box for each part of the address: Line 1, Line 2, City, State/Province, Zip/Postal, and Country.
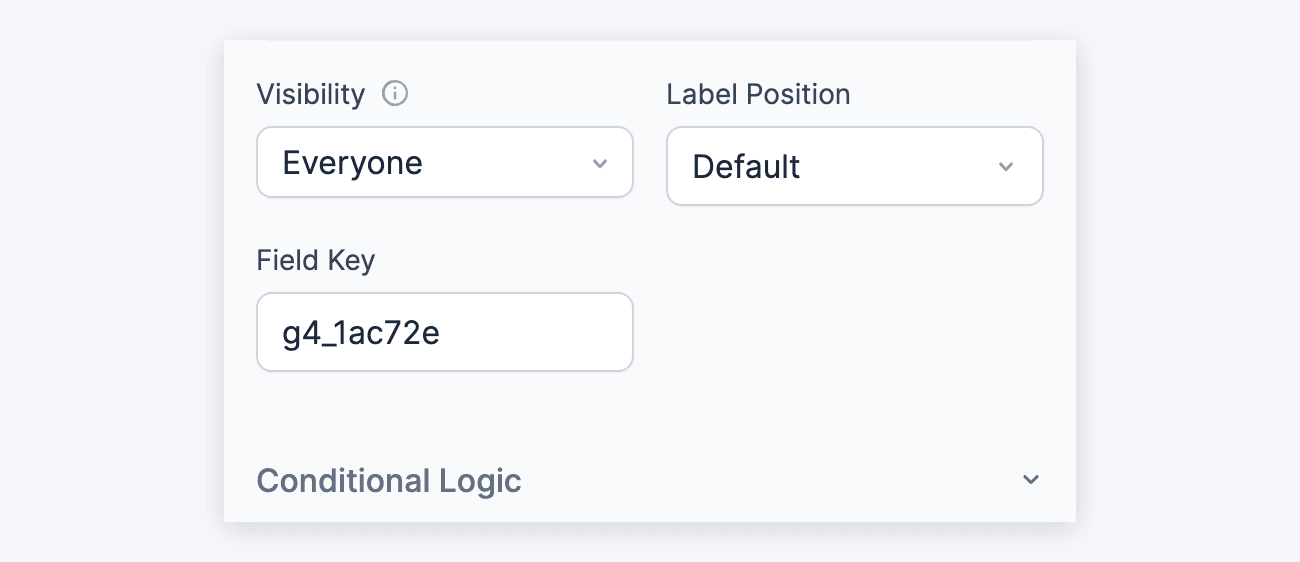
Visibility, Label Position, and Field Key are at the bottom of the Advanced section.
When an Address field is Required and a visitor fills in only part of the address, each empty part gets its own error message that names the part, such as the city or the country. When the whole field is empty, one error message shows for the field.
With Formidable Forms Pro, conditional logic can check one part of an Address field. In the list of fields for a condition, pick the part, such as Address (City) or Address (Country). Address fields are listed by part only.
From Idea to Reality in Minutes. Build Powerful Forms, Dashboards, Apps and More.
Formidable Forms makes advanced site building simple. Launch forms, directories, dashboards, and custom WordPress apps faster than ever before.
Field-specific options
Address type
To remove the Country dropdown or show only US states, choose a type in the Address Type dropdown in the field options:
- International includes the Country dropdown. This is the default.
- United States doesn't include the Country dropdown. The State field becomes a dropdown of the US states and the District of Columbia.
- Europe includes the Country dropdown and has no State field. Zip/Postal comes before City.
- Other - exclude country field doesn't include the Country dropdown.
Next, click Update and preview the form to see the new layout. The field in the form builder keeps the old layout until the page reloads.
Insert placeholders
To add placeholders to the address inputs:
- Go to your form Build page.
- Select the address field where you want to insert a placeholder. In the field options, go to the Advanced section. Enter text in the Placeholder Text box under each part you want, such as Line 1 or City.

- Click Update (or Save on a new form) to save your changes.
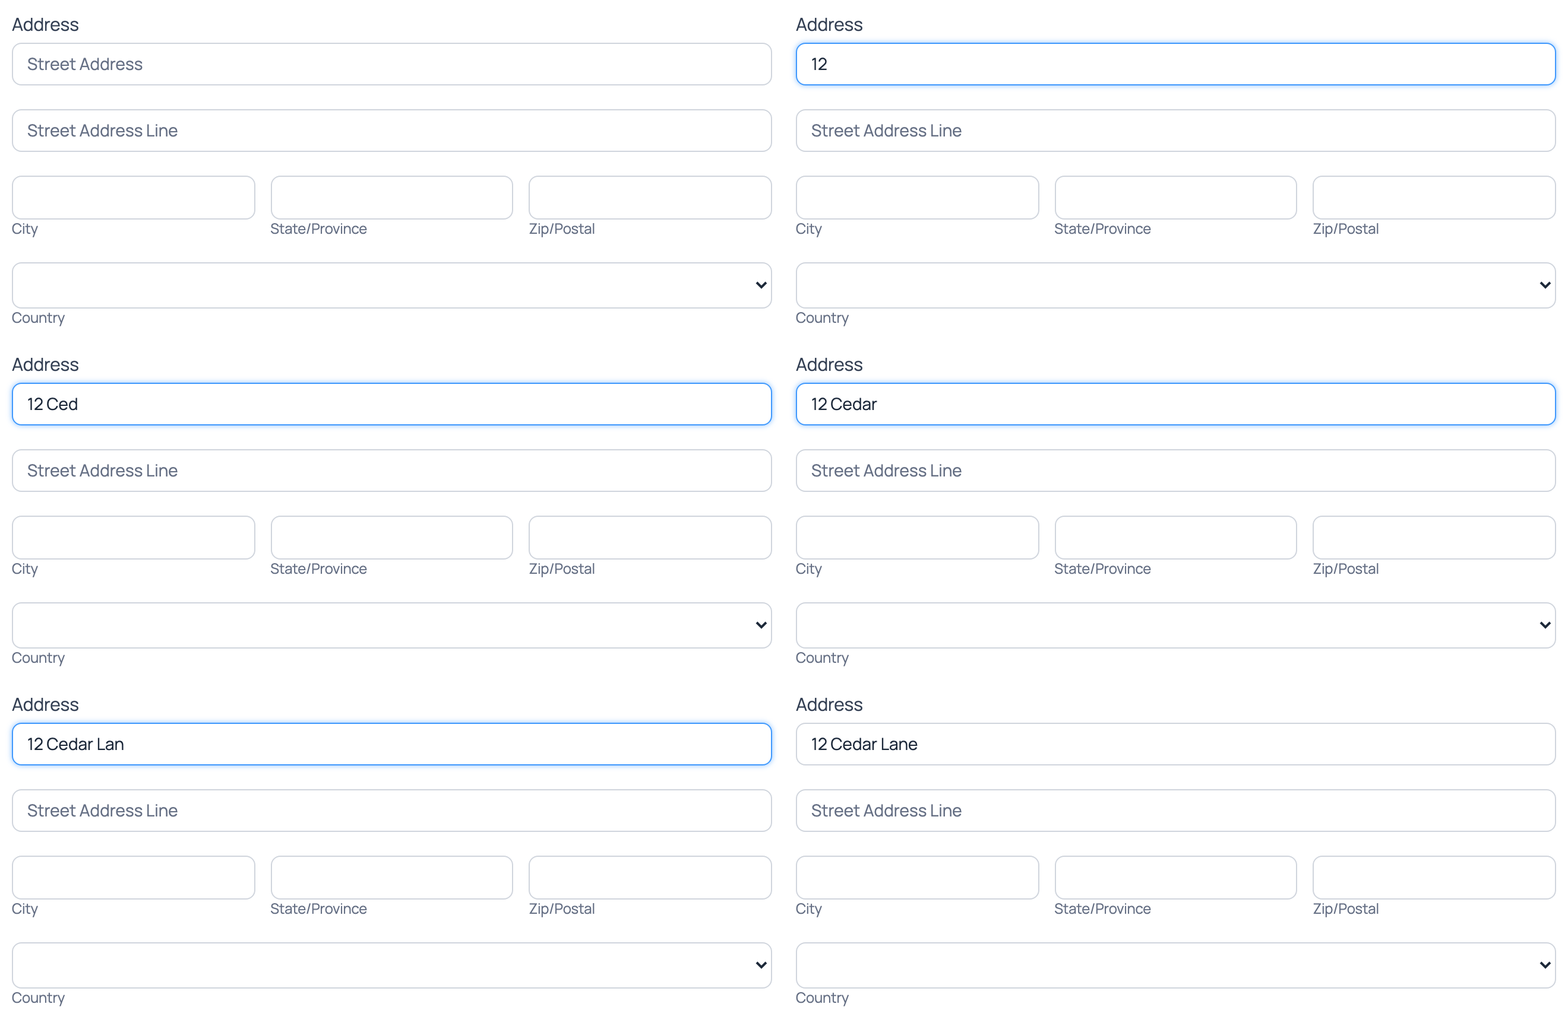
- Go to Preview → On Blank Page. Each part with placeholder text shows it. When a visitor starts typing in a part, its placeholder text is cleared.
- For more information on placeholder text, visit the Placeholders page.
Insert default values
To add default values to the address inputs:
- Go to your form Build page.
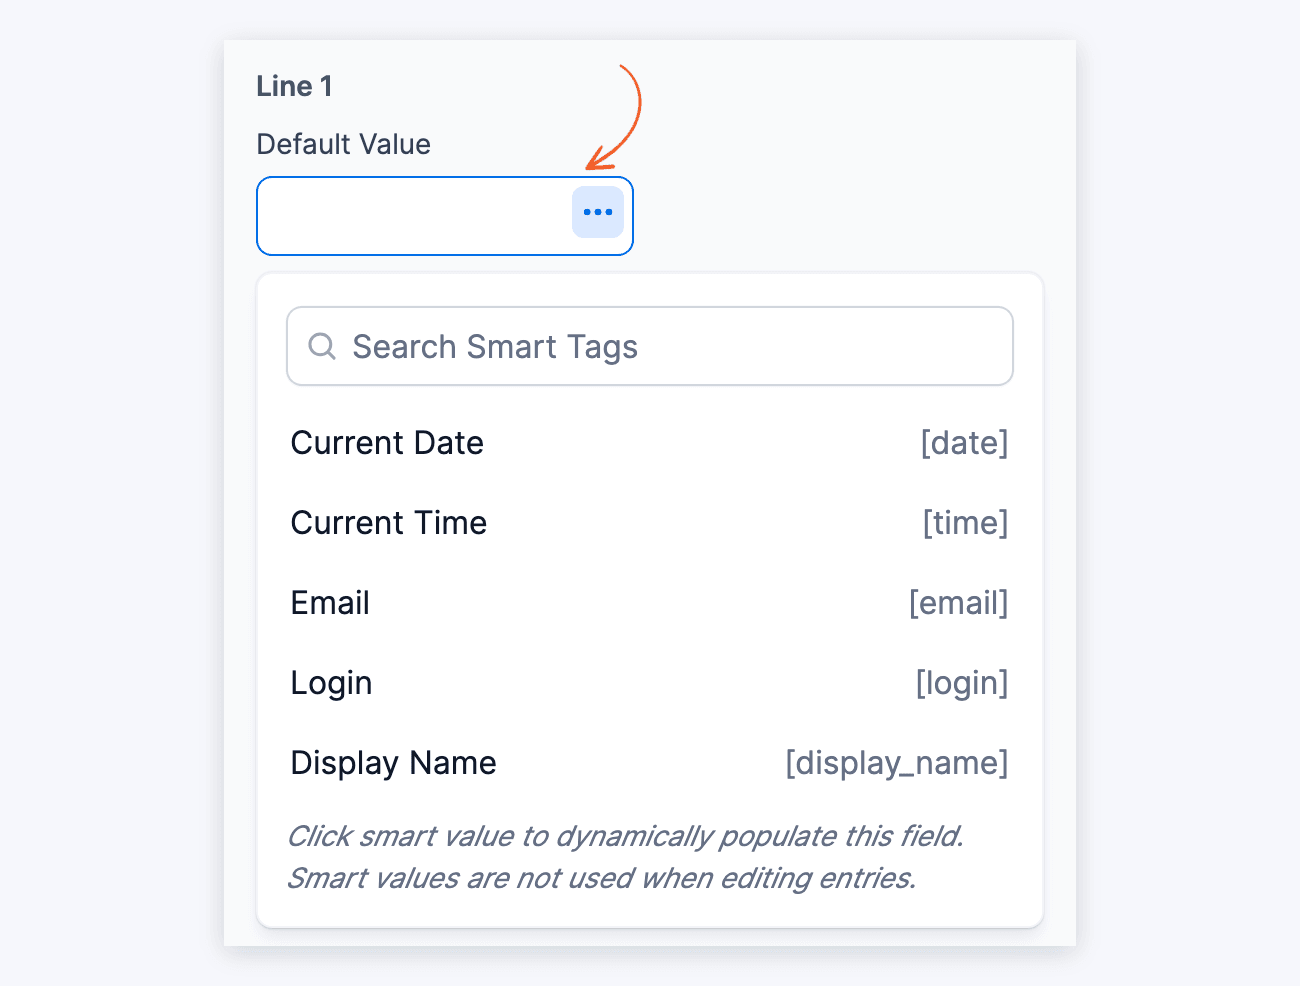
- Select the address field where you want to insert default values. In the field options, go to the Advanced section. Click the … icon in the Default Value box of a part, such as Line 1. The smart tags list opens. Search for a value and click it to use it as the default value.
- Click Update (or Save on a new form) to save your changes.
- Go to Preview → On Blank Page. The address part is filled in with the default value.
- For more information on default values, visit the Default Values page.
Address autocomplete
Learn how to use Formidable Geolocation for address autocomplete for better accuracy and more consistent data.
Display address fields
To display specific data from an Address field, insert the following shortcodes into a View or email. In all the examples, replace x with the field ID/key of the address field.
- Display the address field:
[x]
- Display the first line of the Street Address:
[x show="line1"]
- Display the second line of the Street Address:
[x show="line2"]
- Display the City:
[x show="city"]
- Display the State:
[x show="state"]
- Display the Zip Code:
[x show="zip"]
- Display the Country:
[x show="country"]
- Display the Country code:
[x show="country_code"]
Related customizations
Country dropdown list
The Country dropdown shows when the field's Address Type is International or Europe. To change the countries included in the Country dropdown, insert the following code in the WPCode plugin or a child theme’s functions.php file. Replace Ireland and United Kingdom with the countries you want to include.
add_filter( 'frm_countries', 'change_countries');
function change_countries( $countries ){
    $countries = array('Ireland', 'United Kingdom');
    return $countries;
}
To add to the existing country dropdown list instead of replacing it, insert the following code. Use the same code to put the most used countries at the top of the list. The code removes them from their usual place, so each country is listed once.
Replace United Kingdom and United States with the countries you want to include.
add_filter( 'frm_countries', 'add_countries' );
function add_countries( $countries ) {
    $top_countries = array( 'United Kingdom', 'United States' );
    return array_merge( $top_countries, array_diff( $countries, $top_countries ) );
}
State dropdown list
The State dropdown shows when the field's Address Type is set to United States. With the International type, State/Province is a text box. To add a state to the US States dropdown, insert the following code in the WPCode plugin or a child theme’s functions.php file. Replace Puerto Rico with the state you want to include.
add_filter( 'frm_us_states', 'add_states');
function add_states( $states ){
    array_push($states, 'Puerto Rico');
    return $states;
}
State abbreviations
To show the states' abbreviations instead of their full names in the State dropdown (United States address type), insert the following code in the WPCode plugin or a child theme’s functions.php file.
add_filter( 'frm_us_states', 'frm_us_state_abbreviations');
function frm_us_state_abbreviations( $states ){
    $states = array( 'AK', 'AL', 'AR', 'AZ', 'CA', 'CO', 'CT', 'DC', 'DE', 'FL', 'GA', 'HI', 'IA', 'ID', 'IL', 'IN', 'KS', 'KY', 'LA', 'MA', 'MD', 'ME', 'MI', 'MN', 'MO', 'MS', 'MT', 'NC', 'ND', 'NE', 'NH', 'NJ', 'NM', 'NV', 'NY', 'OH', 'OK', 'OR', 'PA', 'RI', 'SC', 'SD', 'TN', 'TX', 'UT', 'VA', 'VT', 'WA', 'WI', 'WV', 'WY');
    return $states;
}
Related developer hooks
- Change the labels in an address field with the frm_combo_dropdown_label hook.
- Remove the second line of the street address with the frm_address_sub_fields hook.
