
Formidable Forms has made my life so much easier as an event planner.


Last updated on December 12, 2023 by Formidable Team
How to Accept Payments on WordPress for Free
Want to accept payments on WordPress without building a whole online store? You don't need WooCommerce or a monthly plugin bill, just a simple form with a payment field. In this guide, we'll show you how to accept payments on WordPress for free with Formidable Forms Lite.
Approximate read time: 8 minutes
Getting paid on your WordPress site shouldn't take a weekend. But the moment you look into it, every guide points to the same answer: set up WooCommerce, configure a gateway, build a product catalog, and create a checkout page. That's an entire online store, when all you wanted was a way to take a payment.
You don't need any of that. If you can build a form, you can get paid. Formidable Forms Lite is free, connects to Stripe, PayPal, and Square, and lets you drop a payment form on any page with a shortcode. There's no store, no cart, and no monthly bill. You only pay a small fee when money actually comes in.
Upgrade your WordPress site with powerful, flexible forms.
What you actually need (and what you don't)
Most WordPress payment advice assumes you're opening a shop. But if you're a personal trainer collecting a session fee, a photographer taking a booking deposit, or a consultant invoicing a client, you don't need WooCommerce. You need a form, a payment field, and a connection to a processor your customers trust.
Formidable Forms covers all three. It runs on more than 300,000 sites with a 4.8 out of 5 rating, so you're not trusting payments to something untested.
It connects to Stripe, PayPal, and Square out of the box, and the same form that takes the payment also collects the name, email, and order details you need. Authorize.Net is supported too, on the paid Elite license.
Before you build, three quick things:
- Turn on SSL. Most hosts include a free certificate. It encrypts the connection so browsers don't flag your payment page.
- Pick your processor.
- Use test mode while you build, so you can run a transaction end to end before going live.
From Idea to Reality in Minutes. Build Powerful Forms, Dashboards, Apps and More.
Formidable Forms makes advanced site building simple. Launch forms, directories, dashboards, and custom WordPress apps faster than ever before.
What "free" actually means
Let's be straight about it, because the word "free" gets abused. There's no way to take card payments with zero cost. Visa, Mastercard, and every processor charge a fee to move money. That part is unavoidable.
What's free is the software. Formidable Forms Lite costs nothing on WordPress.org, and there's no monthly plugin subscription on top of those processing fees. On the free Lite plan, Formidable adds a 3% Formidable Forms fee on top of the standard processor rate, such as Stripe's 2.9% plus 30 cents per transaction. No sale means no fee, so there's nothing to pay in a month you don't collect.
That 3% is the trade-off for starting free, and it goes away entirely when you upgrade to Business or Elite. For getting started, Lite is the right place to begin, so let's set it up.

Set it up in five steps
Here's the full setup using Stripe, the fastest start. PayPal and Square follow the same pattern, and the differences are called out below.
Step 1: Install Formidable Forms Lite
In your WordPress admin, go to Plugins → Add New, search for Formidable Forms, then click Install Now and Activate.
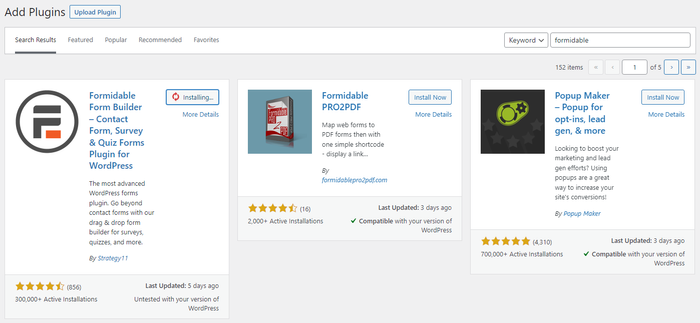
That's the whole step. You now have the form builder and the payment integrations, free from WordPress.org, with no credit card and no trial.
Step 2: Connect your processor
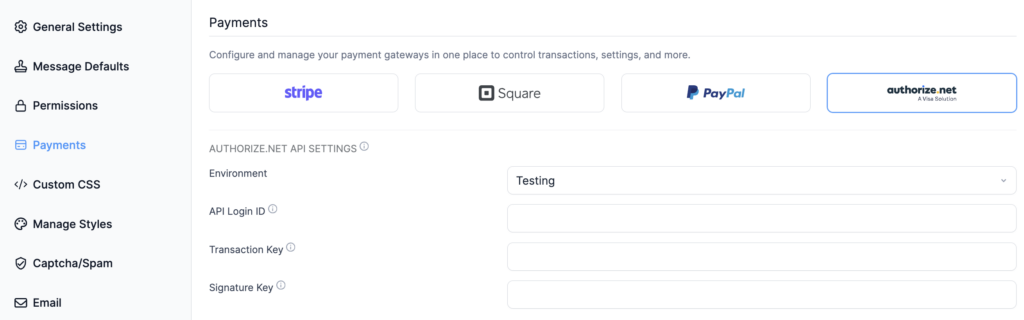
All three processors are built into Formidable Forms Lite, so there's nothing extra to download. Go to Formidable → Global Settings → Payments, open the tab for the processor you're using, and connect in live or test mode.
This takes about two minutes if you already have an account with the processor.

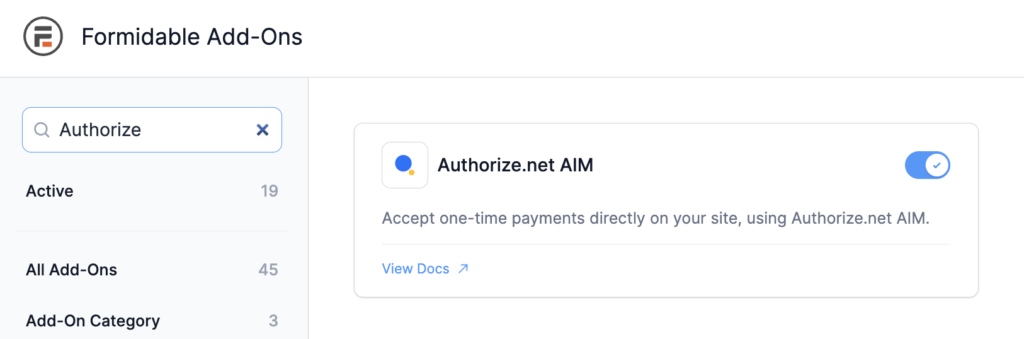
Prefer Authorize.Net? It works a little differently, because it's the one gateway here that isn't free. Authorize.Net ships with the paid Elite license. Once Elite is active, install the Authorize.Net add-on from Formidable → Add-Ons.
Then take your API Login ID, Transaction Key, and Signature Key from your Authorize.Net account, paste each one into the matching field on the Authorize.Net tab, and click Update.
Step 3: Build your payment form
Go to Formidable → Forms → Add New.

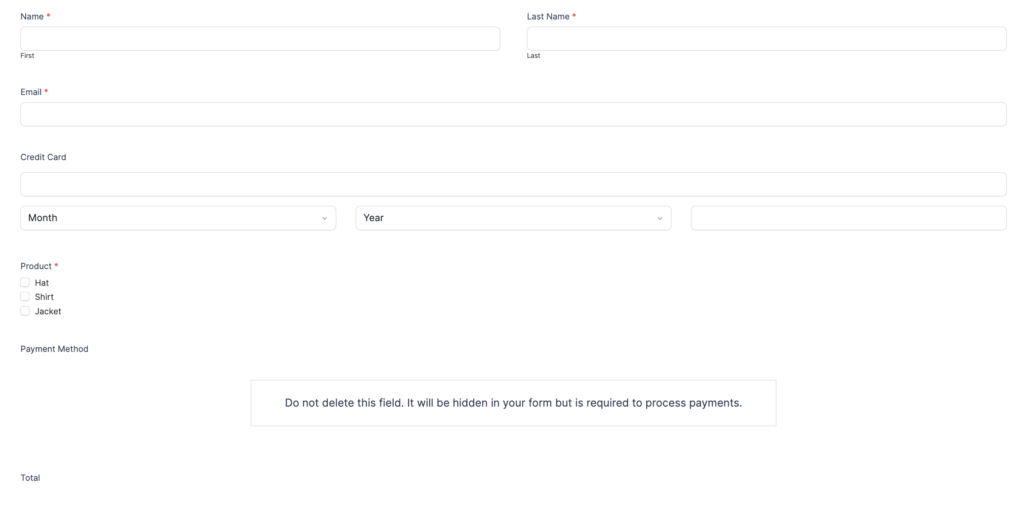
Start from a payment template to get a working form in one click, or pick Blank Form. At a minimum, the form needs three fields:
- A Payment field, which is the card input.
- A Name field, so you know who paid.
- An Email field, for the receipt and follow-up.
Add anything else you need, like a product dropdown for packages, a quantity field, or a notes box. Want the total to update as the customer chooses? Add a product field with options (say, a single session for $75 or a five-pack for $300), and Formidable calculates the total automatically.
Click Update to save.
Step 4: Set up the payment action
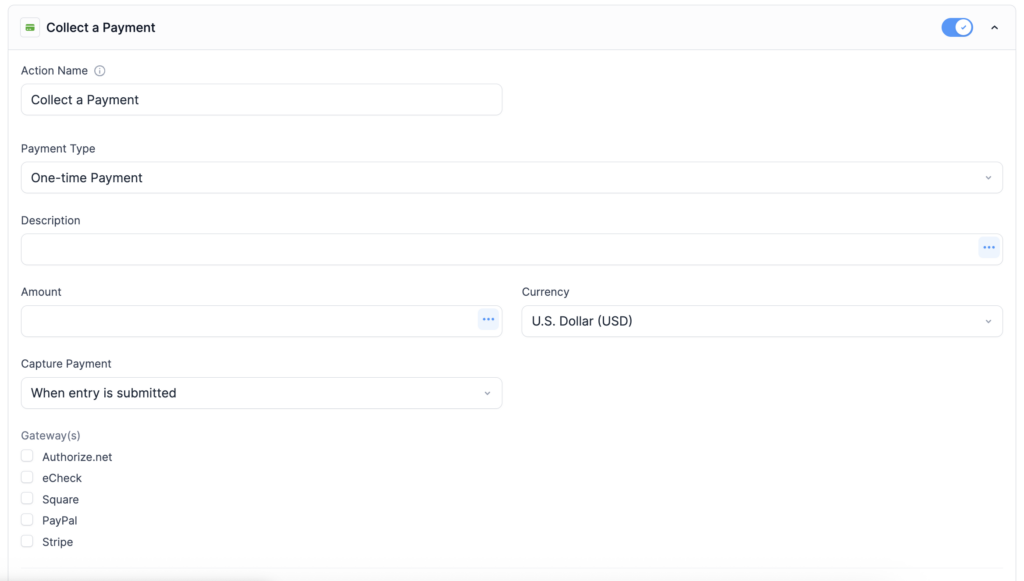
Go to Settings → Actions and Notifications, then add a Collect a Payment action. Set the following:
- Type, one-time or recurring.
- Amount, a fixed price or a value pulled from a field, like a calculated total.
- Currency, such as USD, EUR, or GBP.
- Customer info, mapping name and email to the payment record.
- Gateway, tick the processor you connected in Step 2 (Stripe, PayPal, Square, or Authorize.Net on Elite).
Click Update.
Step 5: Publish the form
Open the page where the form should live, add the Formidable Forms block, and pick your form from the dropdown. Click Publish, run a test transaction in test mode to confirm the entry appears in Formidable and the charge appears in your processor's dashboard, then switch to live mode.

That's it. Your site is taking payments.
Fees and when to upgrade
For occasional payments and small volumes, the 3% fee is rarely worth thinking about, which is exactly why Lite is a fine starting point. (For Square specifically, that 3% applies to US merchants on one-time payments.)
Once your volume climbs, though, the 3% adds up, and the Business and Elite licenses remove it entirely, so above a certain point the math tips toward upgrading. Paid plans also unlock recurring payments, payment installments, conditional pricing, and Formidable Views for showing order history on your site. Need Authorize.Net? It comes in on Elite. But you don't need any of it to start collecting.
Start getting paid today
Now you know how to accept payments on WordPress for free, with no store, no cart, and no monthly subscription. Install Formidable Forms Lite, connect Stripe, PayPal, or Square, build a simple form with the Stripe payment form template, and embed it on any page, all in the same afternoon. You only pay when you actually get paid.
Ready to get started? Install Formidable Forms Lite and build your first payment form today.
- Is it really free to accept payments with Formidable Forms?
-
The plugin is. Formidable Forms Lite is free to download from WordPress.org, with no monthly subscription to use the Stripe, PayPal, or Square integrations. You'll still pay your processor's standard rate, since every gateway charges to move money, plus a 3% Formidable Forms fee on Lite. There's nothing to pay in a month you don't collect a payment.
- Do I need WooCommerce to accept payments on WordPress?
-
No. WooCommerce is built for stores with a catalog, cart, and checkout. If you're selling one or two things, taking a deposit, or collecting payment for a service, a payment form is faster to set up and easier to maintain.
- Is it safe to take payments through a form?
-
Yes, when a PCI-compliant gateway like Stripe, PayPal, or Square handles the payment. PCI compliance is the security standard for handling card data. The card data never touches your WordPress database. Your form collects name, email, and amount, and the processor handles the card. Just make sure your site has SSL.
- Can I let customers choose what they pay?
-
Yes. Add a number field or a dropdown of preset amounts, then set the payment action to pull the amount from that field instead of a fixed price. This is the standard setup for deposits and donations.
- Can I take recurring or subscription payments?
-
Yes. In the Collect a Payment action, switch the type from one-time to recurring and set the interval. Recurring payments are available on paid plans.
This article may contain affiliate links. Once in a while, we earn commissions from those links. But we only recommend products we like, with or without commissions.

