
Connect your forms with Square to seamlessly process credit card payments. Square forms ensures all transactions are secure, allowing users to complete payments without leaving your site. This makes Square an excellent choice for small business owners and online sellers who need a dependable payment solution to efficiently manage and grow their transactions.
Upgrade your WordPress site with powerful, flexible forms.
Download and install
- If you haven't already done so, install and activate Formidable Forms.
- Once the plugin has been activated, go to your WordPress Dashboard and look for the Formidable menu.
To avoid paying the extra 3% charge, upgrade to Formidable Forms Business or Elite. Note that fees are only collected for US merchants, and only for one-time payments.
From Idea to Reality in Minutes. Build Powerful Forms, Dashboards, Apps and More.
Formidable Forms makes advanced site building simple. Launch forms, directories, dashboards, and custom WordPress apps faster than ever before.
Set up Square integration
Once you have successfully activated Formidable Forms, you need to connect it with your Square account to start accepting payments. It is important to configure your Formidable settings to ensure everything functions properly. If any steps are missed, you might encounter issues such as a blank screen. Follow the steps below to get started.
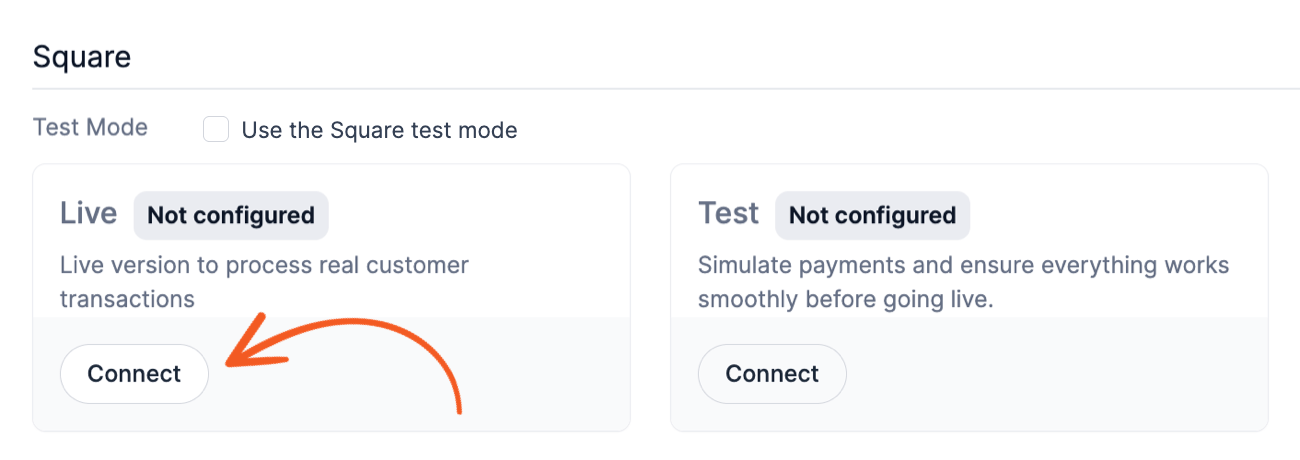
- Navigate to Payments Settings. Begin by accessing your WordPress dashboard. From there, go to Formidable → Global Settings → Payments and click the Square tab. Click the Connect button under the Live section to authorize the connection between your forms and Square.

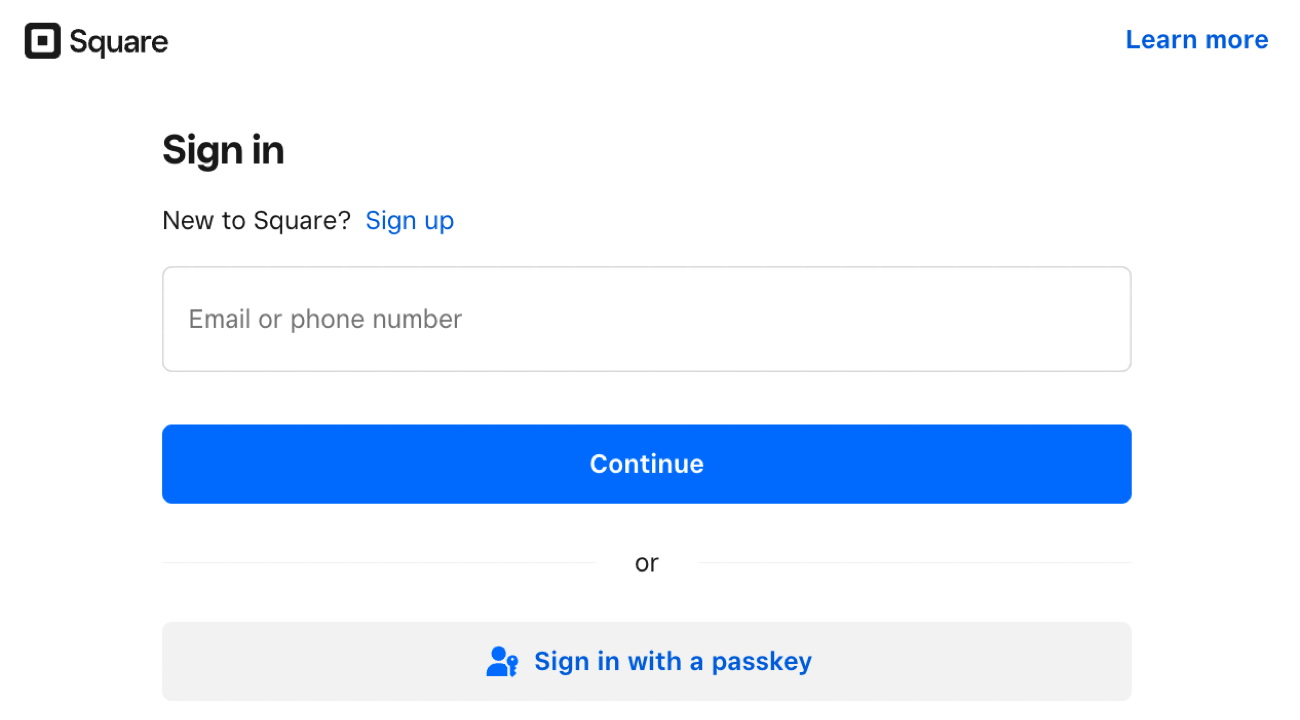
- Access your Square account.. You will then be redirected to Square where you can log in to your account. If you don’t already have a Square account, click here to create one. This account is necessary to integrate Square’s payment processing with your forms.
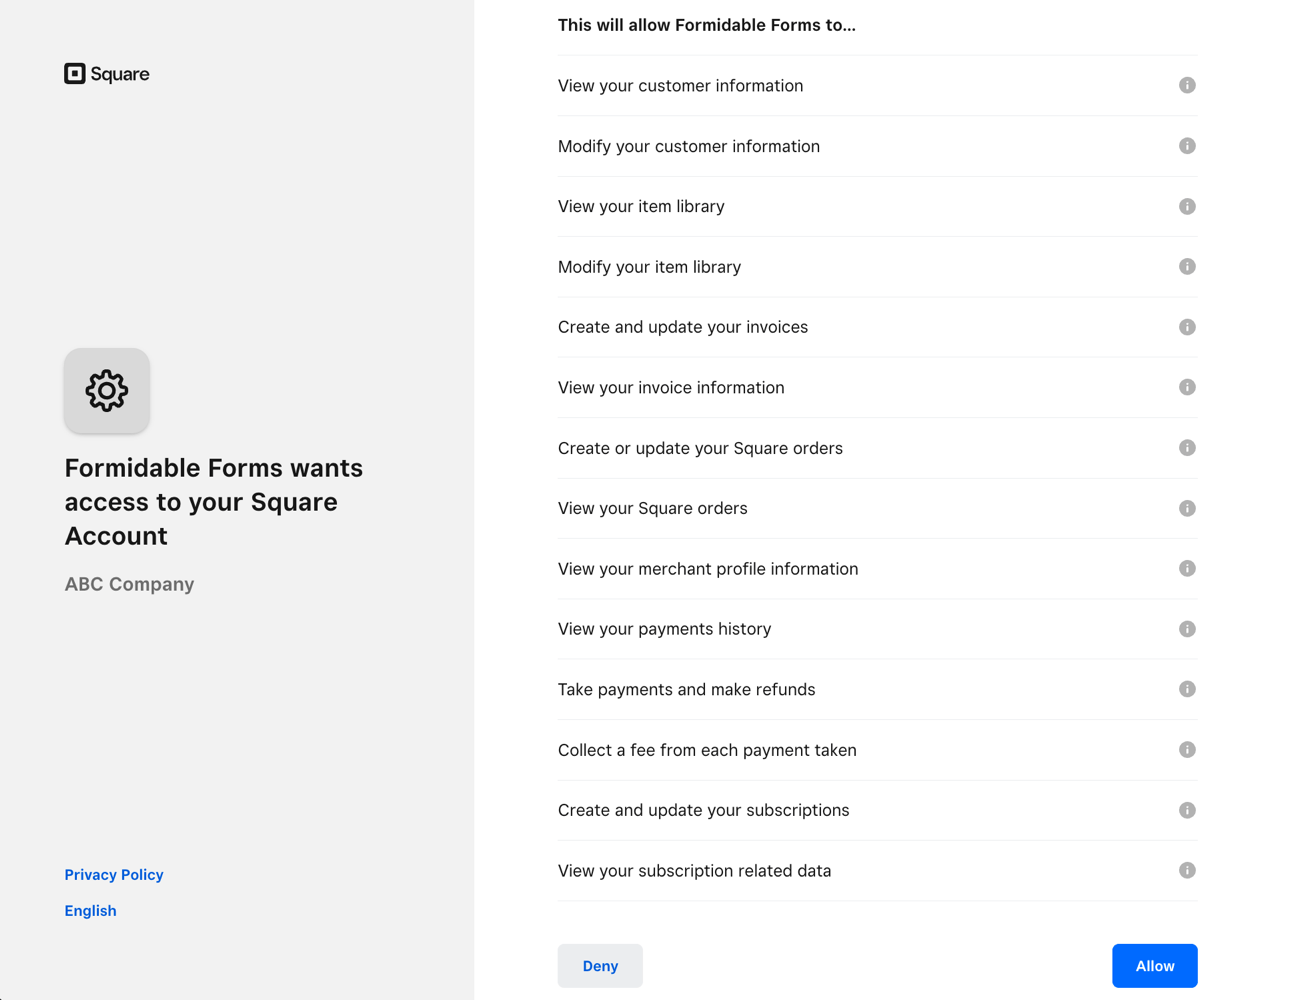
- Authorize Permissions. Approve the necessary permissions for processing Square payments by clicking the Allow button to confirm.
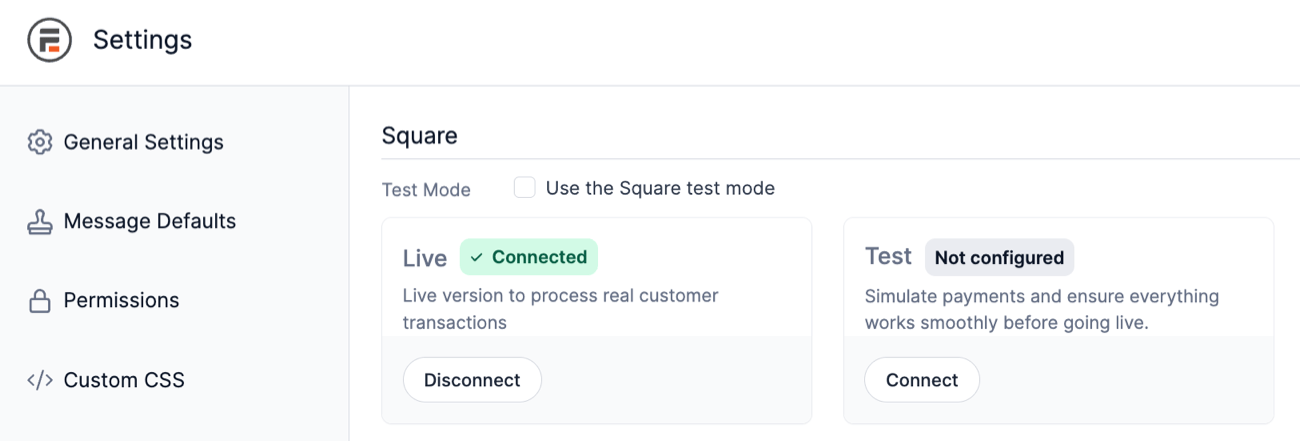
- Verify Connection. After allowing permissions, you will be redirected back to the Formidable Global Settings page on your site. To confirm a successful connection, look for a green checkmark with the text Connected next to the Live connection status.
Set up Square form to collect payments
After your live environment is configured and verified, you can set up a form to collect payments using Square.
- Go into edit the form and add a Payment field to start processing payments in Square.
.
- Go to your form Settings → Actions → Notifications, and click Collect a Payment.
- Give your Payment action an Action Name for easy reference. This name will only be seen on the back end.
- Give your Payment action a Description to attach to the payment. This information will be sent to Square along with the payment. You can either type in a description, or use a field from your form to set the description dynamically. If you would like to use a field for the description, click the icon in the Description box and then select your field in the modal box. This will insert a value like [3130] for your Description setting.
- Set the Amount for the payment. You can either type in an amount, or use a field from your form to calculate the amount. If you would like to use a field for the amount, click the icon in the Amount box and then click your field in the modal box. This will insert a value like [3138] for your Amount setting.
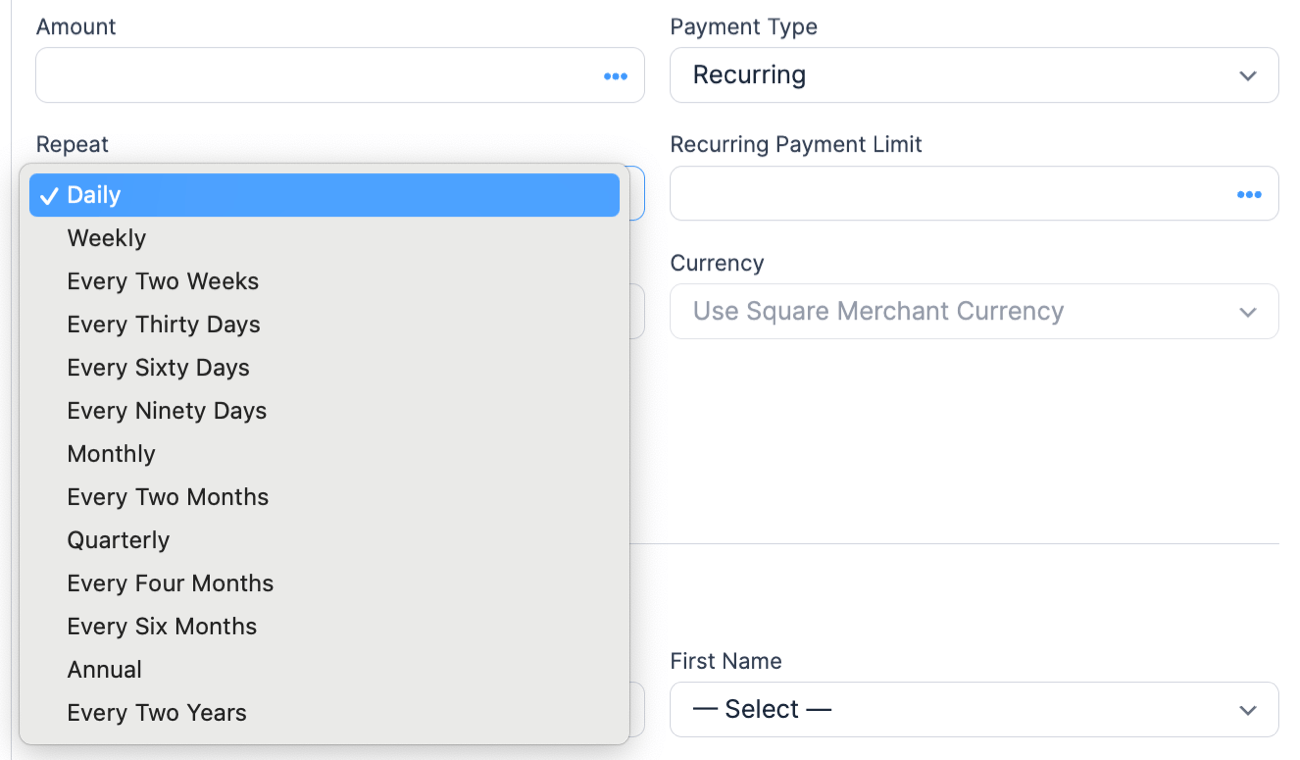
- Choose the Payment Type. Your payment type can be one-time or recurring.
- One-Time Payment: If you choose this payment type, the Use Square Merchant Currency option will be preselected. This option will use the currency associated with the connected merchant. Merchants are limited to a single currency.
- Recurring Payments: For recurring transactions, you can set up Square subscriptions using "Repeat Cadence" options, allowing intervals such as "Daily," "Monthly," or "Annual."
- Select the Payment Gateway. Choose Square as the payment gateway. This selection connects your form with Square’s payment processing system.
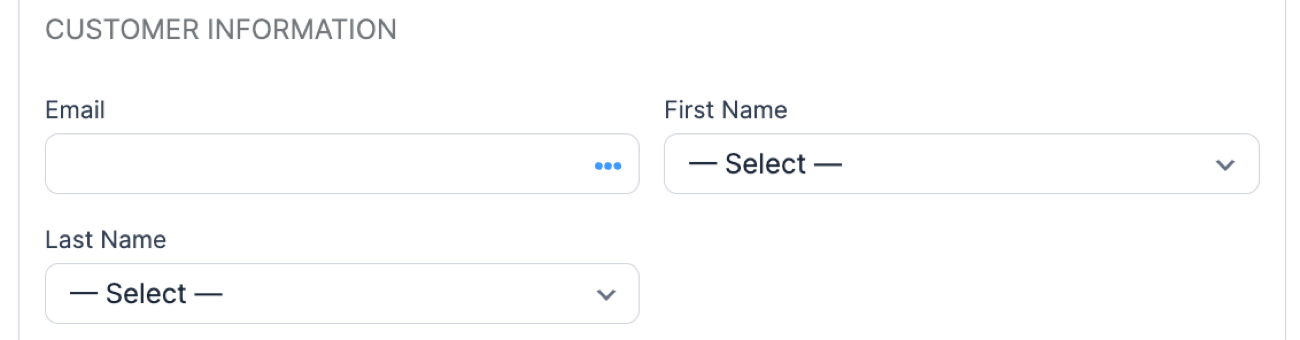
- The Customer Information fields can be associated with field values in your form.
 .
.
Set up Square test payment integration
Before testing payments, it’s important to configure your Square settings to ensure everything functions properly in test mode. If any steps are missed, you might encounter issues such as a blank screen.
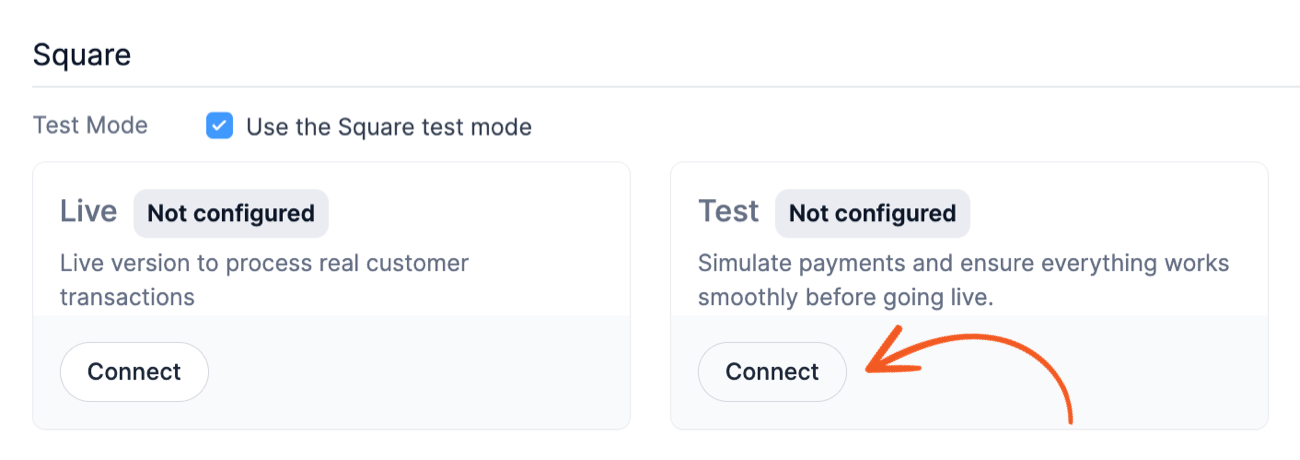
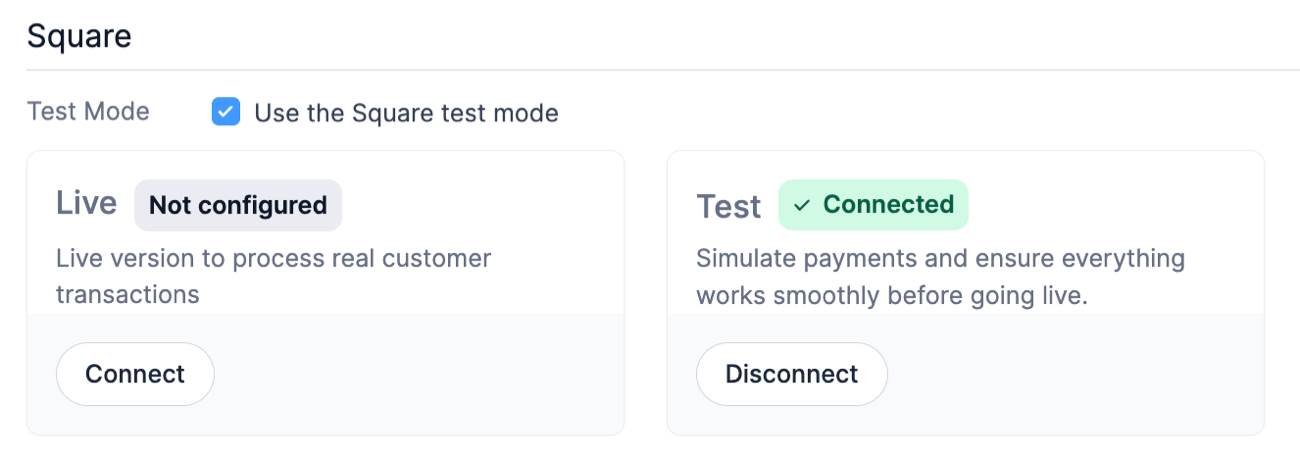
- Enable Test Mode. Navigate to Formidable → Global Settings → Payments and click the Square tab. Locate the option labeled Use the Square test mode and check the box. This enables a testing environment, allowing you to simulate transactions without affecting real funds.
- Access your Square account. Click the Connect button in Test mode to authorize the connection between your forms and Square. You will be redirected to Square where you can log in to your account. If you don’t already have a Square account, click here to create one. This account is necessary to integrate Square’s payment processing with your forms.
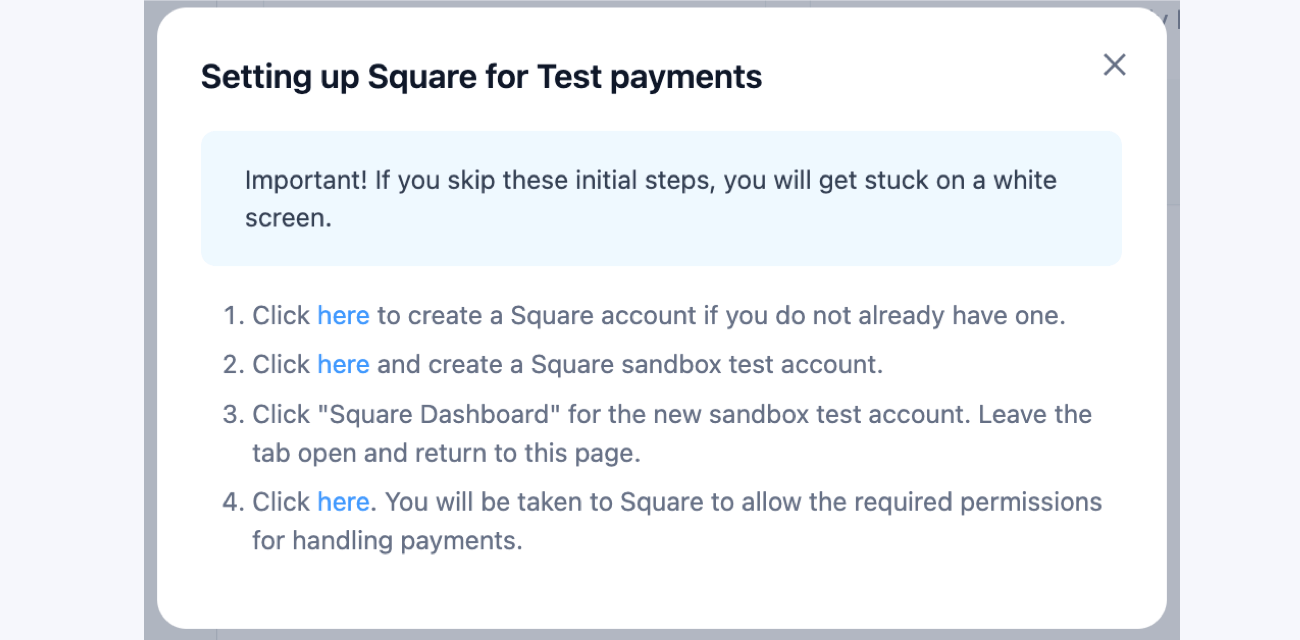
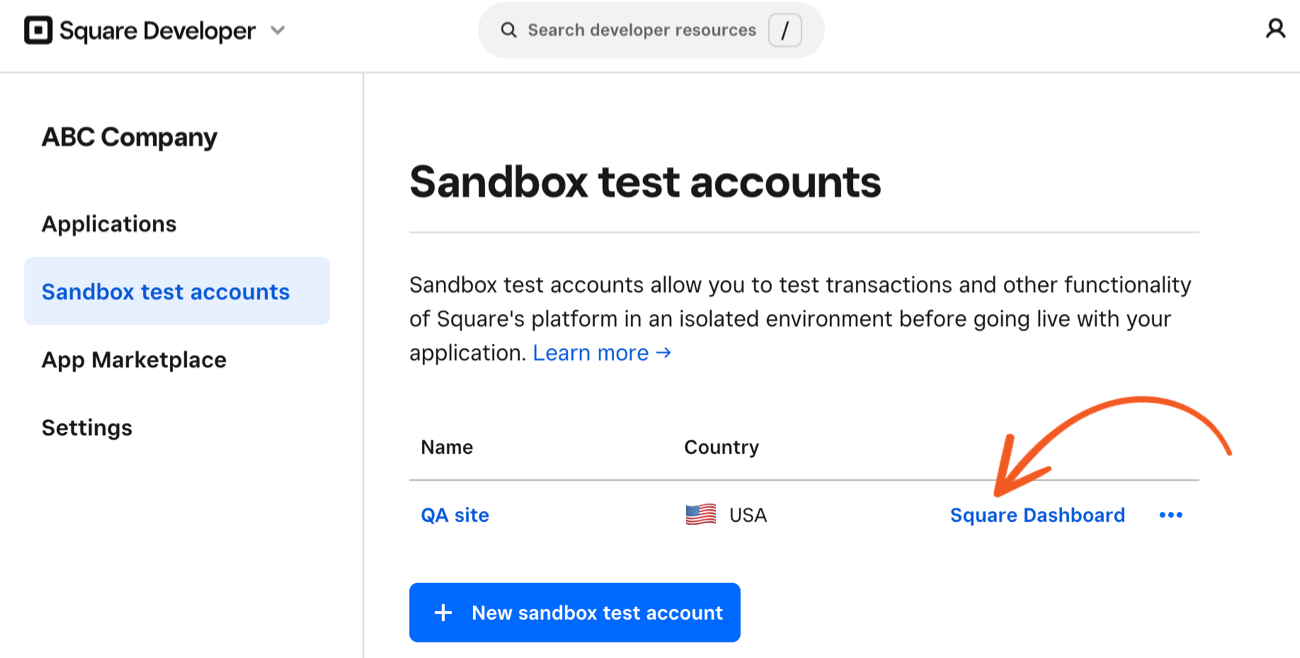
- Set Up a Sandbox Test Account. Click here to create a Square sandbox test account. This account allows you to conduct payment simulations as if they were real.
- Access the Square Dashboard. Click the Square Dashboard to open the new sandbox account. Keep this browser tab open, as you will need to reference it during the configuration process.
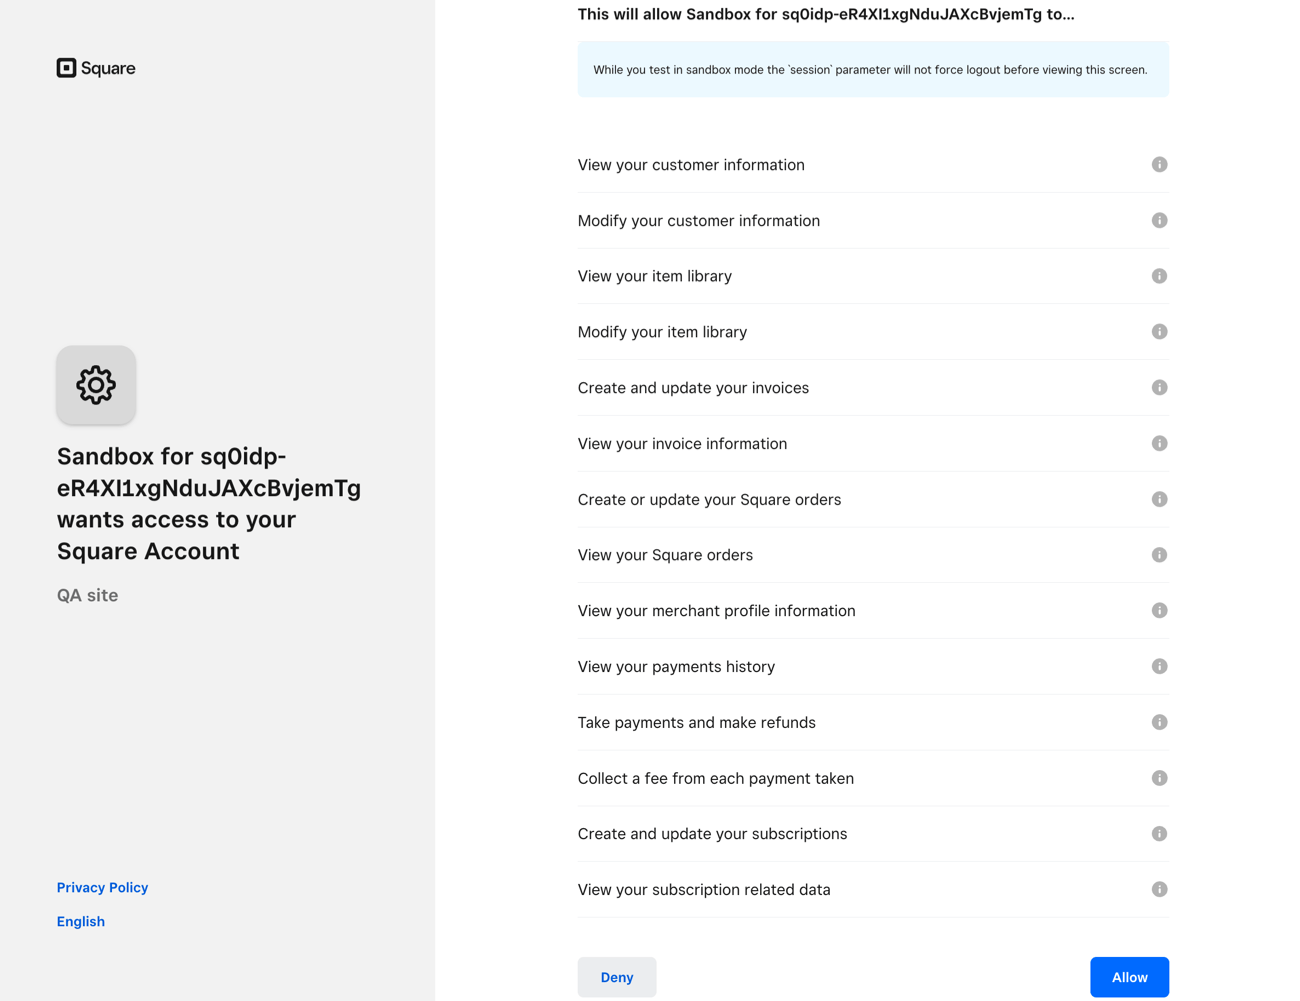
- Authorize Permissions. Approve the necessary permissions for processing Square test payments by clicking the Allow button to confirm.
- Verify Connection. After allowing permissions, you will be redirected back to the Formidable Global Settings page on your site. To confirm a successful connection, look for a green checkmark with the text Connected next to the Test connection status.
Run a Square test payment
Testing your Square payment forms is crucial to ensure everything is functioning correctly before processing actual payments. This section guides you through conducting test transactions.
- Ensure HTTPS Connection. Make sure your site is using HTTPS. Without a secure connection, the Square card fields won’t appear, and you’ll receive an error message, "Web Payments SDK can only be embedded on sites that use HTTPS and have a secure context."
- Open the page where your Square form is published and submit a test entry.
- You can simulate payments using the following test card numbers.
- Successful payments: Use 4800 0000 0000 0004 and 4800 0000 0000 0012 to test payments.
- Declined payments: Use 4000 0000 0000 0002 to test payments.
View and manage Square payments
Keep track of payments from your Square form by managing them within the Payments section of your Formidable settings. This centralized location allows you to keep everything organized and easy to review.
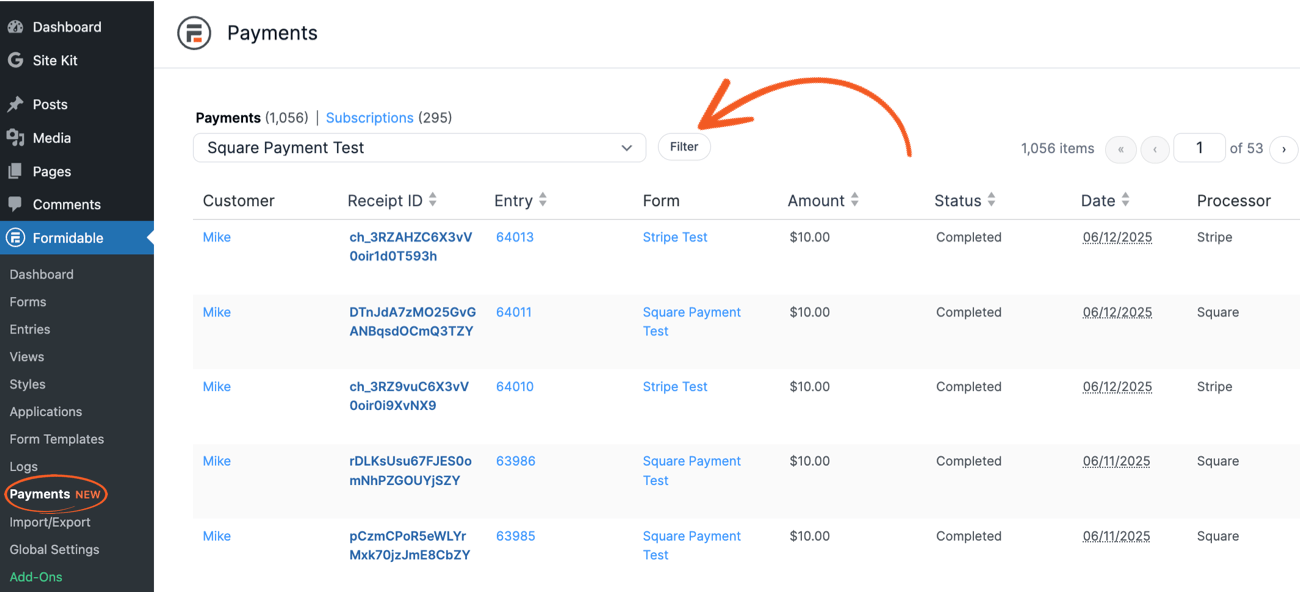
- Navigate to Payments. Start by logging into your WordPress admin dashboard. Once logged in, navigate to Formidable → Payments.
- Open the Payments Overview. Using the dropdown filter, choose your Square form from the selection and click the Filter button.
- Manage Square Payments. You will be taken to all related activities for your Square form, including both payments and subscriptions.
Limitations
- This feature is part of the Lite package. Features like setting field values post-payment and using conditional logic are currently unsupported.
- While Square supports various payment methods such as Apple Pay and Gift Cards, this integration only supports credit cards within the current setup.
Troubleshooting
-
Why am I seeing a white screen when I try to connect?
The pop-up tries to explain this, but you need to create a sandbox test account, and load the dashboard in another tab before clicking Connect.
-
Why is my credit card field not appearing?
This is likely because you are not using HTTPS. In order to use Square payment forms (both for Live and Test purposes), you will need an SSL connection.
-
Why is my subscription immediately canceled after I make a payment?
Square will immediately deactivate a subscription for having a suspicious identity. Try to provide real information, like a valid email, when creating subscriptions.
Related developer hooks
- Customize the styling of a Square field with the frm_square_style hook.
